|
Area51 - Mike's Misc Projects 2018:
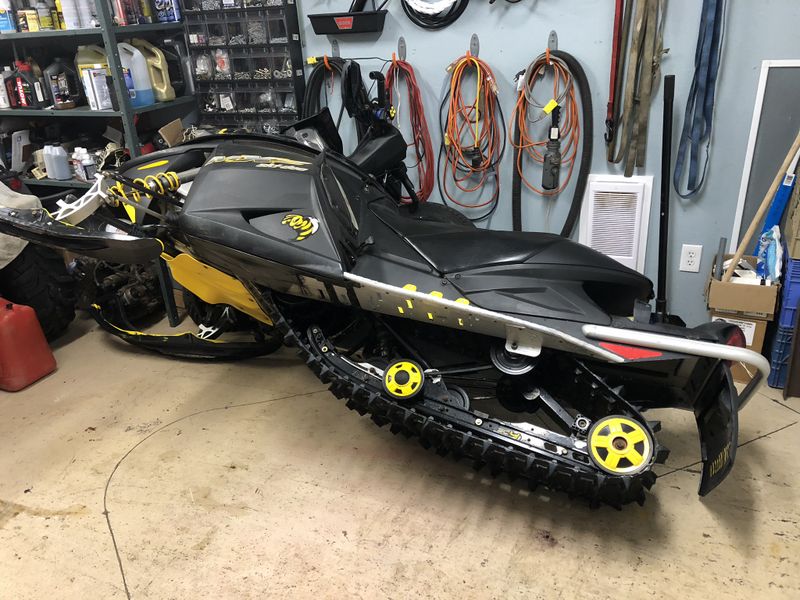
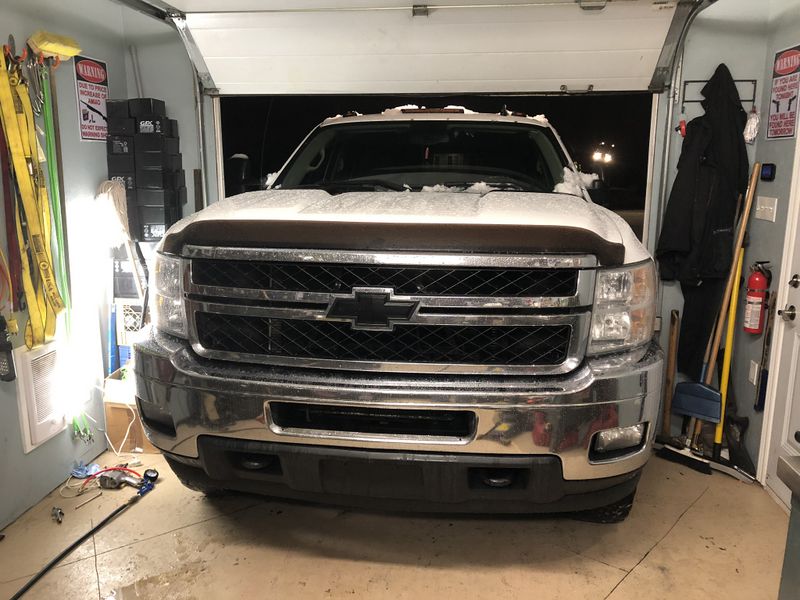
Work in Area51 started just after Christmas when I began a few maintenance repairs on Project REV which fortunately hasn't needed any major work in the last 5 years. Work began by removing all 4 shocks to have them freshened up with new seals and oil by local shock rebuilder Mark Murray.
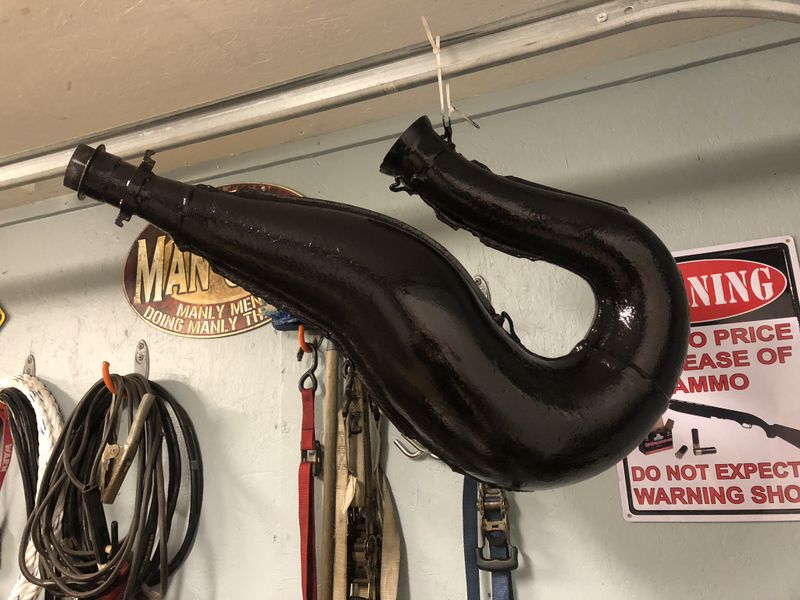
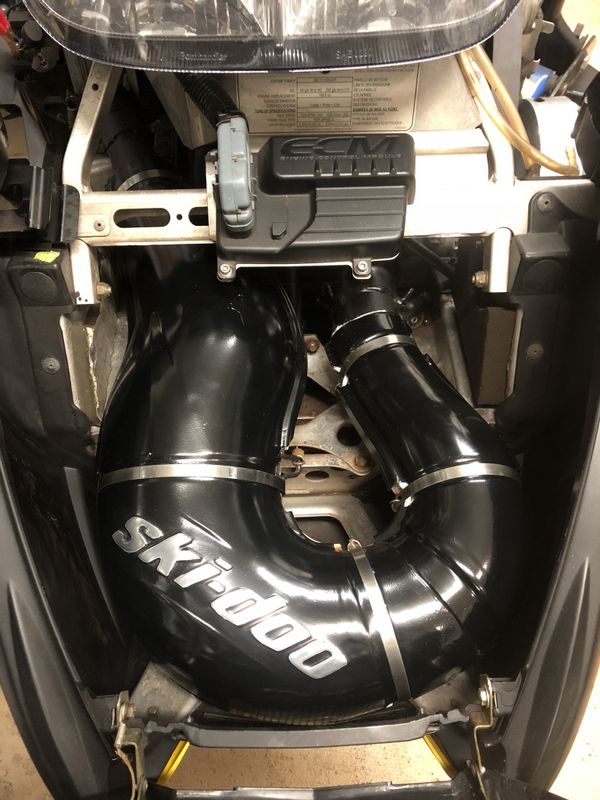
I also painted up the pipe with high heat exhaust paint, installed new packing material (OEM pieces from the Dealer) between the pipe and heat shied to stop annoying rattling, and painted the heat shield with high temp gloss black paint for a fresh look under the hood. Other misc repairs included a new lower steering bushing, new lower A-arm bushings and new chain case oil.
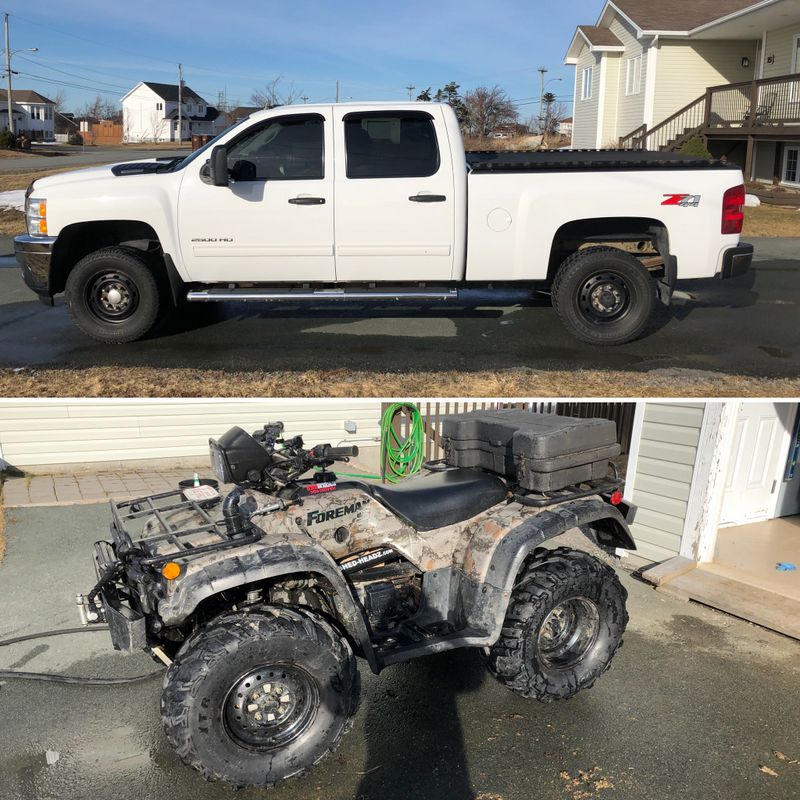
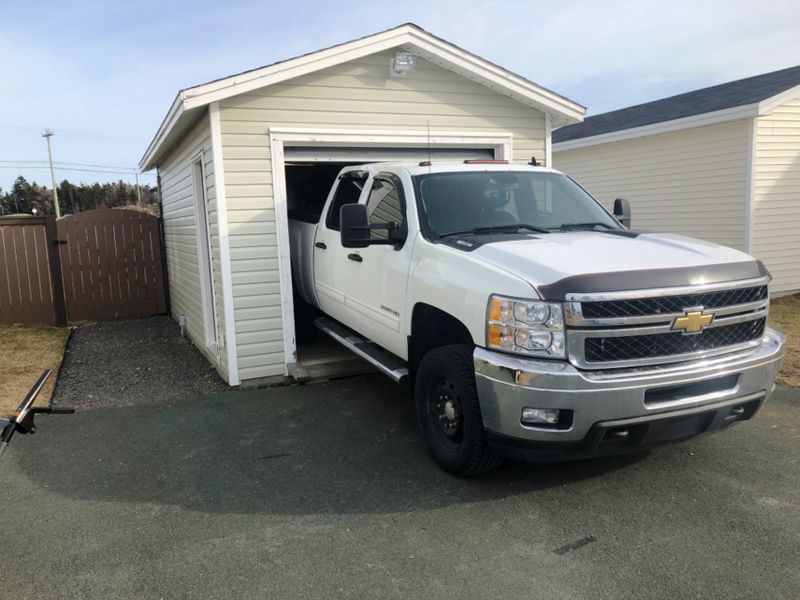
My Area 51 location has been pretty quiet since getting project REV finished, it was a mild winter so I had an opportunity to give the truck and bike a thorough wash in late March.
The weather was so mild I decided to swap over from my winter to summer rims on April 1st which is normally pretty early here on the Avalon.
I'm very happy with my Dean Wintercat winter tires, after 2 winters the wear is fantastic, they are very quiet and the tread design is fantastic in preventing hydroplaning and great in snow. Definitely the best winter tier I've had on this truck yet. My 34" BFG KO2's are also a fantastic tire and give the truck a great look.
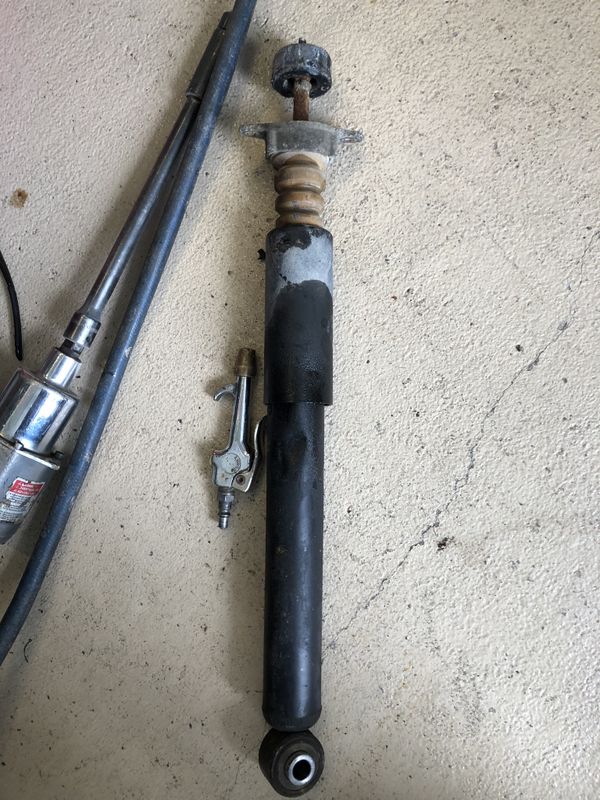
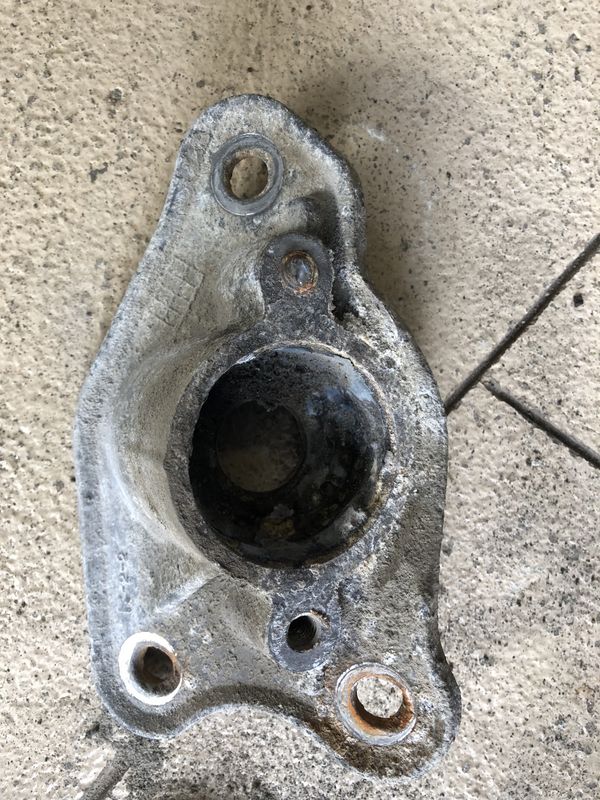
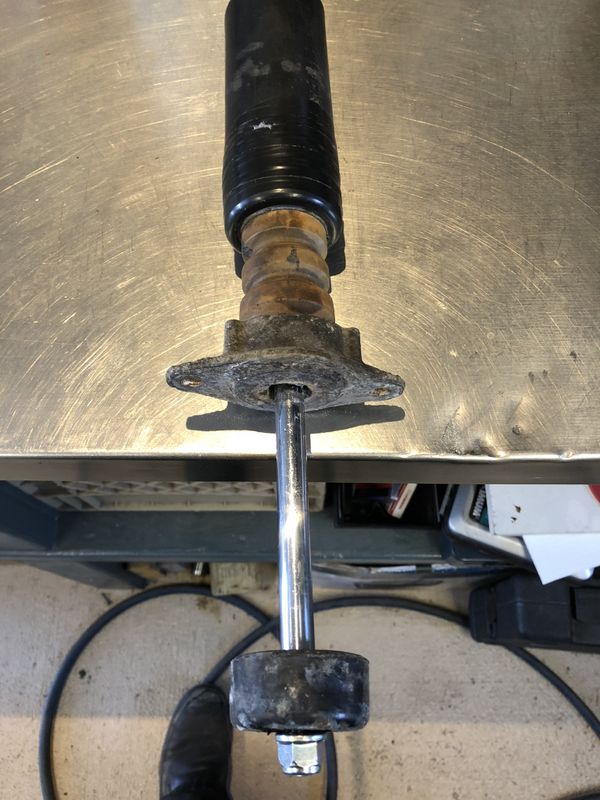
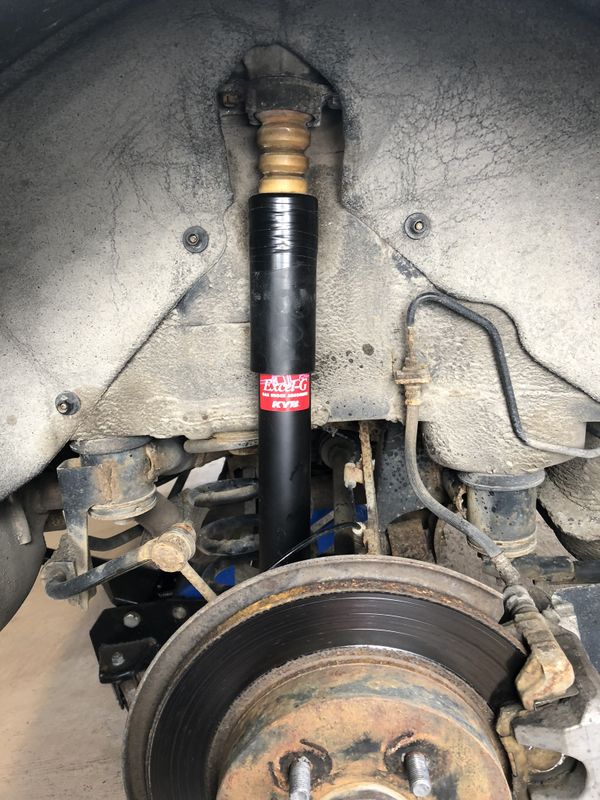
In swapping over Sandra's winter tires a few weeks later I discovered one of the rear shocks had leaked out, I replaced one last summer so now it was time to do the other.
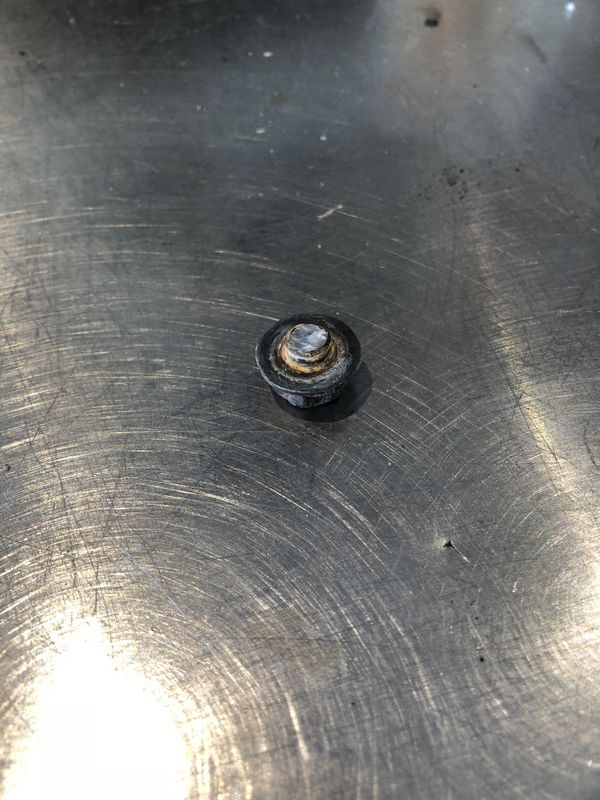
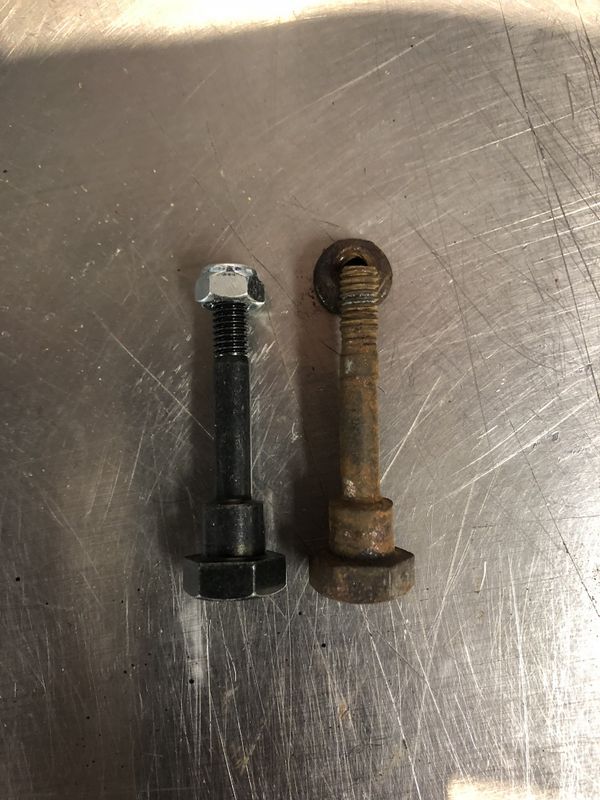
The job it normally pretty quick and easy but this time one of the upper shock mount bolts seized and cracked off. Luckily the bracket it seized into could be unbolted from the car.
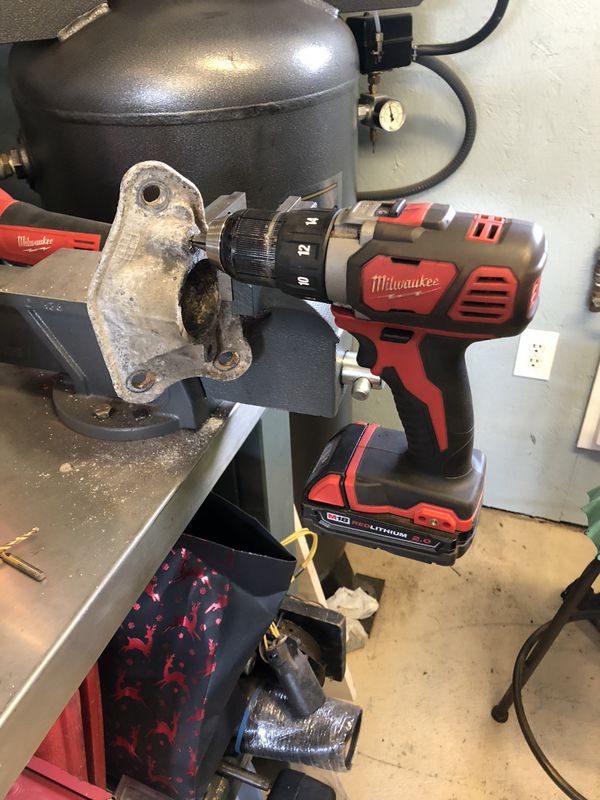
The dealer never had a new shock mount in stock which meant I had to fix this one. After what seemed like an eternity I had the old bolt drilled out, re-tapped and a new bolt ready to install.
With the new shock installed the noticeable clunk was finally gone from the car.
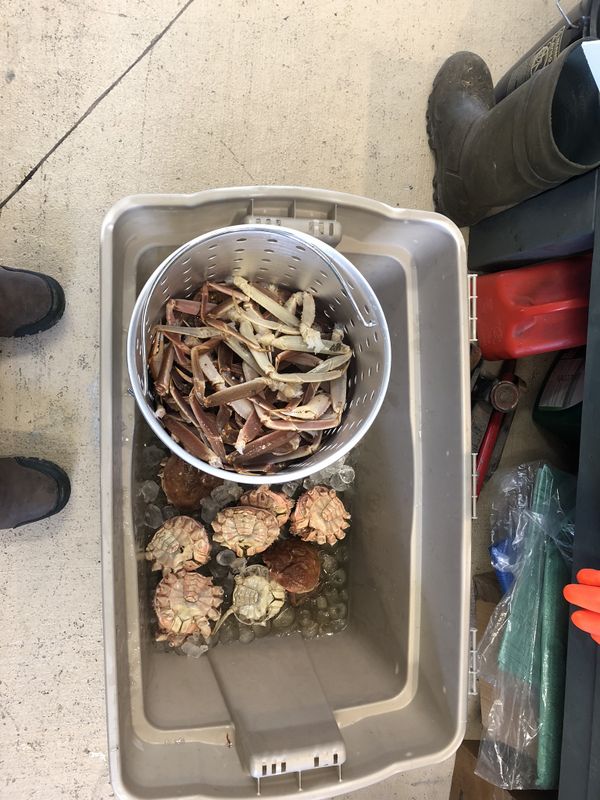
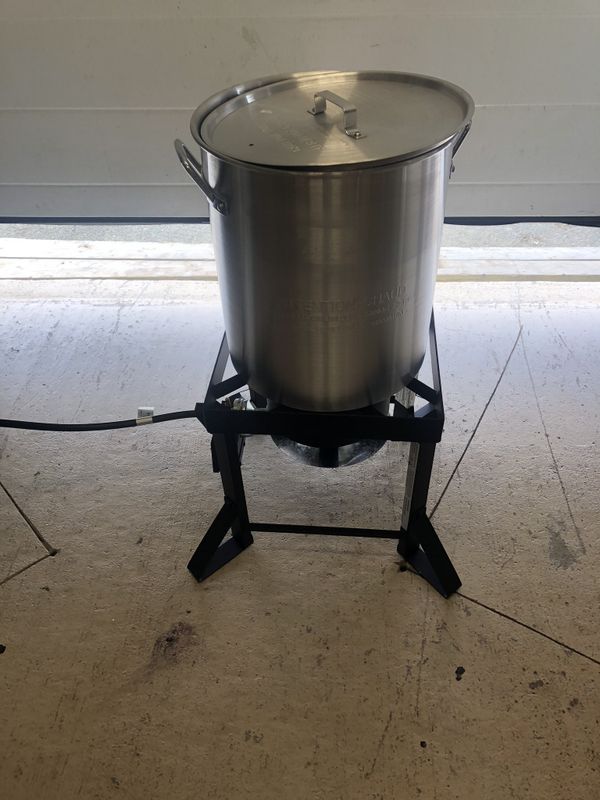
In late May Sandra's brother dropped of a few crab to boil up. I never had an outdoor cooker so I headed to Canadian Tire and picked one up to boil up my feed of crab.
The new cooker works great, Dad uses his all the time for cooking jigs dinner, mine has already been put to use at the SJGRC Lobster Boil in June and I'm sure will see use deep-frying wings & fresh fish later this summer.
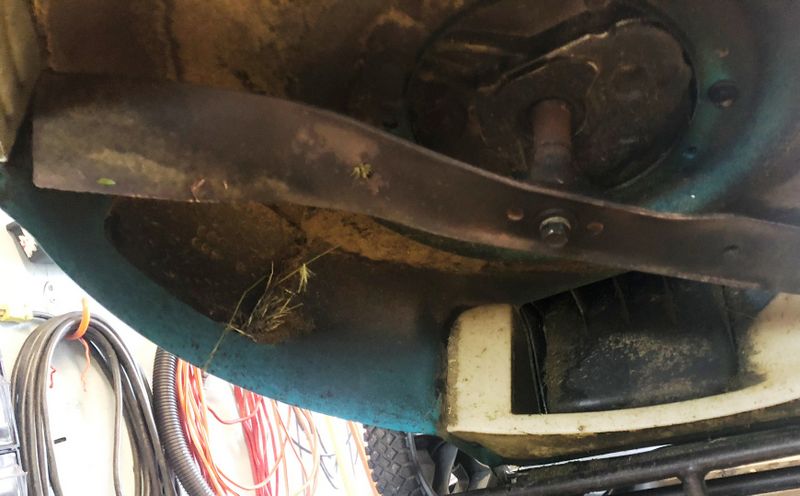
Early this summer Doug called and was having trouble with his brand new lawnmower. Evidently he overfilled the unit with oil and bent the blade on an old tree stump.
The blade was easily fixed with a new unit bolted in place, luckily the engine output shaft was not bent. The overfilled engine oil soaked the air filter so a new filter and spark plug were installed. These new Briggs & Stratton engines do not have an oil drain, as they supposedly have engine oil for life. To remove the 250ml of excess oil I removed the dipstick tube and used a turkey baster with 6" of clear hose attached which worked quite well. The unit now runs as good as new!
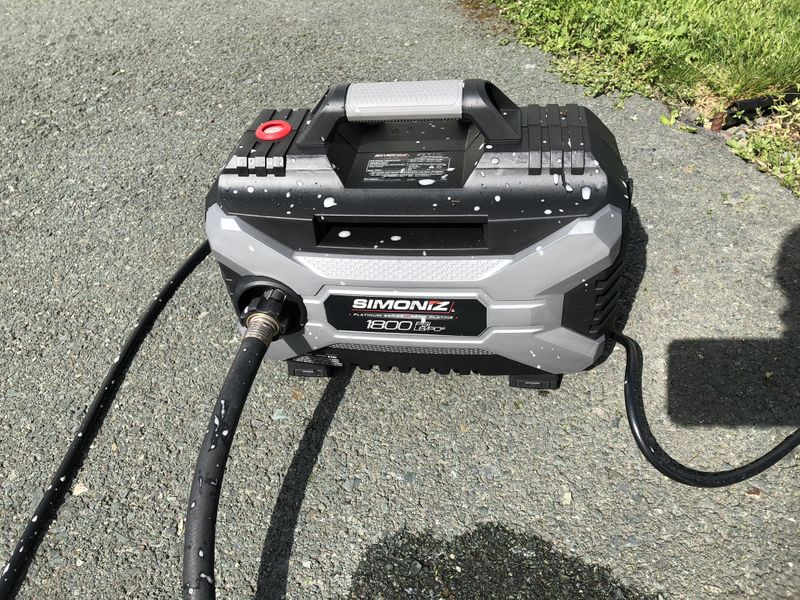
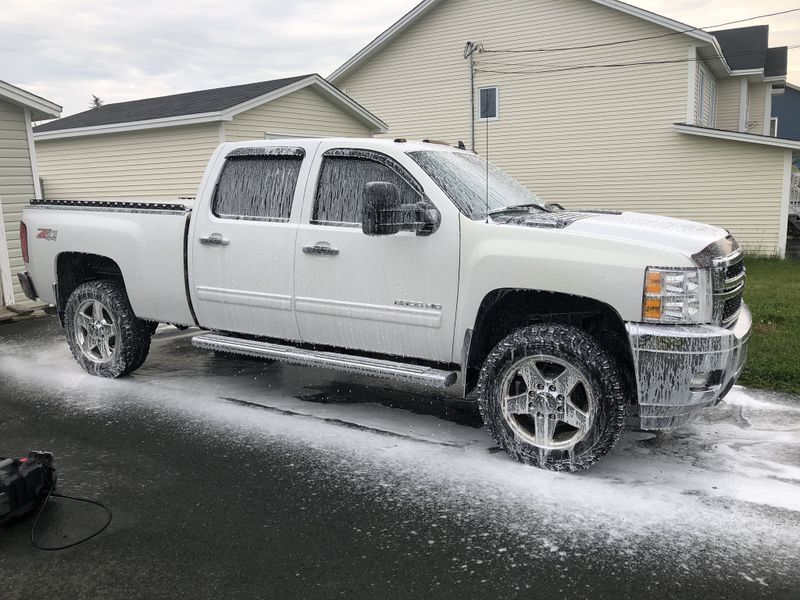
I picked up this electric pressure washer when it went on sale at Canadian Tire. Its a great compact unit which is important for me as I just don't have room for a large gas pressure washer. It features a high flow rate and brushless motor, hopefully it holds up well!
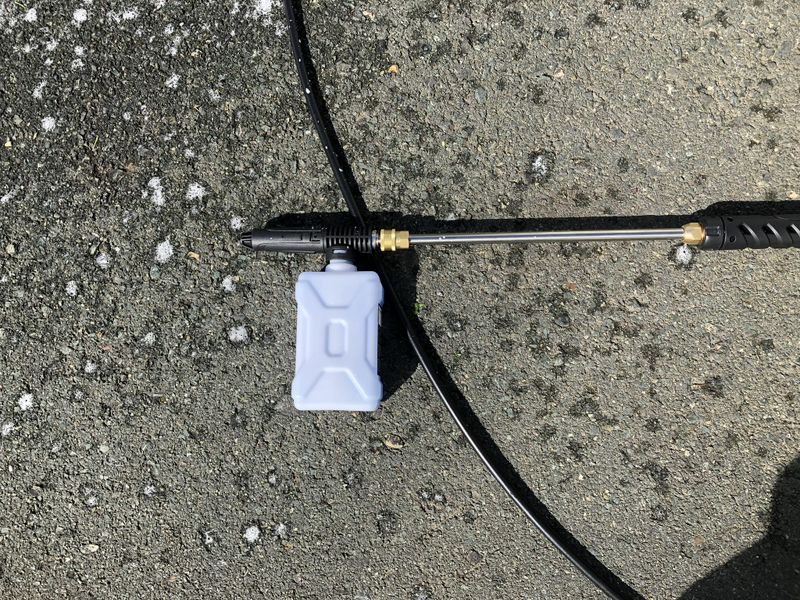
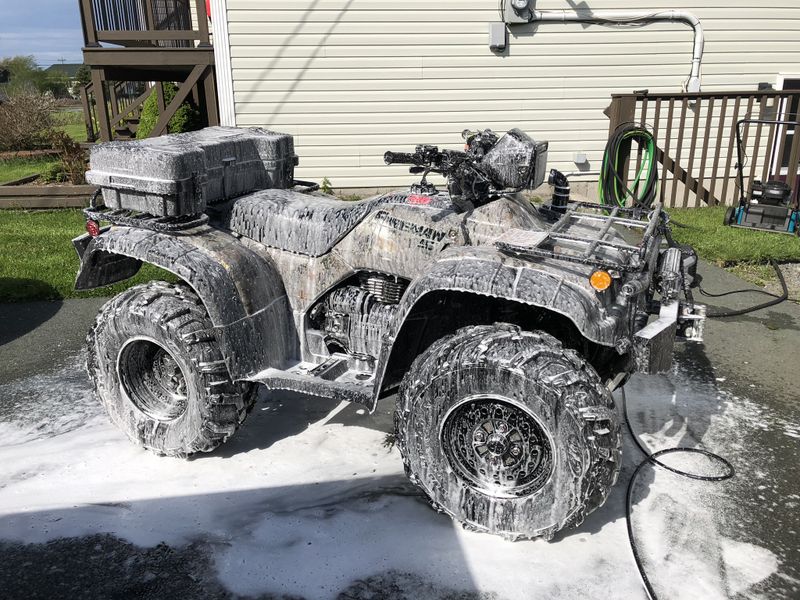
This unit also came with a foam cannon, which I was excited to try as I've heard great things about them.
I really like the cannon, it puts lots of soap on the vehicle which really loosens up dried in dirt. You still have to hand wash but it certainly works better than soap in a bucket of water alone.
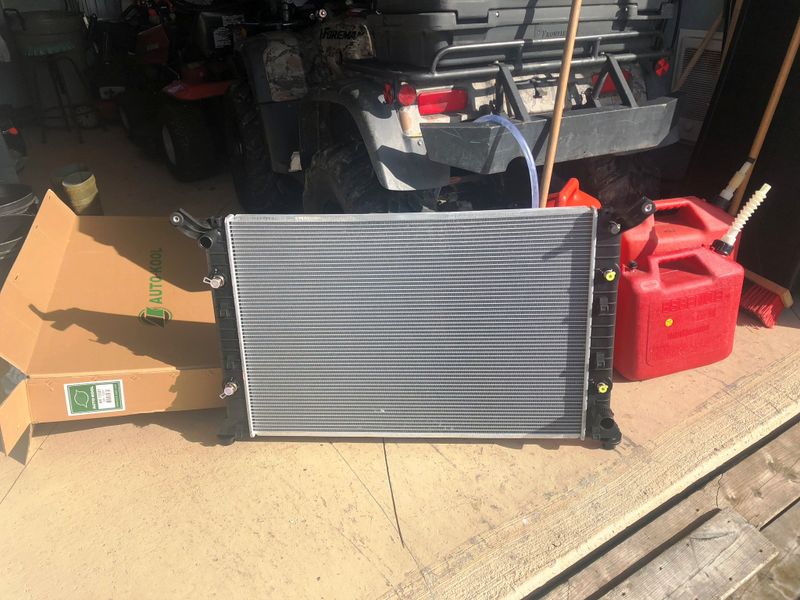
After having the ABS pump module replaced on the Silverado earlier this year it was soon time to revisit the garage. The side tank on the radiator split wide open causing a considerable coolant leak. I patched the rad temporarily but ended up ordering a brand new one from Automotive Supplies. Not wanting to fool with/risk damaging the expensive tranny cooler & power steering cooler lines I opted to have the new rad installed at Tobin's Auto Service in Donovan's Industrial Park. These guys do great work in a spotless garage for very reasonable rates.
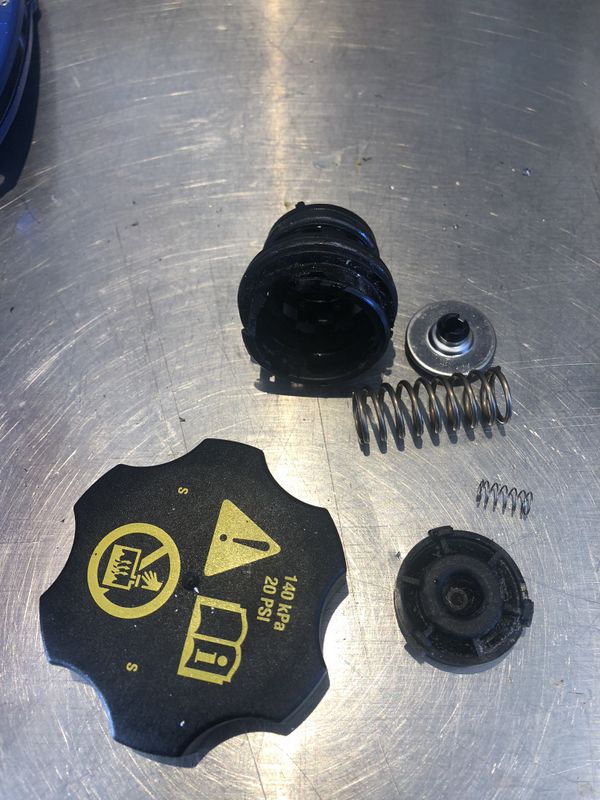
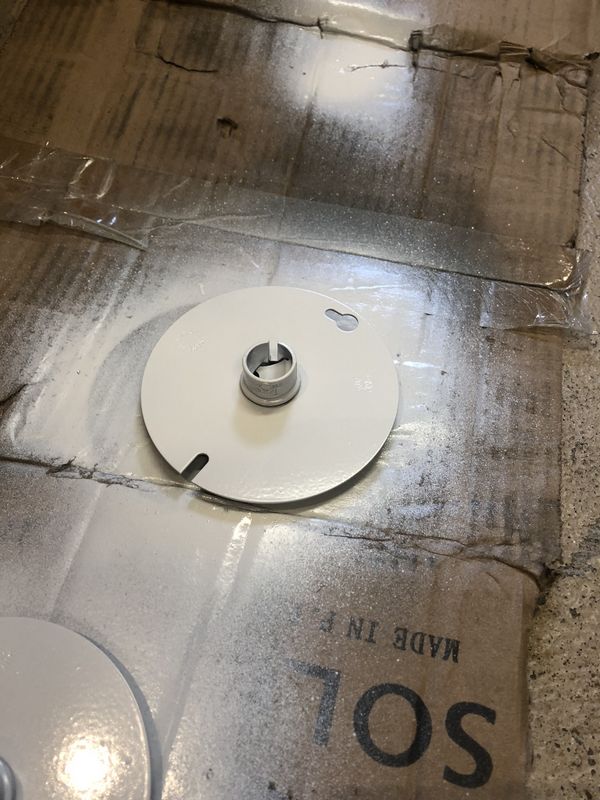
I did manage to fish out the broken off Rad cap from the expansion chamber and replace with a new cap myself. LoL
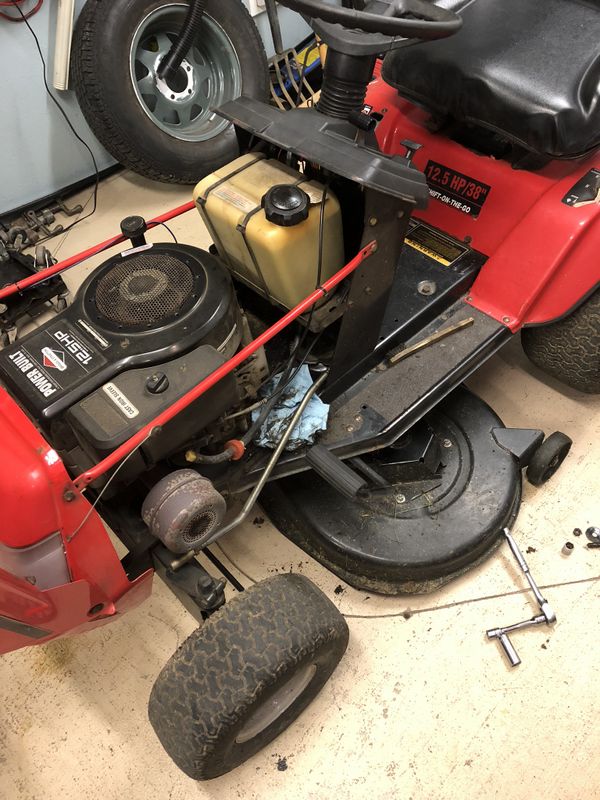
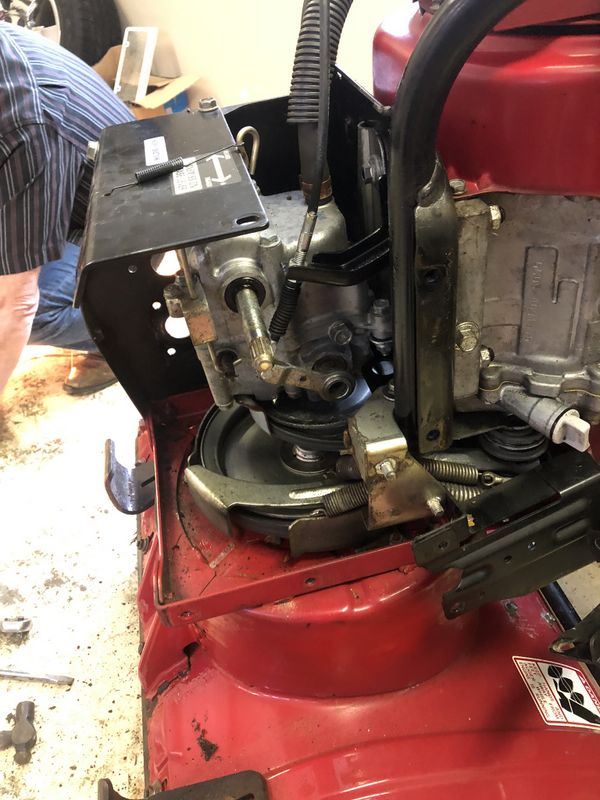
Acting on a new summer motto of spending more time in the Garage with the crew instead of Tim Horton's, Ronnie and I did a little maintenance on the old Lawn Tractor. We started with an oil change and inspection. This led to removing and sharpening the blades, and taking apart the steering.
The nut on the rod end which attaches to this plate was very loose so it all had to be removed to access the lose bolt. While apart the piece was cleaned and re-greased. With the rod end tight the steering is 100% tighter than previous. The rest of the tractor is in great shape including the mower deck and belts.
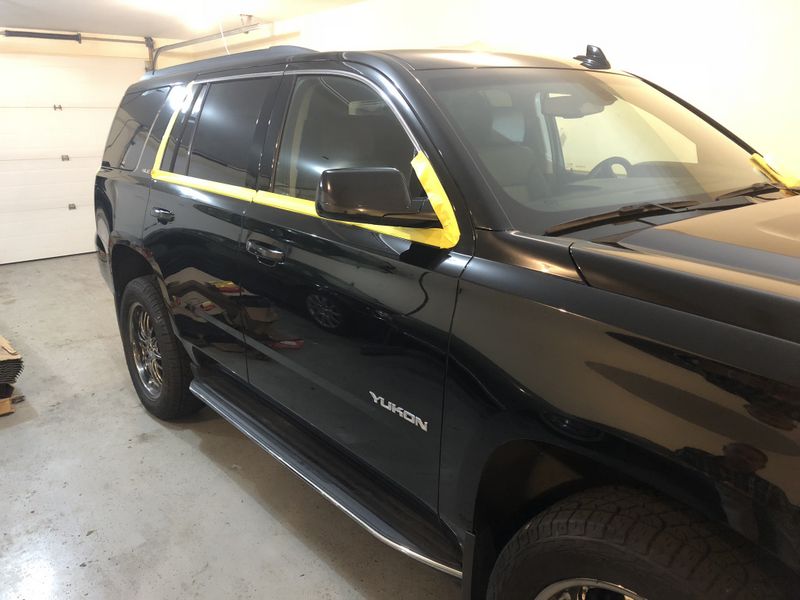
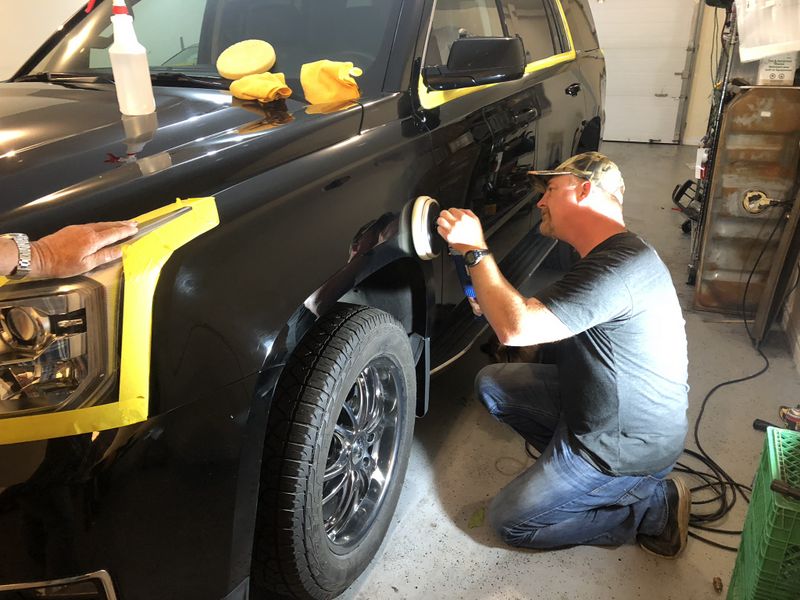
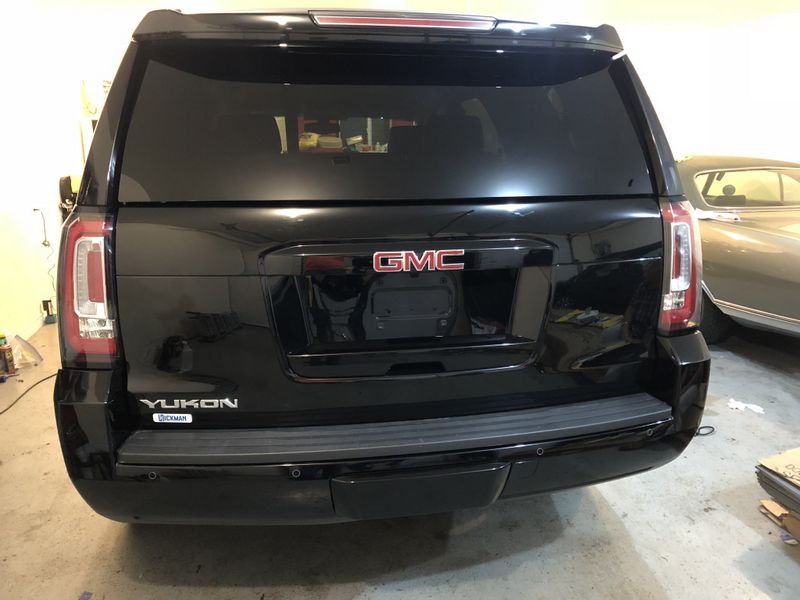
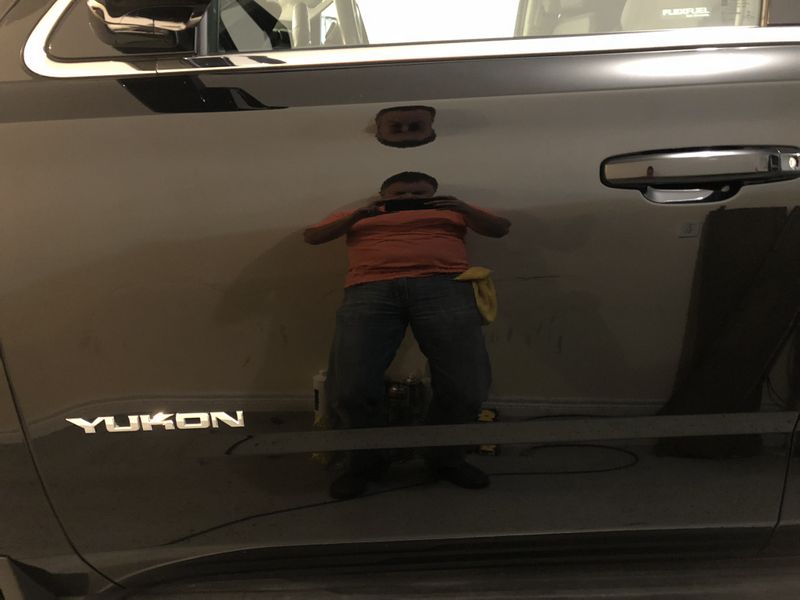
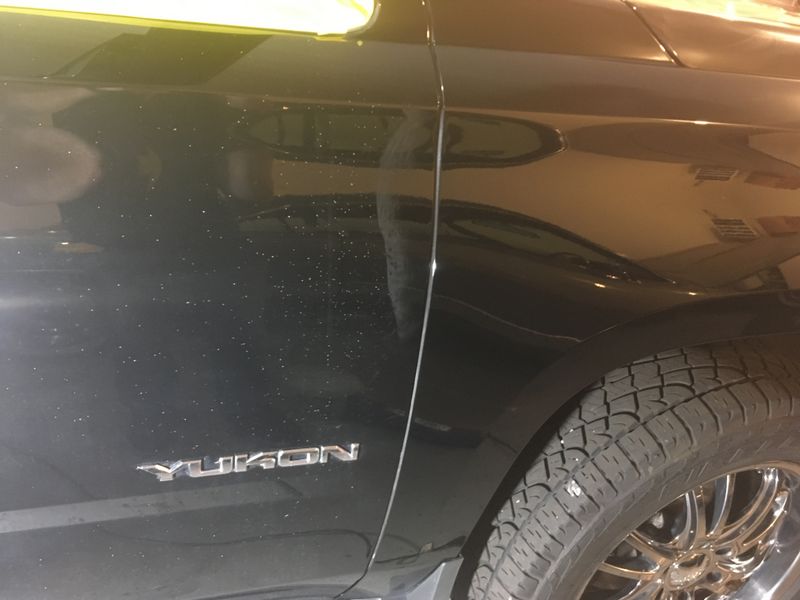
Earlier this year Lester had a bad experience with a local detailer he hired to buff and polish his beautiful 2017 Yukon. It's black and needed a buff but when he got it back it was brutal, swirl marks from the polisher everywhere, which only got worse as the coat of wax applied wore off. When the guy wouldn't fix the problem Ronnie and I dropped up to lend a hand.
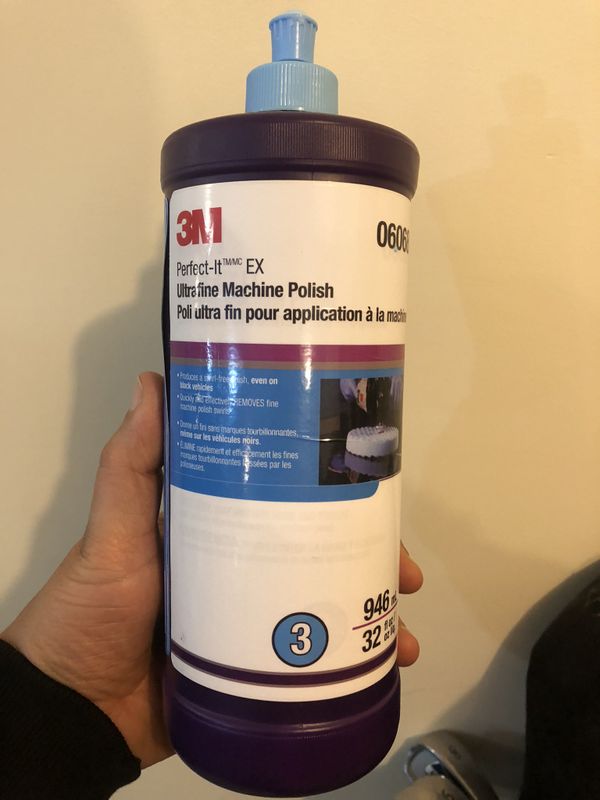
Ronnie got to work with his polisher using 3M ultrafine machine polish. It appears the previous detailer used an aggressive compound and didn't follow up with a ultrafine polish to remove the swirls.
When Ronnie finished up one side of the vehicle Lester and I set about installing two coats of Meguiar's Gold Class paste wax, which is a high quality carnauba wax. It gives a deep shine and lasting protection to the paint, two coast ensures complete coverage and a deep gloss.
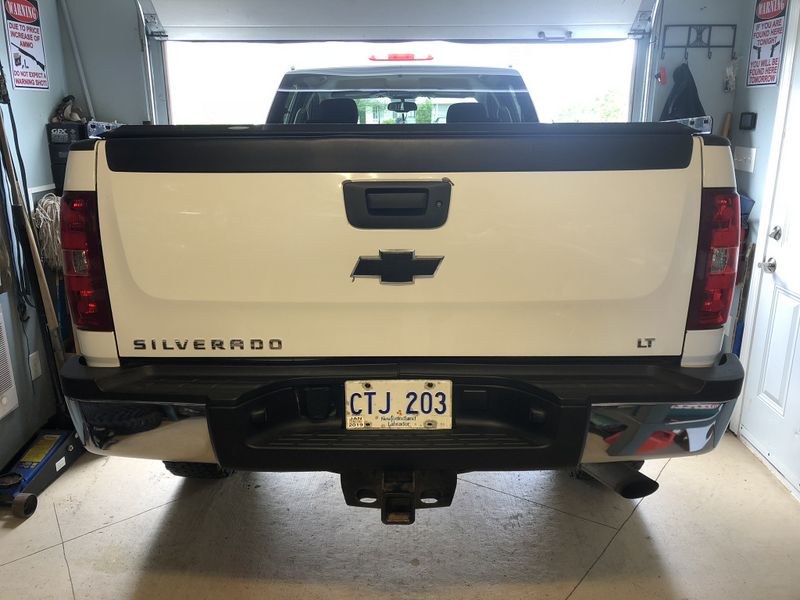
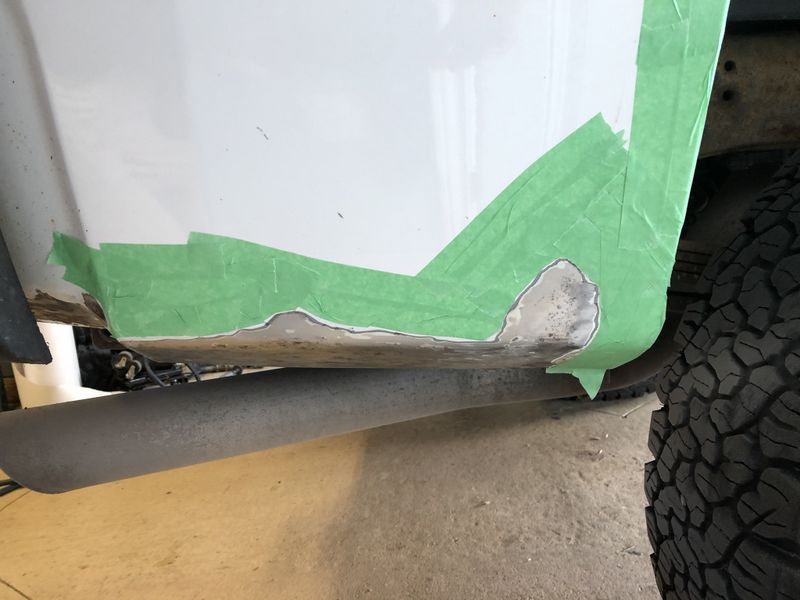
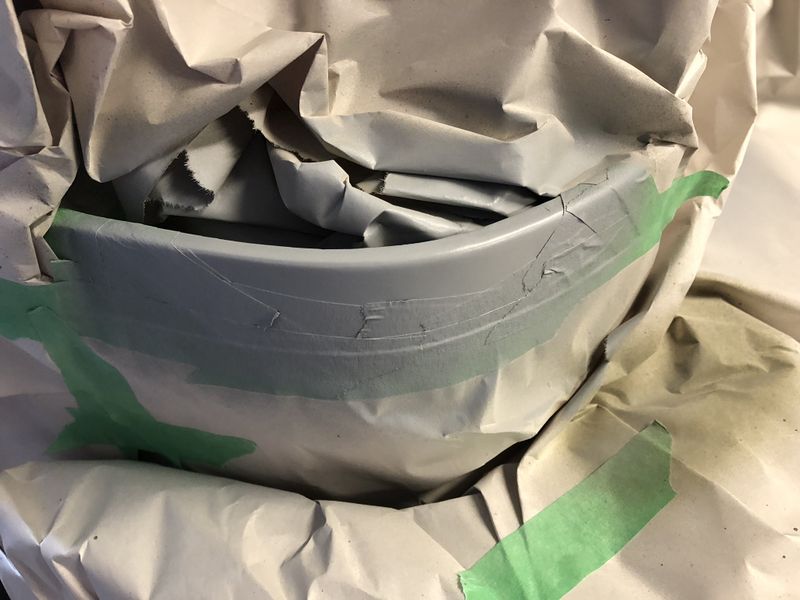
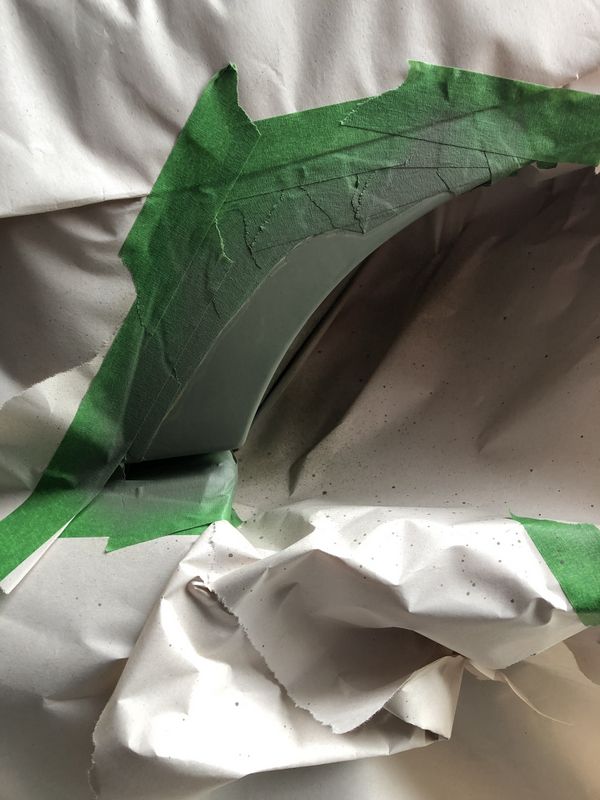
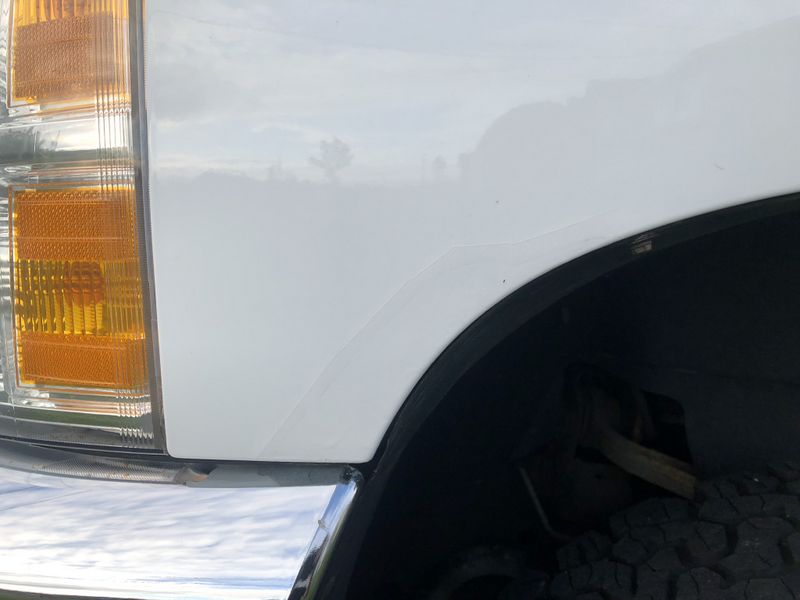
The next project on my list was paint repairs on my Silverado. The truck is 7 years old now, and GM fleet white is not exactly durable. I've made these repairs before, but this time I took a few extra steps for a longer lasting repair.
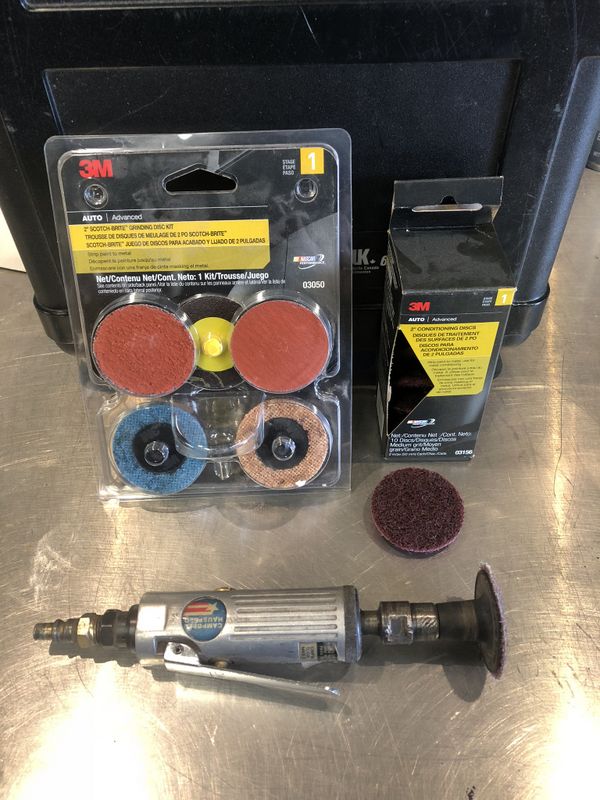
First I picked up this 3M 2" conditioning/sanding set with an extra box of 3M Scotchbrite conditioning/stripping discs. I used the Scotchbrite discs to remove all loose paint and rust from the affected areas under the tail lights and behind the rear mud flaps. This seemed to work much better than the hand sanding I did two years ago.
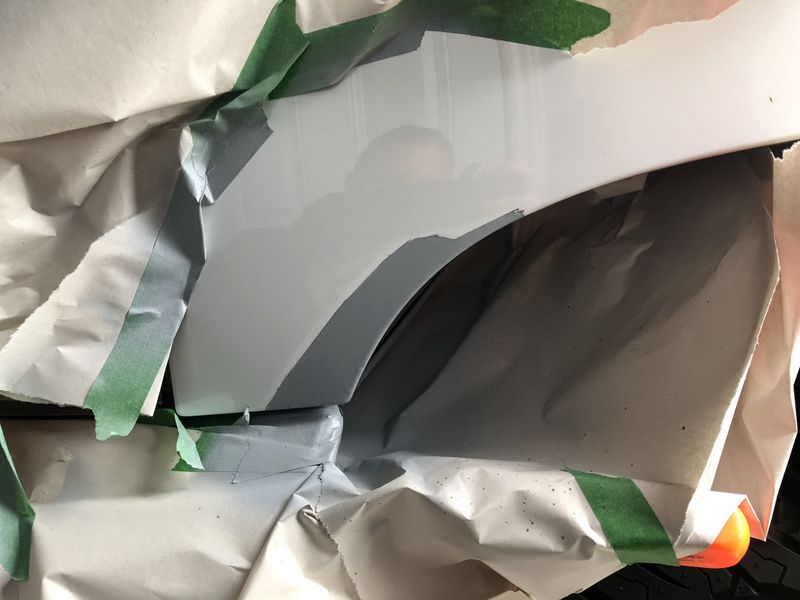
After using the 2" discs I feathered the edges about 1/2 back into the OEM paint but taped pretty tight to the edge of the effected area. This way I could build up coats of primer and paint to roughly match paint thickness between the new & old paint. I hate painting over perfect OEM paint which is why I choose not to blend over a larger area, this is a work/personal truck that I'd like to look good from 10' and by far is not a show truck.
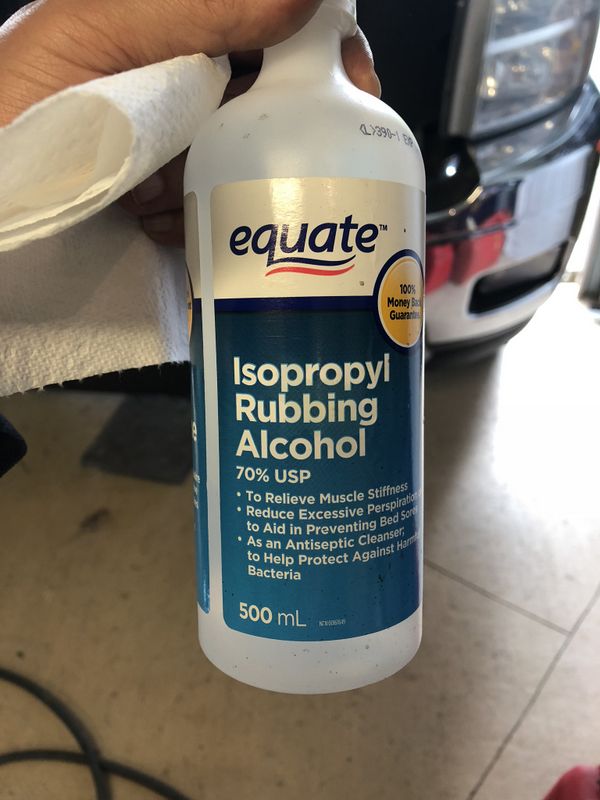
Before any primer is applied I wiped the area with rubbing alcohol to remove any contaminates.
The first paint applied was etching primer to give the best chance of adherence to the bare sheet metal.
Next 3 coats of high build grey primer were applied to build up the paint thickness of the repaired area.
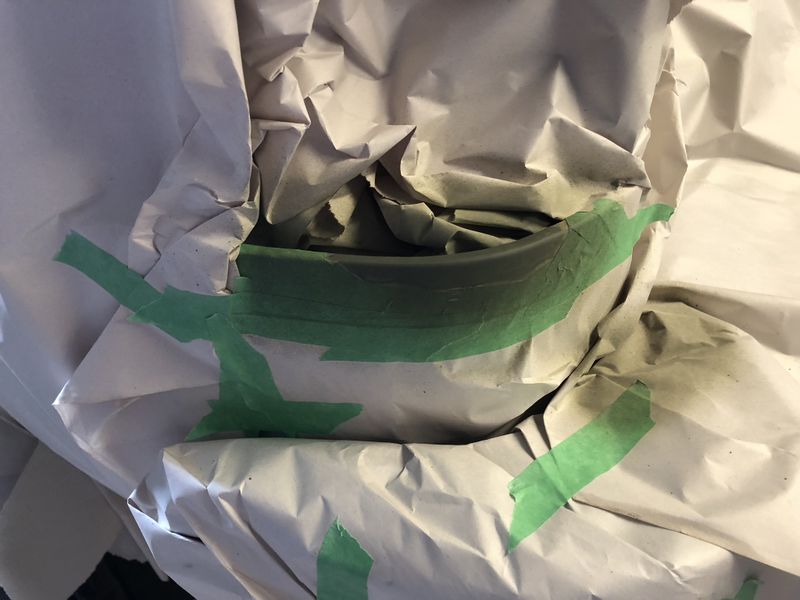
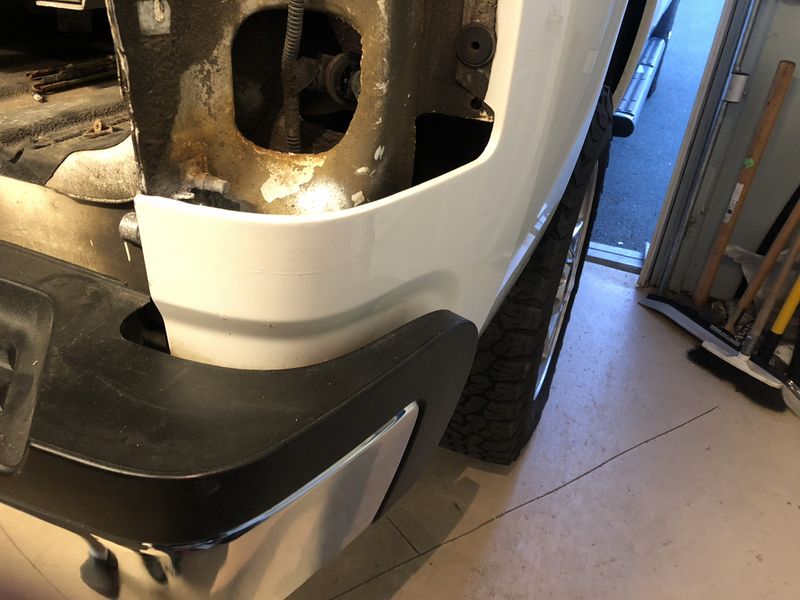
The tape was removed after the primer coats and the edge sanded & feathered before the next step. I re-taped the repair area about 1/4" back from the primer line so the single stage white paint will overlap the primer. With the white paint finished, I will wait a few weeks for the paint to fully cure then wet sand the edge and polish the area to blend the repair with the OEM paint. This will remove scratches currently on the OEM paint near the repaired area.
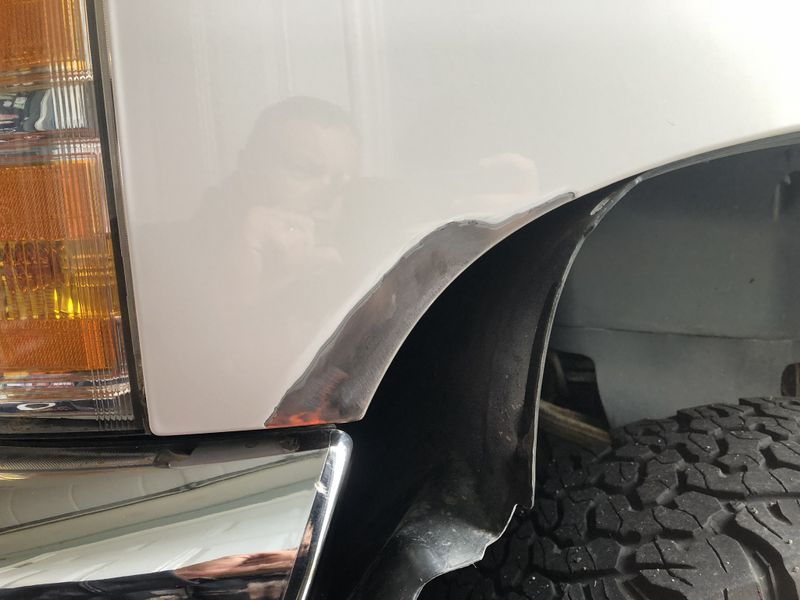
A week or so later I tackled the same repair on the driver side front fender following the same steps as before.
Again after a few weeks I'll wet sand and polish the area to remove sanding marks on the OEM paint and lessen the tape edge on the new white paint.
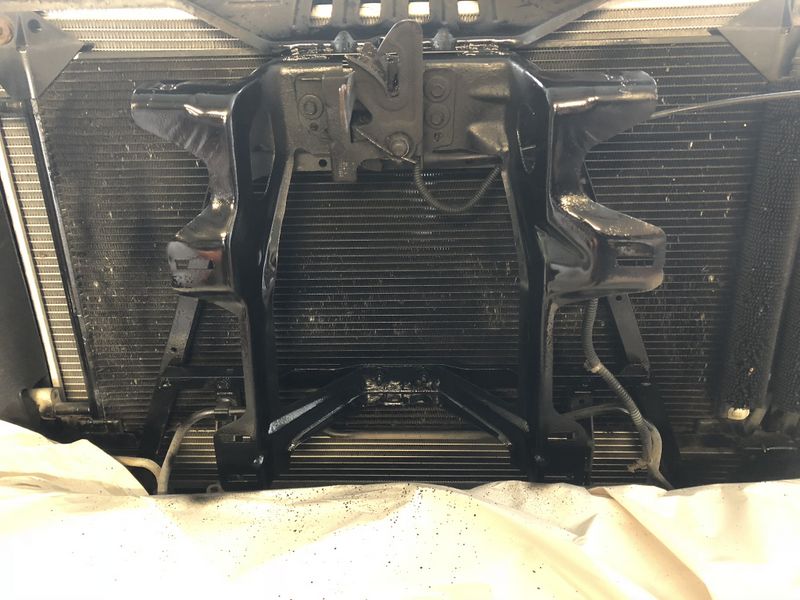
In between steps while waiting for paint to dry on the front fender I cleaned up and painted the supports behind the grill. This really cleaned up the front of the truck.
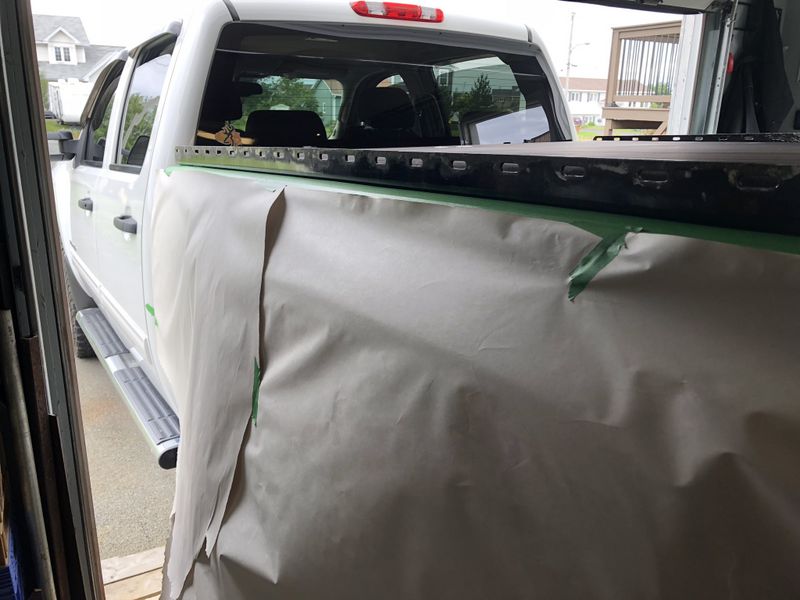
The following week I tackled the rusting Ladder Rack bars bolted to my box sides. These bars are for my removable ladder rack and a real a convenient tie down place when carrying stuff in the bed. Unfortunately they are steel and prone to rust so they get an annual stripping with a flap disc in the grinder and the new 2" conditioning wheels in my air grinder.
The bars were coated with a fresh coat of Brush on Tremclad Gloss Black oil based paint. While I was working on the bars I cleaned and painted the trailer hitch as well.
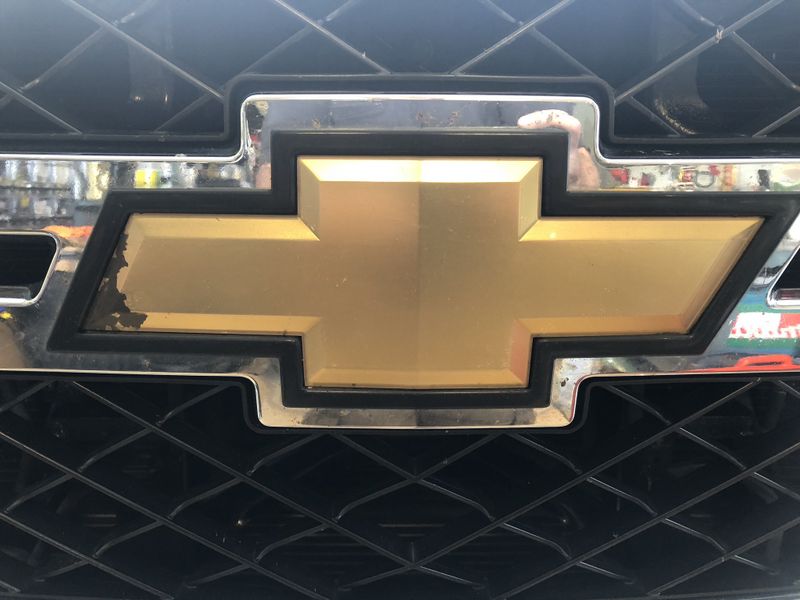
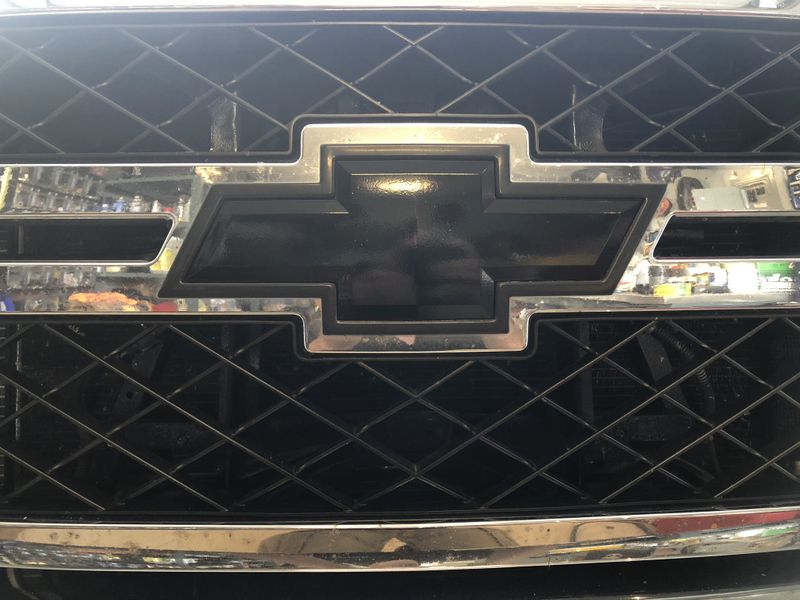
A couple weeks later while pressure washing the truck the gold paint started peeling off the back of my Chevy front grill emblem. I had previously painted the rear emblem black for the same reason so I decided to do the same on the front.
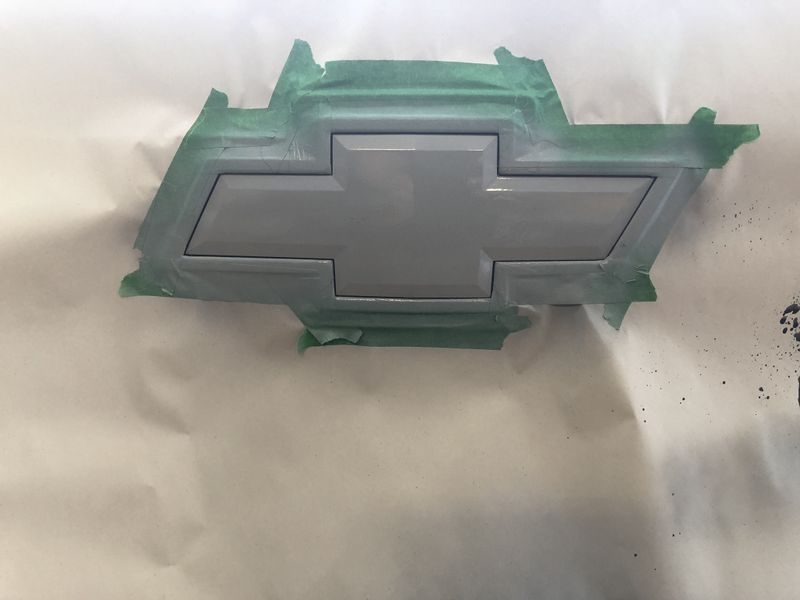
The badge was scuffed up by hand with a 3M Scotchbrite pad, wiped with rubbing alcohol, taped off then hit with a coat of Duplicolour Primer.
Next a couple coats of semi-gloss black was applied for a nice clean finished product.
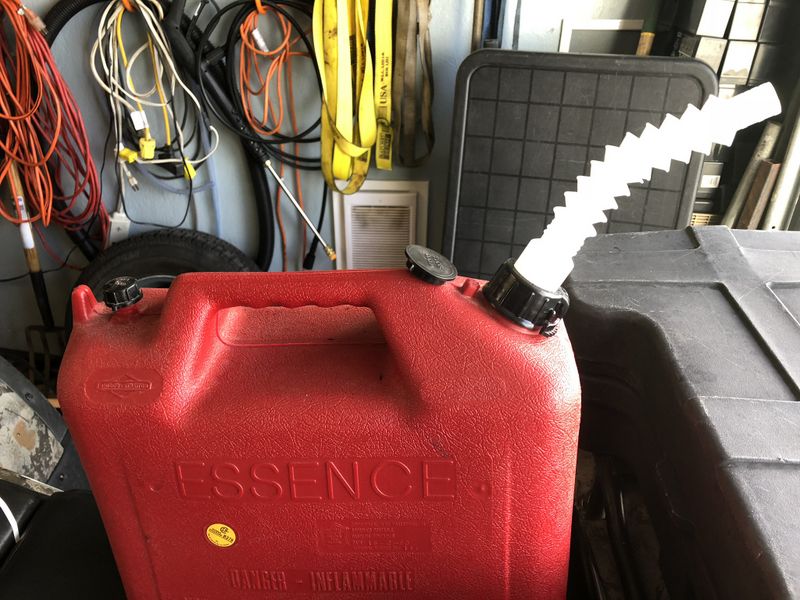
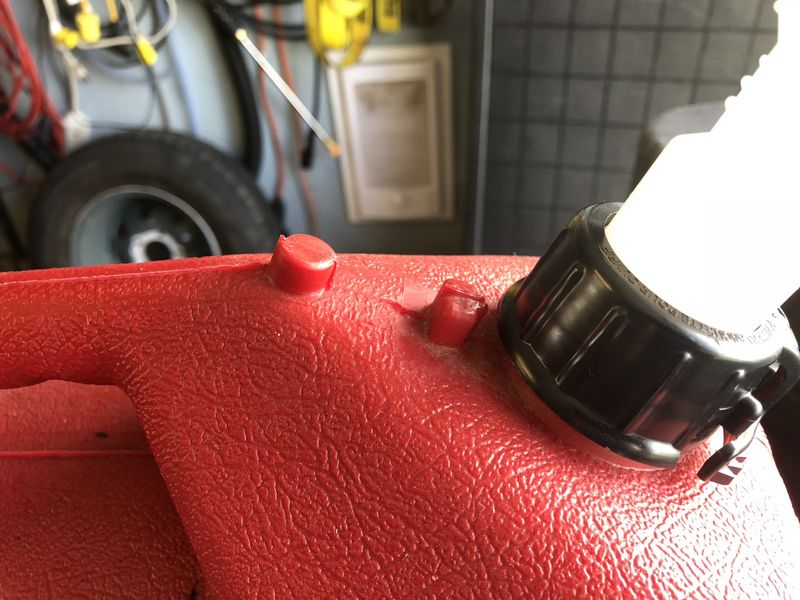
Top tip Tuesday. Did you know that Wedco gas cans have a built in storage spot for the stopper seal disc you remove from the spout while refilling?
This bump behind the fill spout will hold the stopper disc secure while refilling your gas powered device saving you from searching high and low for the damn thing once your finished!
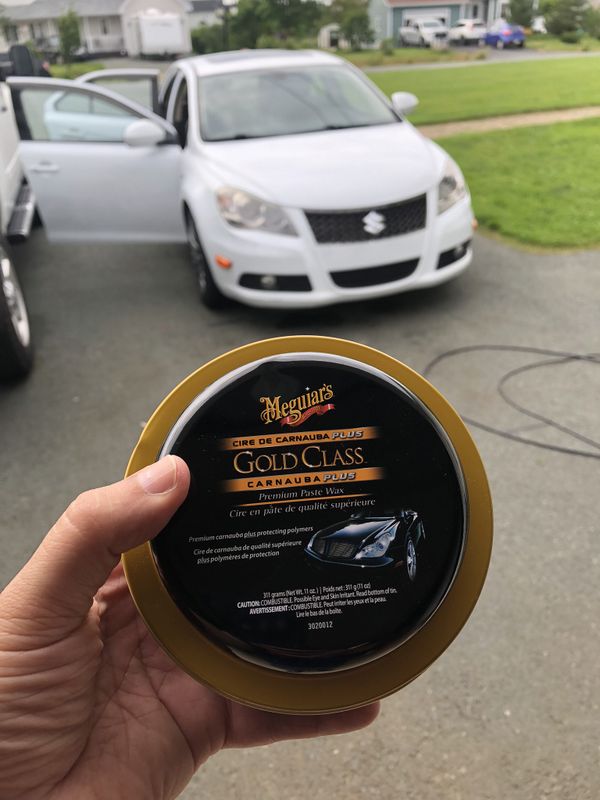
Of course in between all the Silverado repairs I managed to find time to show Mrs. Sandra's Suzuki Kizashi some love as well. Our car has a beautiful pearl white paint that really pops with Meguiar's Gold Class!
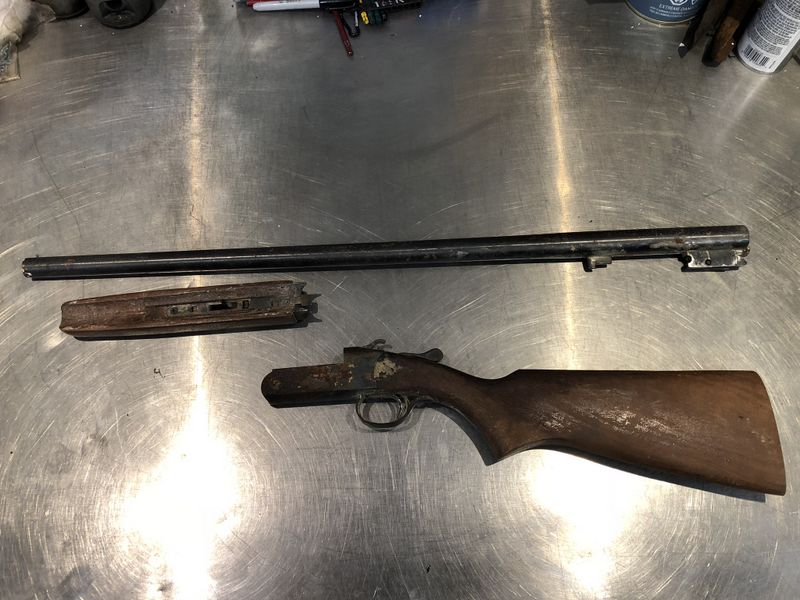
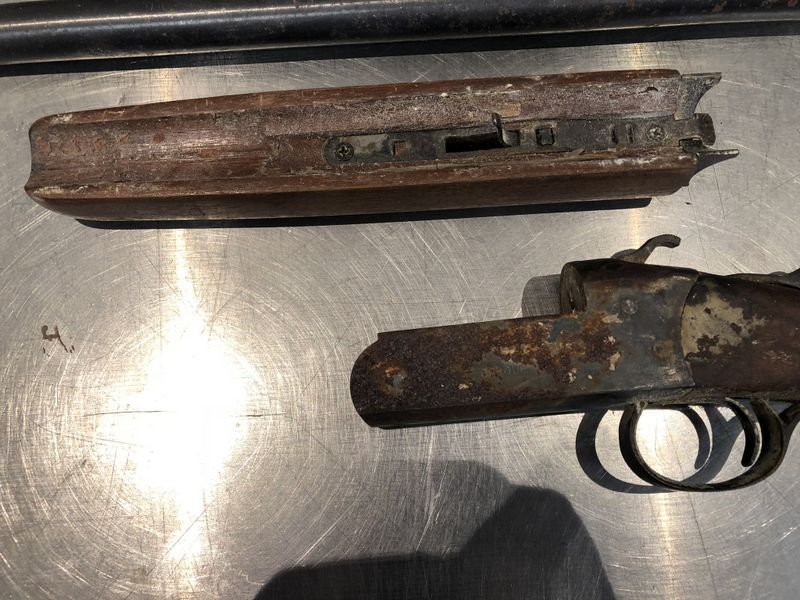
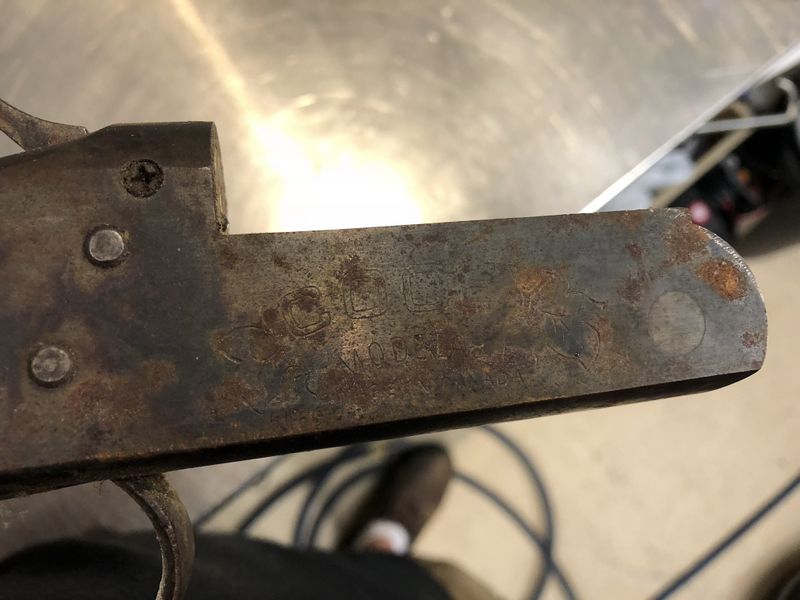
August 16: Thursday night Shed night. Started working on Lester's old Cooey 12 gauge shotgun, I wouldn't call it a full restoration but a very good cleanup. The metal was rusty & wood in need of re-finish, however the firing mechanism was clean and worked well!
Improper storage caused the firearm look pretty rough at first glance, I began with basic disassembly to separate the barrel, fore end, receiver, stock, recoil pad and trigger guard. I didn't disassemble the firing mechanism as it was surprisingly clean! I started cleaning the trigger guard then the receiver. Some time & effort with steel wool, wet sandpaper and mineral spirits got these metal parts looking pretty good again.
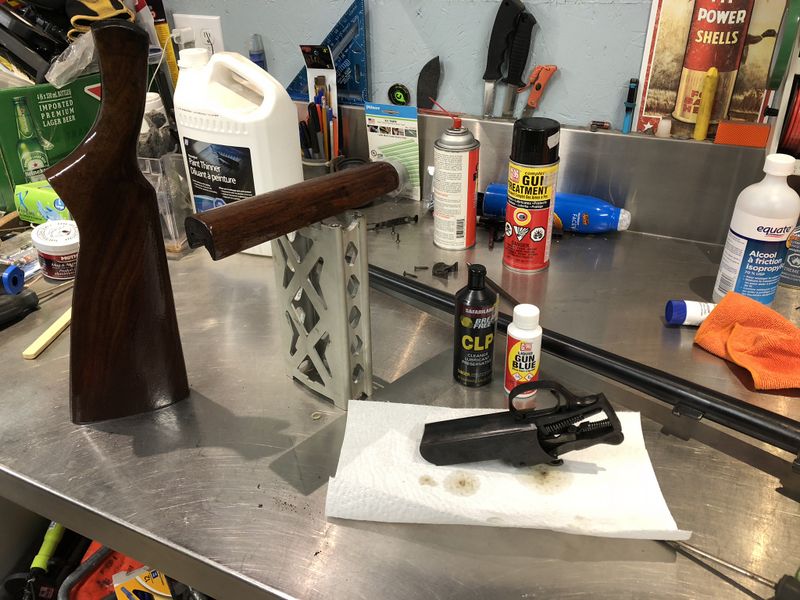
Another before pic. The barrel received similar cleaning treatment (with steel wool only) to remove rust and paint splatters outside. The inside was cleaned with G96 Crud Buster & cleaning wands starting with the brass brush and finishing with swabs coated in Break Free CLP. Once the rust was removed I cleaned the parts again with Isopropyl alcohol, then treated them with G96 Gun Blue which is a simple do it yourself metal bluing product that works well.
With the receiver, trigger guard & barrel finished and soaking in a heavy coat of Break Free I began work on the wooden parts. The wooden stock was stripped with steel wool, lightly sanded, stained & refinished with multiple light coats of oil modified water based polyurethane. It should be a fairly durable finish, but more than likely this firearm will be a showpiece for the owner.
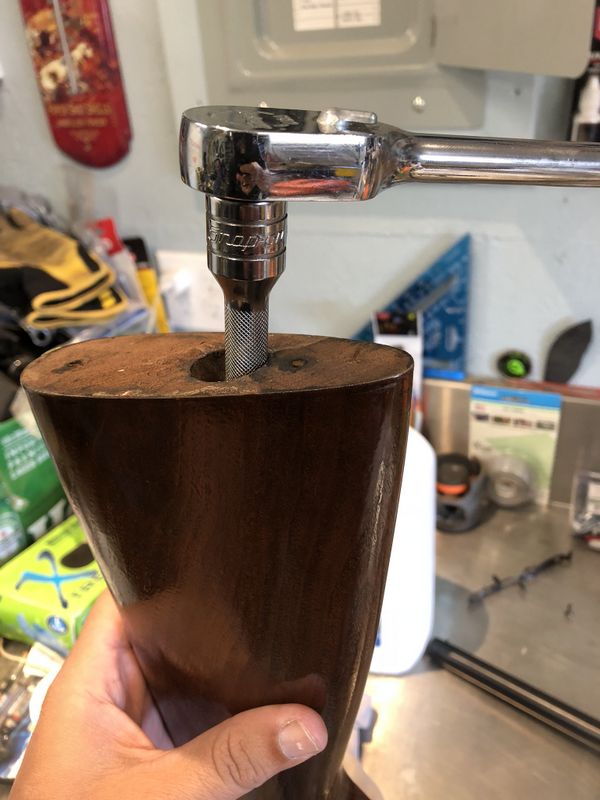
The following evening I began putting the Cooey back together. The stock is held to the receiver with a long internal 7/16" bolt.
Finished project: The metal still has minor imperfections and pitting caused by the heavy rust, but the fresh bluing and a good coat of Break Free CLP inside and out, it is now looks great and is much better protected than when it arrived.
September: As many people know, I love a good bargain when purchasing something. Good value doesn't mean most expensive, nor cheapest, sometimes it's getting a pricy item for a good deal which was the case with today's shed project.
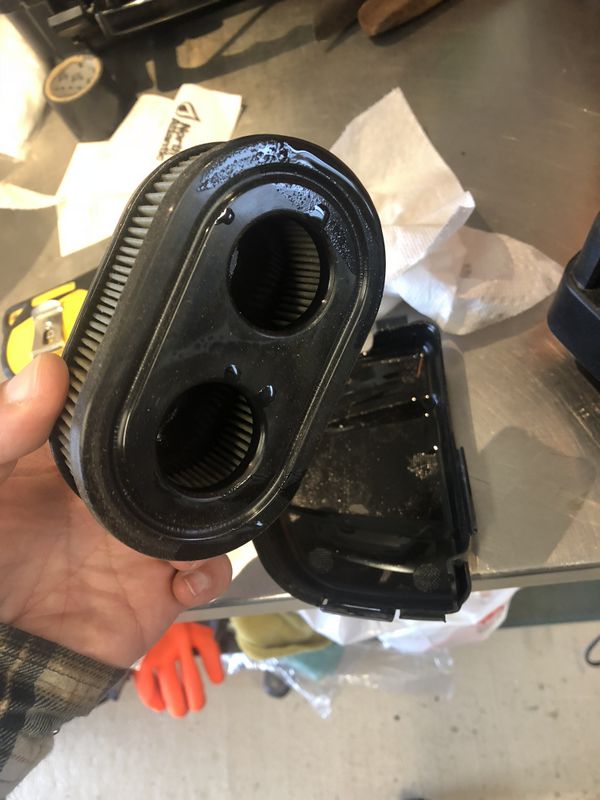
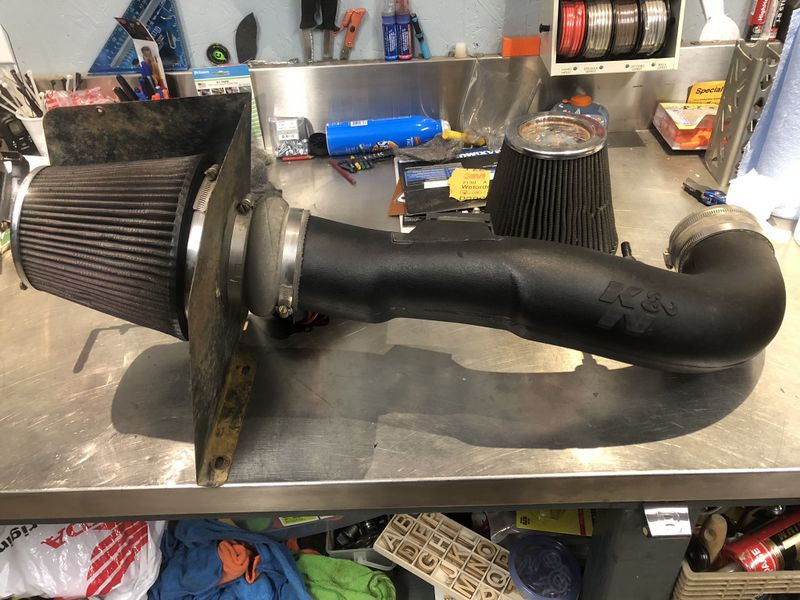
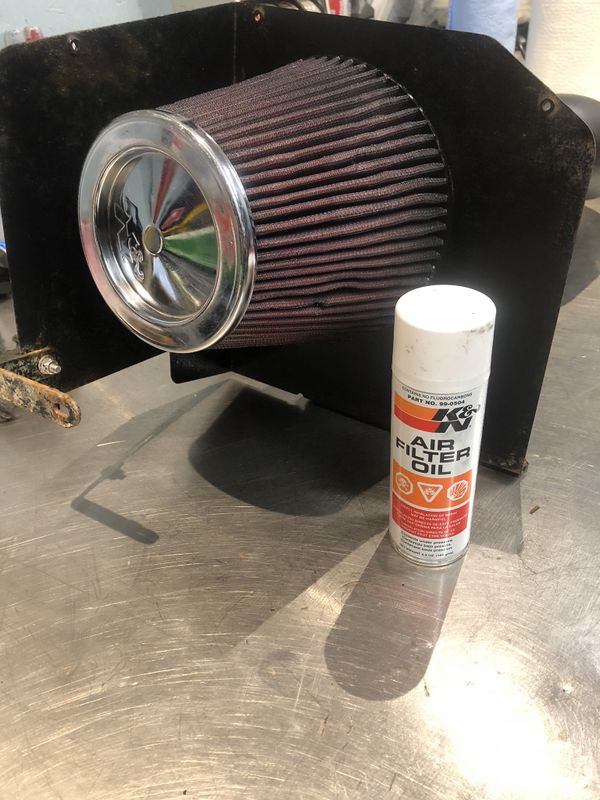
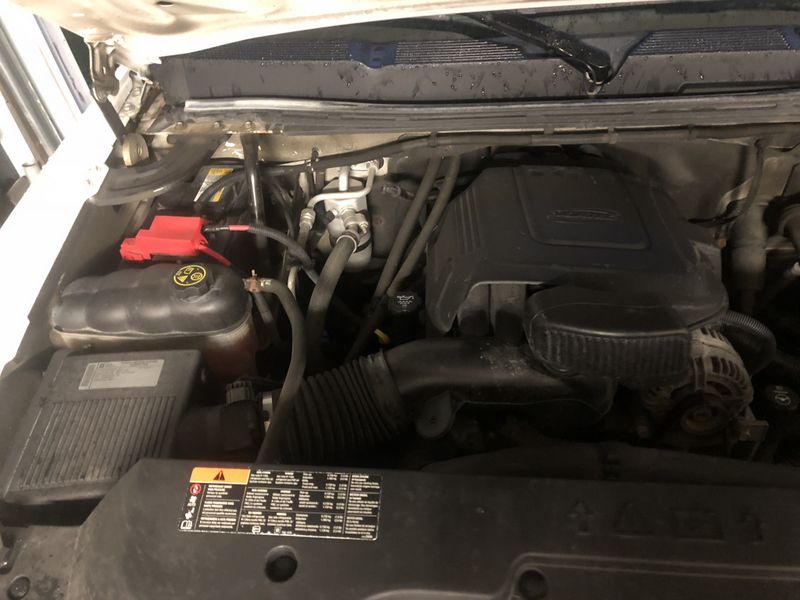
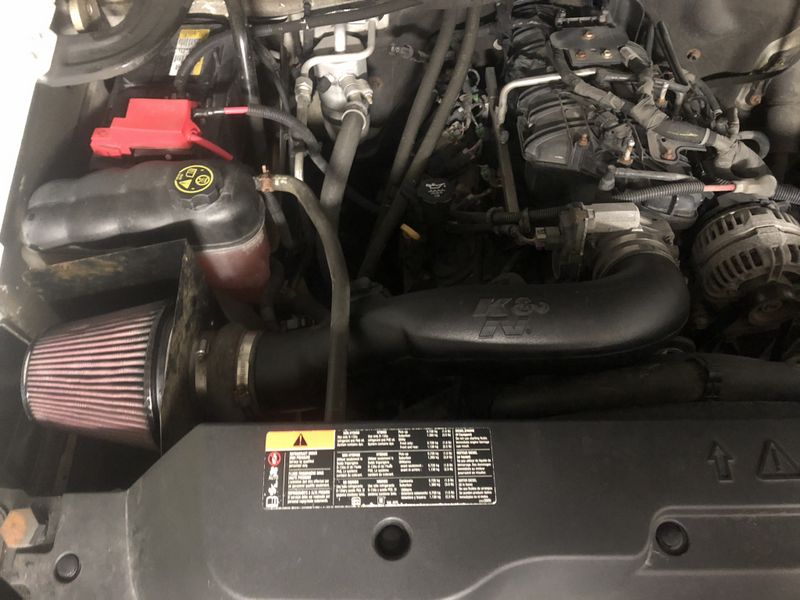
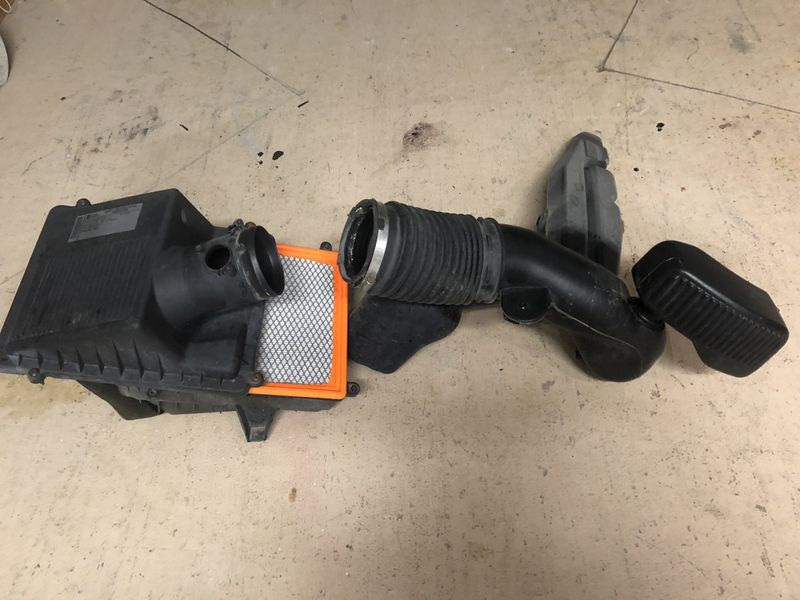
Today I stumbles across a great deal on a used K&N Cold Air Intake for my 2011 Silverado 2500HD. I picked it up locally for 1/4 price of new plus it came with a spare filter so I can always have a clean one on hand ready to install.
I Googled the installation instructions and it was pretty straight forward. I unbolted the stock airbox and breather pipe, removed and swapped over the mass airflow & intake air pressure sensors and installed the new K&N intake in its place.
There is a crank case breather vent in the intake pipe near the throttle body. With the new intake, you carefully disconnect the short plastic tube from the steel line near the passenger side valve cover. It is replaced with a short length of fuel grade rubber line to the new intake.
The new intake seems to work very well. All electrical connections were plugged back in and no engine or trouble codes set. The sound from the new intake is amazing. Driving at a reasonable pace you don't really hear any difference or drone, but when you step on the gas it has quite a noticeable rumble!
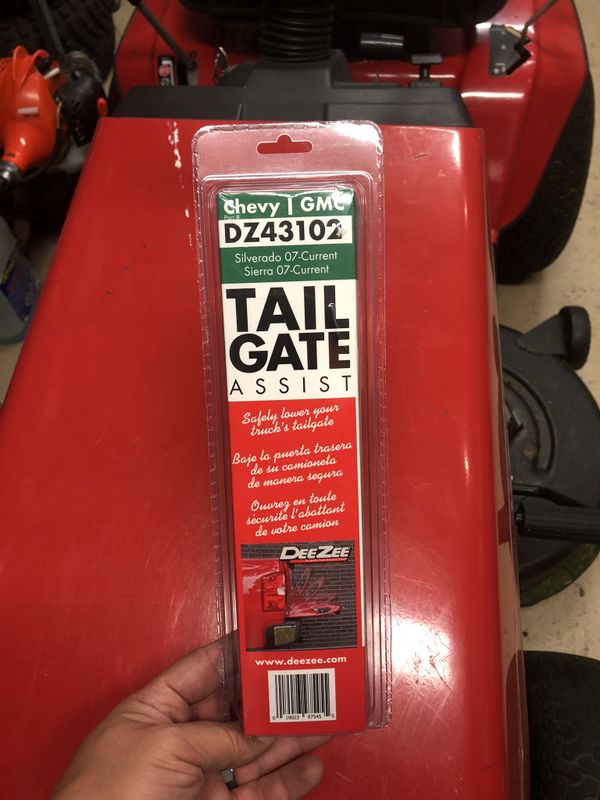
My next Silverado mod was the installation of a DeeZee tailgate assist, which is essentially a shock absorber for dropping the tailgate. I really should have installed one of these years ago as my tailgate is opened many times a day while working and this saves a lot of banging on the tailgate straps.
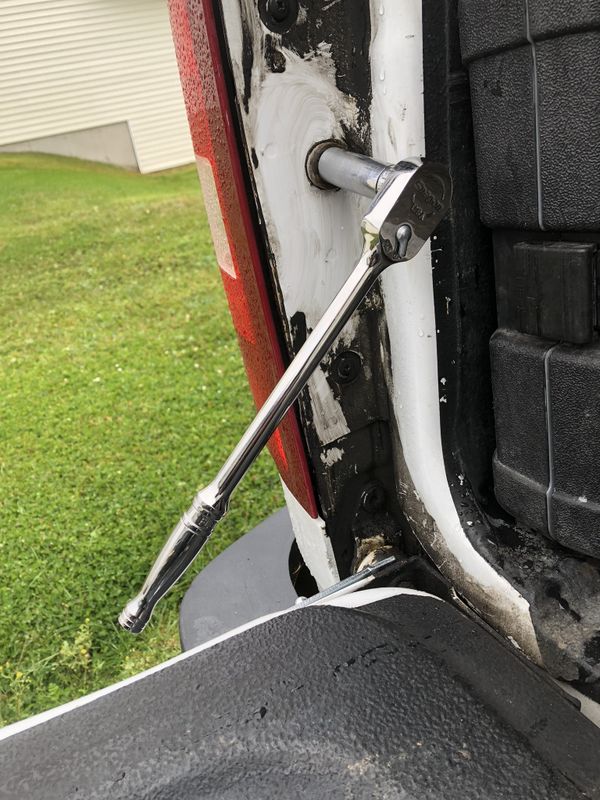
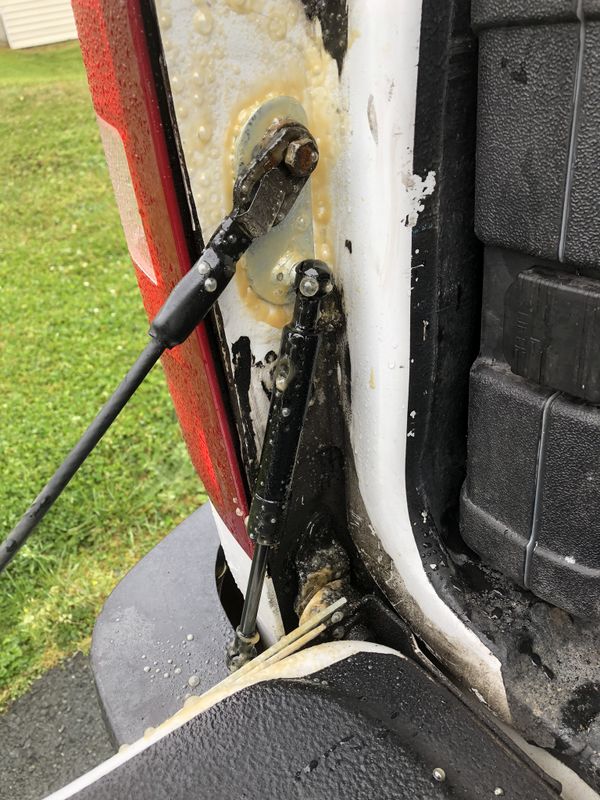
Installation was straightforward with the tail gate bracket utilizing an existing hole & a hollow anchor bolt supplied with the kit. The box side bracket installed by removing the support bolt for the strap and reinstalling the same bolt through the new bracket.
The shock absorber then clicks in place and is easily pulled off if you need to take the tail gate off the truck. With winter around the corner I soaked the new brackets and shock in my rust preventative of choice - Fluid Film.
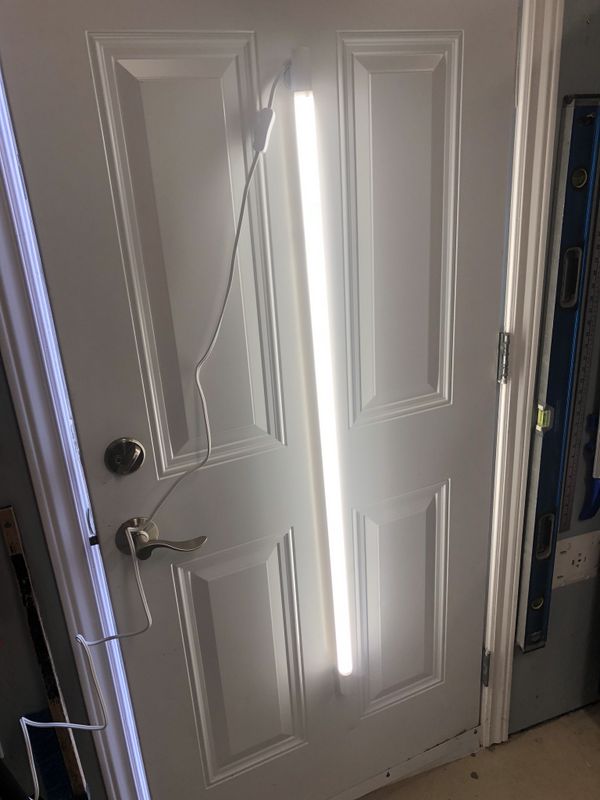
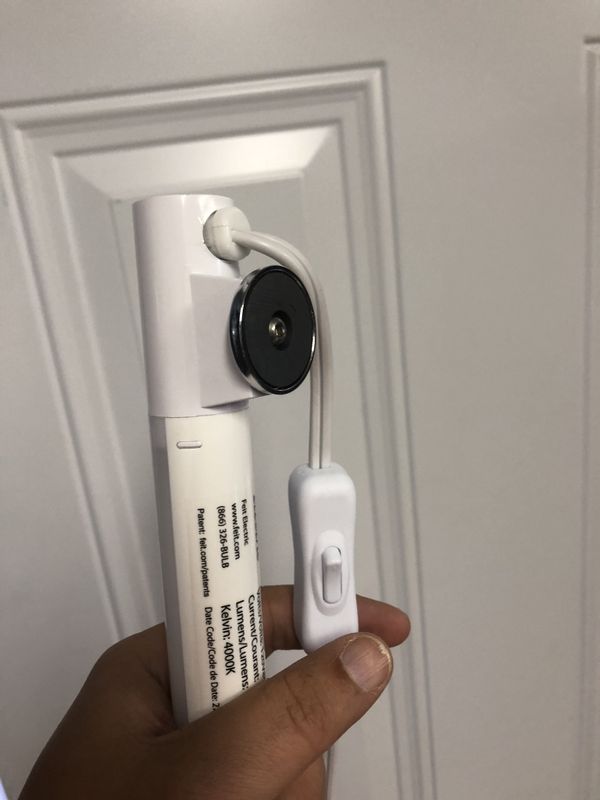
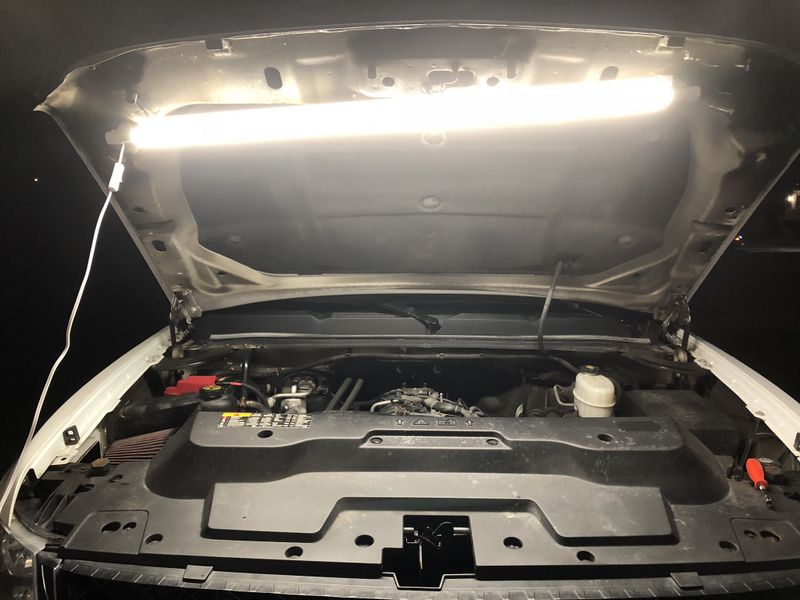
This week Canadian Tire had these awesome 4' LED lights on sale for $15.00. I picked up a coupe for the house, but more importantly one for the garage.
I really needed a good under hood light, and I noticed mechanics using 4 foot magnet mount lights in garages lately. Instead of paying a fortune for one on the tool truck, I used this $15 unit from Canadian Tire, screwed on 2 magnets and voila, I have the same product! The light puts out 1850 lumens, is small and compact and comes with a 110v electrical plug already installed.
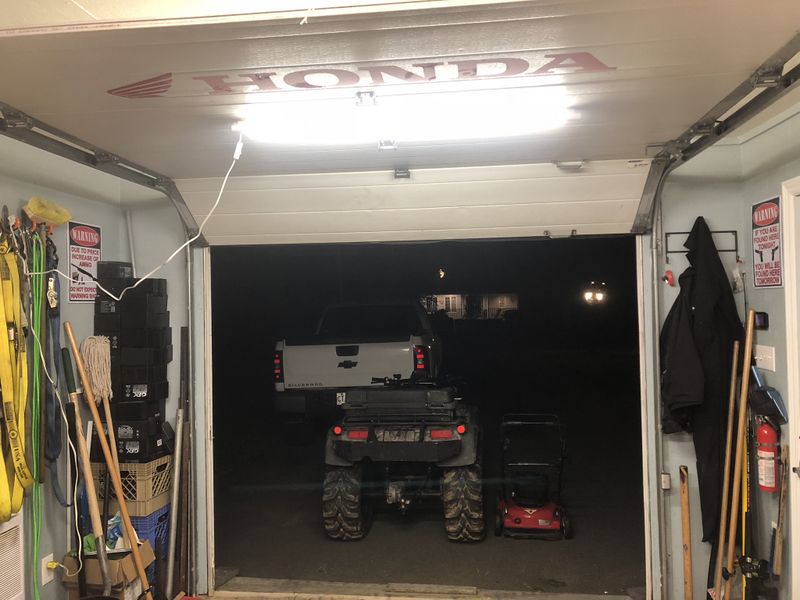
The light doesn't only work well under hood of a vehicle. When I put my garage door up it blocks one of my 3 ceiling fluorescent lights. Now I stick the new LED light to the overhead door and the garage is bright again! I can also stick it to my man door, tool box, or shelving unit to have extra light when waxing or painting in the garage. All in all a fantastic new tool for the shed at a very reasonable cost.
For the lights in my laundry room & back porch I cut off the plug, painted an octagon box cover white and used a wire lock to properly permanently wire them in place.
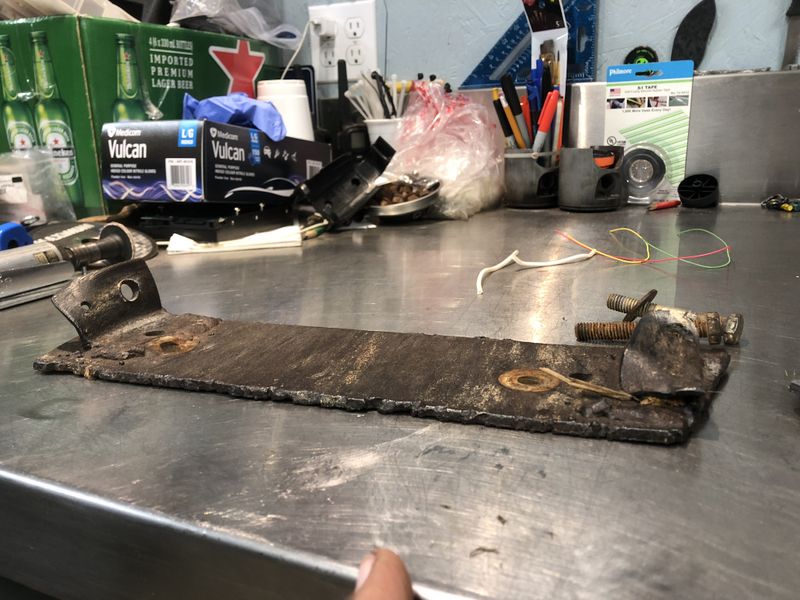
After the September Cabin trip I gave the bike a quick look over when I got home, and was surprised to find that the snowplow bracket I installed two winters ago was still on the bike! This certainly explained why I got hung up so bad towing out the last load of firewood, especially given the damage to the bracket!
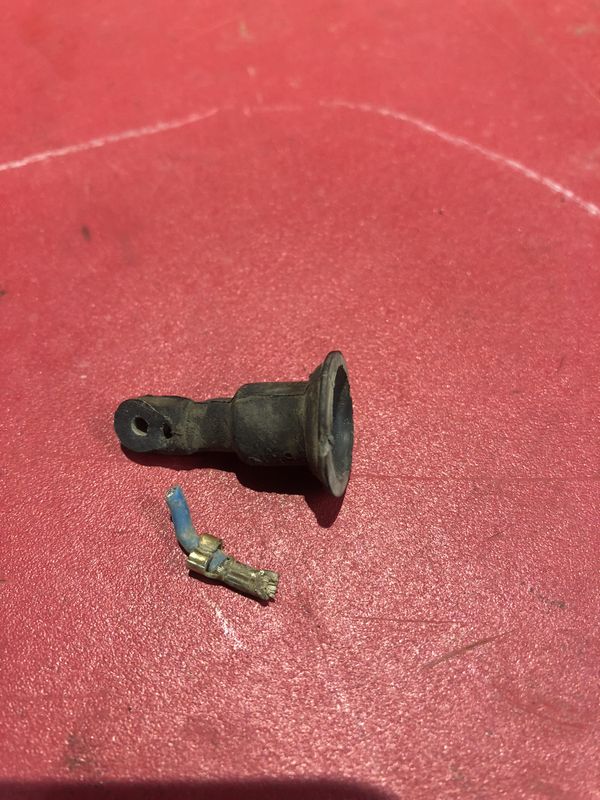
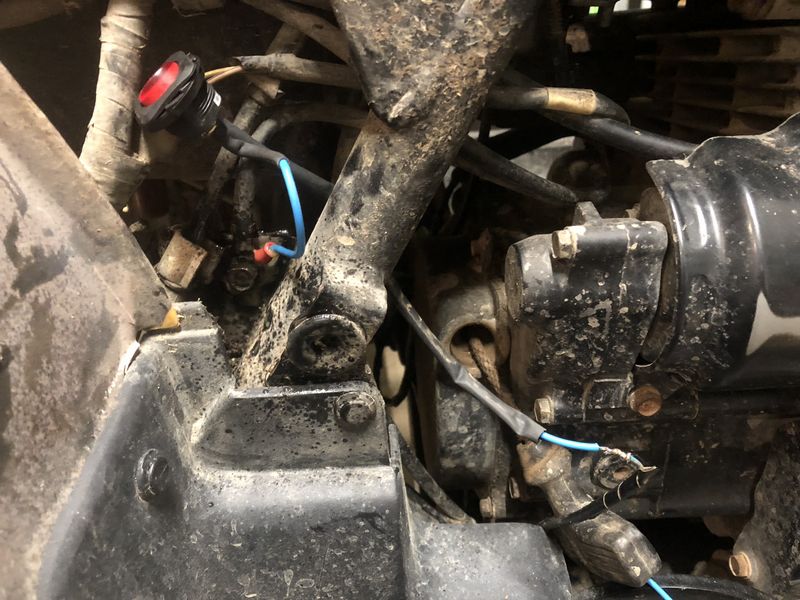
On my last ATV ride in Torbay I noticed the oil cooler fan kicking on an off rapidly so I knew I would be tracking down an electrical gremlin soon. While hauling firewood at Sooley cabin the fan didn't kick in at all. Rather than throw parts at the problem I followed my service manual and began trouble shooting. Following the steps I removed the electrical connector from the fan control unit under the front fender, all tested OK except that I had an open circuit to the engine oil temp sensor. I took off the single wire connecter and found it split in two. An OHM's test of the sensor itself showed that it was OK so the broken connector was the problem.
The sensor is in a very difficult place to reach with my aftermarket skid plates installed. The Allan head bolts are in terrible shape having been dragged over countless rocks so I will have to cut the heads off the bolts at some point to do a proper repair. For now I picked up a good ground at the OEM main chassis ground and fed it through a switch to the oil temp sensor wire. This wire looks for a ground signal to activate the fan and will only work with the key on. This will provide a great temporary repair until I can get the right electrical connector and cut off the skid plate bolts to install it.
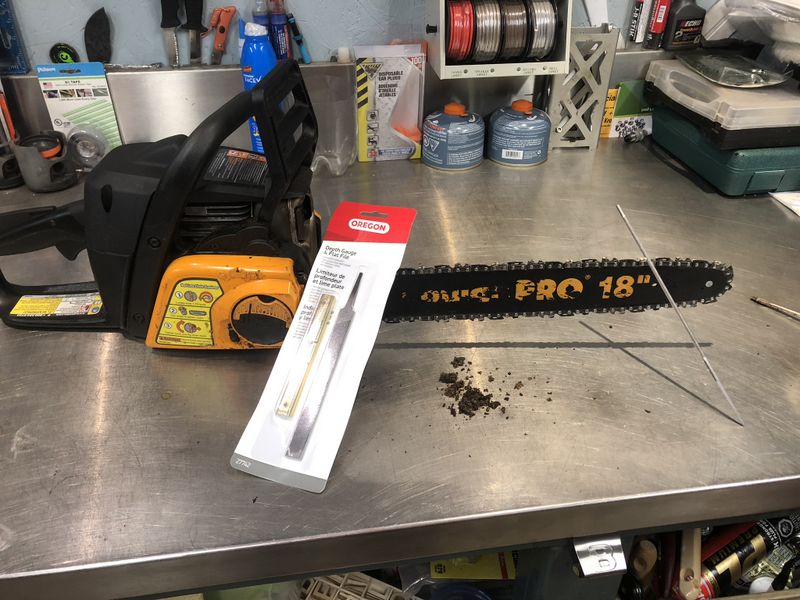
After cutting & junking a bunch of firewood, cutting stumps & trimming up gravel covered overturned tree roots, the chain on the old Poulan was now a little dull. I took my time and gave the chain a good sharpening with the appropriate sized round file, then finished the job by filing the depth gauges with an Oregon flat file and gauge. I also cleaned up my spare chain so that if I strike a rock in the woods I can quickly swap chains and continue cutting.
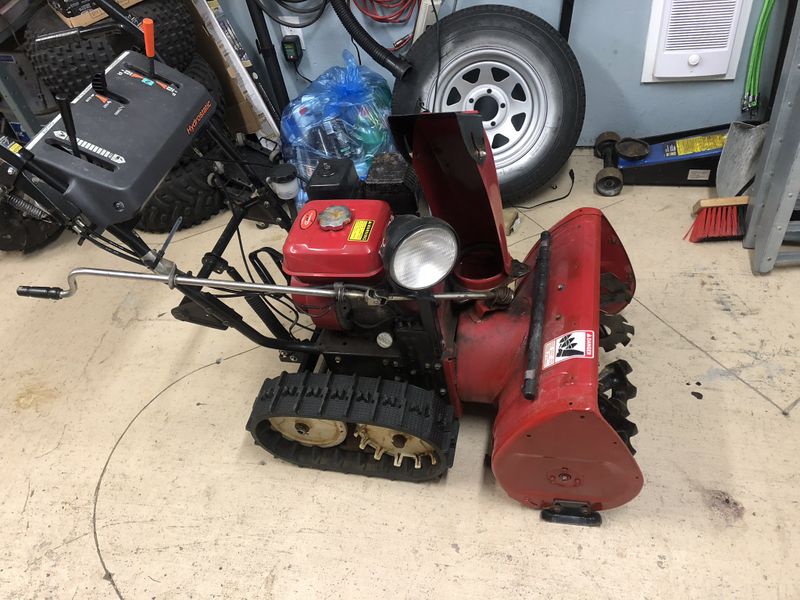
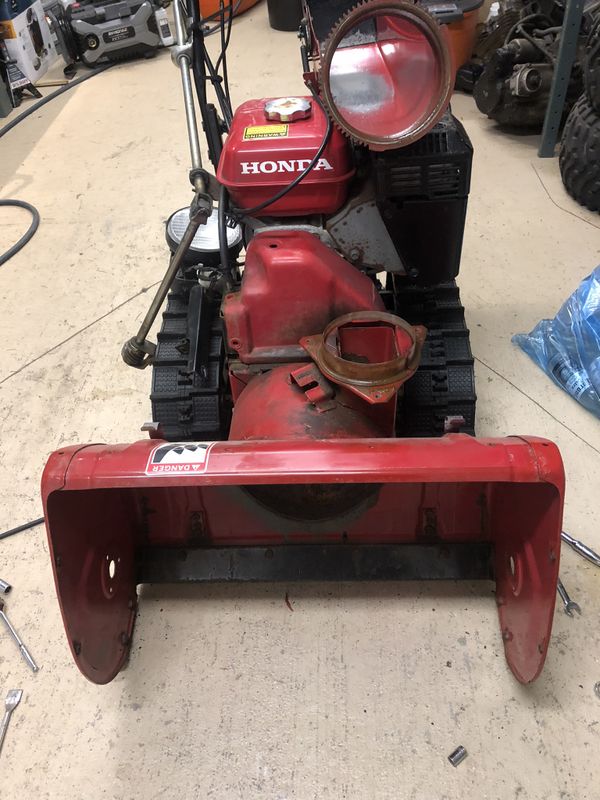
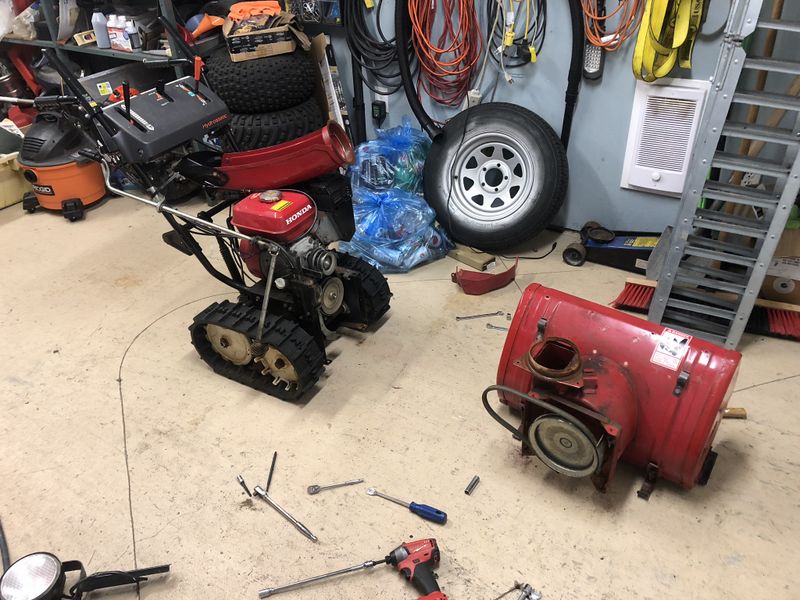
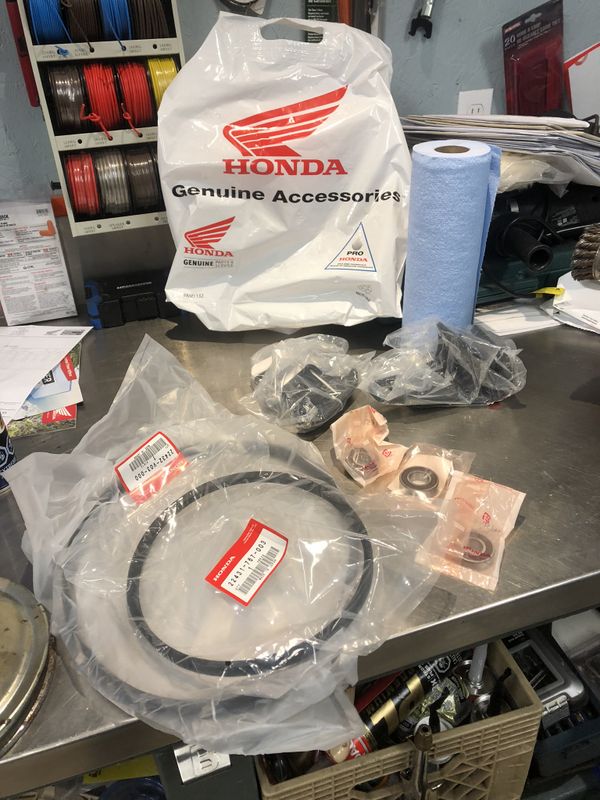
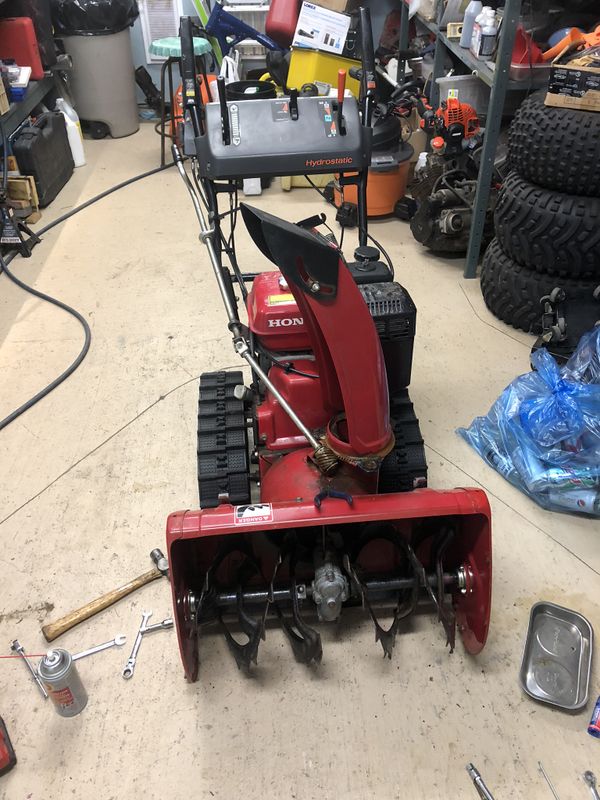
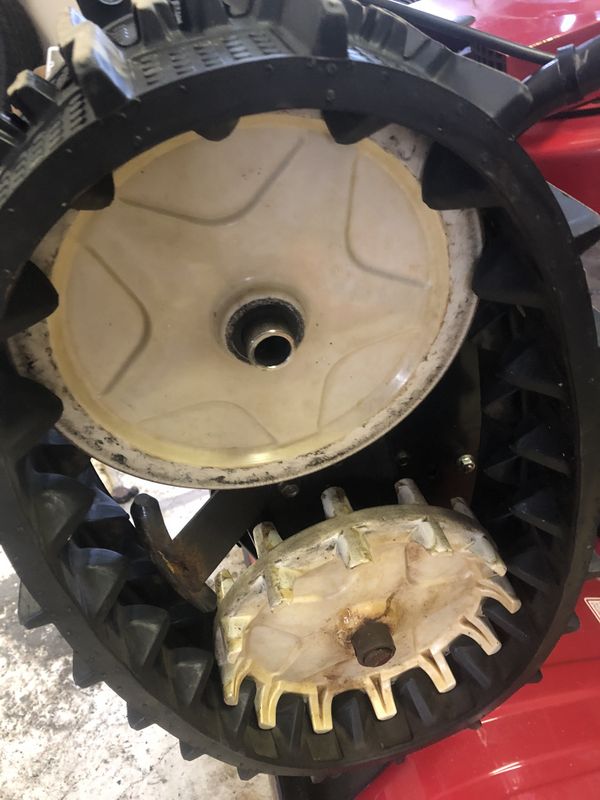
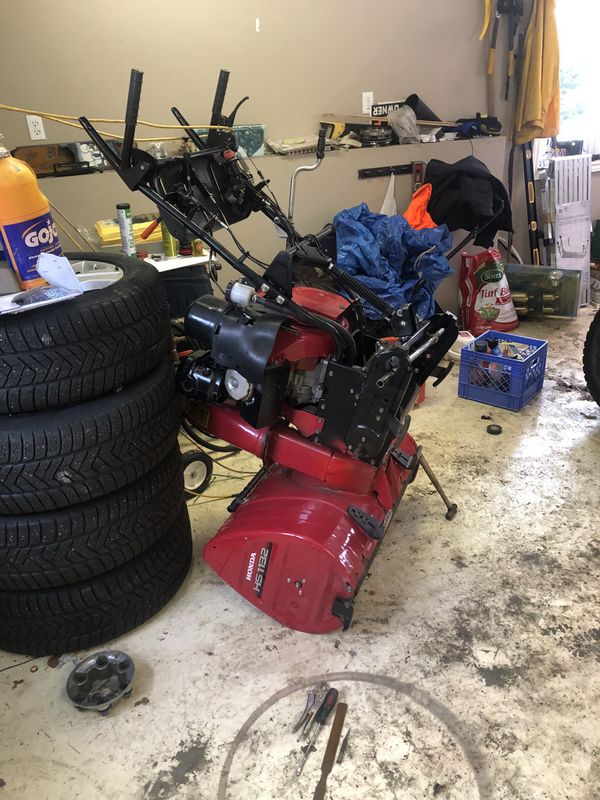
Even with Moose Hunting season in full swing its been a busy couple weeks in Area51. My first project to complete was the annual maintenance on Doug's Honda 7/24 Snowblower.
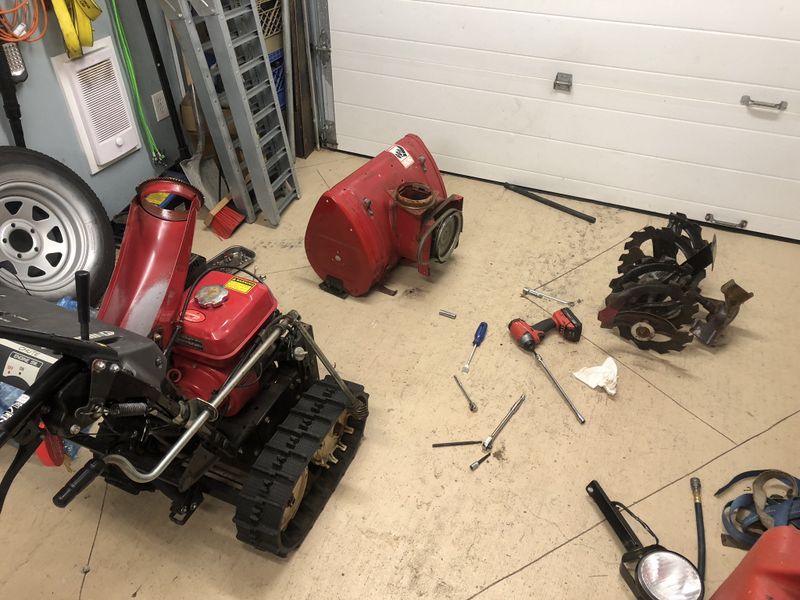
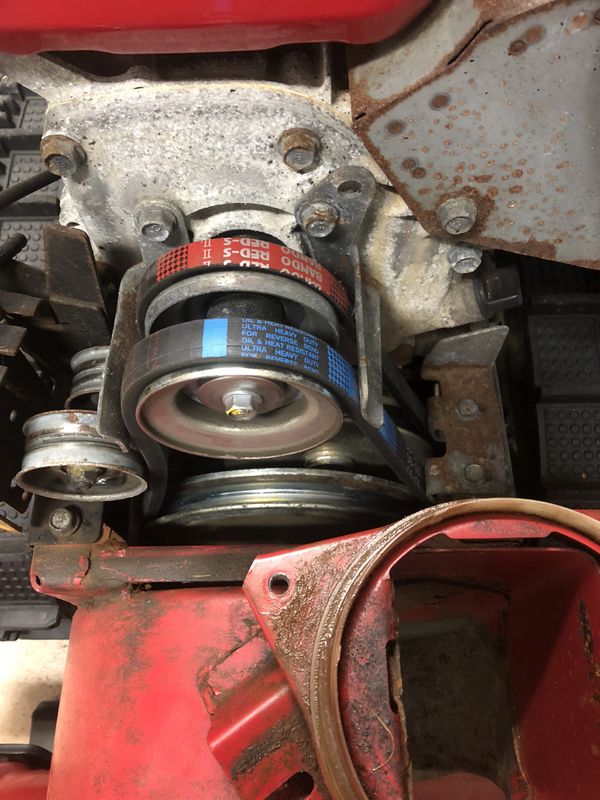
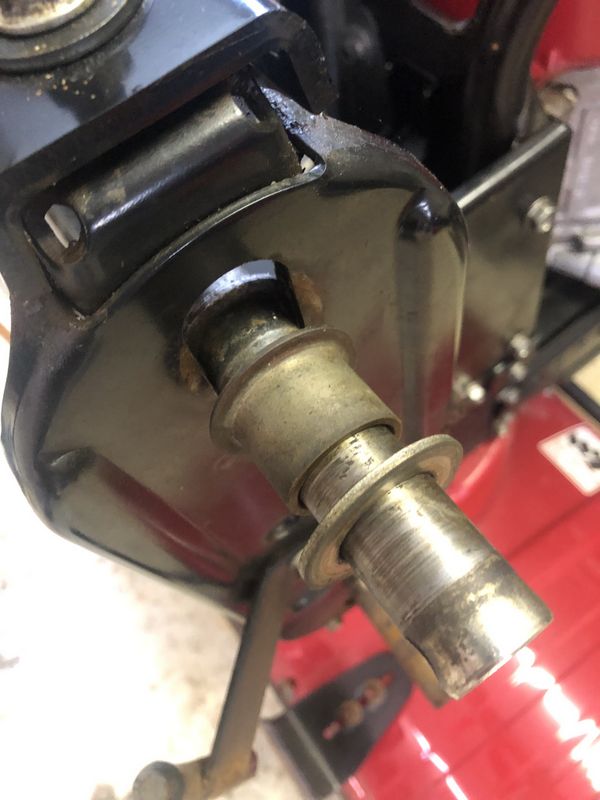
However after a quick inspection I found that this wasn't going to be a standard maintenance. The impeller bearing was completely shot, it was actually seized and made a horrible sound when I ran the auger. With parts picked up from Honda One I set about disassembling the unit to replace the impeller and auger bearings, while I was in there I recommended replacing the 10 year old belts and replacing the paper thin bucket skids.
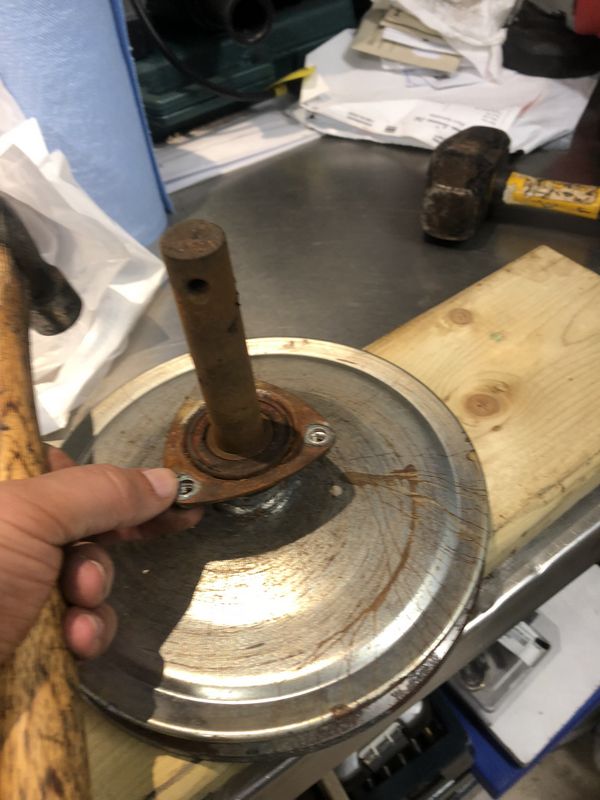
With the augers removed, and machine split I proceeded to remove the 3 bolts holding the impeller bearing cup to the back of the bucket.
This very very rusty/shot bearing was thoroughly seized into the bearing cup.
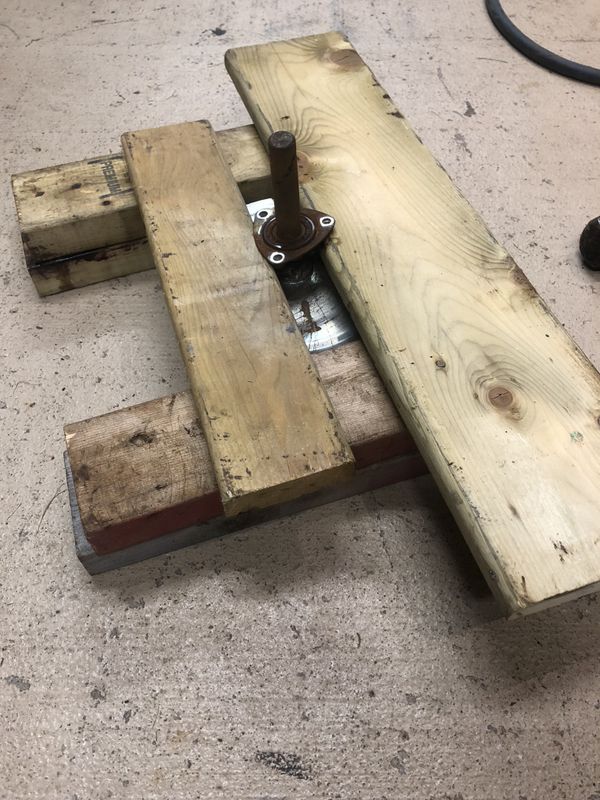
However making a quick jig to suspend the piece then hammering the end of the impeller shaft got the old bearing and retainer cup separated from the impeller shaft pretty quick.
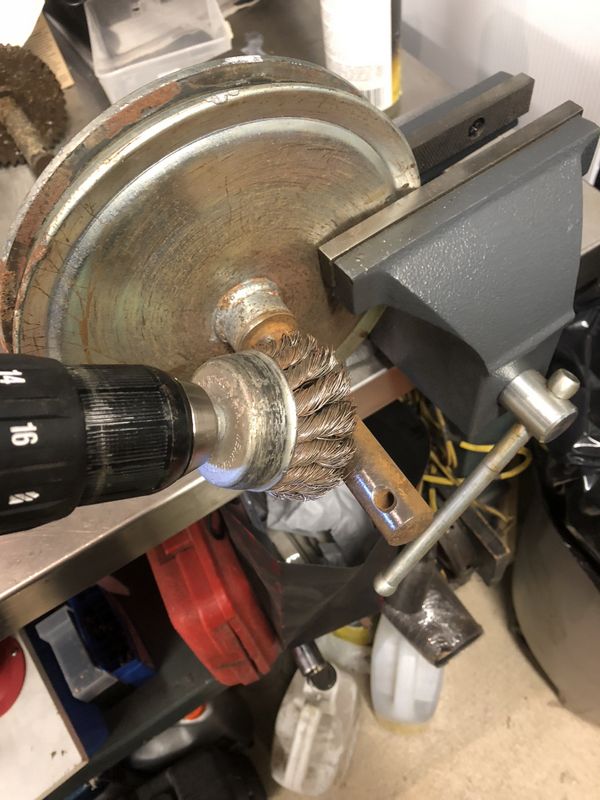
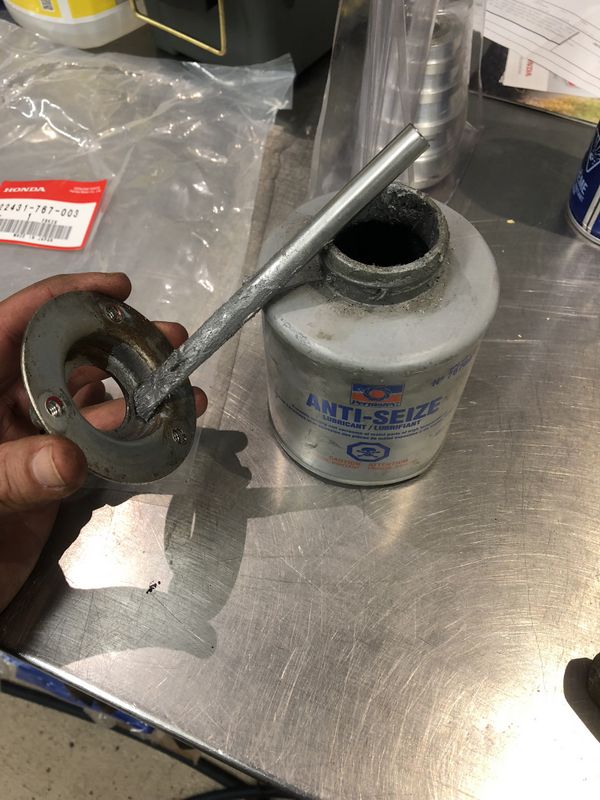
The impeller shaft was cleaned and coated with antiseize before installing the new bearing.
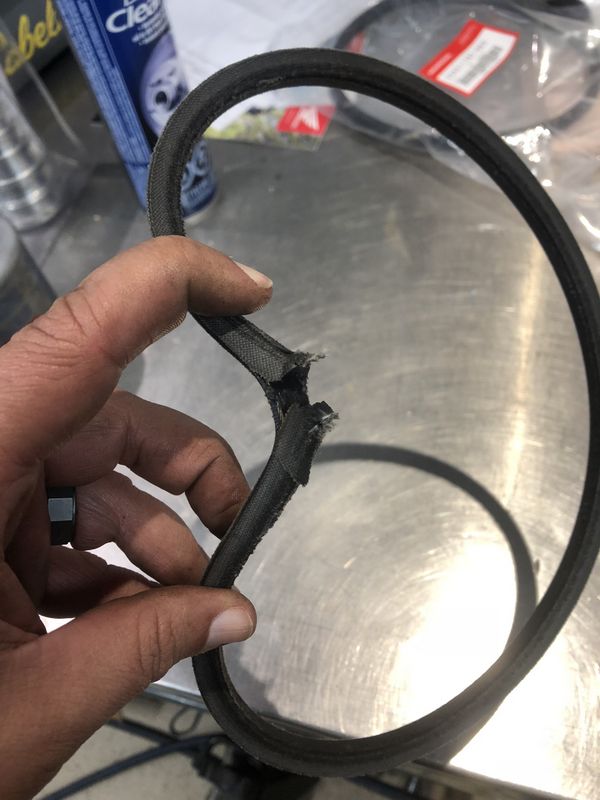
The old belts didn't look too bad when viewing them from the inspection cover but when removed I could see their days were numbered.
I also coated the inside of the auger bearing cups with antiseize to prevent rust from forming after new bearings were installed.
Next the 10-year old impeller shaft shear bolt was replaced as the old unit had deep wear marks and was therefore weaker than it should be.
With the blower back together I proceeded with my normal annual maintenance which includes oil change, draining the carb bowl & sediment cup, inspecting the fuel tank for water, greasing the track drive transmission grease nipple, and lubing all moving parts, cables & controls.
Lastly I replaced all four bucket skids with new Genuine Honda parts. The rear bucket skids were replaced with updated parts which are much stronger than the original pieces.
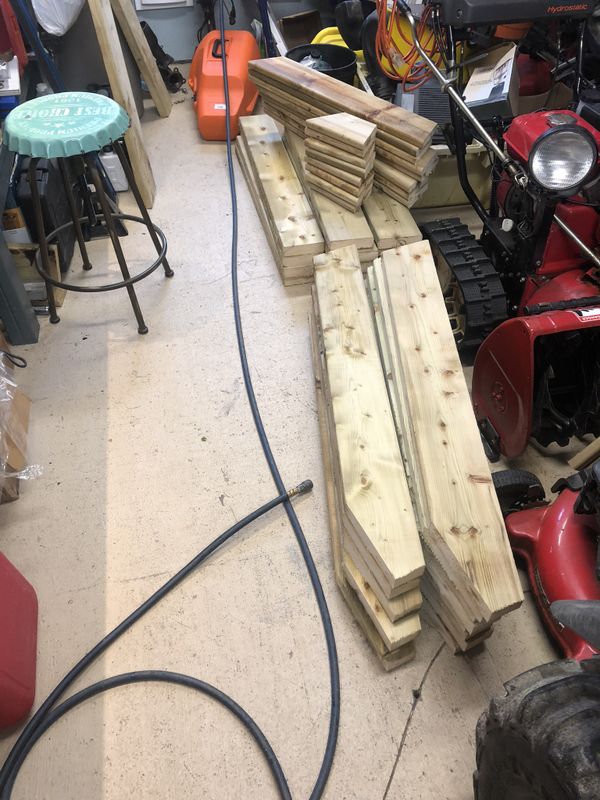
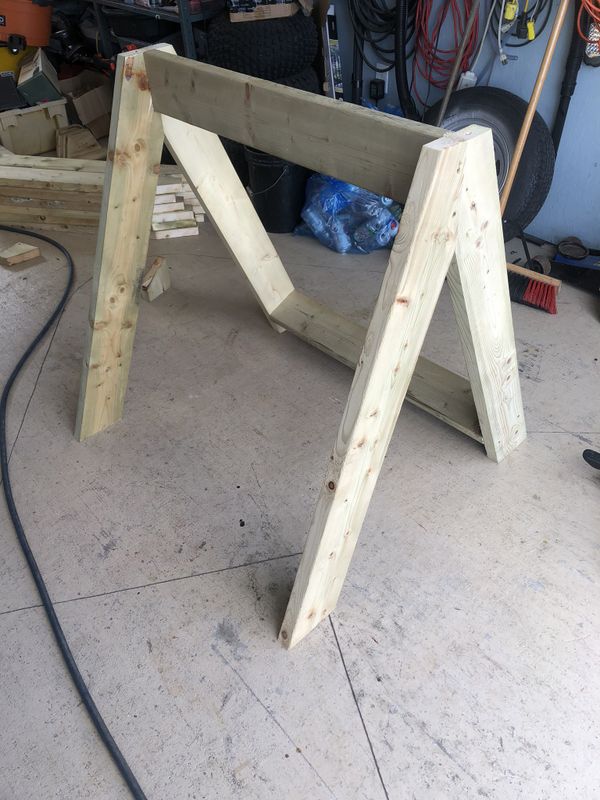
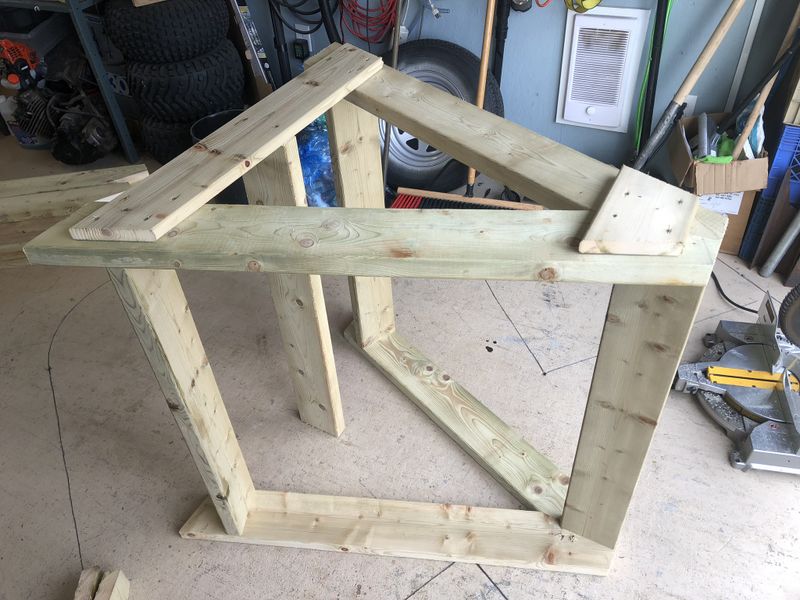
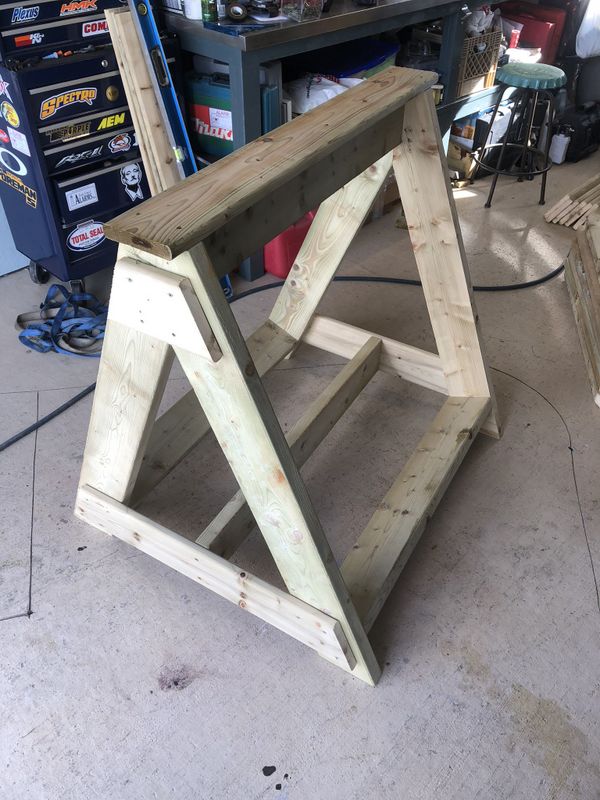
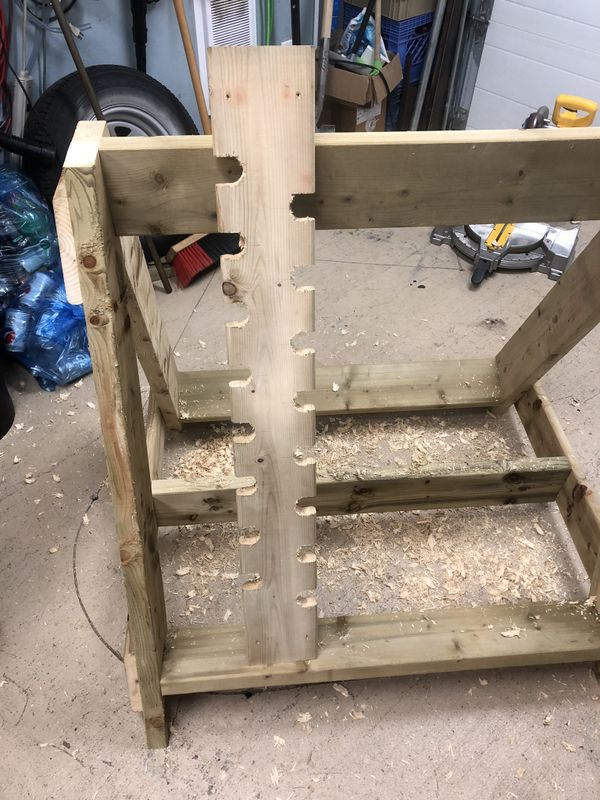
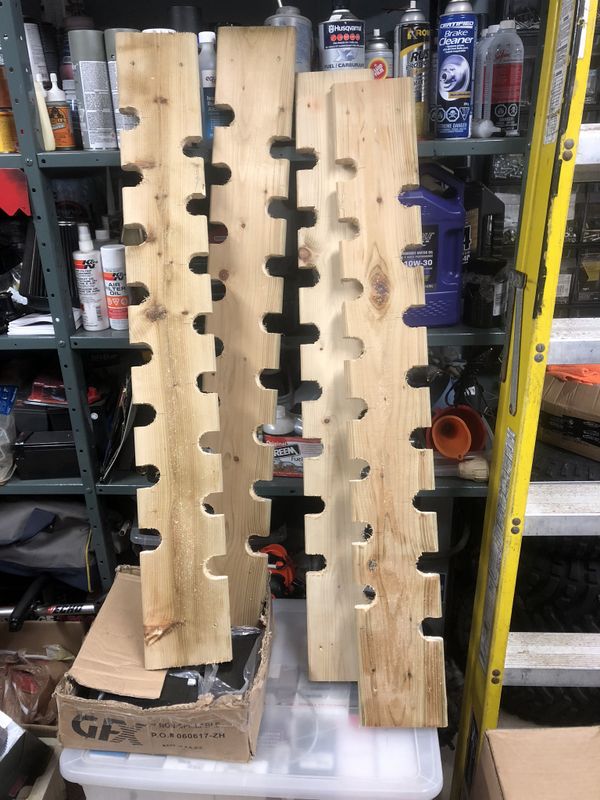
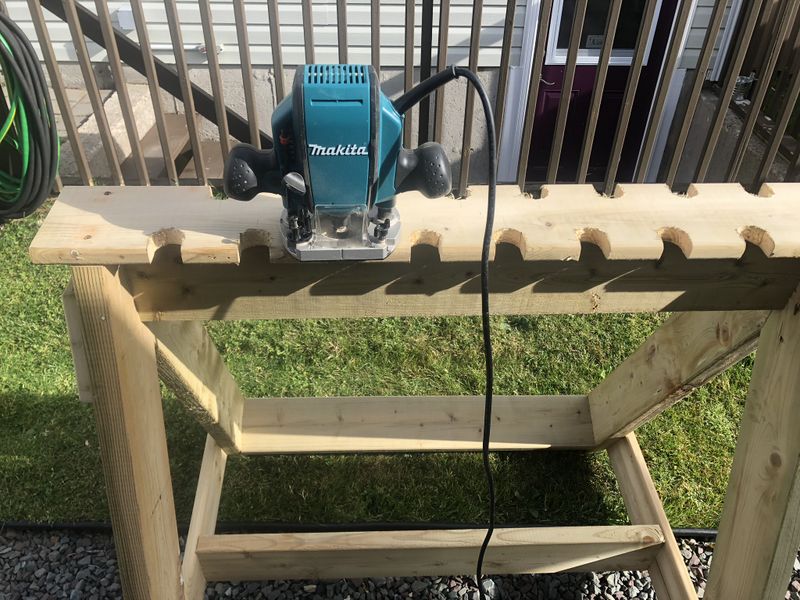
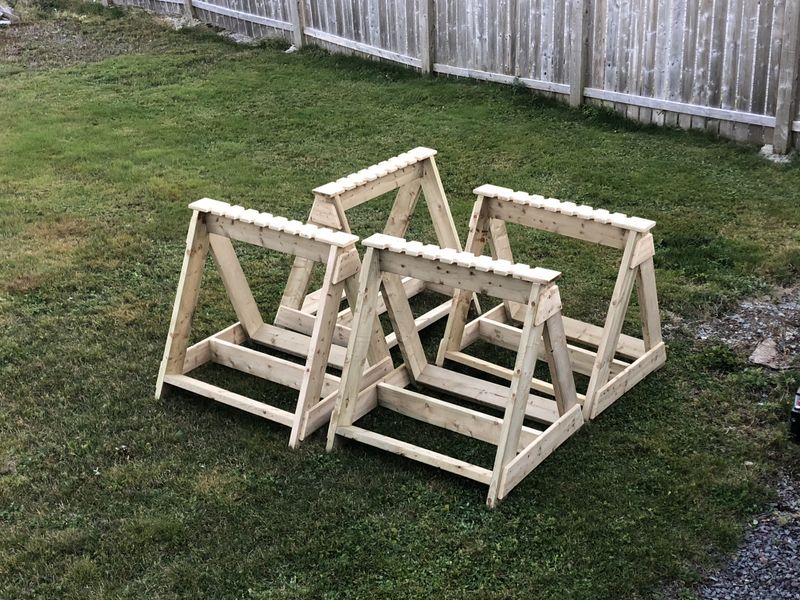
With Doug's blower complete it was on to the next project, building four new gun racks for the Trap Range at the St. John's Rod and Gun Club. The four existing gun stands will be used on our Sporting Clays Range. With weather clear but rain forecast I took the opportunity to get all my pieces cut outdoors to prevent sawdust from creeping into every corner of the garage.
I have measurements recorded that I use to make these stands, this is the 3rd set of four stands I've built in the last 5 years and its great to keep them all identical.
All of the wood used was pressure treated, and all joints joined with PL Premium and 4" construction screws.
The barrel rests were made from 6" 5/4 board using a 1.5" hole saw then trimmed with my chop saw.
The final step was rounding over all sharp edges with a round over router bit and then a quick sanding with my random orbit sander.
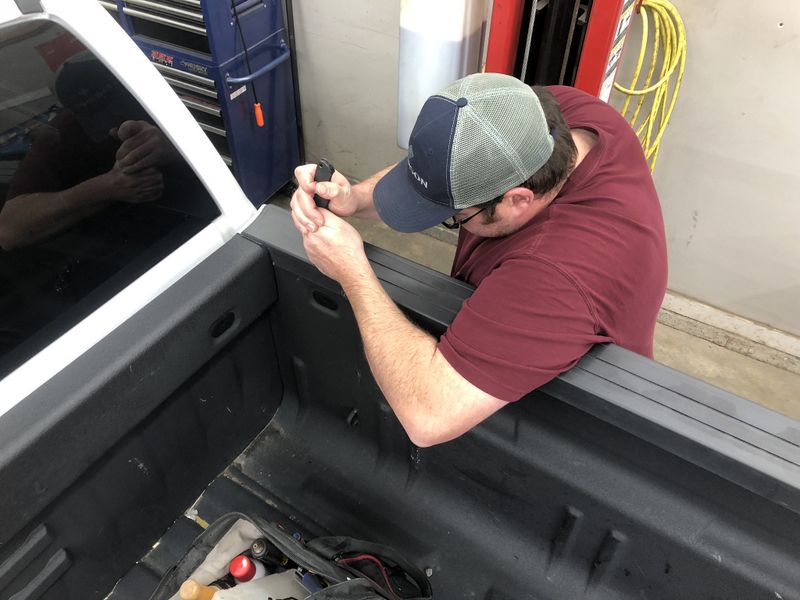
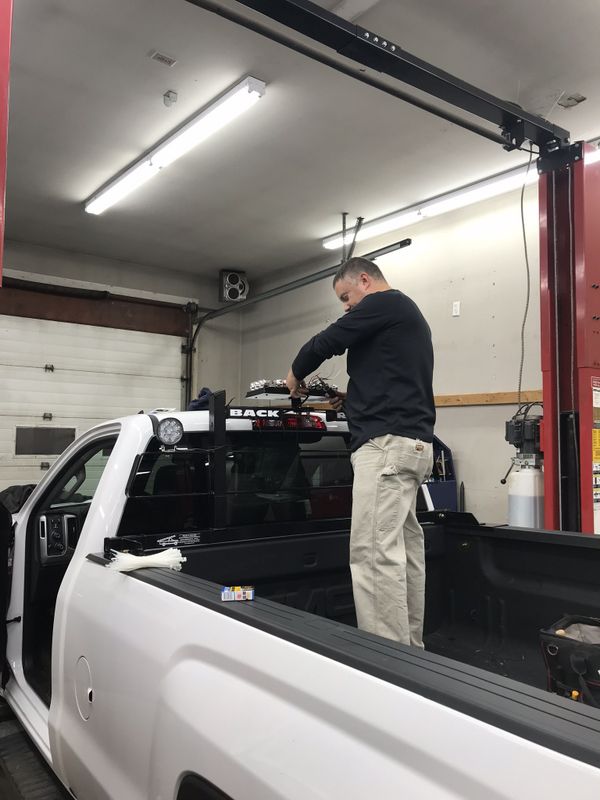
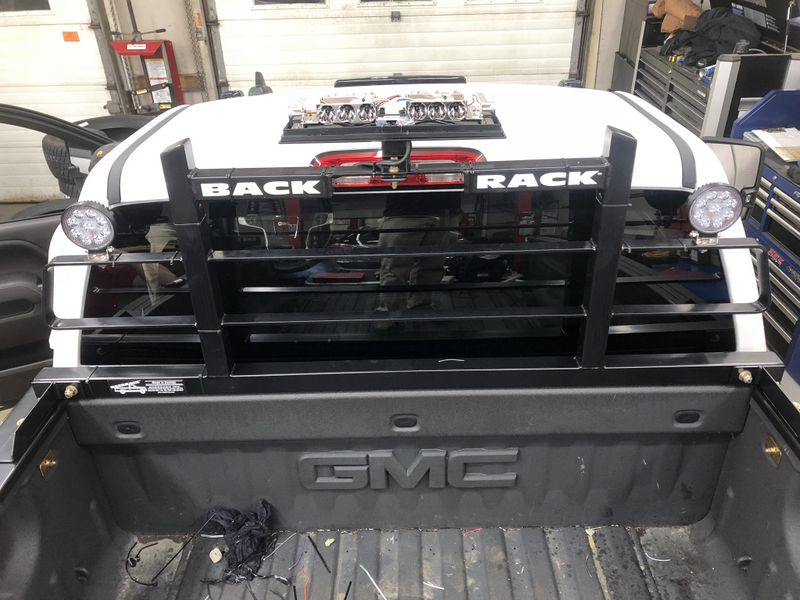
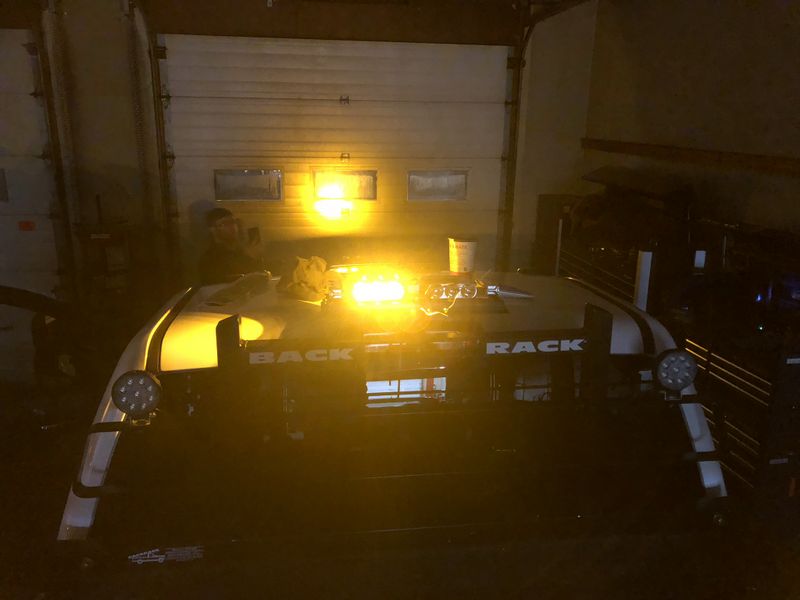
My next project actually took place at the French's new business, Canada Car Care on Commonwealth Avenue. Congrats Don & Justin on your new business venture! Over the course of two evenings Mark, Justin and I assembled and installed a Back Rack with Amber flashing light and two LED reverse lights on the 2018 Sierra 2500HD Shop Truck.
This truck will be set up with a pro grade Western Plow for clearing the parking lot this winter.
The truck had the factory snowplow prep package which meant there was an OEM switch and plow light connection located above the centre console inside the cab. After checking the owners manual for more info and Googling how to disassemble the console I fished a wire from the console, through the cab and then outside to the back rack.
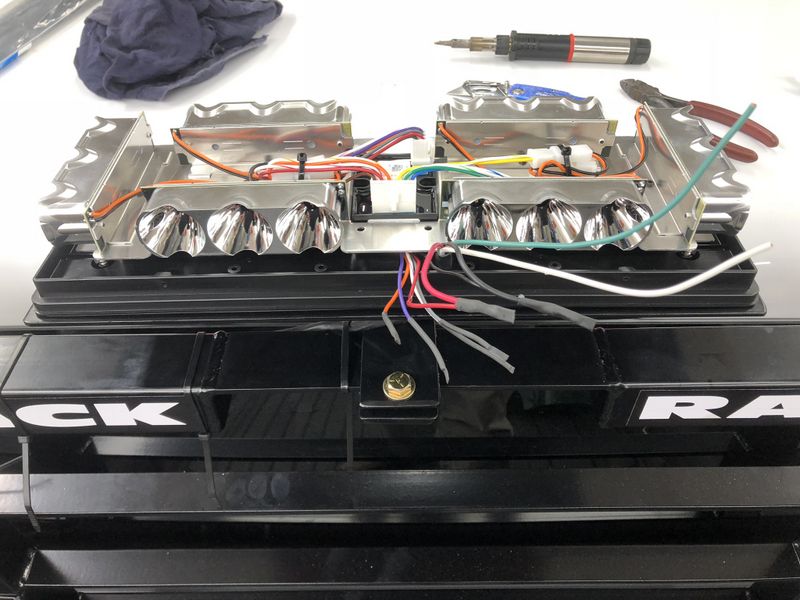
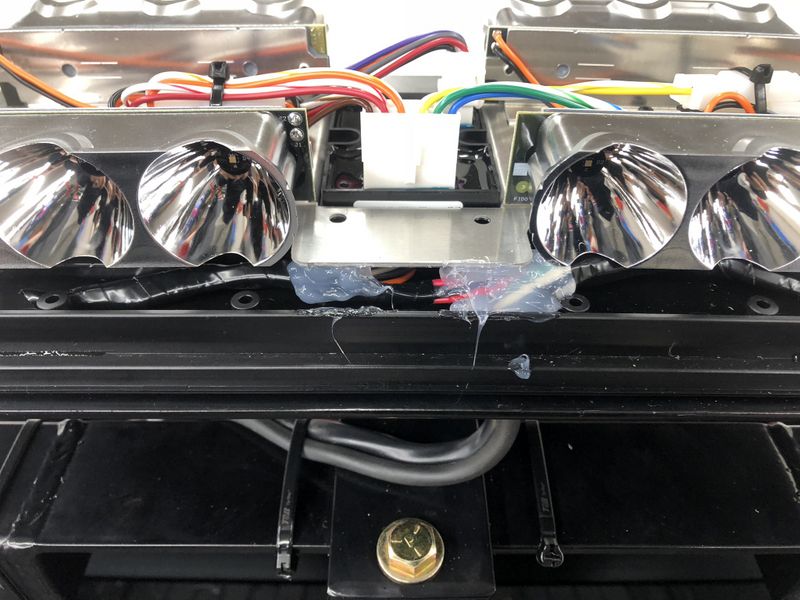
The four conductor wire coming from the cab will provide power for the amber light as well as separate switched power for the LED reverse lights. The splice is located high and dry inside the Amber light safe from salt and corrosion. All splices were soldered and covered in adhesive lined heat shrink, the wires for additional features on the Amber light were capped in the same manner.
Finally the splices were tightly bundled then a dab of silicone adhesive applied as an extra preventative measure against chafing/abrasion.
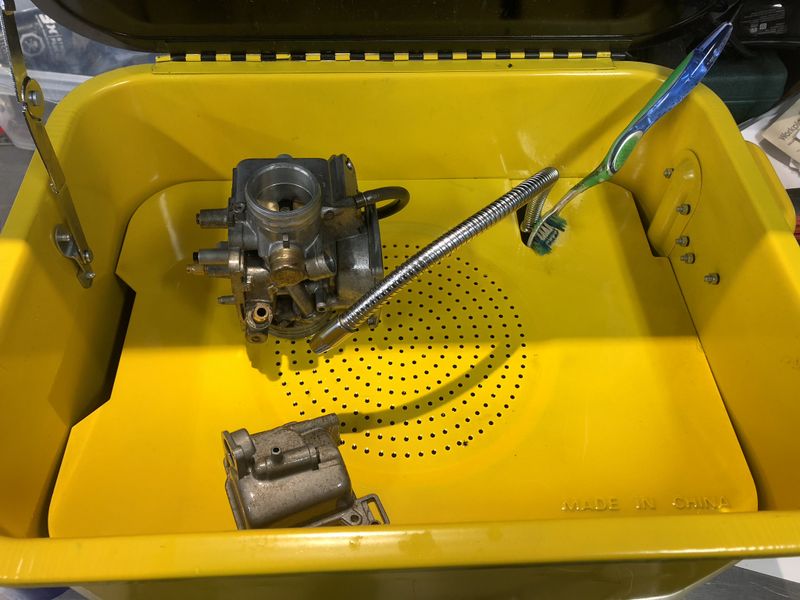
With Justin's shop truck complete, it was back to my own Area51 location for the next evening's adventure, rebuilding Bassan's Foreman 400 carburetor. Link: Bassan's Foreman 400 Project.
The next evening was spent working on project Foreman which recently celebrated its 20th anniversary! Link Project Foreman 20th Anniversary & misc Repairs 2018.
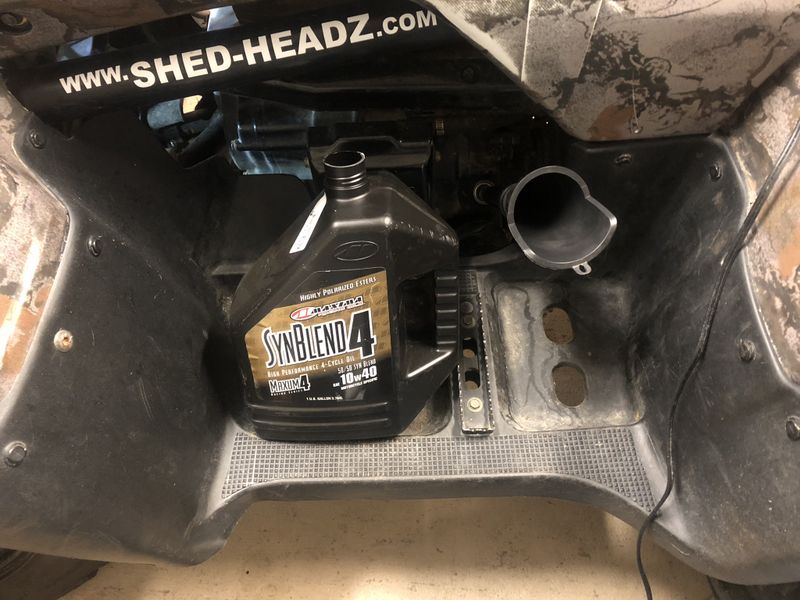
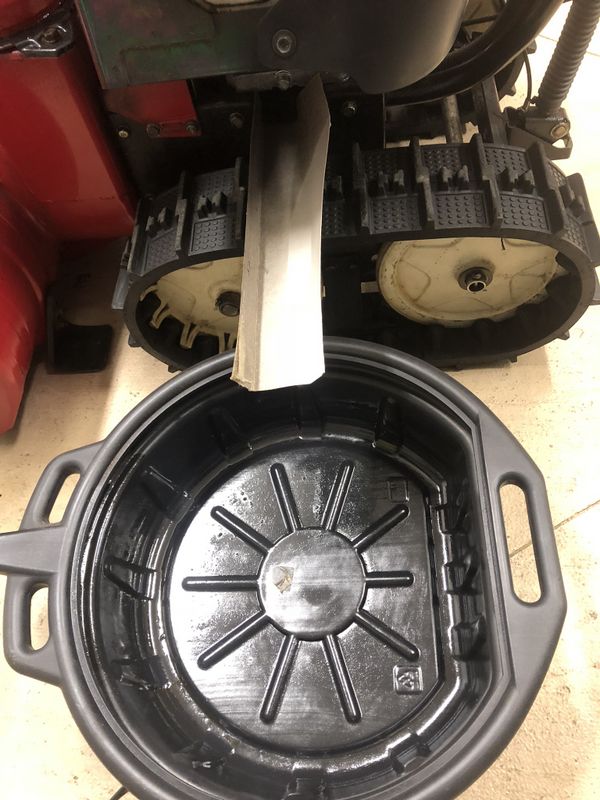
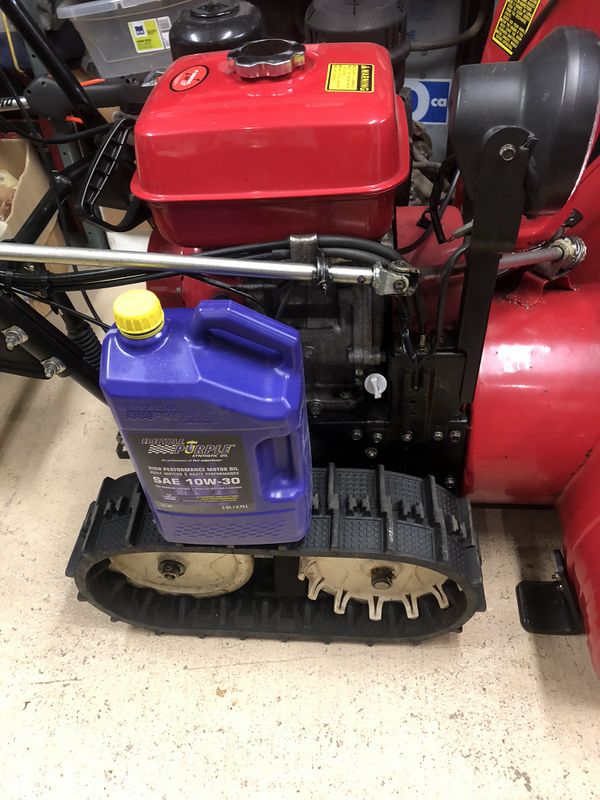
Next up was the standard fall maintenance on my own Honda 9/28 Snowblower. Having made a major repair to the track drive transmission last year I was relieved to find no other repairs necessary. I started by draining the engine oil, followed by the carb bowl and sediment cup. The track drive transmission grease fitting was greased and all moving parts, bearings and controls coated in fluid film. The pic above is THE trick to non-messy oil changes on Honda Blowers. These motors can be drained and refilled from either side as they are used in all kinds of Power Equipment such as Snowblowers, Generators & Pumps. On a blower you always drain oil on the left side using a trough, and fill on the opposite side through the dipstick opening.
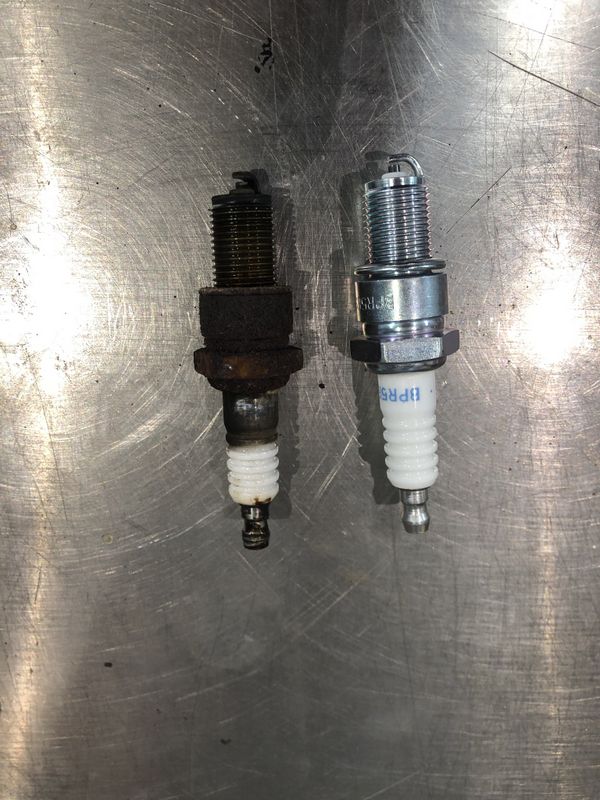
I found the spark plug rusted and really dirty so it was replaced with a freshie.
Lastly the oil was refilled with a high quality full synthetic, Royal Purple which I've been using for a few years now in blowers.
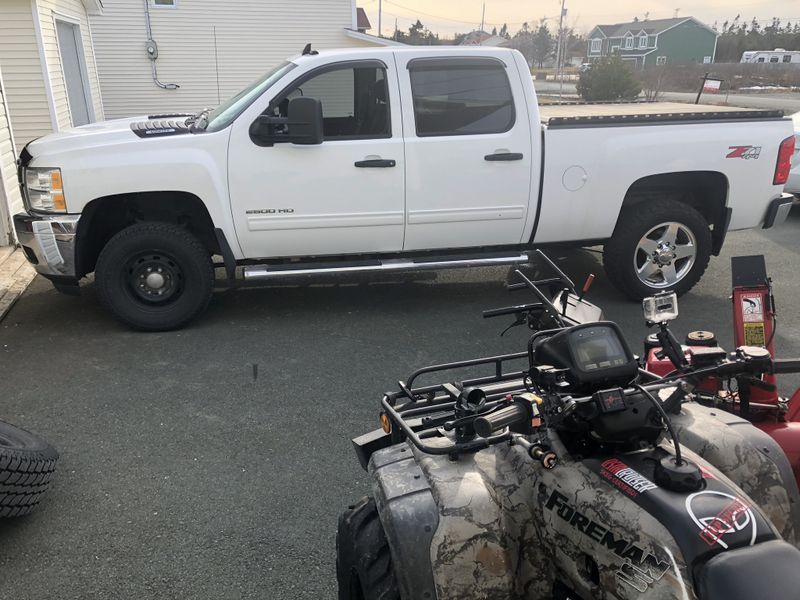
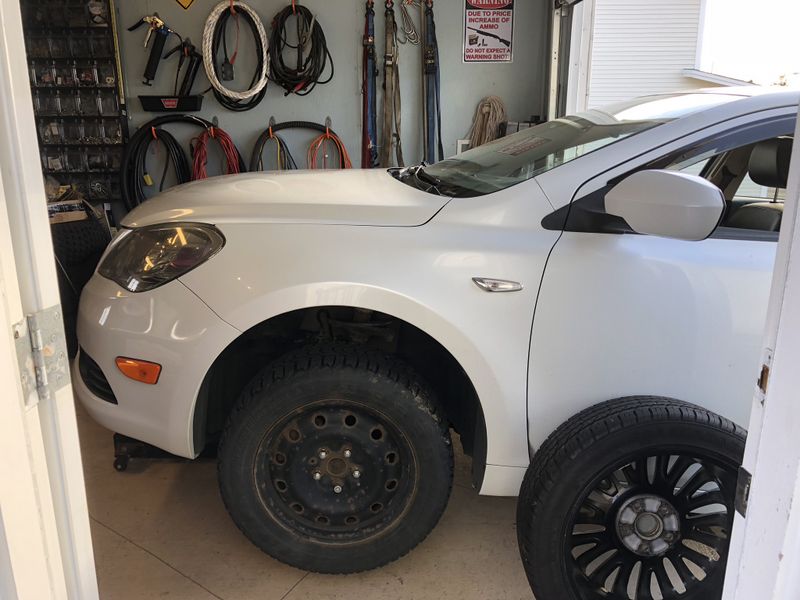
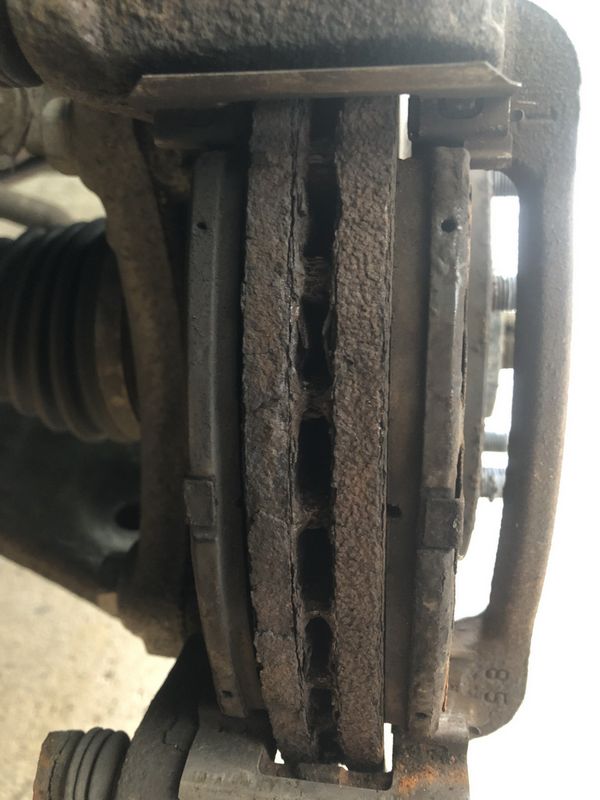
November 10th, after putting it off as long as possible and with snow on the way I quickly set about changing over from my summer wheels to my winter steelies.
My summer BFG All Terrain KO2's would work well in the winter, but the GM Aluminum rims do not hold up well at all. Having had one set replaced due to corrosion I've always ran the truck with cheap winter rims. Plus 17" snow tires are much cheaper than 20" tires to fit the Aluminum Rims!
The changeover went well, while I had the truck pulled in I greased the front end, applied Fluid Film rust preventative, replaced 2 fog lights *which took longer than swapping wheels) and performed a brake calliper service on the front brakes, as the rear brakes will be replaced soon.
The following afternoon I swapped over tires and rims on Sandra's Suzuki Kizashi and performed similar pre-winter maintenance and inspected/serviced these front brakes which the dealer told us were 90% worn out.
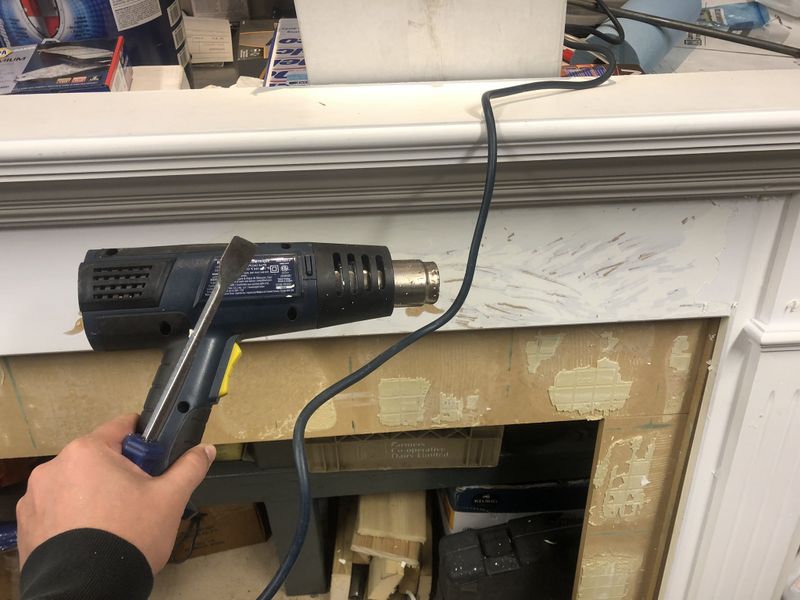
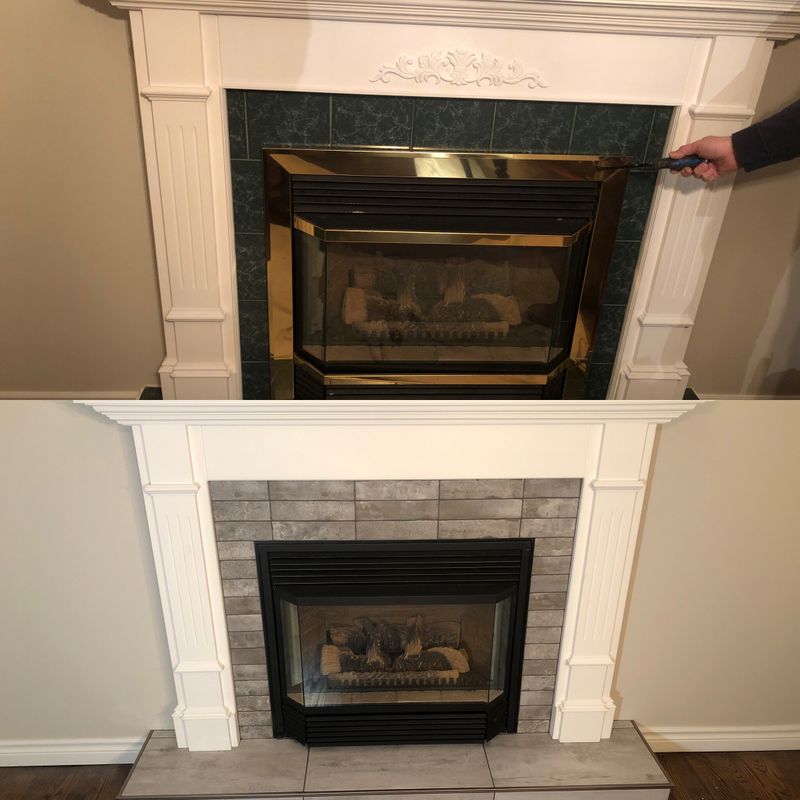
In early December, Bassan and I took on a hobble to repair a very dated fireplace. Some of the work was done at the customer's house but we removed the mantle to refinish it in my Garage. There was an ugly wooden emblem that we removed, then had to fill the gouges left behind while prying off the emblem, stripped peeling paint from the centre section, and then prepared the piece for paint.
We also built a brand new plywood base, removed the glue covered MDF which held the ugly green tile (and was falling apart) replaced it with 3/4" Plywood, then sanded, primed and painted the piece before reinstalling it at the customers house & installing tile.
Quick before and after of the project.
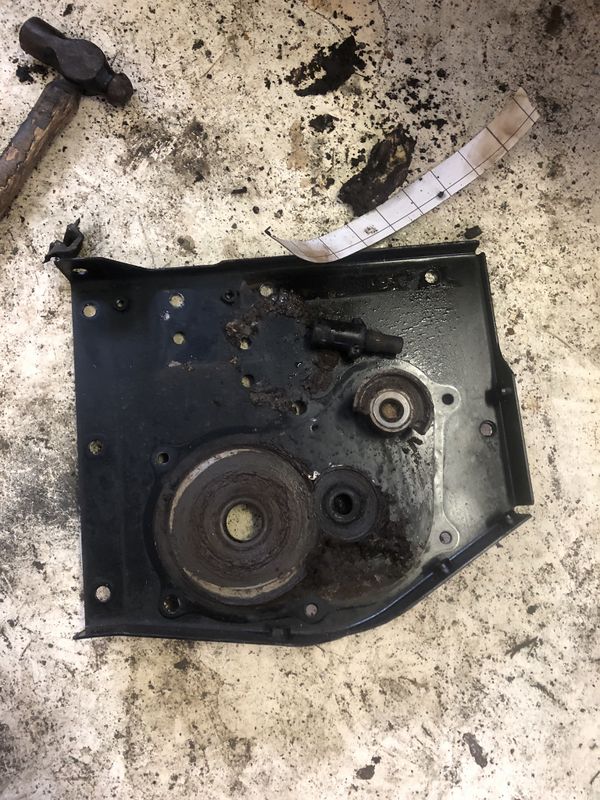
Between Christmas and New Years, Lester's Honda 11/32 Snow Blower broke down. It was left outside, and when he went to move it something broke. Unfortunately he experienced the dreaded track drive transmission failure which is the only real common problem with these blowers. I only took a few pics while rebuilding Lester's, but here is a link to my HOW TO on rebuilding these gear cases.
It's a great idea to take lots of pics, particularly of all the spacers in the crawler as the online diagrams are sometimes hard to view during reassembly.
Having the machine leaned up against something solid and tied off makes the job much easier.
Thankfully Lester looks after his equipment so no bolts were seized and the machine came apart with relative ease.
As you can see from the wear marks on the Right Side plate, the drive gear bearing was getting bad for awhile which let the drive gear wobble and rub the case. This machine had no play in the drive axel last year when we serviced it, so failure can come about pretty quick.
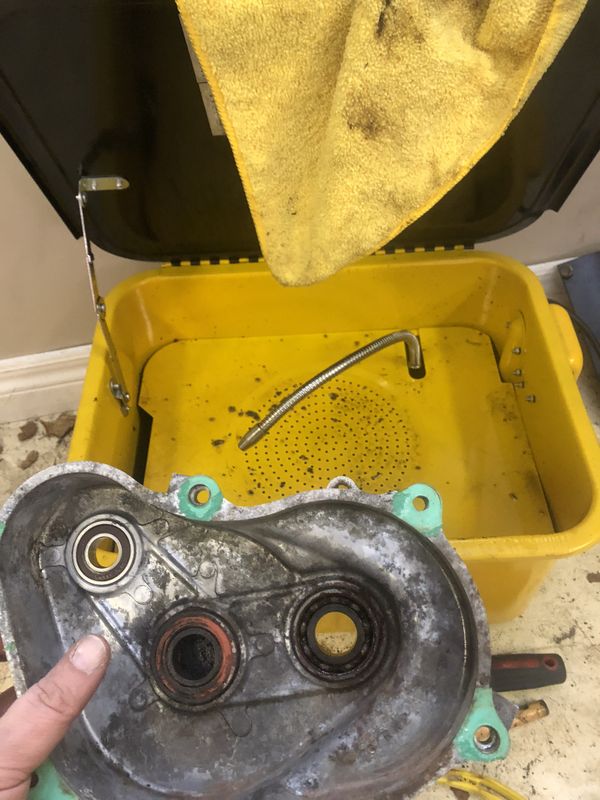
My new parts washer made quick work of removing all the old grease and dirt from all the parts being reused. Lester picked up all the parts needed at Honda One, the only other pieces we needed were new drive cog pins as one of Lester's was really bent up.
Cheers, MIKE
Copyright © 2011 Michael Smith
|