|
Area51 Project - Old Man to Renegade: |
||||||||||||||||||||||||||||
|
Machine Specs:
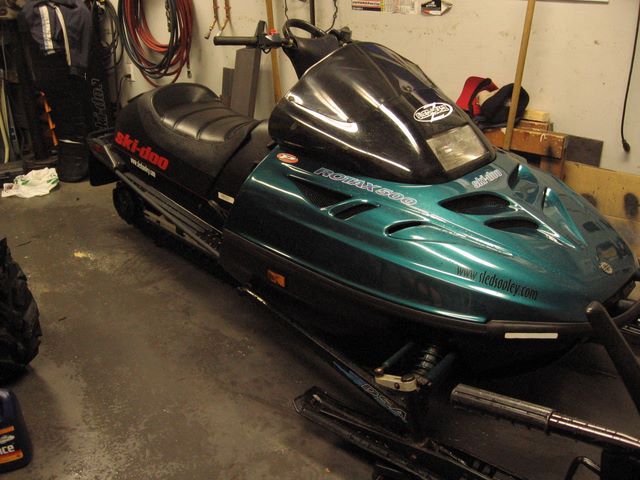
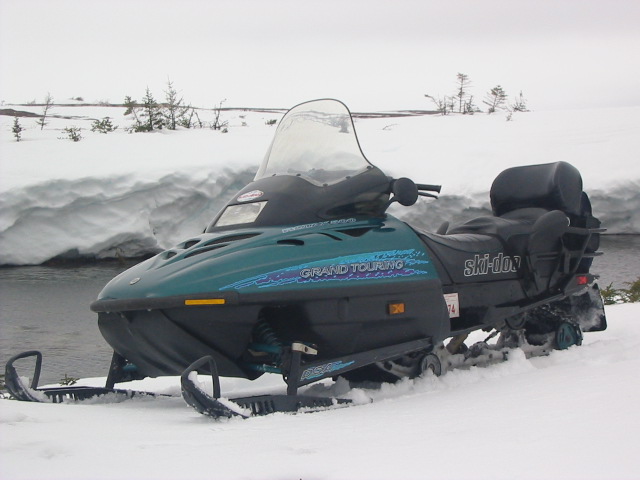
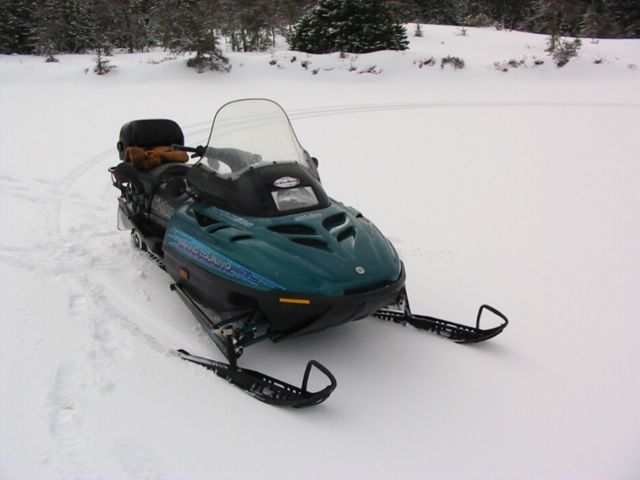
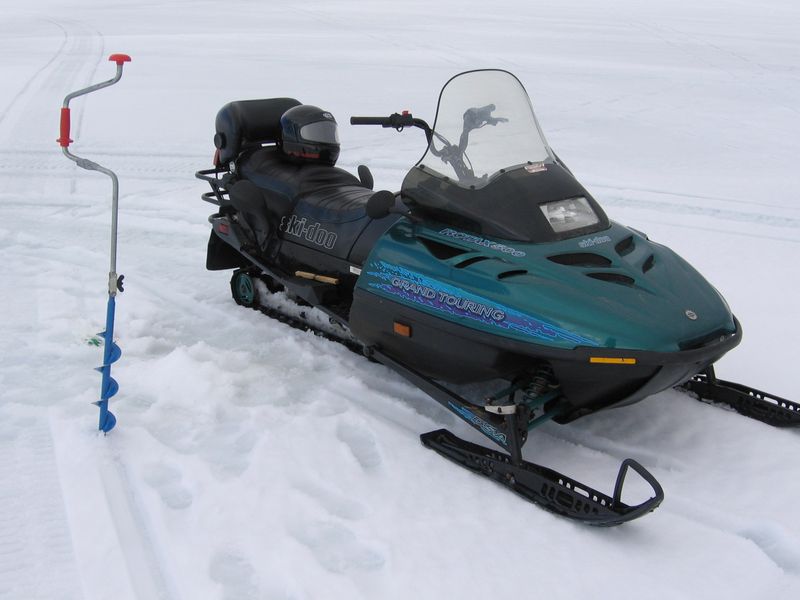
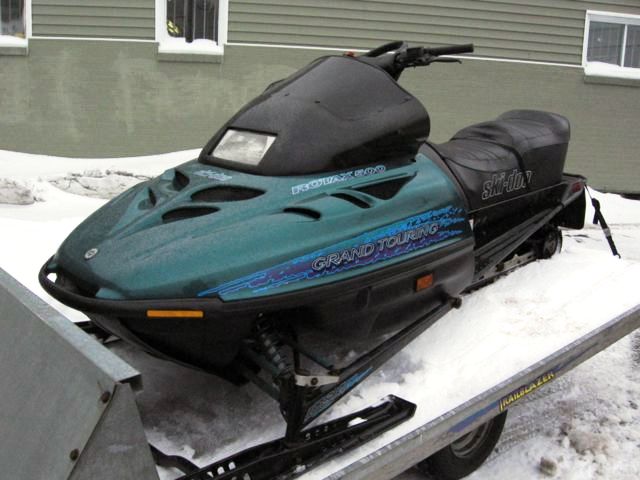
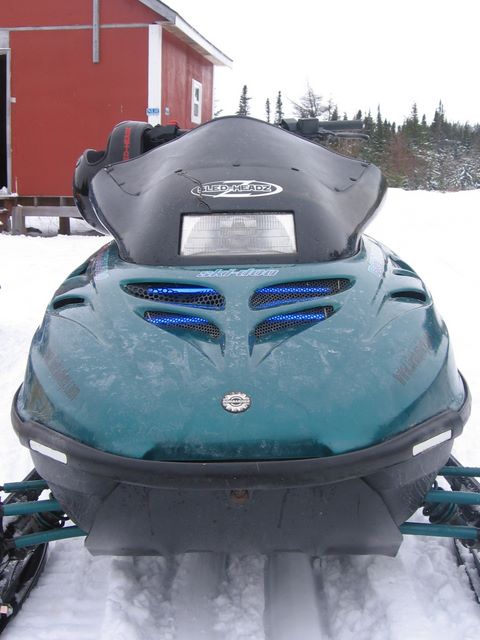
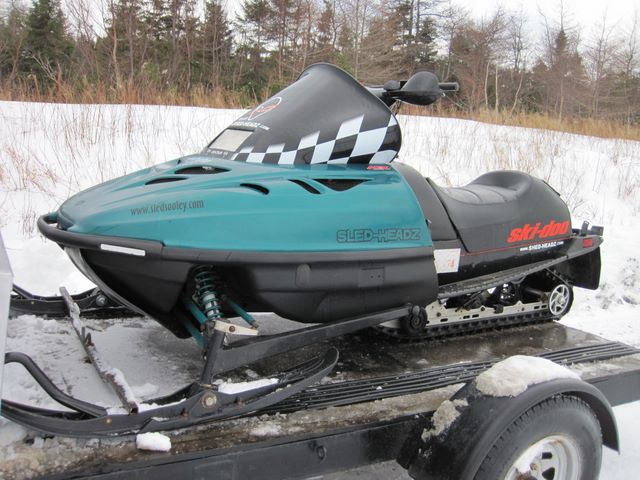
Post transformation. Project Renegade didn't start out as a project at all, this 1997 Skidoo Grand Touring 500 was my first sled and my formal introduction to snowmobiling. I got a taste for the sport after a few hap-hazard excursions on my uncle's Scandic 377, but owning your own machine makes a world of difference.
This machine was bought used in 2003, my theory was if I crashed it or lost interest in the sport I wouldn't be out too much money compared to a brand new unit. I bought this 2-up touring sled with the intention of occasionally carrying two people and having a rack for carrying ice fishing gear to my favourite ponds. After a couple seasons of snowmobiling I developed my riding style, like most of the crew I became more adapt to boondocking, hill climbing, generally fooling around, and riding solo almost all the time.
Now the choice was simple, purchase a new sled or invest a few dollars into the one sitting in the garage that was long paid off. For me the choice was clear. As much as I would love to be seated on a brand new REV chassis sled, my practical side prevailed and I knew that other expenses would have to take priority over riding an expensive new sled.
I decided to transform my bland Grand Touring "Old Man" sled into what I’m sure Bombardier would have called a Renegade model in 1997 as they did the later model 136" single seat sleds. This project was about achieving the best value per dollar spent, building a Renegade sled for a Renegade rider! LoL If you look at the guts of what separates a touring sled from a play sled, you will find more similarities than differences. Within the same model year, most of the s-2000 chassis machines are identical. My Grand Touring and a 1997 Summit are both outfitted with a 136" track, similar suspension set ups, identical engines, and aside from clutching and gearing differences the rest is merely cosmetic. Driven with this new information my plan was set and the work began in late fall of 2006 as we eagerly awaited winter's arrival.
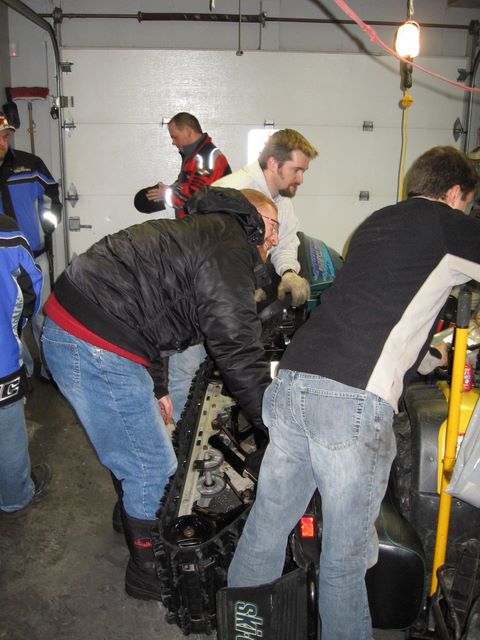
The project began by striping off all the bits that defined this sled as a Grand Touring sled. First to go was the tall windshield followed by the low handlebars, rear view mirrors, rear rack, back rest, passenger foot rests, the 2-up seat, and of course the Grand Touring decals on the hood.
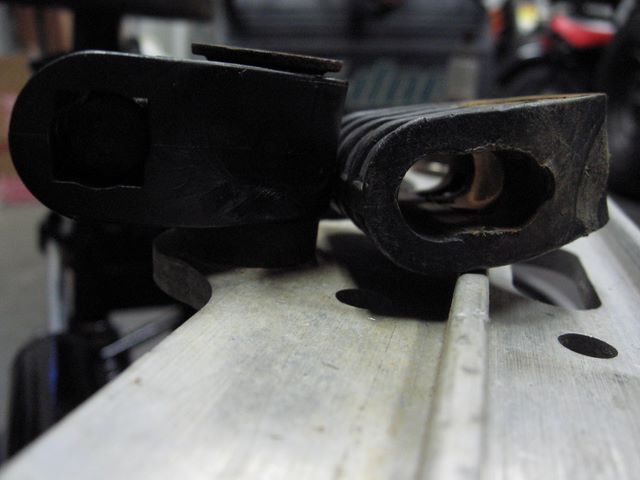
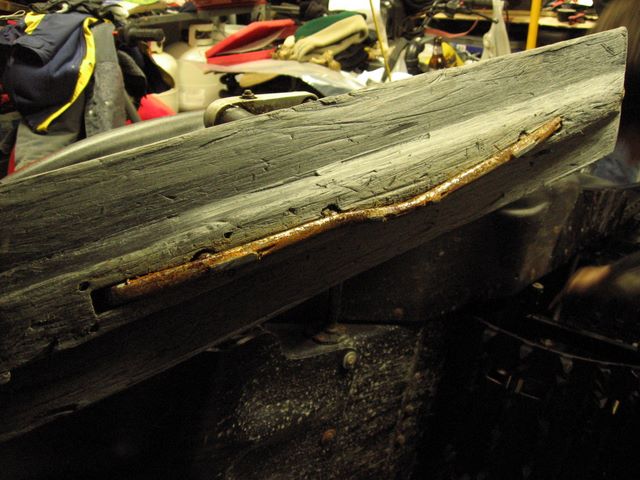
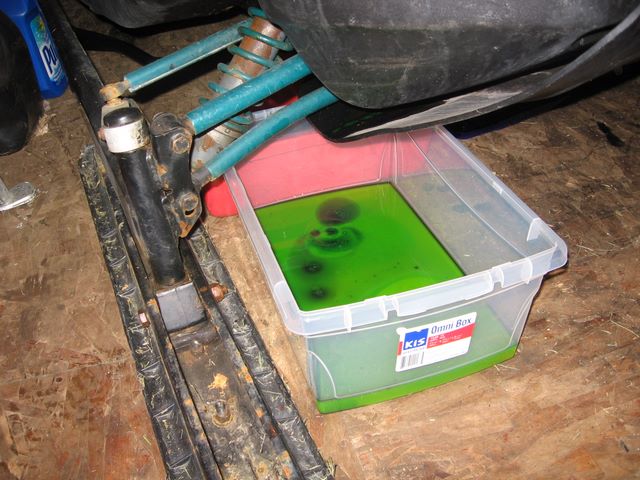
I removed the rear slide suspension for a thorough cleaning, painting and replacing of worn parts including these torsion spring mounts that had seen better days! New hyfax were installed and the single limiter strap was replaced with a dual strap set up.
I painted all the outside bogy wheels black and replaced any wheels having worn or missing rubber with new parts. I inspected and replaced the rest of the bearings throughout the skid including the drive shaft bearing which is opposite the chain case on the frame.
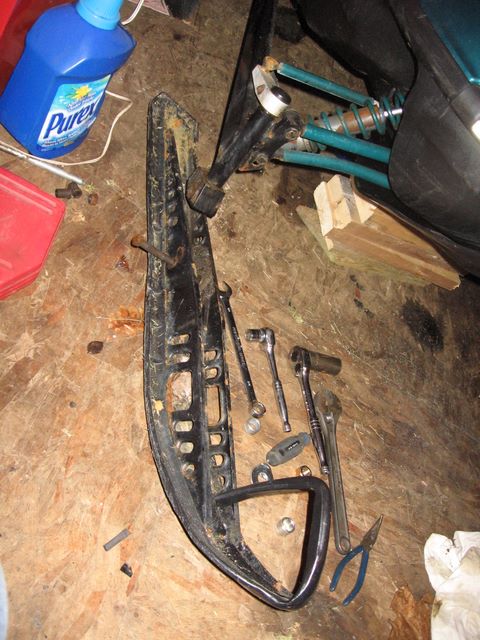
The ski carbides had seen better days so a new set was installed to improve handling.
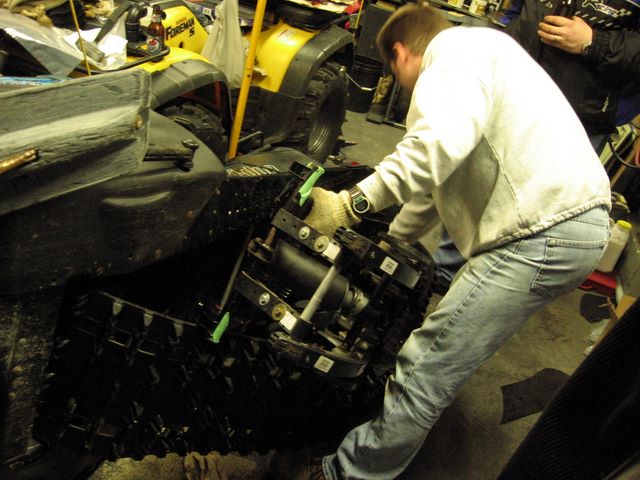
Next I disassembled and removed the chain case and driveshaft to replace the track.
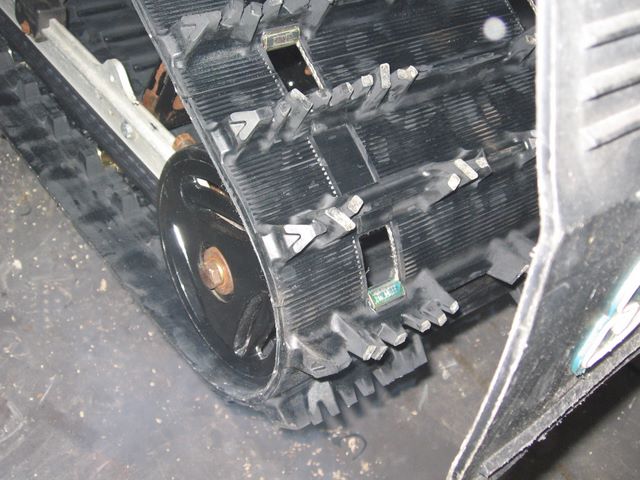
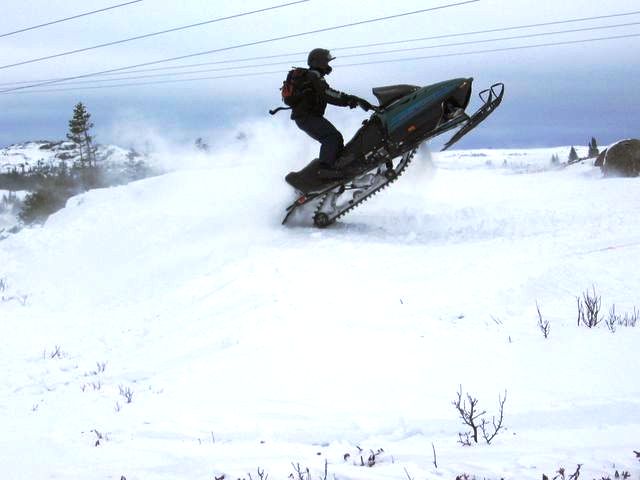
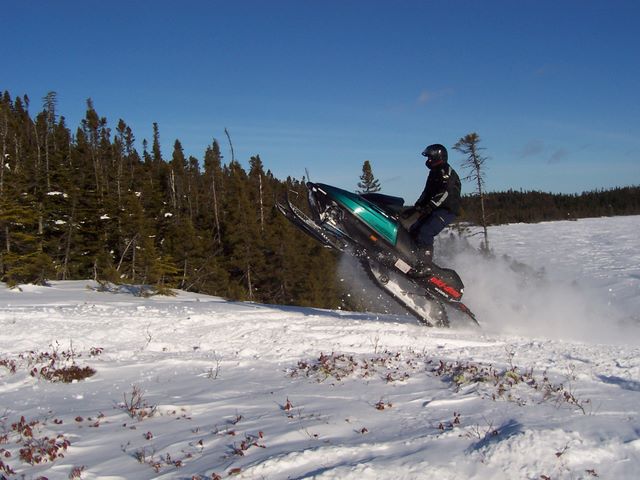
The track I chose was a 136 x 15 x 1.25" Camoplast Rip Saw. From my research, this was the tallest profile that my chassis could fit without interference. This well proven profile should provide great hook up in a myriad of conditions, especially compared to my old well-used 0.88 profile track! It will probably be the single most noticeable improvement of this whole build.
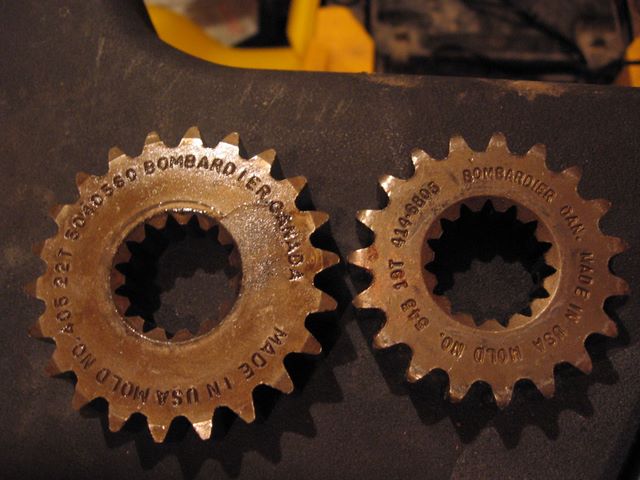
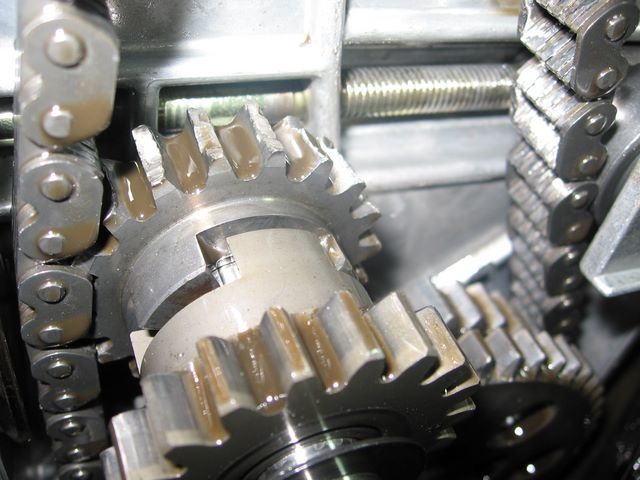
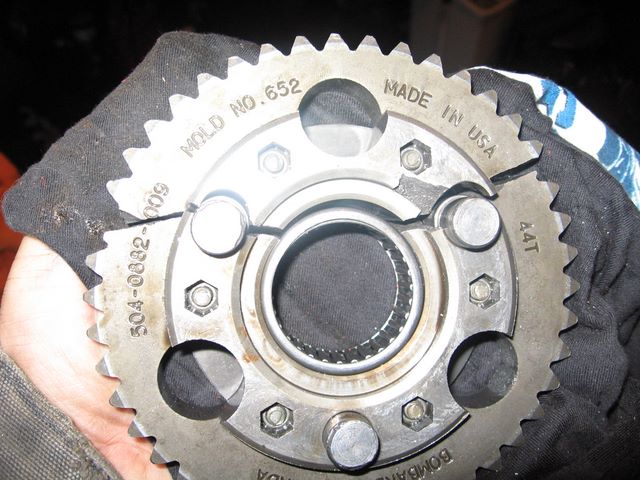
While everything was disassembled, I installed a used 22 tooth top chain case gear to replace the OEM 23 tooth top gear. This lower gearing will provide better launch and low end grunt, especially useful when combined with the more aggressive track.
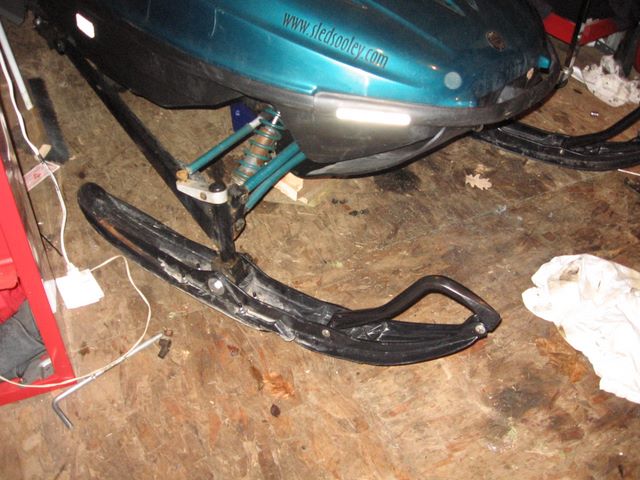
The new track is a huge improvement, nearly twice as tall, not worn out, and a lug design that reportedly works well in powder and on hard pack trails.
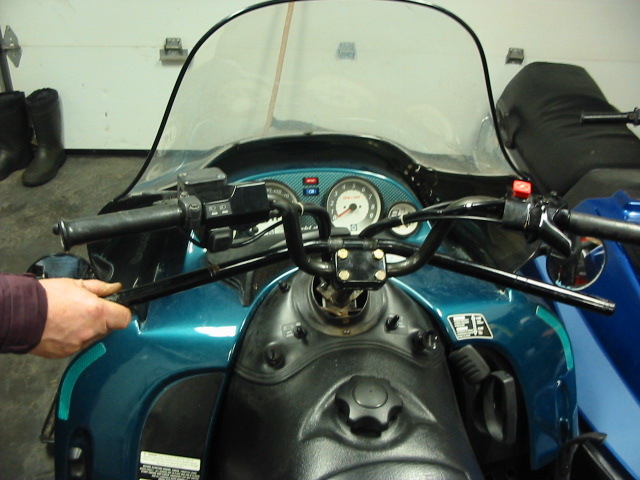
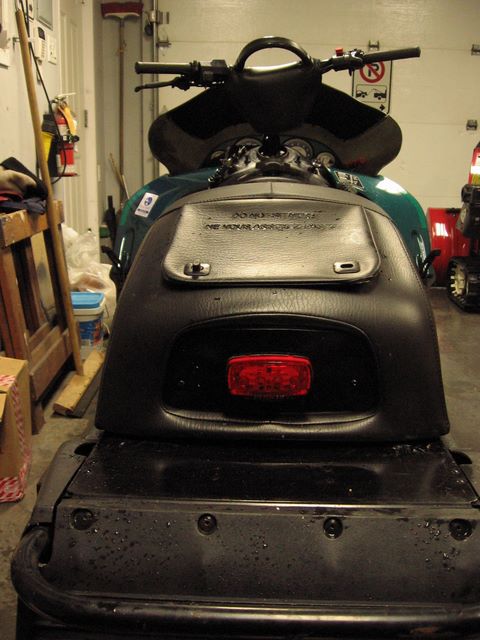
With the track installed and the rear slide and chain case put back together, it was on to the handle bars. I sourced a set of used mountain handlebars which had a 5" rise to replace the stock straight bar, the seller also included a matching bar pad and a mountain strap. Since the factory hand grips had seen better days, I bartered a pair of new factory REV hand grips/warmers. The bars were bolted in place, a careful re-routing of the control cables & wiring was all that was necessary on this machine to accommodate the additional height.
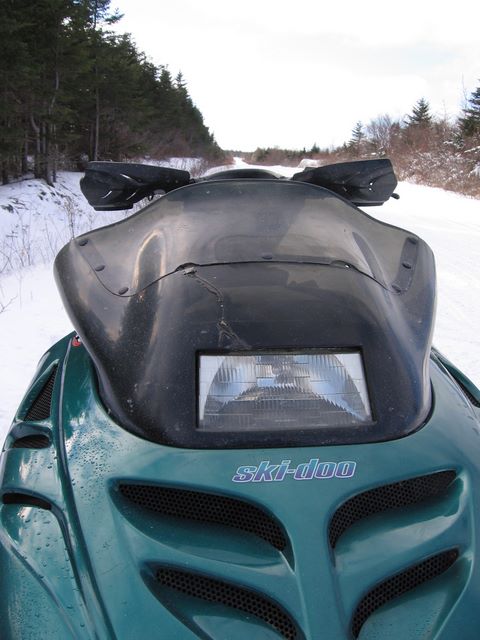
Next on the list was to fabricate a new low windshield. With previous success in fabricating one for Project Invader, buying one would be a last resort. I wanted a sleek low windshield to replace the ugly factory tall windshield. I made several templates out of Bristol Board and soon had a pattern that I was happy with. A black crazy carpet provided ideal flexible black plastic, using my template I cut the windshield, secured it with the factory push clips and trimmed the edge with self adhesive black automotive door trim. The door trim provided a finished edge and helped stiffen the flexible windshield.
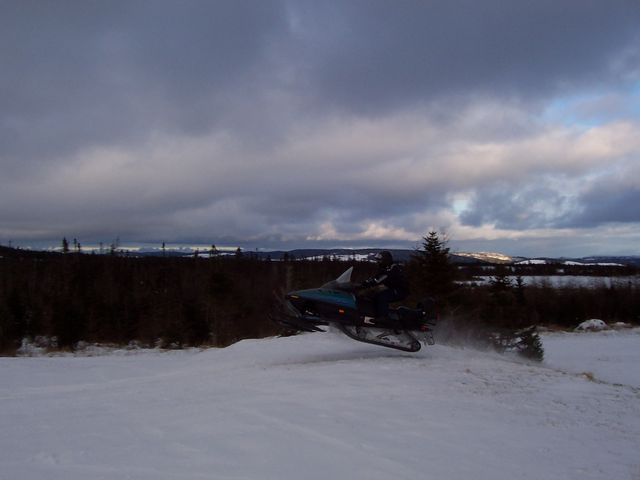
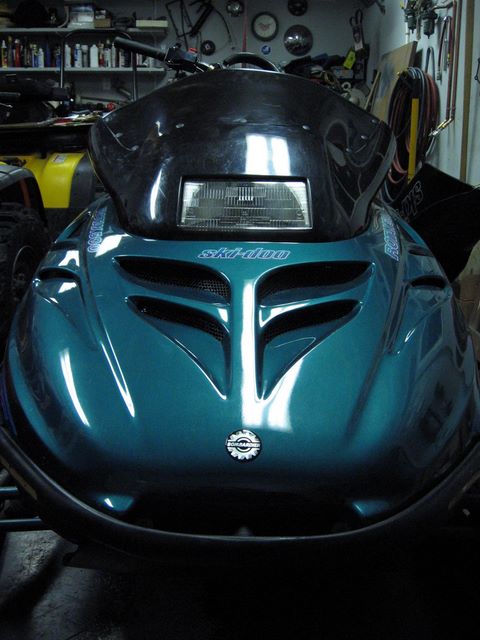
All in all not a bad look! While waiting for my 1-up seat I loaded up the machine for a test ride with the crew. Needless to say, after a day of riding, I was not only very happy with the look, but the performance gained with the new track.
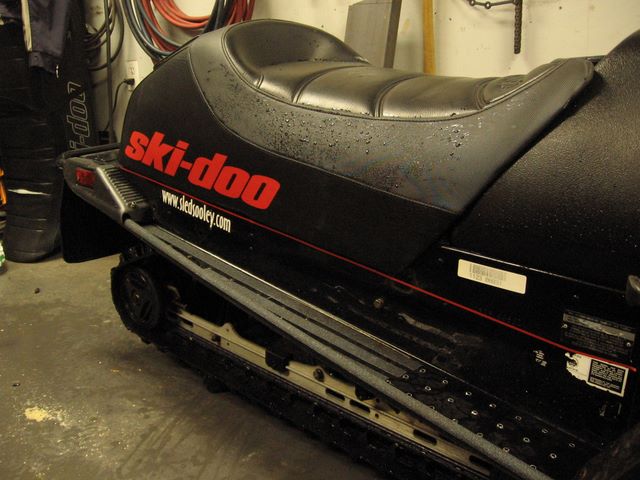
The last major hurdle was to secure a one-up seat, as the two up seat even without the rack did not look right. I quickly realised that finding one used and reasonably priced was like finding a needle in a hay stack. None of the used parts dealers had one and a search of the local online message boards came up empty handed. One day I went to my local dealership to purchase a set of factory running board edge grips, sitting on the clearance rack was a brand new (old stock) one-up seat and it was right in my price range! I purchased the seat and edge grips on the spot and had it installed within the hour. The front mounting points lined up perfectly and two new holes were drilled out back for the rear bolts. The last modification I made for boondocking and side hilling was the removal of the front sway bar.
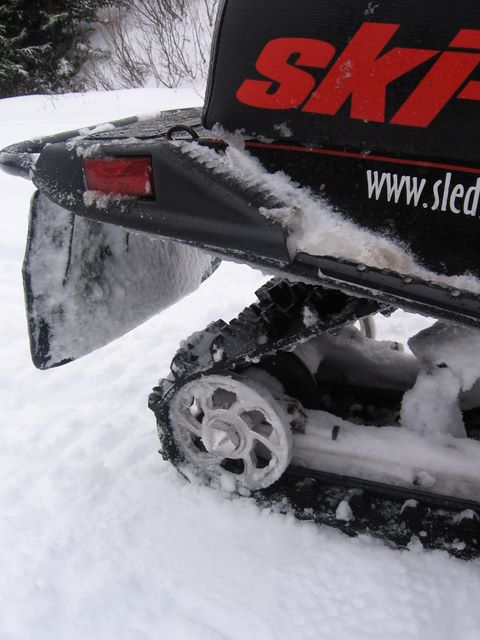
Aside from a few minor cosmetic details such as the installation of shed-headz decals, changing the amber reflectors out for white ones and the installation of my custom LED tail light, this project was done and ready for further testing.
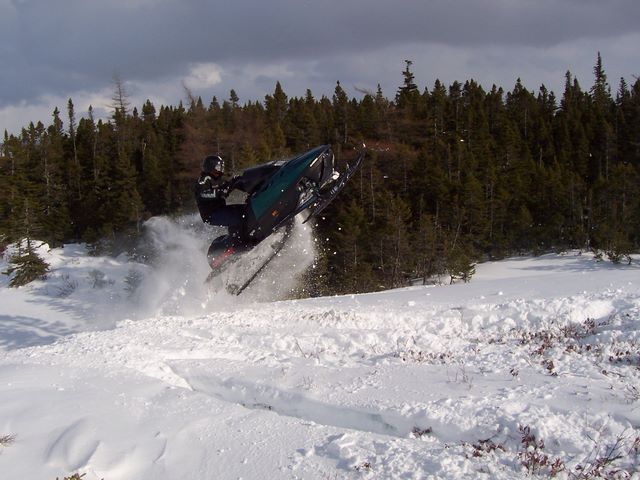
The new handlebars created a much improved riding position, the running board edge grips now keep my feet firmly planted, both of which allow much more control over the machine when boondocking. The new track combined with the one tooth smaller top gear provided outstanding hook up and power output from stop especially compared to the old set up.
To top it off, I was extremely happy with the new sporty appearance of the sled with the one up seat, low windshield and so on. The exposed section of the tunnel out back even allowed me to strap on an extra fuel can for longer rides. At the end of the project I met and exceeded my goals of creating a sled that feels looks completely new while staying within a reasonable budget.
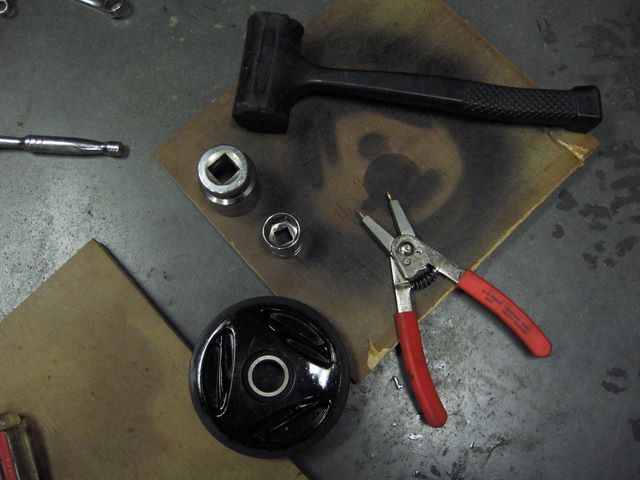
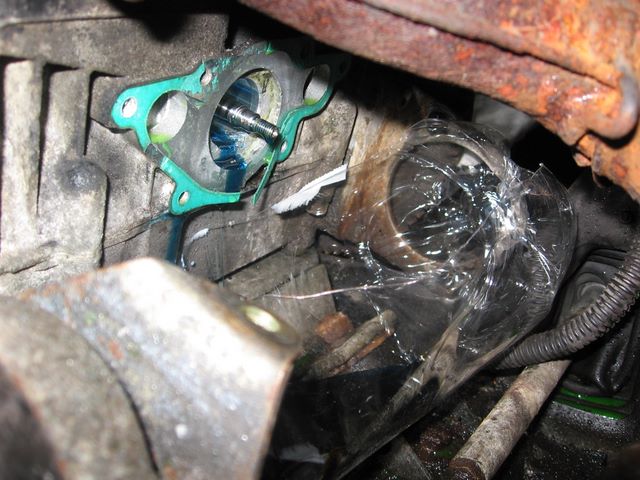
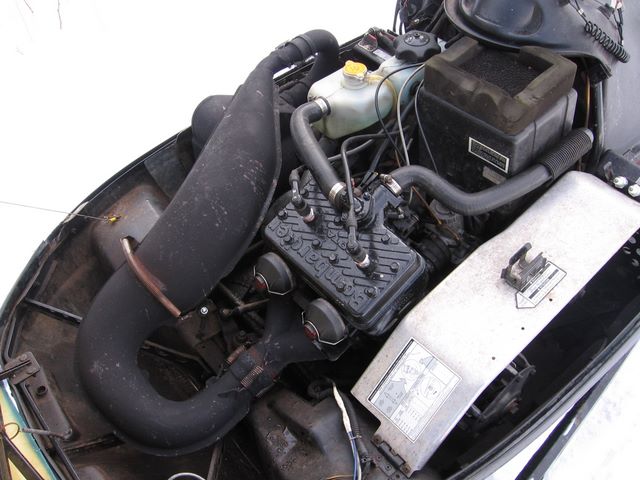
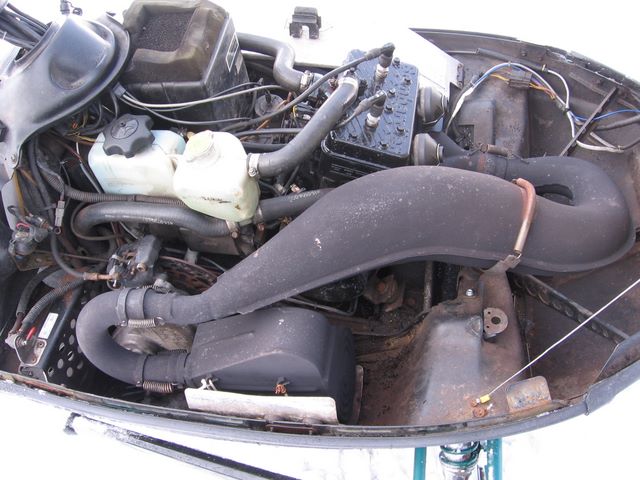
Fall arrived in fine style and a few repairs and more improvements were made to Project Renegade. Over the summer I noticed a small leak of clean injection oil coming out of the engine near the water pump. After some research online I learned that this is a weep hole designed to tell of an internal oil seal failure on the rotary valve shaft.
The first step was to remove the water pump, metal backing plate, coolant seal, then the oil seal, installation was reverse of the same steps.
I used bombardier parts so I knew they would fit correctly. It would be easier to do this with the exhaust y-pipe removed, but the bolts on mine were very corroded so I worked around it instead of potentially creating another problem to fix!
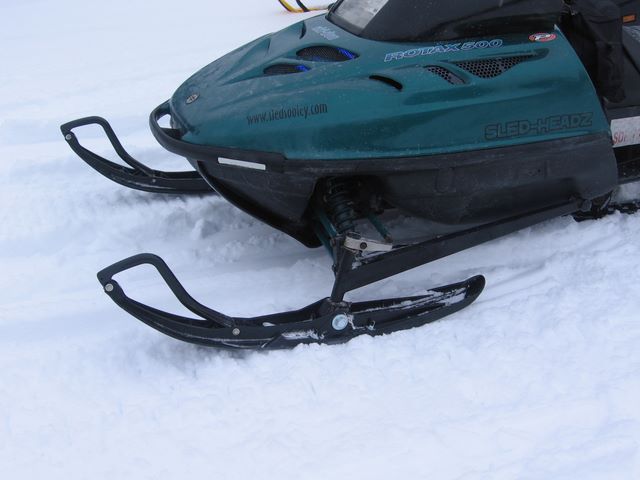
The stock plastic/metal bridge skis were now 11 years old, bent and beyond their useful service life.
This year I installed as set of used Pilot 5.7 Skis with dual carbides, the same skis used on new Bombardier sleds.
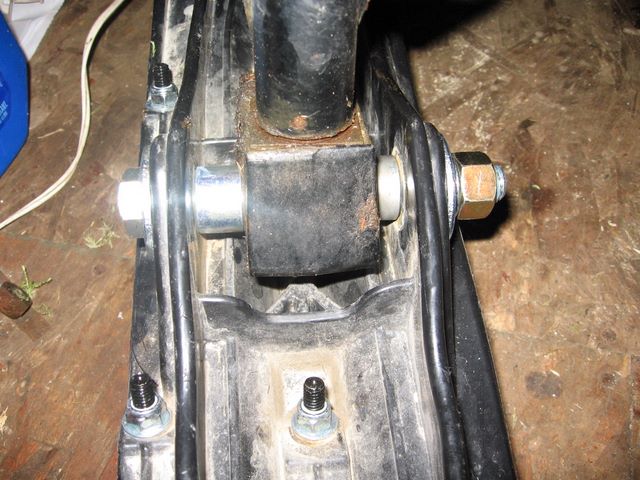
This was accomplished by removing the stock ski leg bushing and replacing it with a large 5/8" bolt, nut and washers. I cut 2 small pieces of hollow round stock to use as bushings to center the ski leg on the ski, I drilled the end of the bolt for a cotter pin to prevent the nut from coming off.
Online I found a set of machined billet rear idler wheels with "nasty nuts" which just look awesome. The nuts are basically a solid milled aluminum cap over a steel bolt that have a pointed end.
This year I decided to try out a new 19/44 gearing combo which is way way lower than the current 22/44, it should give great low end launch. I'll have to test it and see if it just digs trenches and how much top end I will lose.
I installed a set of blue neon lights under the hood for nighttime accent illumination, then fixed the defective brake light switch.
The new skis are fantastic, they provide better cornering and less darting.
During my trip with the Southern Harbour Crew to Black River in February 2009 my machine rolled over 10,000 km and almost immediately developed mechanical trouble! We were way back in the country when the chain case began grinding horribly. While looking at that I also noticed the primary clutch was not working properly. I limited my speed to around 30kph for the ride out of the country which made for a boring journey, but it kept the harsh noises to a minimum. Fortunately everything held together and I managed to ride all the way to Irving in Goobies where I got picked up with my truck and trailer.
The first problem was that the outer sheave of the primary clutch was stripped and spinning free of the inner sheave, so the clutch still worked, but was only applying power through the inner sheave. It will probably need to be replaced.
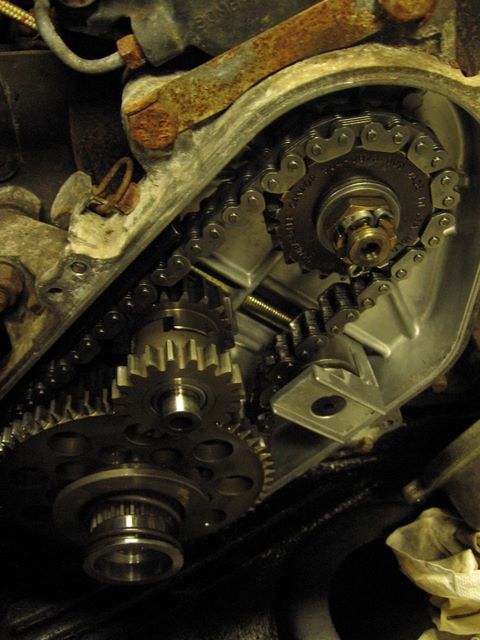
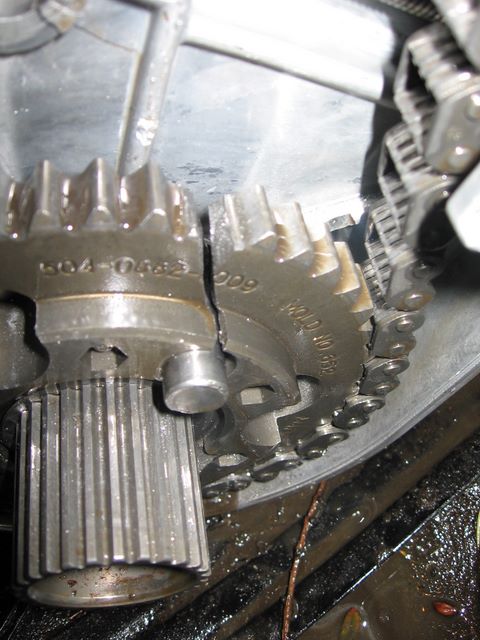
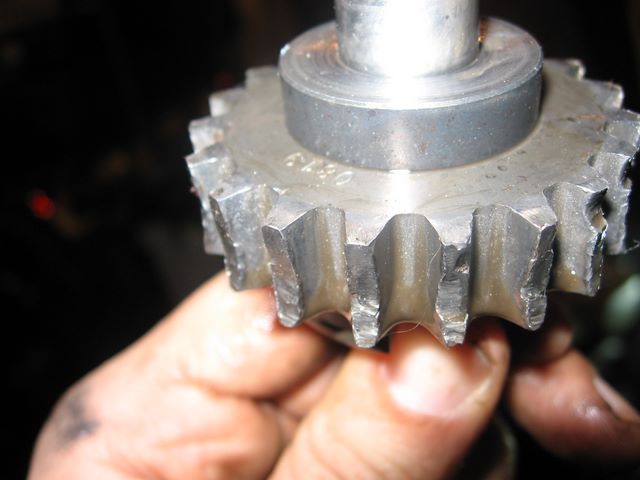
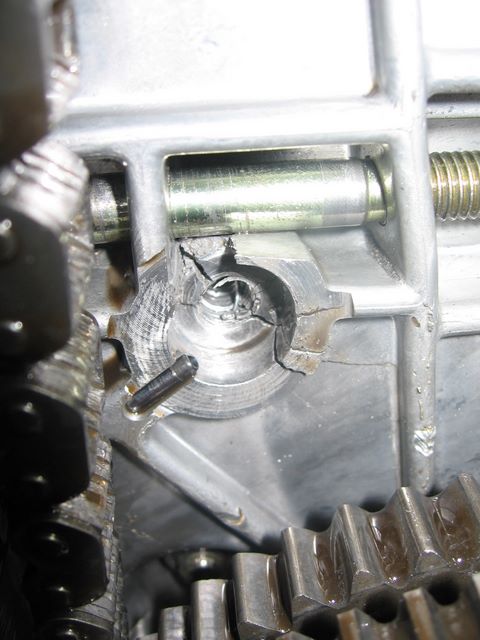
The noises in the chain case were caused by a severely broken bottom gear which damaged the reverse gears and even split the case! With such damage to the bottom gear, it's a wonder I made it out under my own power, the gear was literally broken in two pieces!
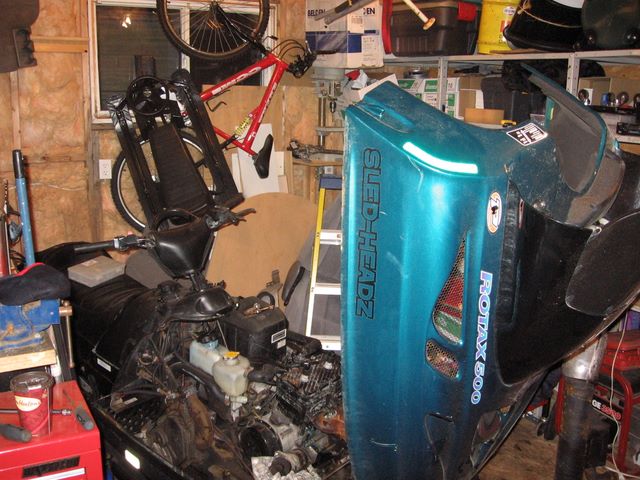
Young Joe finally wore out the '96 Formula 583 he bought last fall, so I bought what was left of the sled for parts to repair and hopefully improve Project Renegade. The repairs started by removing the damaged inner chain case which was cracked by forces from the damaged bottom gear.
This was replaced with the chain case from the Formula. Unfortunately the Formula did not have reverse, so for the time being I will have to do without as two of my damaged gears were part of the reverse system, but at least my sled is now ride able. During this swap I chose a 22/43 gear set from my parts stock pile which should work well in all conditions. Next I removed the rear suspension to replace a cracked suspension arm utilizing a replacement part from the Formula.
The 583 engine in the formula was in great shape and would be an incredible upgrade for Project Renegade. It looked to be a direct swap into my chassis using the 583 coolant hoses, clutch and carburetors. Even swapping the 583 carburetor boots into my S-Chassis air box worked out perfect, the electrical was plug and play, and the 583 exhaust system fit right in. I completed the swap using all of the 583 throttle cables. I unhooked my stock cables right at the throttle lever and re-connected the cables from the Formula. This was a great upgrade as the 583 is much more powerful than the 500 due to increased displacement and the addition of RAVE valves which my 500 did not have. Unfortunately on my 2nd run of the year the oiler failed on the 583 and the engine melted down. In one more evening I swapped back to my trusty 500 and installed a used primary clutch purchased from Reid's Used Parts. It was a busy year, although I'm disappointed that the 583 swap didn't pan out for very long, I'm glad to have this project back on the snow.
This year I also installed a pair of free hand guards from Sooley,
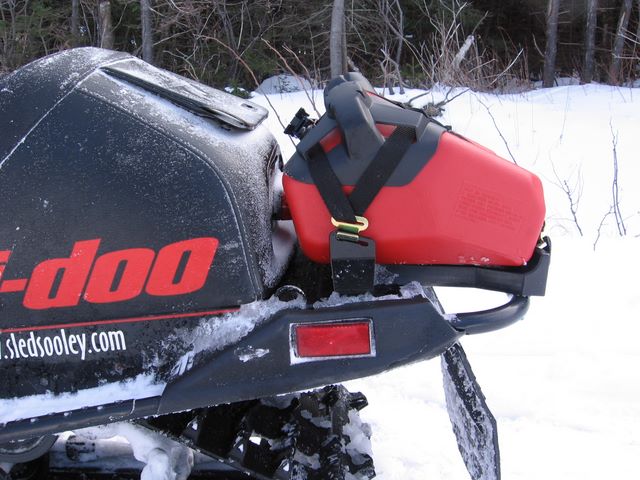
and picked up a REV gas caddy to carry extra fuel on long trips. I bought the gas caddy install kit meant for a REV-XP from the dealer and bolted the plastic mounts to my tunnel and rear bumper. It's not 100% ideal, but is sturdy. I will be able to reuse the gas can properly on a REV or REV-XP chassis sled in the future.
Project Renegade is still running strong, although having no reverse really sucks. On the final run last season my rear shock seized/froze solid so I purchased and installed a replacement Kimpex unit this fall. Upon further inspection I found both front shocks were leaking so I replaced them with Kimpex units as well. I've had great success installing HID lighting kits in my vehicles so I ordered a kit for the sled. A kit from VVME uses an H4 base with a halogen bulb for Low Beam, and HID for Hi Beam. The HID bulb I chose is 55w unit in 5000k color for a nice white light. My electric starter has been acting up for awhile, so I removed it and repaired a frayed wire on the starter solenoid. A new battery from Wal-Mart now provides easy starts, and constant clean DC power to run my new HID headlight.
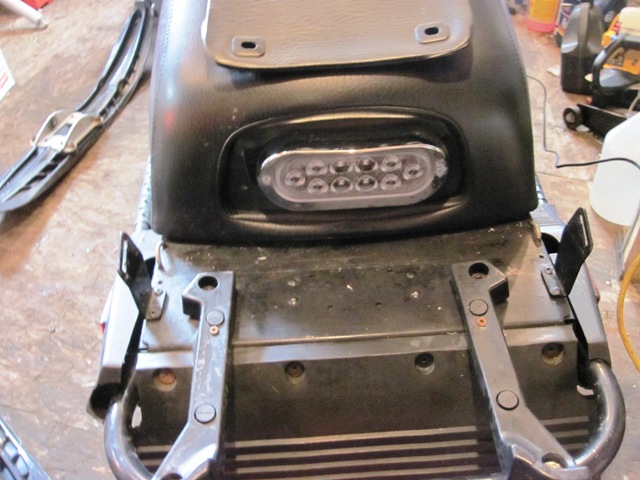
My old LED taillight broke earlier this year, so I installed a new, larger, clear lens LED taillight purchased at Princess Auto. It's brighter than my old one and looks great installed with the matching chrome mounting bracket.
This year I really planned to buy a new sled but so far that plan hasn't come to fruition. I had a few items to do whether I decide to keep or sell Project Renegade so I got started. First was the installation of a fresh new snow-stuff low windshield to replace the cracked original. I wasn't really a fan of the checker board pattern, but there are pretty much no other options out there in replacement windshields for a 15 year old sled. I installed a new ignition coil as the original one died putting the sled in storage this past spring. I also replaced the outer tie rod ends which removed most of the play in the steering. All in all, the sled has been running great with no complaints all this season. In the spring of 2012 I picked up a new (to me) sled and it will be a project to get it on the snow and reliable. Cheers, MIKE
Copyright © 2025 Michael Smith |


 Mike's
'06 Powertek REV Sled Project
Mike's
'06 Powertek REV Sled Project 