|
Area51 Project - Mike's 2006 Powertek REV: |
||||||||||||||||||||||
|
Machine Specs:
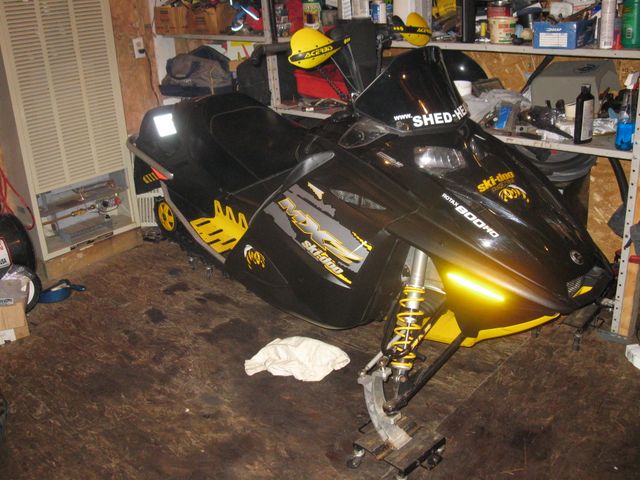
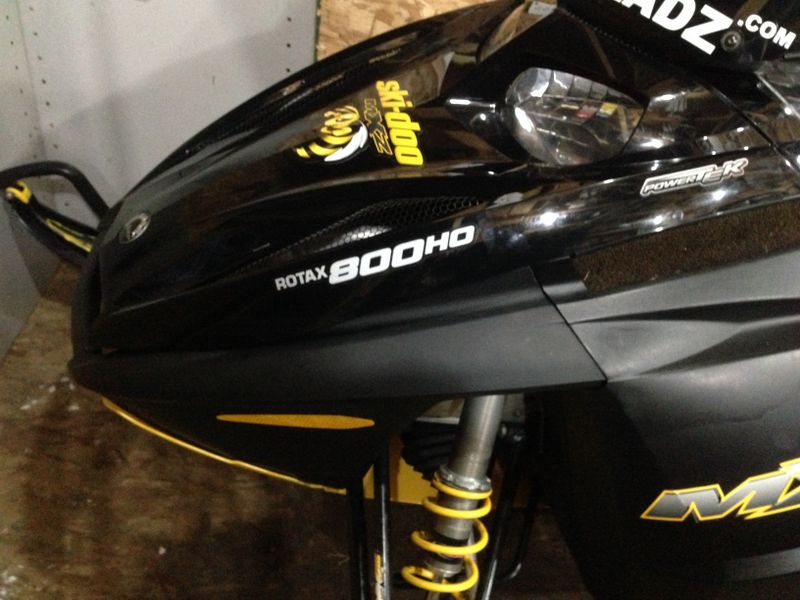
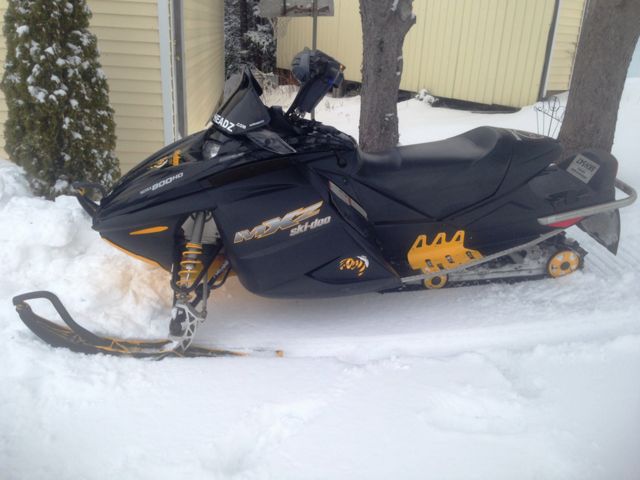
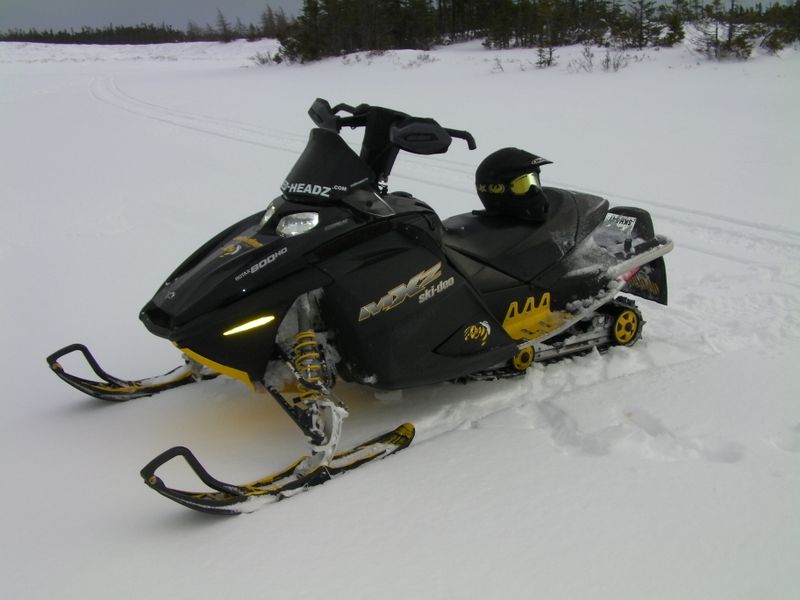
Well it finally happened, after nine years and over 6000 kilometres, I finally retired Project Renegade and upgraded power, technology, and comfort. In February 2012 I purchased this 2006 REV 800 HO short track for a great price as it needed a bunch of work. While Project Renegade didn't start out as a project at all, this time Project Powertek is absolutely starting out as a project!
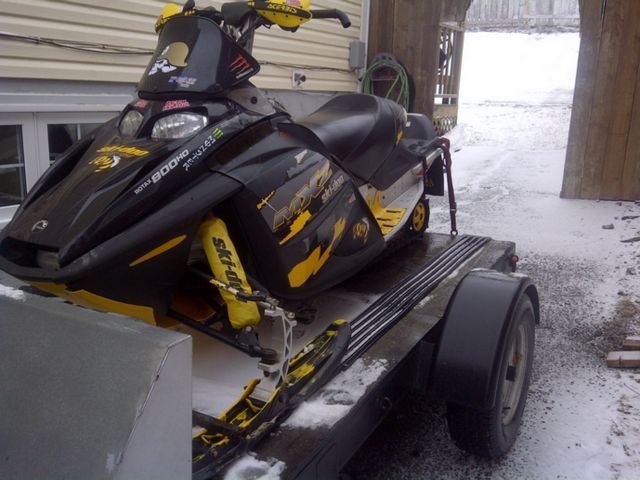
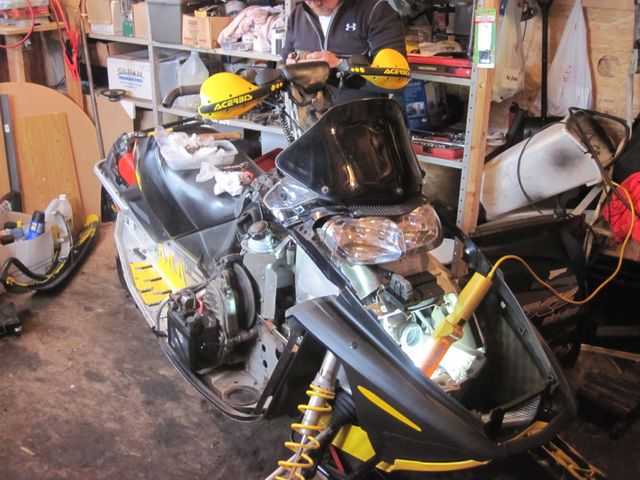
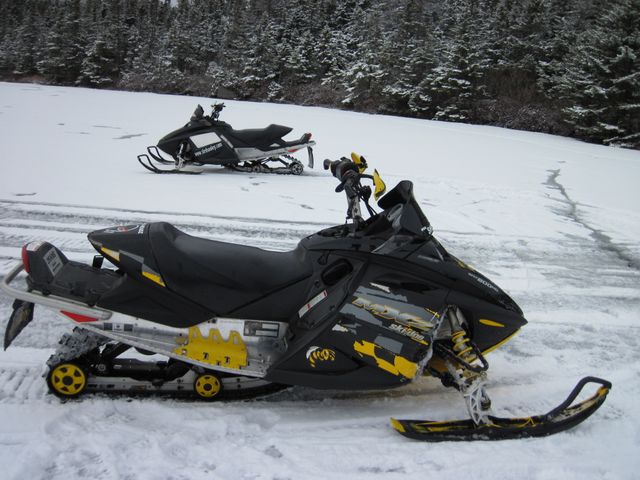
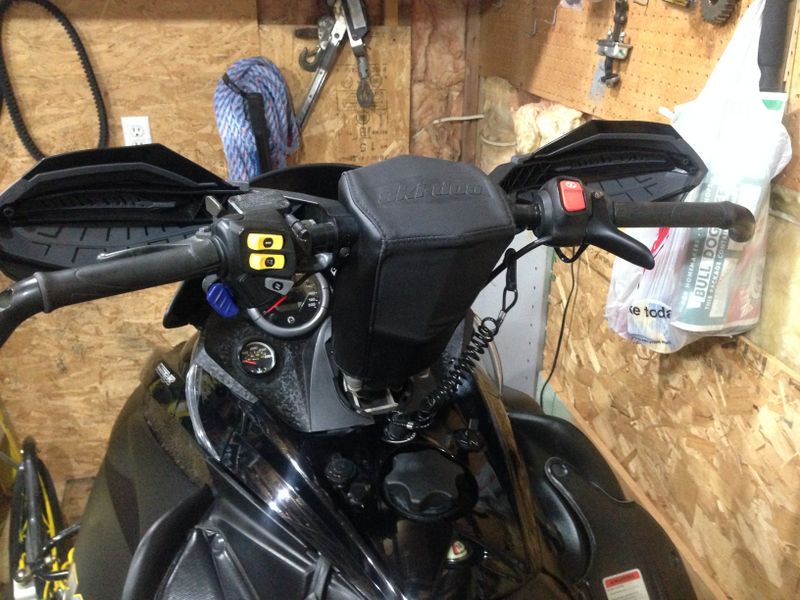
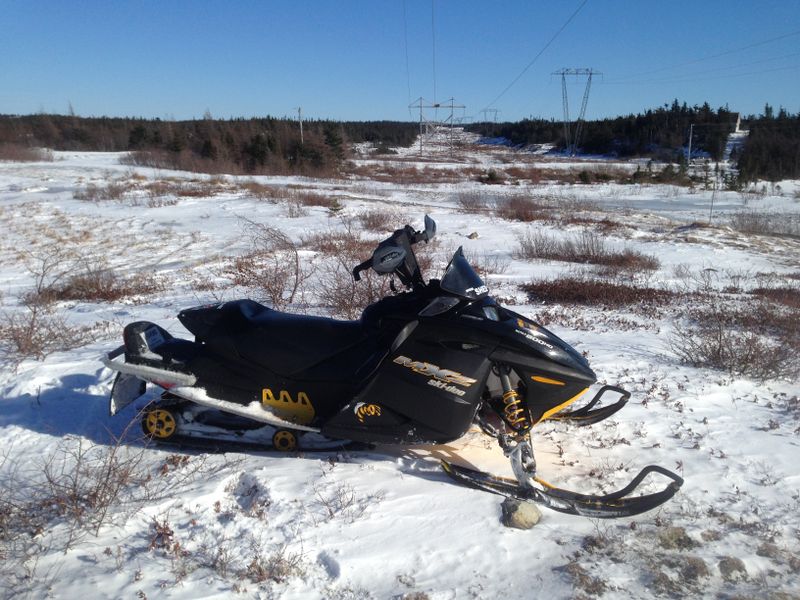
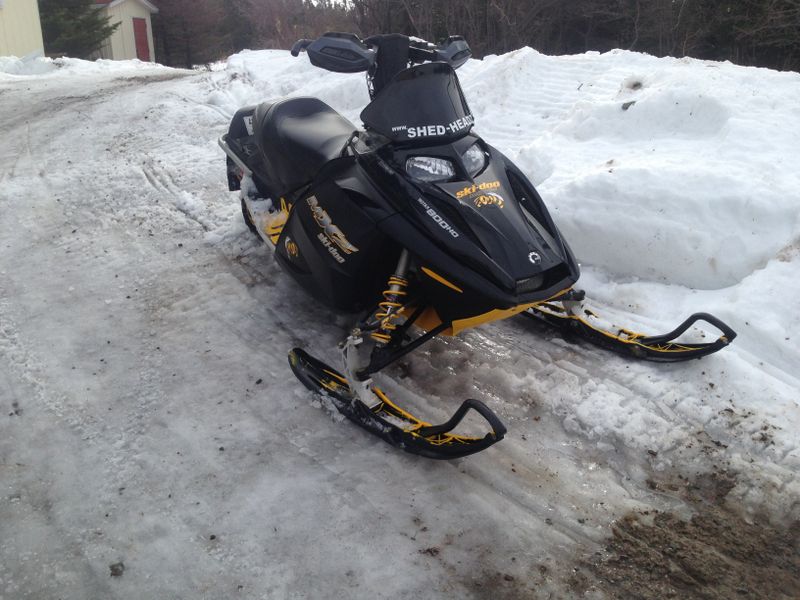
Project Pages: Prior to purchase I inspected the sled and found that the frame was straight and had not been bent or broken, overall the machine had seen some neglect in the parts replacement department. As a bonus, the original owner already upgraded to X-package handle bars & windshield, installed a Skidoo skid plate, hand guards, tunnel strengtheners, a riser block and included a factory skidoo trailering cover. The sled also features electric start, an upgraded 1.5" Camoplast Intense track, and had no missing panels, parts or grills.
Beauty is often in the eye of the beholder. I had been looking for a sled to replace Project Renegade and wanted something newer yet affordable, a project without getting into major structural repairs. I came across this weapon on NL-Classifieds and checked it out with Mark French. We looked it over and seen that although it was dirty and plastered with stickers, there was no frame damage, had a lot of accessories, an upgraded 1.5" track, and the plastics were not cracked. It did needed some work as the motor was making noises and it needed suspension parts replaced. Based on all this I made a reasonable offer, struck a deal, and brought the sled home.
February 19, 2012 so it begins!
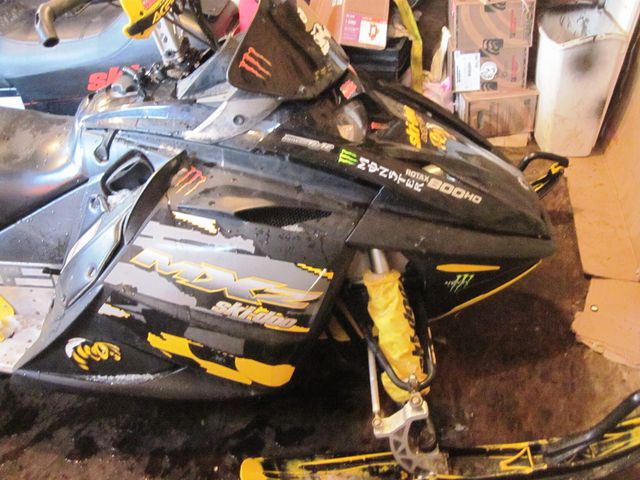
This sled needed a good cleaning and a load of monster energy decals removed. These were removed slowly by heating them with a heat gun and then removing any residue with 99% pure rubbing alcohol. I think the sled breathed a sigh of relief when returned to its original clean lines!
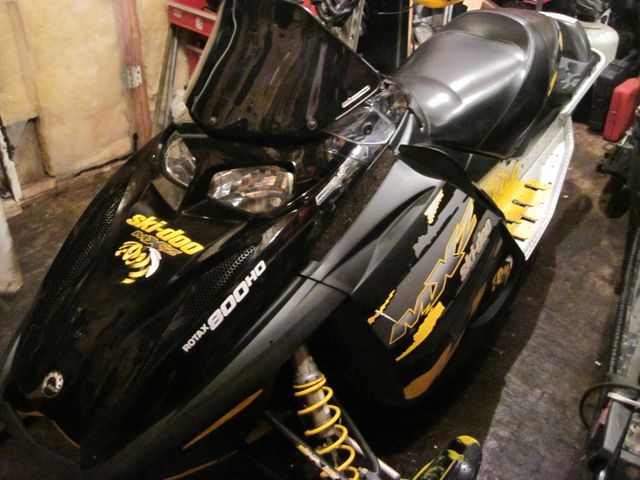
The REV was washed, dried and polished up with SC-1 Cleaner/Protector. It was already looking amazing!
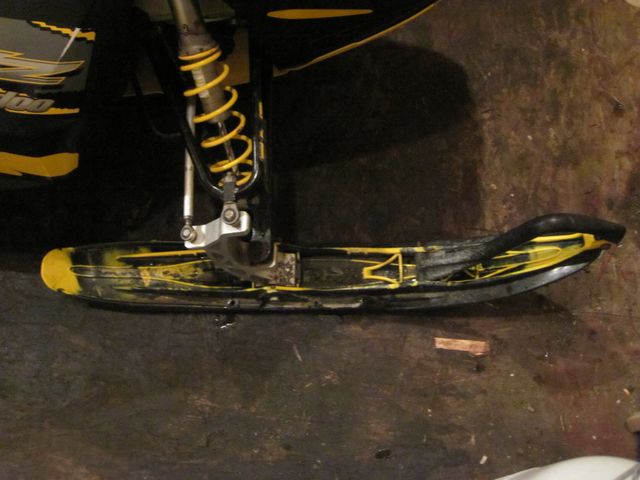
Real repairs began with replacing very worn out upper and lower ball joints on both sides, and replacing all 16 A-arm bushings to tighten up the very sloppy front end. With the new parts installed the suspension is tight & just like new but it will need skis and shocks. For now I reused the worn out skis, but installed a new centre carbide on each one (taken from my used parts bin as Project Renegade also runs Pilot 5.7 skis).
Next on the list was installing two new lower side panel rubber latches This was done by drilling out the old rivet, and installing the new latches with a new 3/16x1/2" long rivet. I also noticed one of the front hood hinges was missing, so a new hinge was purchased at the dealer and installed with fresh hardware and red lock-tite.
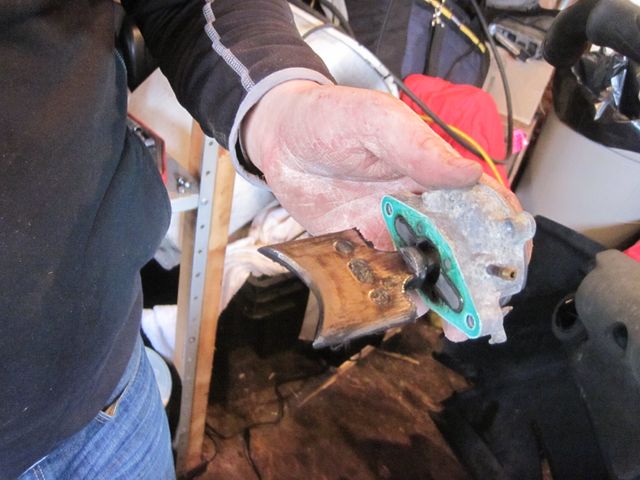
Next I removed the RAVE Valves, cleaned off the heavy carbon deposits with brake cleaner and a 3M Scotchbrite pad, and reinstalled them with new o-rings and gaskets.
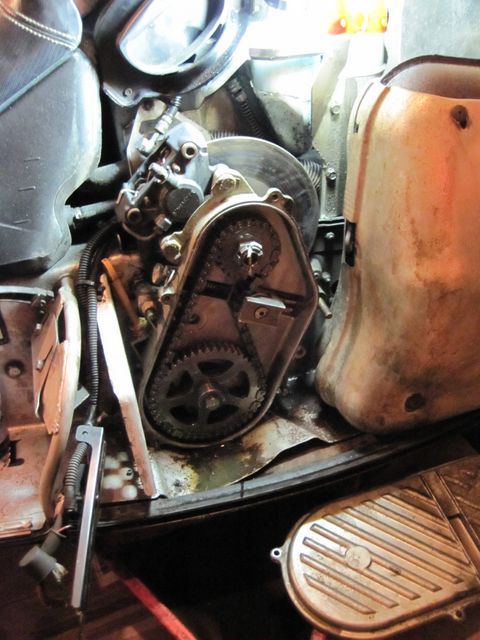
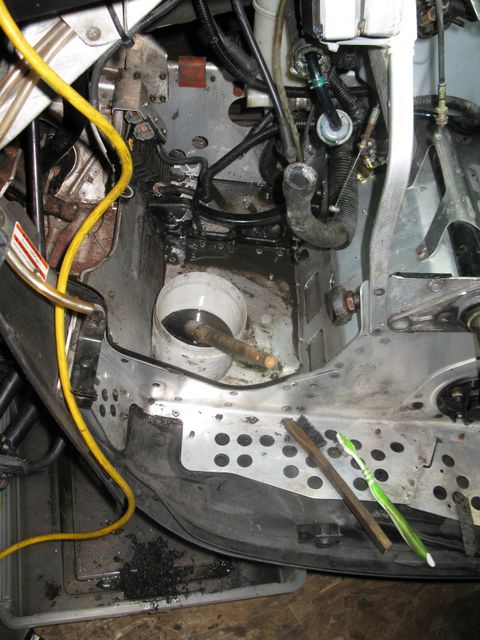
The chain case was serviced by removing the cover to inspect the chain and to see what gear set was inside. The stock 23/43 gearing was still in place and the fluid wasn't too neglected. I did find a cracked off cover bolt which was causing a small leak. This was easily removed with Vise Grips and a new bolt installed. This is why its very important to thoroughly check literally every bolt on a used sled when performing your first round of service work.
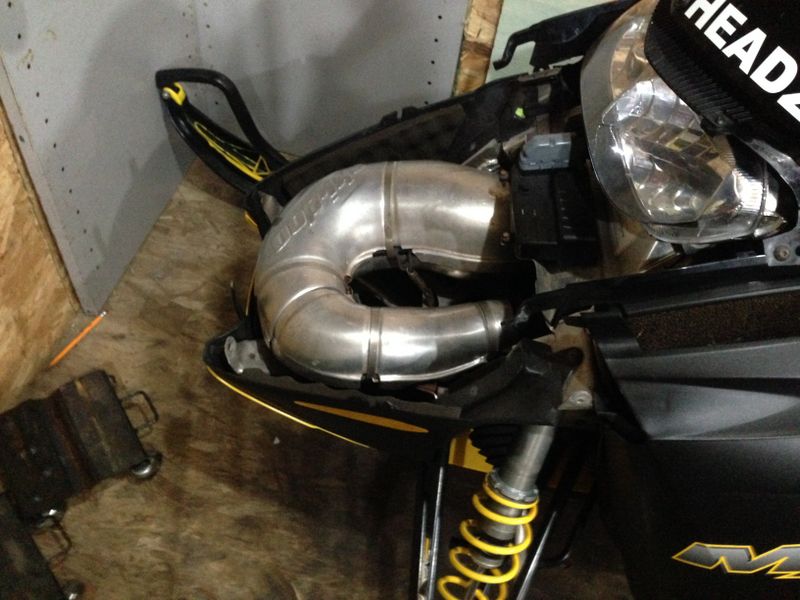
Next on the list was patching a hole in the muffler, the metal on the rear of the muffler was very thin and rusted through. I cut a patch panel to cover the area, secured it with steel pop rivets and coated the area with hi-heat muffler cement. This should hold until I can find a good used muffler, or replace it with some sort of trail can.
When I reinstalled the freshly painted exhaust, I also installed new donut gaskets as the original ones were completely fried.
The last item I installed was the Bombardier accessory gas can already in stock from Project Renegade. This can was actually designed for the REV chassis, I installed two metal brackets in locations already marked on the rear tunnel cover. As of today, the last of February 2012, I only need a centre shock and some snow to get out for a test ride. Over the summer I plan to have the engine freshened with new crank bearings, seals, new pistons, rings and necessary gaskets. This should ensure a trouble free ride for a good few years to come!
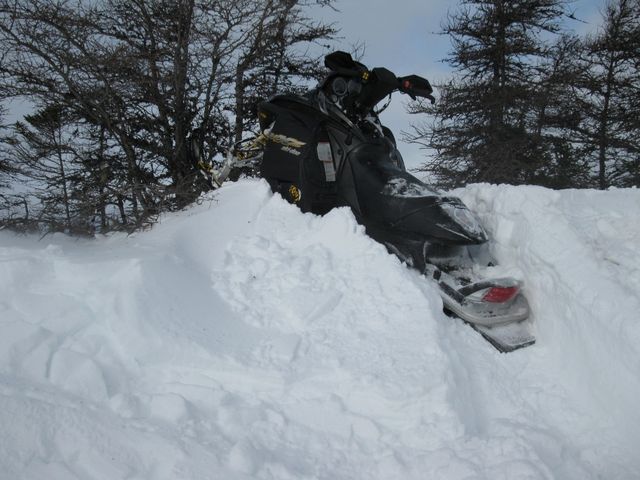
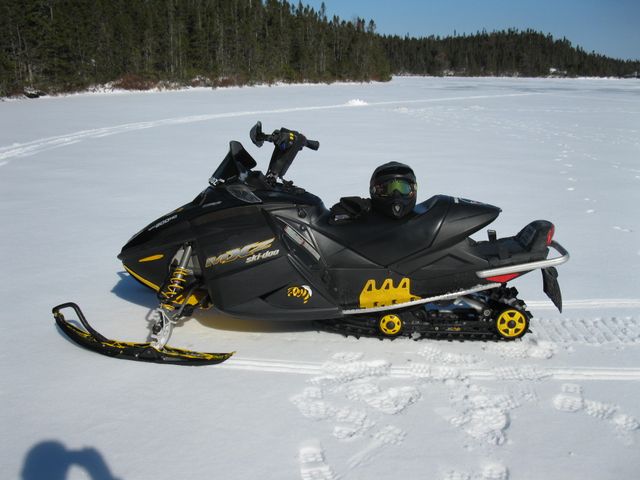
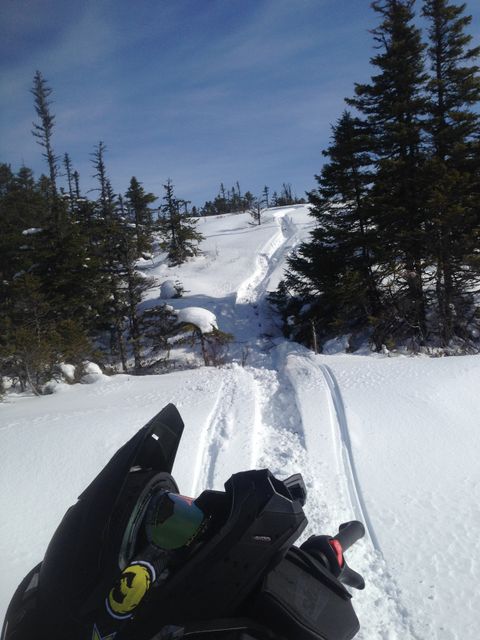
On March 9th we headed to the Sooley cabin near Whitbourne for a late and albeit short annual cabin trip. Even with low snow conditions I could do a shakedown run with Project REV to check out my repairs and seek out any further issues to be addressed over the summer.
A 20cm snowfall before the trip was decimated by rain by the time we got to the cabin. Riding conditions were dreadful but with a few flurries we had enough to putt around, and skim a lot of water! This 800 is a wheelie machine on water!
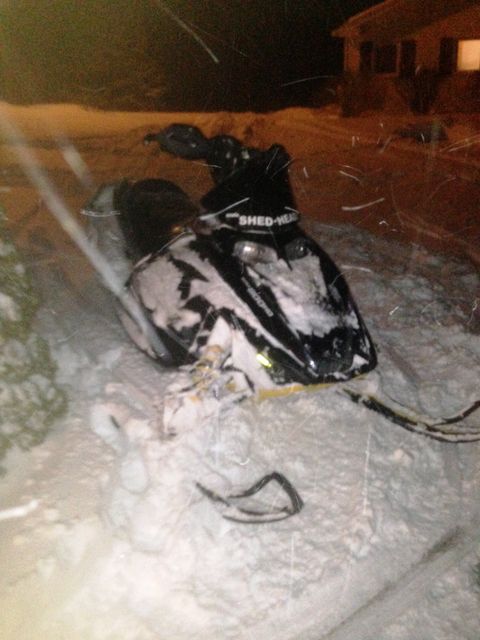
Not surprisingly the motor popped on this trip. It was making a weird noise since we first looked at it, but held on for the whole day Saturday before letting go skipping open water! We towed it back and formulated a plan for repair.
With summer drawing to a close and winter around the corner, the first major issue to deal with was the blown motor.
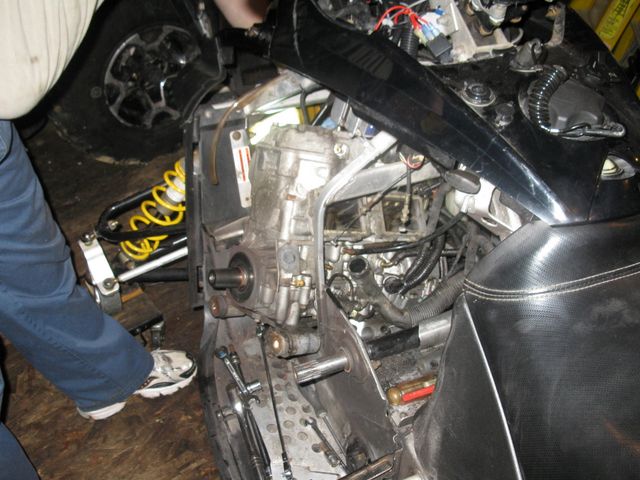
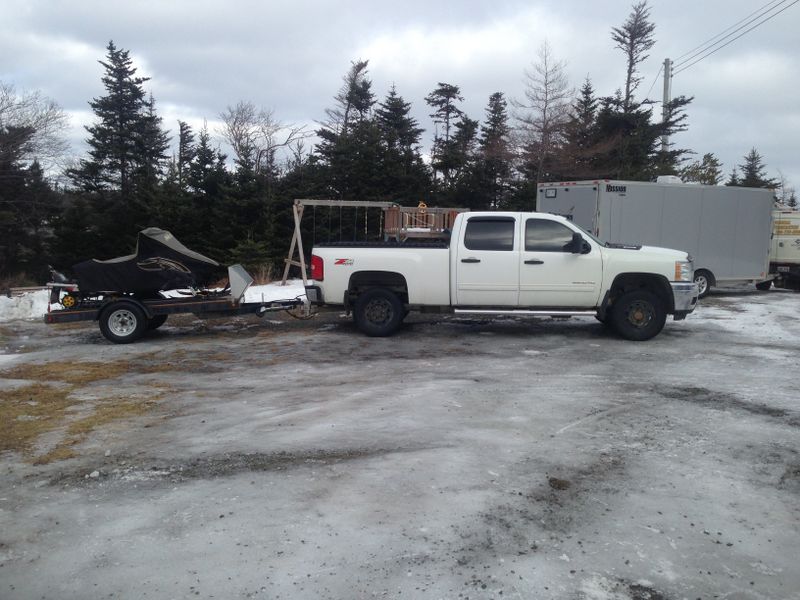
In October, Maffer and I got to work removing the engine. It was pretty straight forward, removing the exhaust Y-Pipe was made much easier by using a metric Allen key socket with a ball end about 4" long. I picked up a set at princess auto that fit a 3/8" drive ratchet and they were extremely handy for this whole project.
We removed the electric starter and unbolted the recoil starter. We also removed the carburetors, RAVE valves & reeds, although the motor can come out with these last two items still attached.
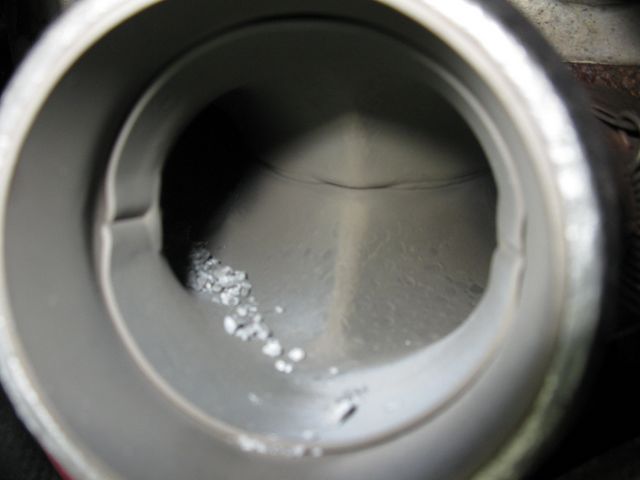
Molten aluminum in the exhaust is usually a bad sign.
We disconnected the last few wires & hoses, drained the coolant and the motor was finally ready to come out. I took a lot of pictures of the wire harness, vacuum lines for the DPM, and the cables which came in handy during reassembly.
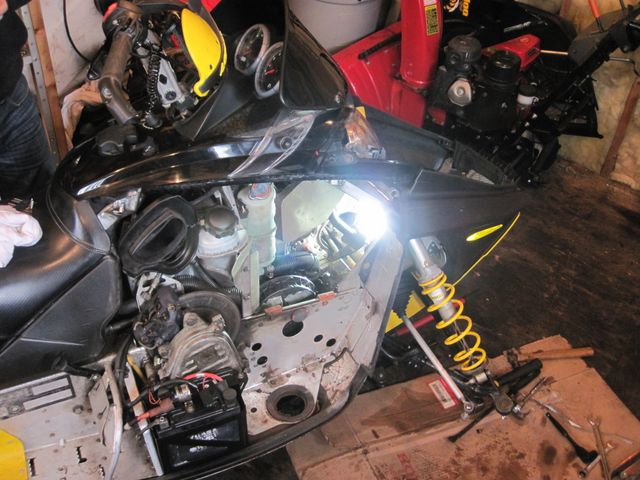
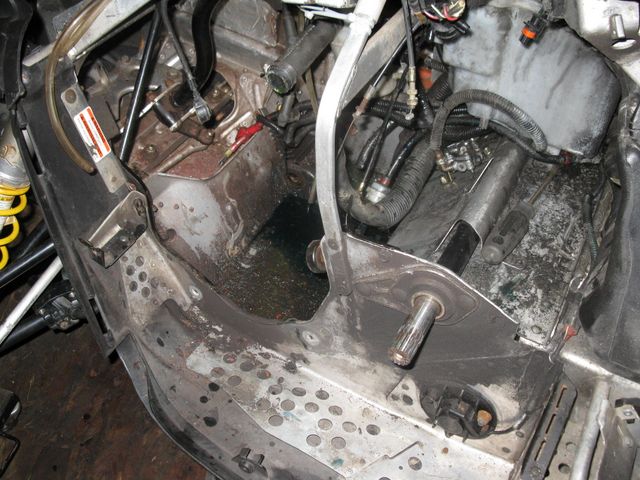
The engine compartment was extremely dirty, I couldn't wait to start cleaning it up!
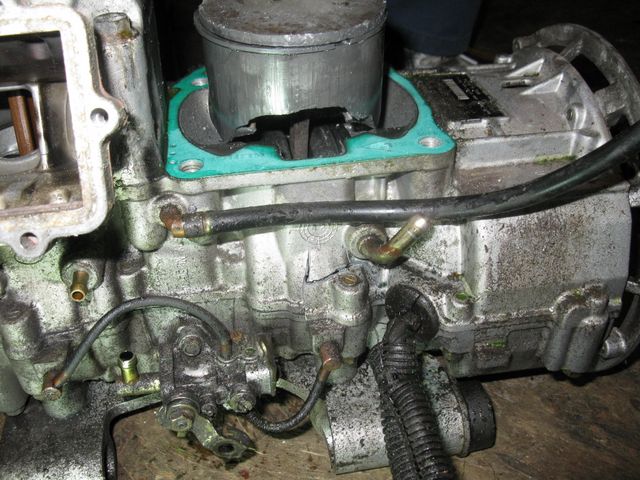
With the motor out of the sled I found a major problem, the connecting rod came out through the lower engine case. This meant I would need a replacement motor instead of just a rebuild. The piston skirt on the mag side let go, some went out the exhaust, more down in the base. This jammed the crank which in turn split the case. I sourced a donor motor in Carbonear and took a trip out over the highway to pick it up. The seller also threw in a good used stock muffler to replace the one I patched together last year.
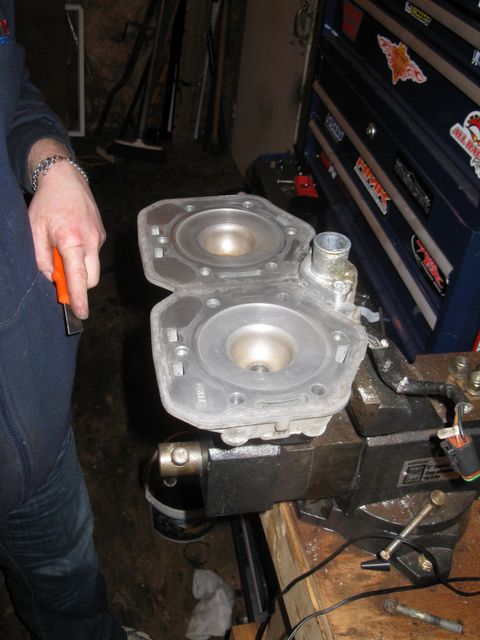
The donor motor was a year older so I had to swap the cylinder head as my Powertek has a knock sensor the replacement motor did not. This was easily done, I cleaned the mating surface, washed it thoroughly and installed it according to my factory repair manual. While on the bench, I installed the motor mounting plate, RAVE valves, reeds and a pair of spark plugs.
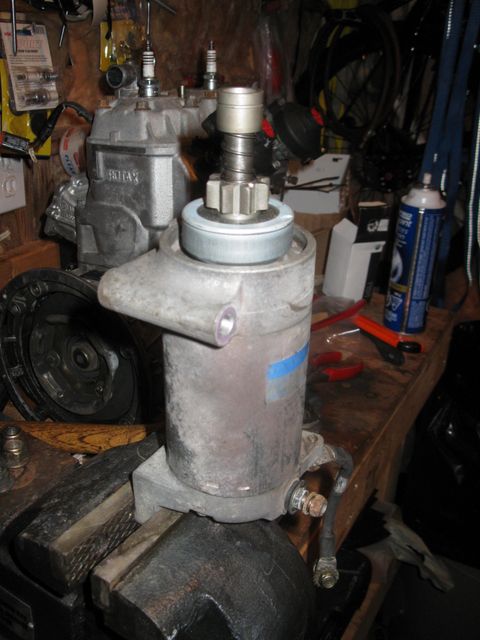
While the electric starter was off I replaced the bendix with an OEM kit from the dealer. The gear on my old bendix was chewed up. This was due to a weak return spring which allowed the gear to wander out and contact the ring gear on the primary clutch while riding, it was a common problem on these machines.
Of course while the motor was out, I took the opportunity to completely clean the engine compartment of oil, exhaust crud (from the old leaky donut gaskets) and belt dust.
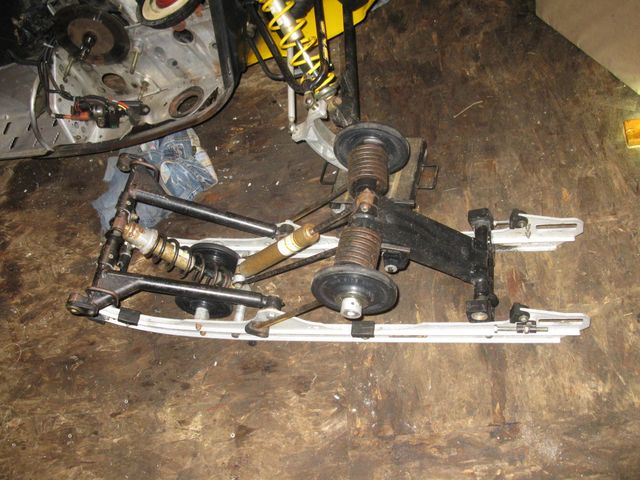
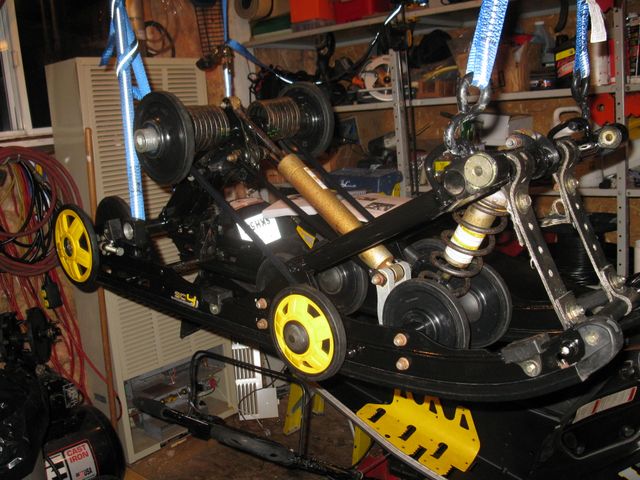
The motor installation was put on hold while I waited for bulkhead braces to arrive, so I moved on to the rear suspension. I wanted to pull out the SC-4 skid for an inspection and replacement of worn parts. I replaced every bearing in the skid, as well as the bearing on the driveshaft. The chain case bearings were in great shape so they were retained.
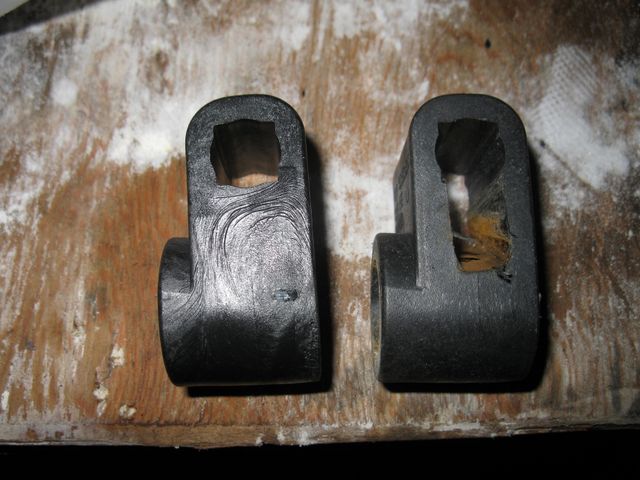
New left old right. These bushings hold the end of the torsion springs and were well worn!
While everything was apart I striped, cleaned and sanded the suspension rails as I wanted to black them out. I decided to try some POR15 paint which is supposed to chemically bond on bare metal, plus I already had some left over from my trailer rebuild project. If this doesn't hold up I may have them powder coated, but they sure look fantastic! With the rails painted I also replaced the worn out hyfax.
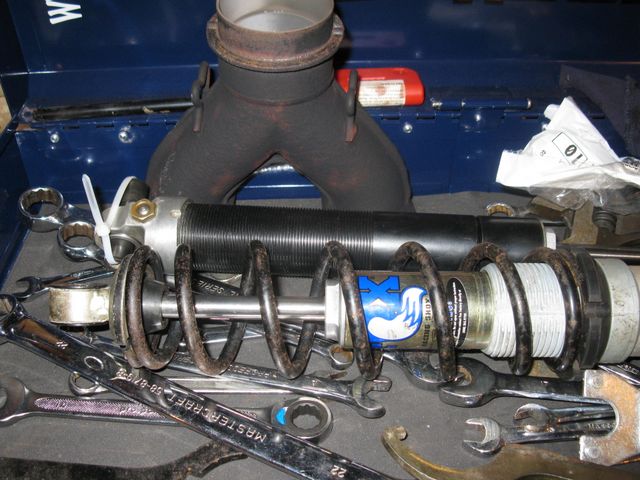
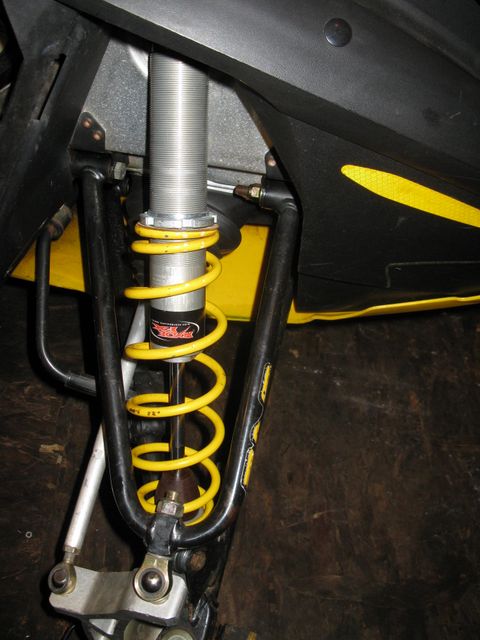
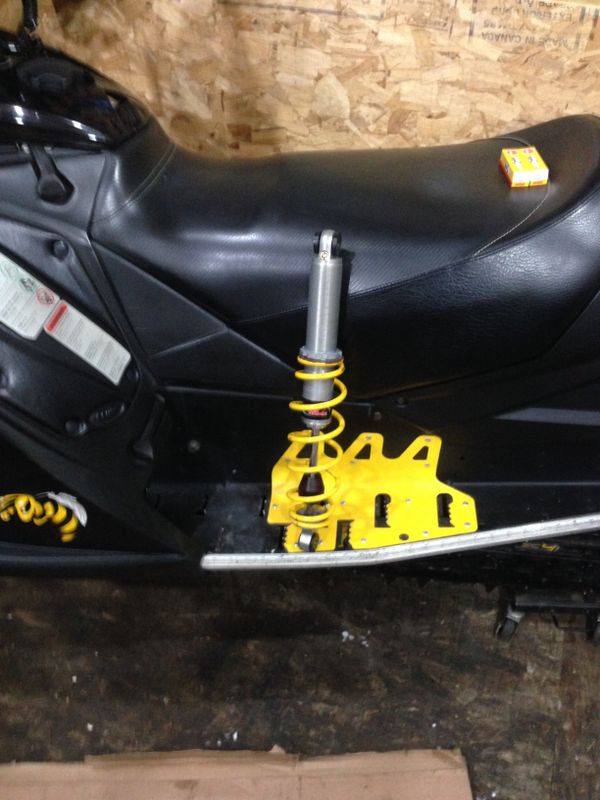
The last item on the rear skid was to replace the worn out leaking stock shocks. Mark Murray of Rock Suspension, my local shock rebuilder, had a pair of freshly rebuilt Fox shocks for sale, so I picked them up and bolted them in place.
While the skid was out I tackled my next appearance mod. I wanted to coat my tunnel black without the expense or the hassle of completely disassembling the frame to have it powder coated. I decided to try Duplicolor aerosol truck bed liner (blue can from NAPA, not the black water based crap from Canadian Tire). This product worked well on the racks of my Honda Foreman ATV, holding up great over the last three years. I prepped the tunnel by cleaning with brake parts cleaner, thoroughly sanding with 120 grit sand paper, then wiping down with 99% pure rubbing alcohol. The more time you put into prep, better are the results.
I taped off the areas I did not want coated and applied the product in one generous coat. I did not paint the top of the rear heat exchanger in part to aid performance of the cooler, and because this area is covered with a plastic panel. With the bumper and plastics reinstalled the sled looks fantastic!
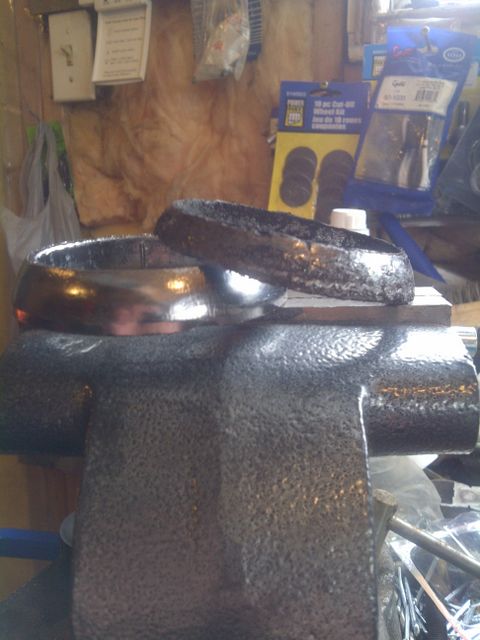
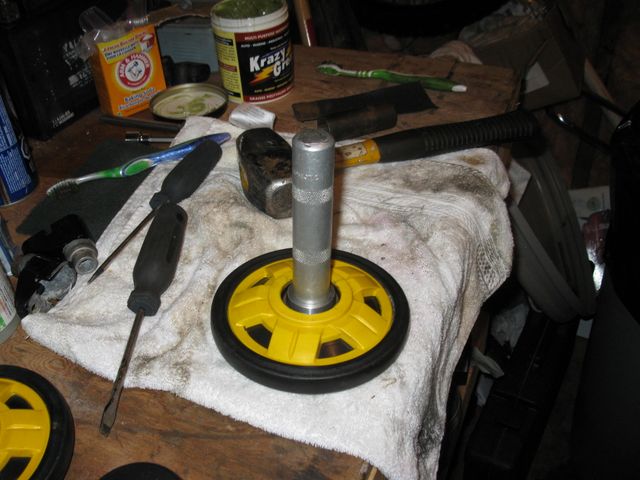
When I bought the rear shocks from Mark Murray I picked up a set of front ones as well. He had a bunch of brand new Ryde FX 9200 series rebuildable shocks in stock for a great price. The old shocks were easy to remove, just one bolt top & bottom and they were out. To swap springs we mounted the shock in a bench vice, turned the tensioners as low as they would go, then Maffer pulled down on the spring while I removed the keeper plates. The springs were easily installed on the new shocks as there is a infinite adjustment. They fit in place perfectly, we made a rough estimate to the tension adjustment making sure each side was adjusted equally. I bought a pair of brand new black/yellow marble Pilot 5.7 skis identical to the existing worn out skis on the sled already. I installed four carbides I had in stock from my last sled (they only had a couple hundred kilometres on them) but I replaced the rusty nuts with stainless lock nuts & washers.
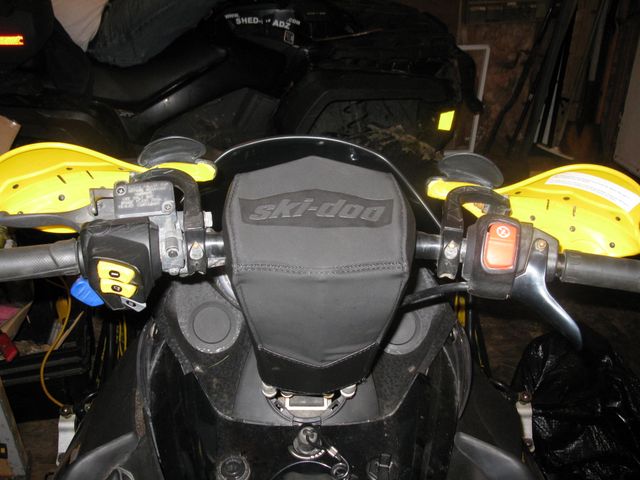
Next I swapped out the stock x-package bar pad for one from a 2009 REV-XP Summit (thanks Steve Long). This piece is a bar pad and riser cover all in one, and looks much cleaner as it covers all of the wires on the riser block. I let the brake line and throttle cable hang free outside the cover so they wouldn't bind during sharp turns.
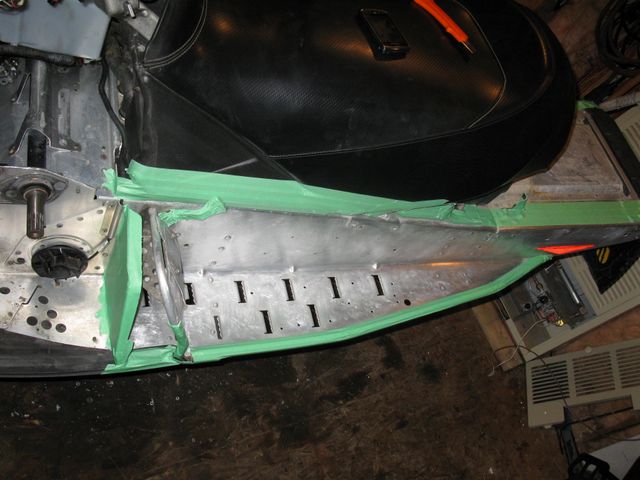
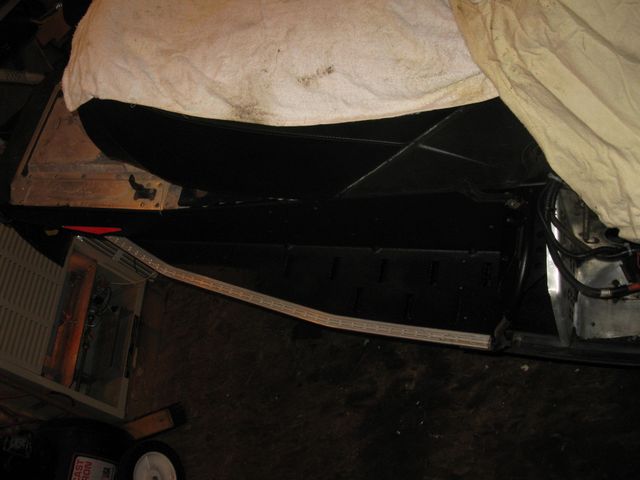
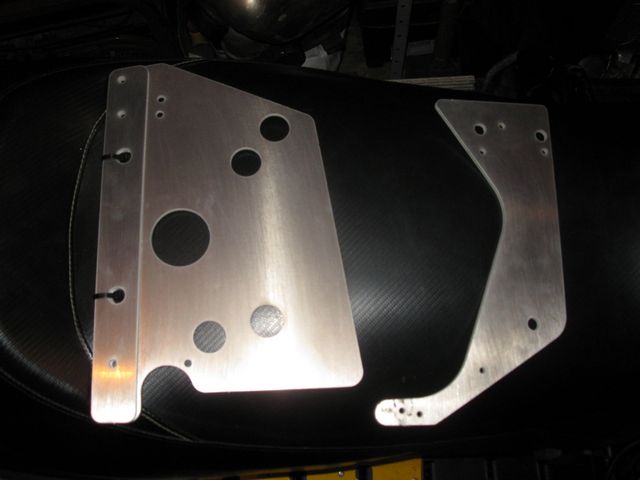
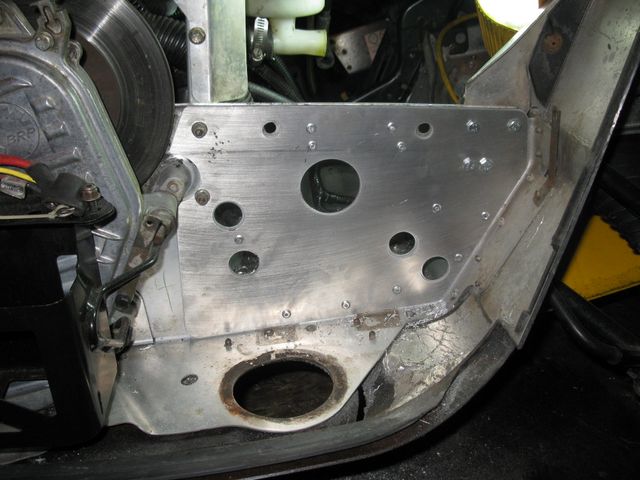
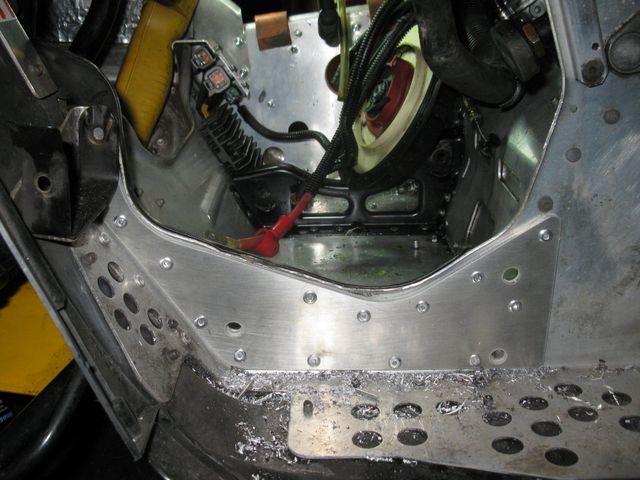
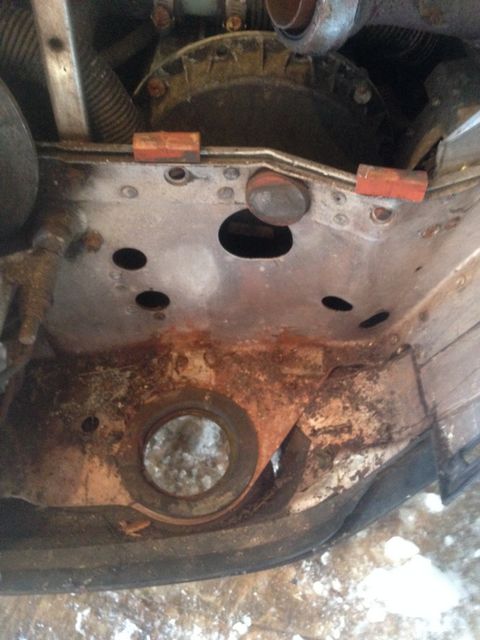
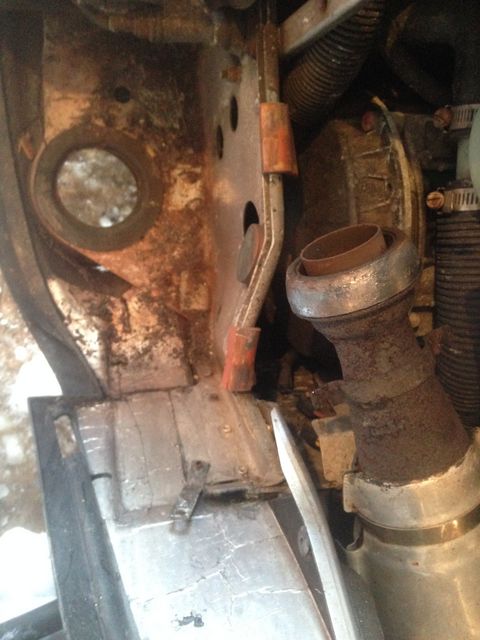
Finally after nearly a month my bulkhead braces arrived from fellow dootalk.com member "wwracer" in Alaska. He designed, fabricates, and sells this brace kit which bolt & rivet to the bulkhead frame under the engine making it much stronger. This way if you strike something and bend an A-Arm or even the Nun, the bulkhead under the engine has a better chance of not being damaged. A minor bend here means pulling the motor to fix, a major bend means replacing the entire tunnel.
The new braces almost triple the thickness of the frame in this vulnerable area. Now if I strike something I can replace the Nun section of frame as it bolts in place. The frame under the engine is one piece all the way to the rear of the sled.
It's a lot easier to install these with the motor out, delaying installation of my new motor was definitely worth the wait.
We managed to carefully straighten the area using steel angle iron and C-clamps then bolted a piece of steel flat bar in place to sturdy up the weakened tunnel. It's not perfect but much better than it was before the repair.
Back to Project Powerteck:
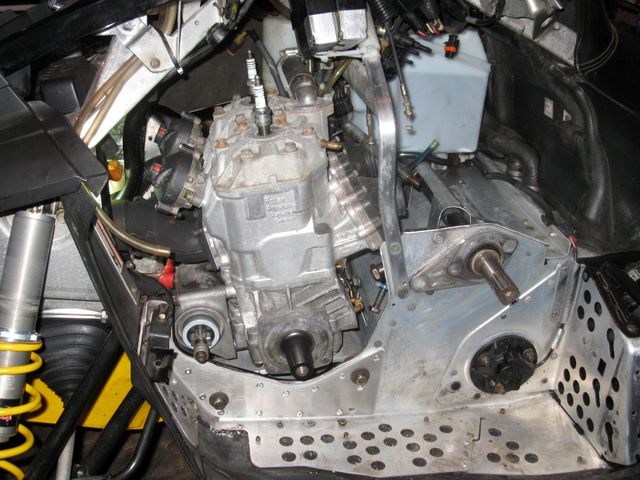
With the bulkhead braces installed, I was ready to reinstall the motor. As mentioned previously, the engine will fit in with the RAVE valves and reed cages installed, so I left them on, but took out the spark plugs. When I had the engine half way in, I connected the Oil Pump Cable, main oil feed line, impulse line for the fuel pump and bolted on the starting motor. The engine slid in the rest of the way with a little wiggling and negotiation but it really wasn't too bad. The rest of the job involved reinstalling the Y-Pipe & bolts with red lock-tite, connecting all the electrical & vacuum lines, installing the carburetors, and bolting up the recoil starter. When everything was checked and re-checked I pulled the sled over a bunch of times holding the oiler wide open to remove air & pump gas to the carbs. The sled fired right up with a small amount of mixed gas dropped into the cylinders and ran great. I bled the cooling system by elevating the front of sled to remove air from the heat exchanger.
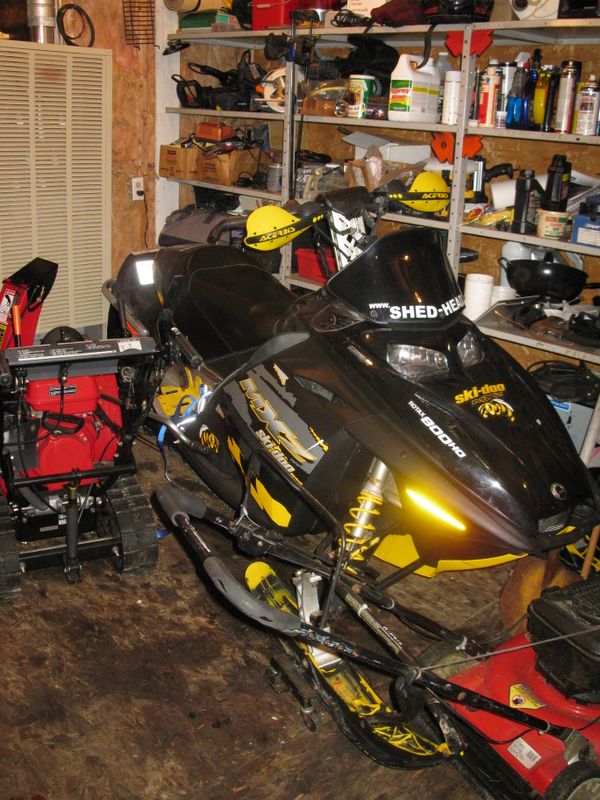
With the belt installed I hung the rear of the sled to adjust the track alignment/tension and to perform the torque procedure for the primary clutch as outlined in the shop manual. Knock on wood everything seems to be working great, I have the sled cleaned up and ready for snow. Lastly I removed the factory 2000's style decals, carefully trimming and leaving just "Skidoo MXZ" on the side panels, but removing the rest. This really gives the sled a sleek uncluttered appearance. A new set of black/grey hand guards from a current XP chassis sled are on the way from eBay to replace the cheap floppy Acerbis ones on the sled.
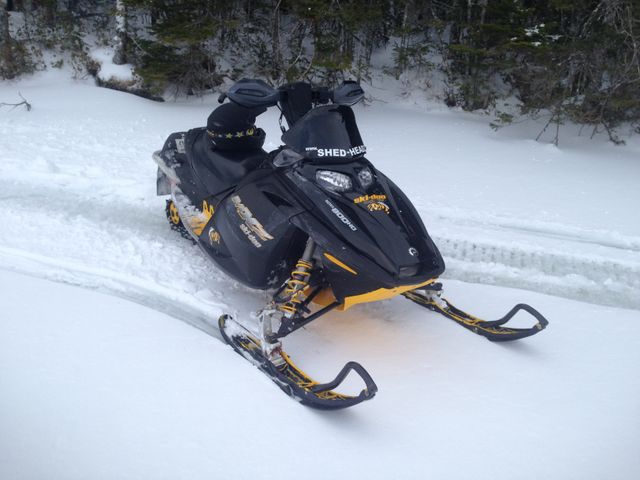
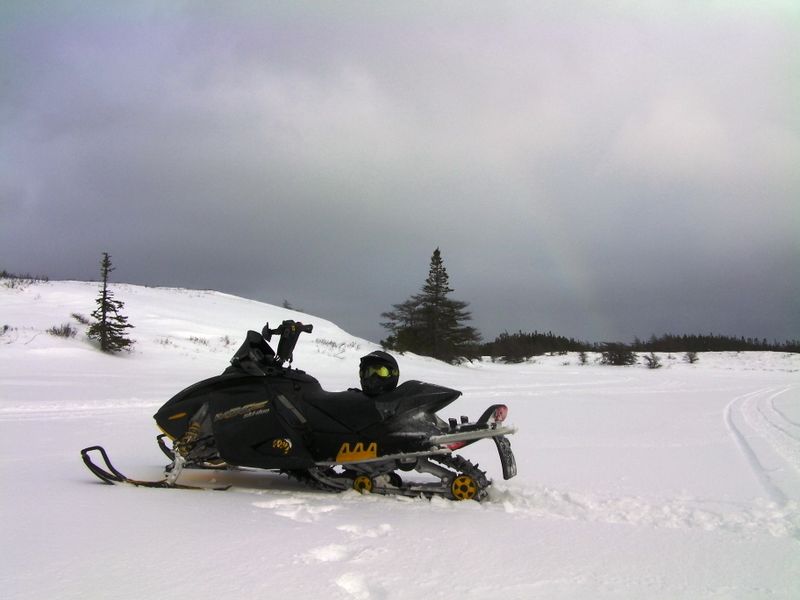
January 19, 2013 Goulds Solo shakedown run. With no one else available to go for a rip, I really wanted to take advantage of our first major snowfall and test rode Project Powertek after the major repairs these past few months.
The sled ran great! The motor is very strong and never caused a moments grief. The suspension on this machine is so far ahead of my 1997 Project Renegade, it's truly a a night and day difference!
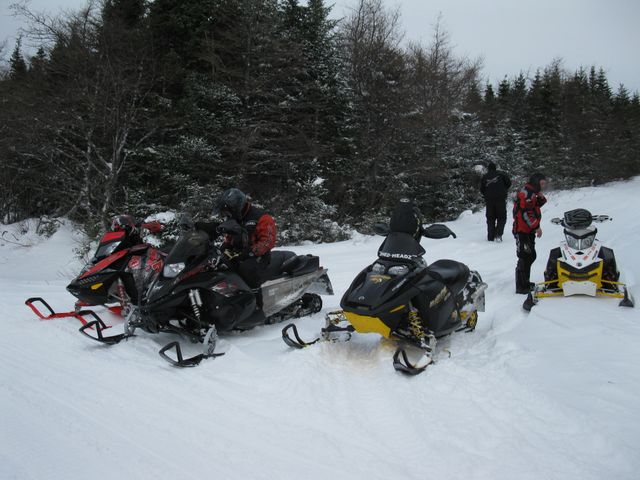
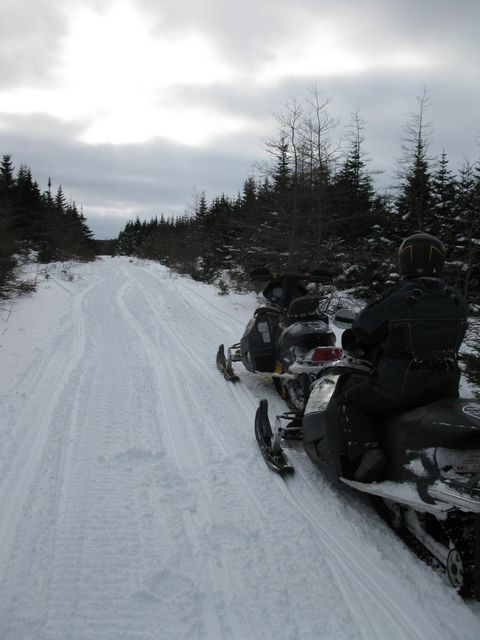
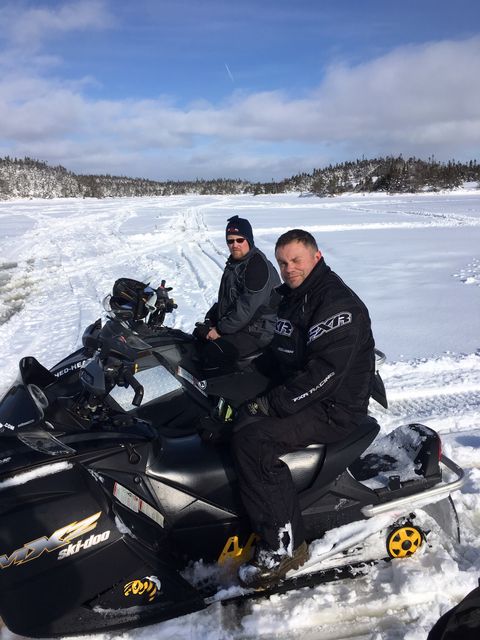
January 20, 2013 Goulds to Witless Bay with Todd, Bill & Long. The following day the boys were ready to head out for a crew rip, we did so leaving from the Goulds and grabbed a bite to eat in Witless Bay. Again the machine is running & riding great!
January 26, 2013 Goulds to Witless Bay with Maffer, Danny and Brian. Same ride, different crew still just absolutely awesome!
January 27, 2013 Goulds rip with the Crew! Another day, more snow, so yup another ride exploring new trails from Northern Pond, Goulds to Witless Bay line.
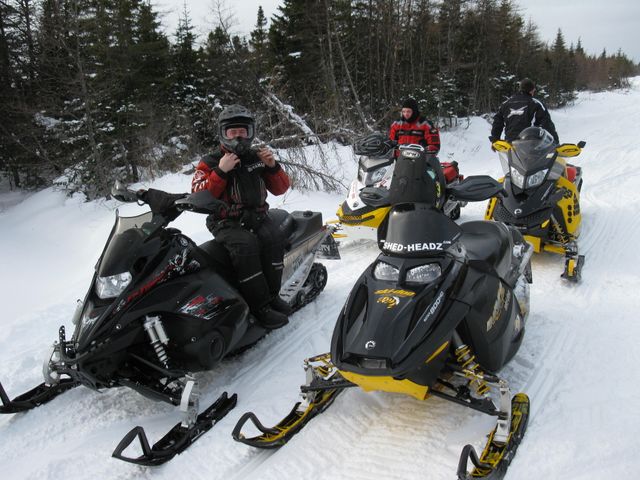
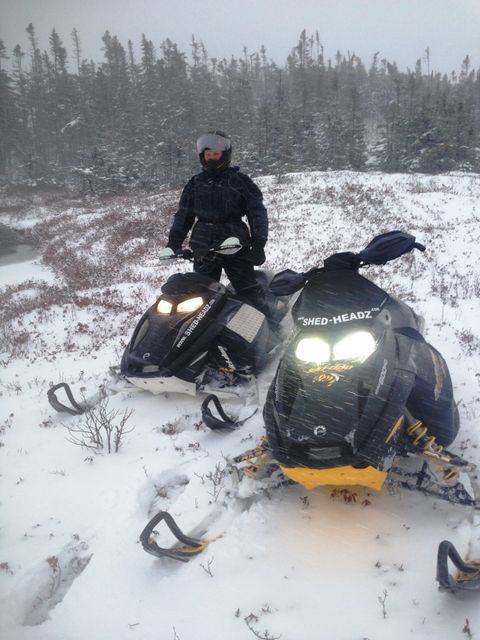
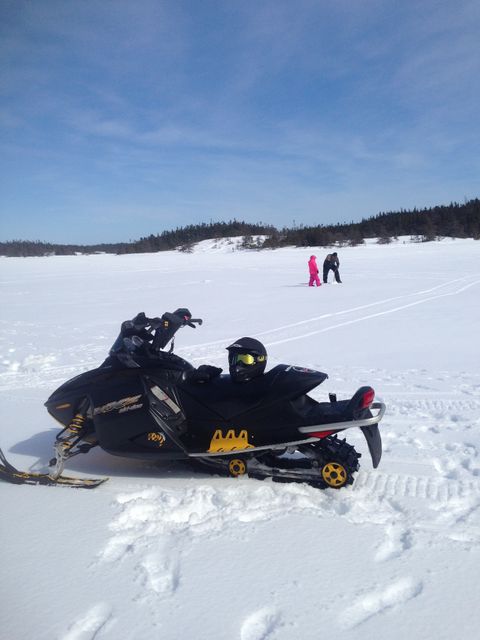
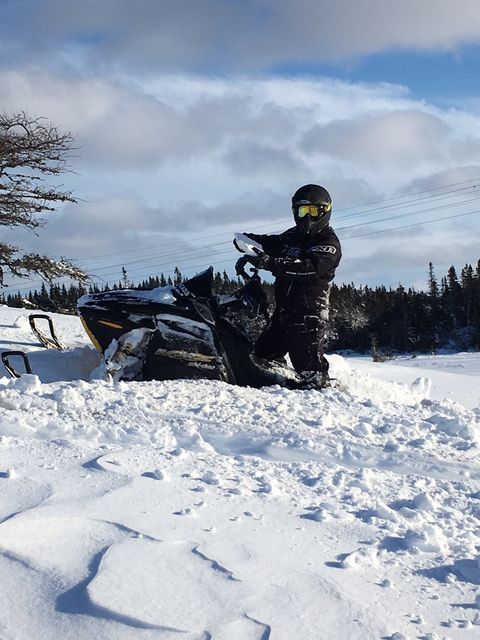
February 16, 2013 Whitbourne Ice Fishing. We may have missed an annual cabin trip this year but we never missed a trip to Goulds Pond as Maffer, Gavin and I headed up for a day ice fishing and a rip on the sleds!
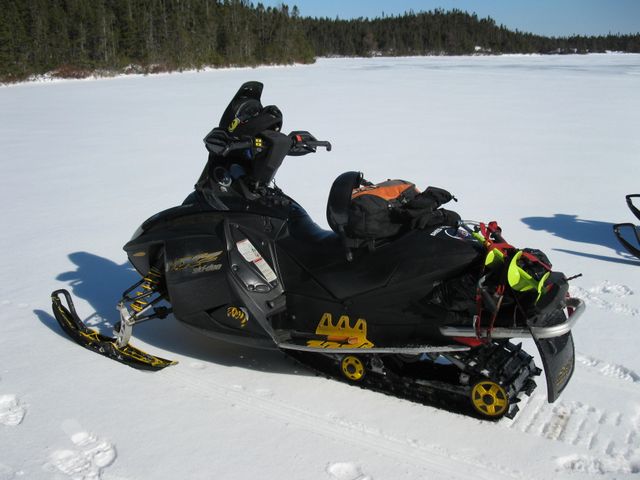
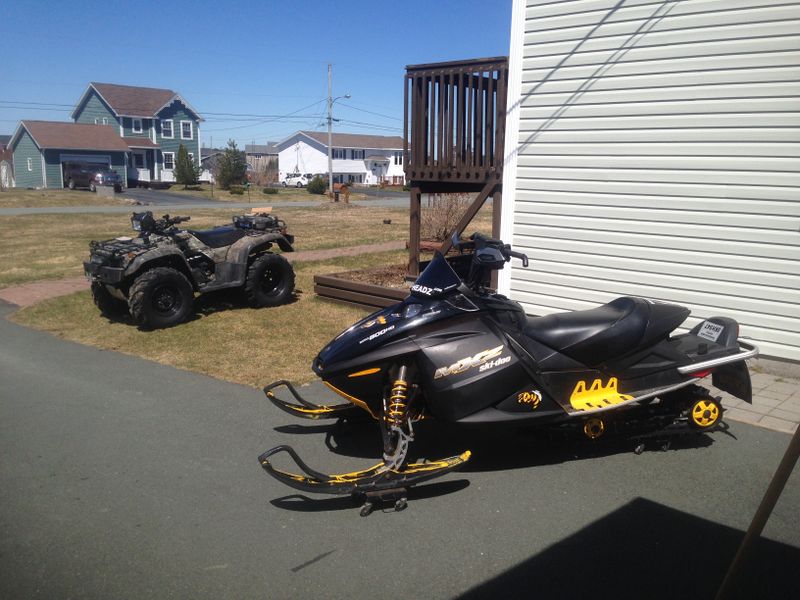
With all of the work completed last year on project Powertek I'm pleased to say that the sled ran great all season! The new/used motor is holding up great, the 800 is not renown for being the most reliable engine Bombardier ever designed, but it certainly pulls like a train! The new shocks greatly improved the ride and handling of this sled, and the coating on the tunnel and paint on the slide rails is also holding up perfectly.
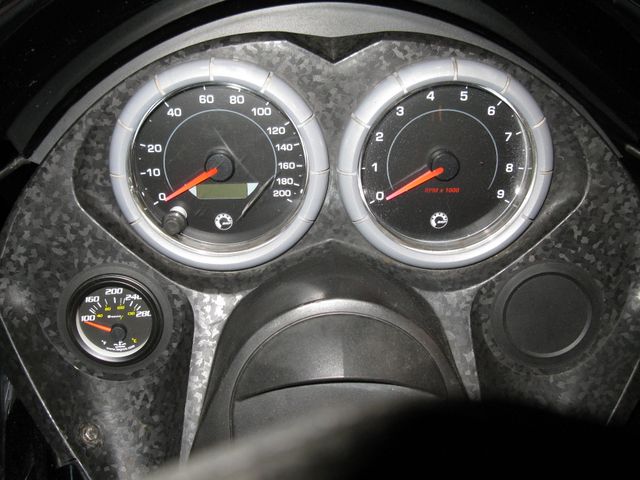
Late last season I installed an Equus water temperature gauge so that I can easily monitor engine temperature and not rely on the "it's too late" warning light to come on. This installation has been detailed in the How To's section of the site.
In 2013 French sold his 2009 Yamaha Nytro so I purchased his still new Sledstart HID headlight kit to install in project REV. The bulbs are an exact fit replacement item, but I had to make a small modification for them fit properly. In stock form the wiring for the bulb will rub on the front pyramidal frame and eventually chafe through causing a short circuit. This was easily fixed by removing 2 small Phillips screws and turning the bulb base 180 degrees so that the wires exit the on top of the housing instead of below. The ballasts were ty-wrapped to the frame to keep them secure. This is a great plug and play kit that retains hi & low beam function and does not bring up any error lights in the dash.
During a day trip at Sooley's cabin January 11, 2014, I managed to break the center out of my front bumper when I ran over a small tree. (I guess it wasn't so small or was just froze up pretty good!) I ordered a new replacement piece and installed it with relative ease. You really miss not having that front handle for moving the sled around!
It's held in place with 4 10mm bolts, and two bolts for the hood hinge also have to be removed and swapped to the new bumper.
While finishing the bumper installation I noticed there was no resistance in the Right Front shock. I found the oil/gas had leaked out, likely due to a bad seal. After quick call to my local shock rebuilder Mark Murray and I had the shock out, rebuilt and reinstalled the same day. I purchased these shocks from him last year and once again I was impressed with his outstanding service and no hassle warranty repair.
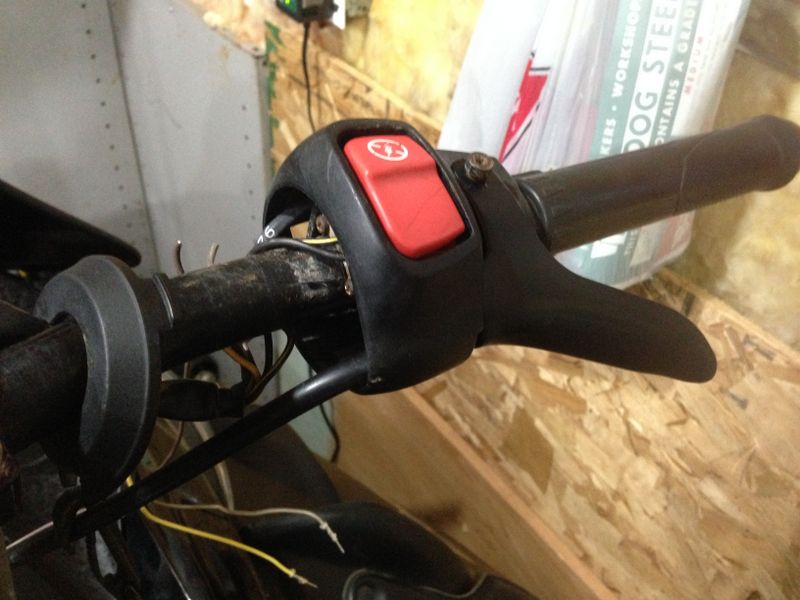
The thumb warmer has not worked on this sled since I bought it. With such a short "to do list" this year, I decided it was time to replace it. To fix this problem you have to replace the whole throttle lever as the heater is glued directly to it. I purchased a new part from the dealer, disassembled the throttle block to access the wiring and installed the new lever with ease. I chose to cut, splice, solder and heat shrink the connections for a reliable installation. While everything was apart I took the time to disassemble and service my kill switch which started acting up after summer storage. A little corrosion on the terminals is easily cleaned and the switch works like new. Check out my fixing REV Kill Switch HOW TO for more information on this relatively easy repair.
Snow conditions were pretty sparse at the 2014 Annual Cabin trip in February. Both Project Foreman and Project REV got some seat time due to the poor snow conditions, but I did manage to burn a tank of gas in the sled!
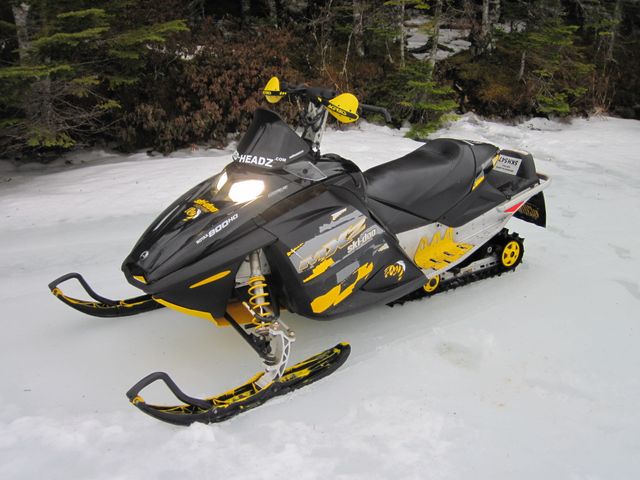
I'm very happy with the performance and look of the sled so I doubt that will change in the near future. The REV chassis provides a great ride, predictable handling and is pretty sturdy without being too heavy. This sled is a huge leap forward in technology and design over my old 1997 S-2000 chassis machine, the new XP chassis machines are really only an incremental improvement over my trusty '06. I believe my REV with the extra bulkhead braces will stand up better in a ski impact than the new machines so I'm happy to keep riding this beast and enjoying a great sled with no monthly payment!
February 21, 2015 Whitbourne Ice fishing with Dad & Lloyd.
March 21, 2015 Whitbourne rip with French & Bill. Just a quick rip leaving from the town of Whitbourne heading in the pole line towards the Sooley family cabin.
Some of the crew dropped a few lines, while Bill & I tore up the back country taking advantage of great snow conditions.
Annual Cabin Trip February 12-15, 2016. This was one of the first annual trips in a long time where I actually didn't need Project Foreman on hand due to lack of snow!
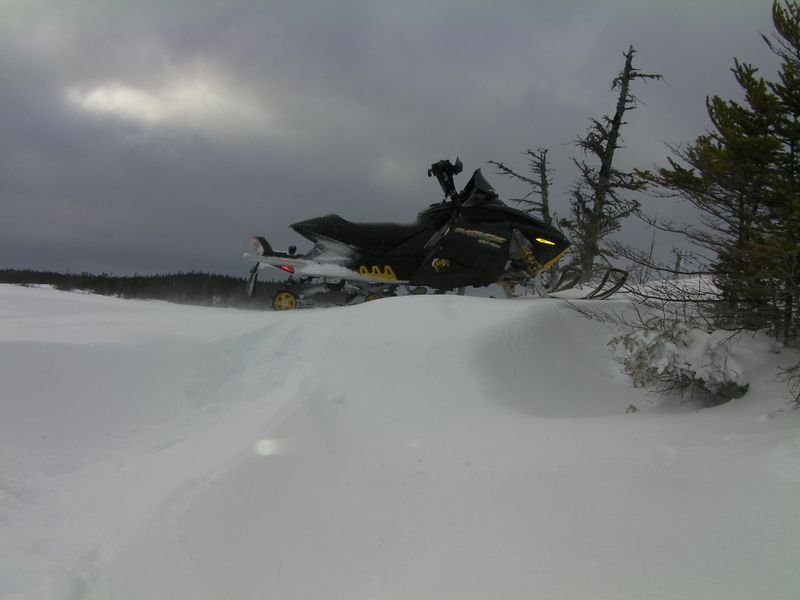
In fact, during the trip we received another 30cm snow which made for truly epic riding conditions the following day!
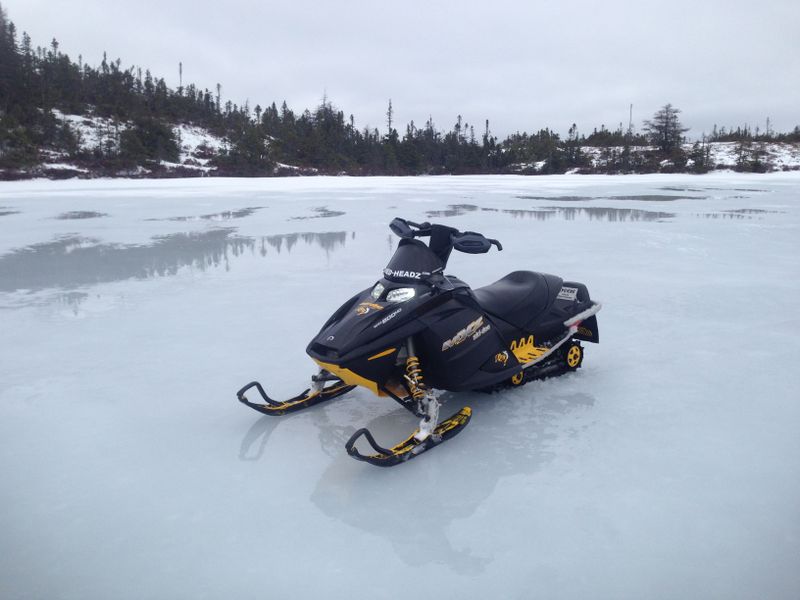
Snowdrifts were plentiful, this was definitely the trip Project Powertek had been waiting for since it was rebuilt in 2012-2013, and it handled the trip perfectly with no major issues at all.
February 7, 2017 Annual cabin trip started out well with at least some snow on which to ride. This was also Mark French's first winter for his Argo 8x8 which is fitted out with tracks and full convertible top for comfy cruising.
In traditional East Coast fashion, this trip went wet and soggy like so many annual trips that came before it.
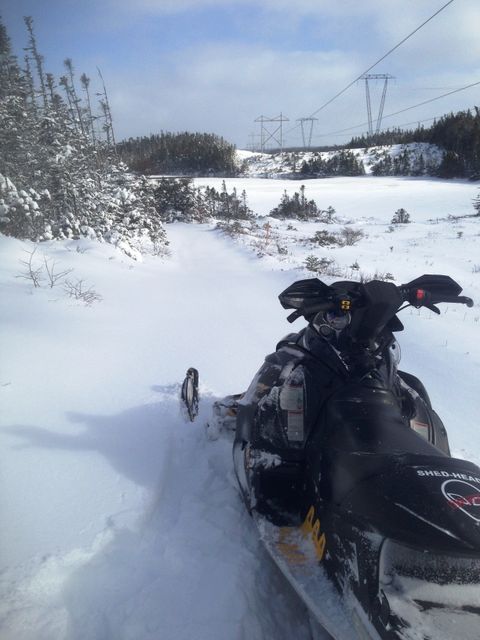
Water on the ponds isn't a major issue, it keeps the sled quite cool. The problem lies when temperatures drop and all you're left with is glare ice which will cause liquid cooled sleds to overheat and all sleds to melt Hyfax.
February 18, 2017 Day rip with Sooley, Alison & their kids. With a fresh dump of 70cm snow on the ground, some of us were eager to get out for a rip on sleds.
We headed to the Sooley cabin near Whitbourne for a day of ice fishing mixed with backcountry riding. Sooley took Maffer's REV and joined me looking for hills, jumps and drifts to lay tracks across all over Highwaters.
This fresh dump of snow is in stark contrast to snow conditions at the end of this years annual cabin trip just a couple weeks ago!
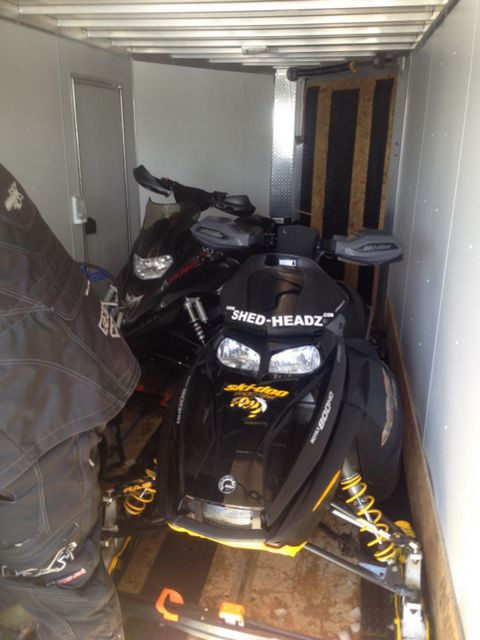
By April 2017 snow was long since melted. I performed a quick service on Project REV greasing the suspension & driveshaft bearing and adding Seafoam to the fuel, before dropping it off at my storage locker until next season.
Cheers, MIKE Project Pages:
Copyright © 2025 Michael Smith |