|
Area51 Project - Mike's 1985 Honda 250sx ATC - aka The Weapon: |
||||||||
|
Machine Specs:
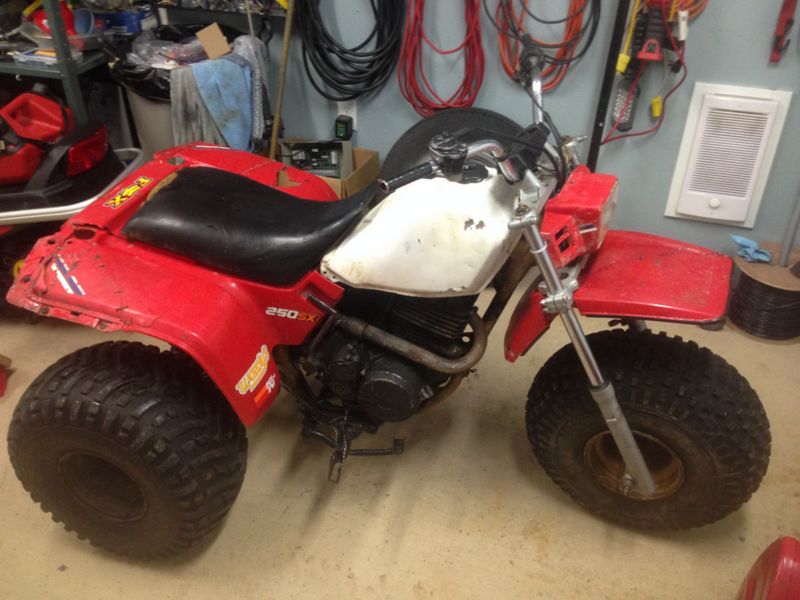
When I finished restoring Bassan's '85 Big Red I went looking for my own ATC project. After doing a bunch of research I decided on a 250sx. It shares the same reliable power train of a Big Red, a 250cc four stroke, 5-speed auto clutch manual with reverse and shaft drive. The SX is a sportier model with smaller tires, a taller rear differential ratio, and no racks. This won't be a work machine, simply an occasional trail cruiser.
Project Pages:
In February 2016 during my regular daily search on our local classifieds I finally found a reasonably priced, aka cheap '85 250sx.
The machine I picked up is far from mint, has a lot of missing/wrong parts, but most of the important bits are there.
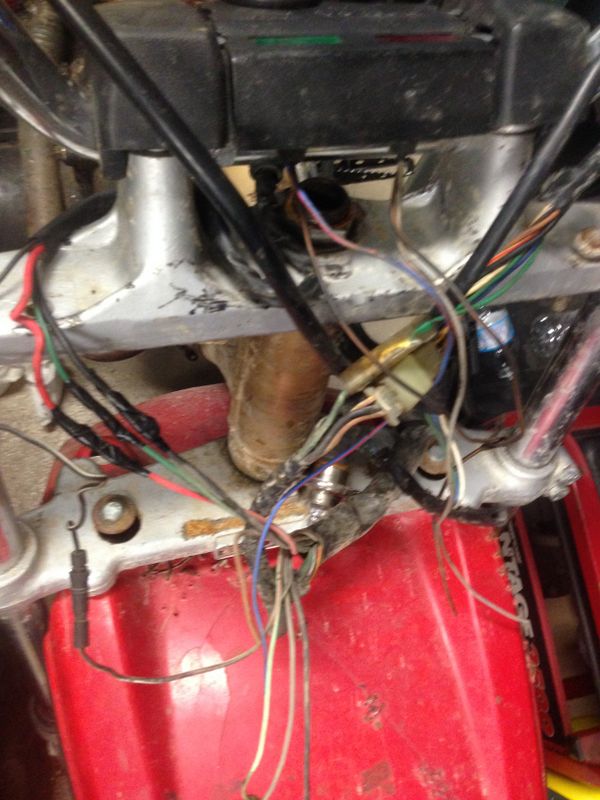
I bought the bike as "recently stopped running" which was reflected in the very cheap purchase price, it lost spark and wouldn't start. The wiring harness on the bike was chopped to hell, so I picked up a good used replacement on EBay.
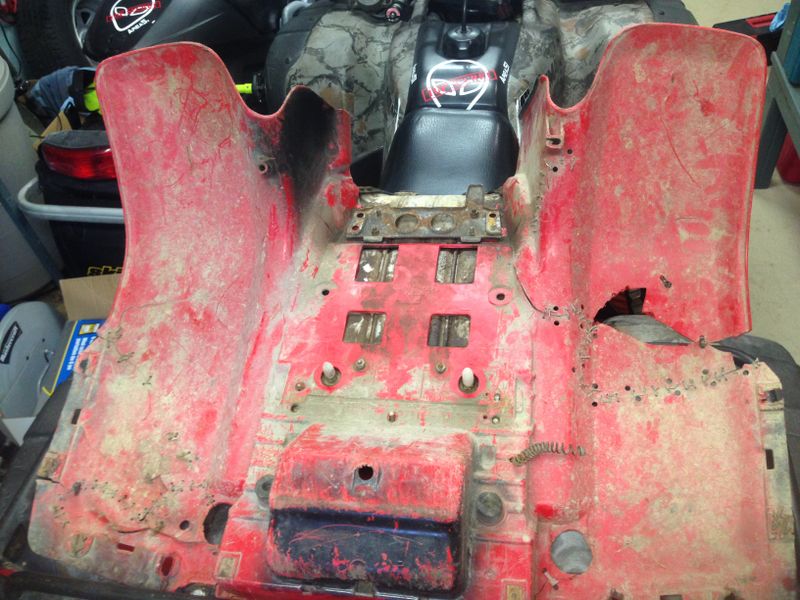
The gas tank was only laid in place and gravity was solely responsible in keeping the rear fenders & seat in place. Again EBay has been a fantastic tool in sourcing cheap and readily available used parts for my project. There I found a set of seat/fender brackets and gas tank rubber mounts, they arrived soon after and were immediately bolted in place. These original fenders with trunk will have to be replaced, but now I have OEM mounting hardware all ready to go.
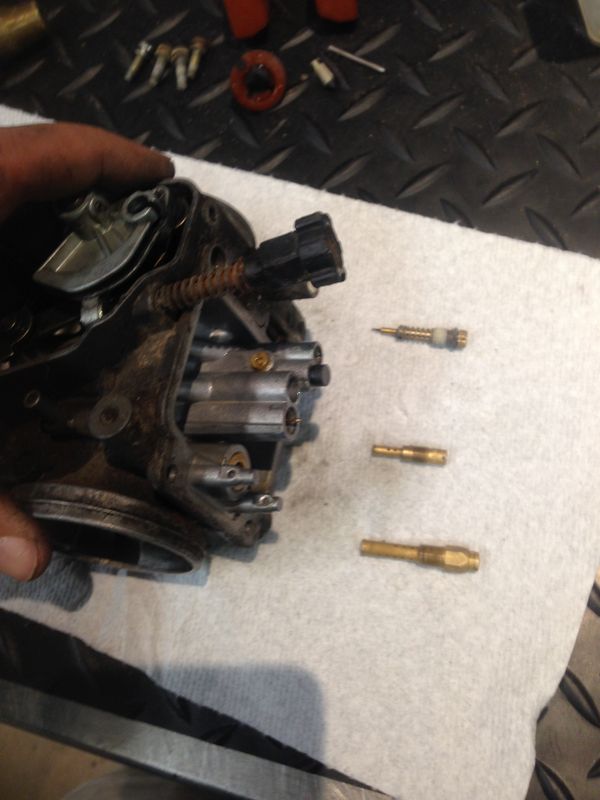
It looks like the bike was ran for a considerable amount of time with no air filter (or air box as both are missing). Today I stripped down and thoroughly cleaned the carburetor and installed a complete rebuild kit which jets the bike to the revised 1986 spec. EBay also sourced me a used OEM air box with filter and rubber connectors.
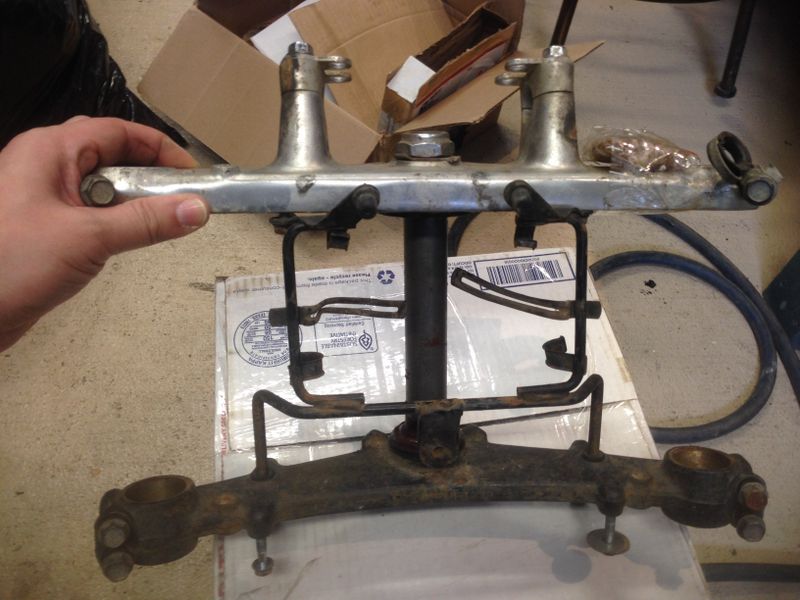
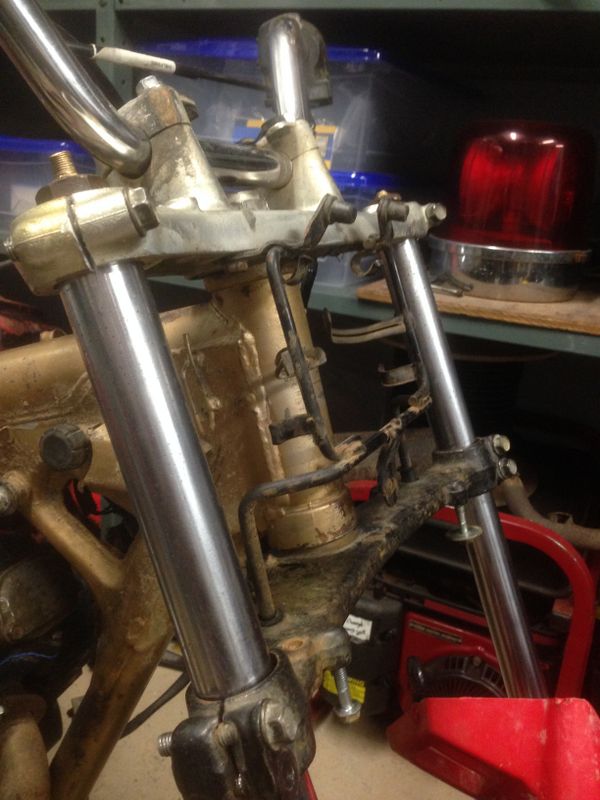
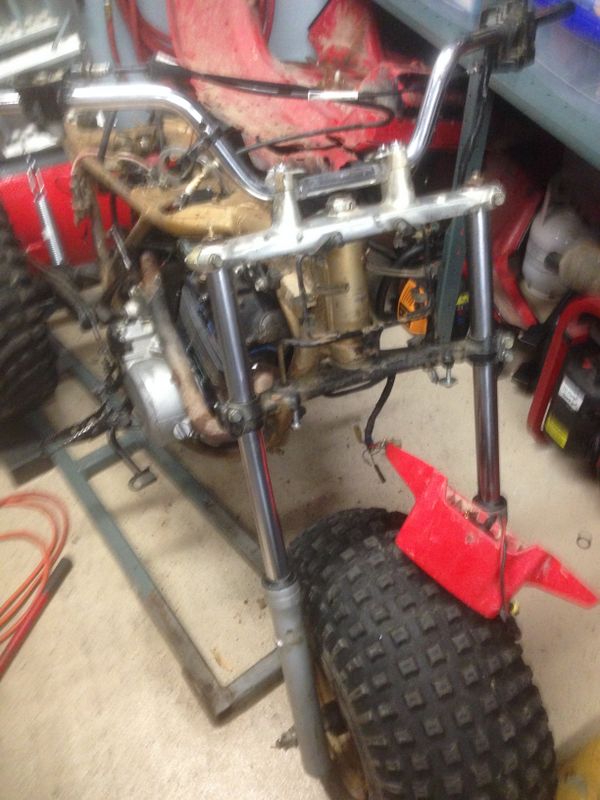
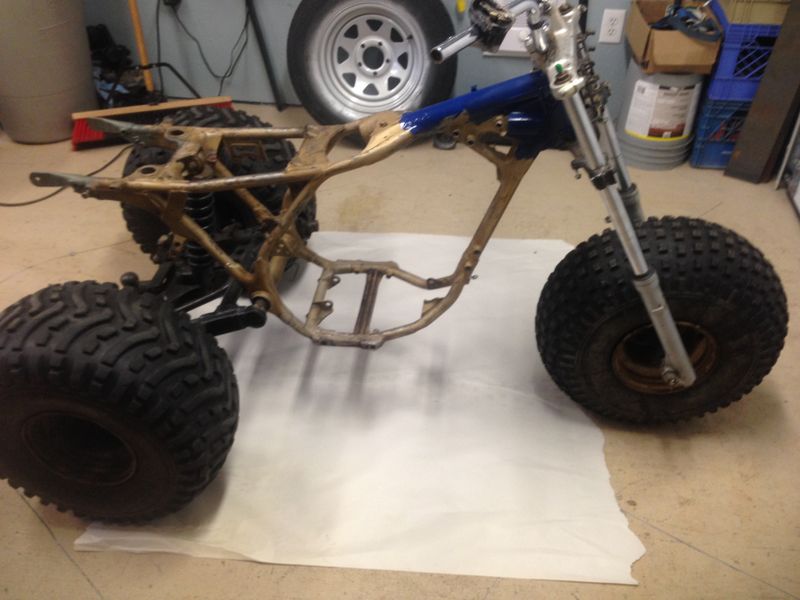
For some reason the original front forks and triple trees had been replaced with parts from an '82 250r. The air adjustable forks are in hard shape and the triple trees didn't fit right. The steering stop is wrong, they are 1.75 inches too wide, and there is no headlight mount. Luckily EBay came to the rescue again with these proper OEM 250sx triples & headlight bracket, a local ATC enthusiast sold me a pair of matching forks & a front axel.
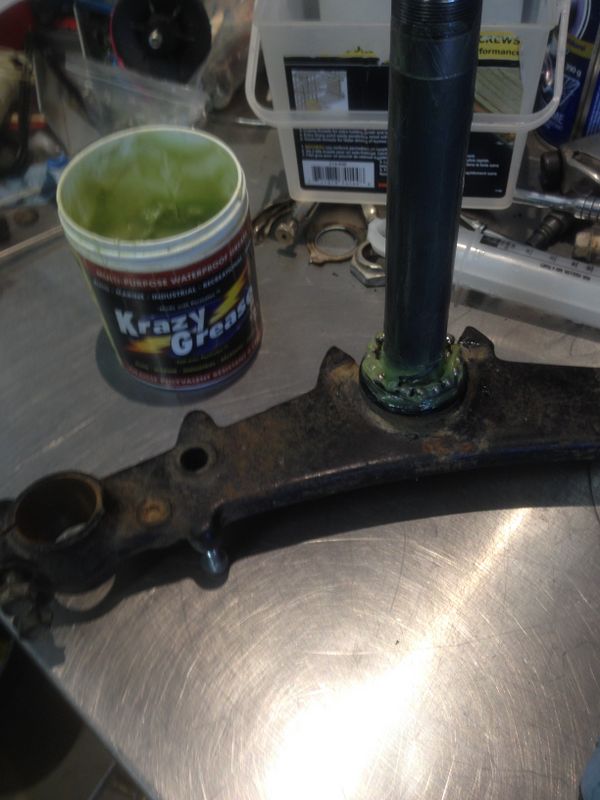
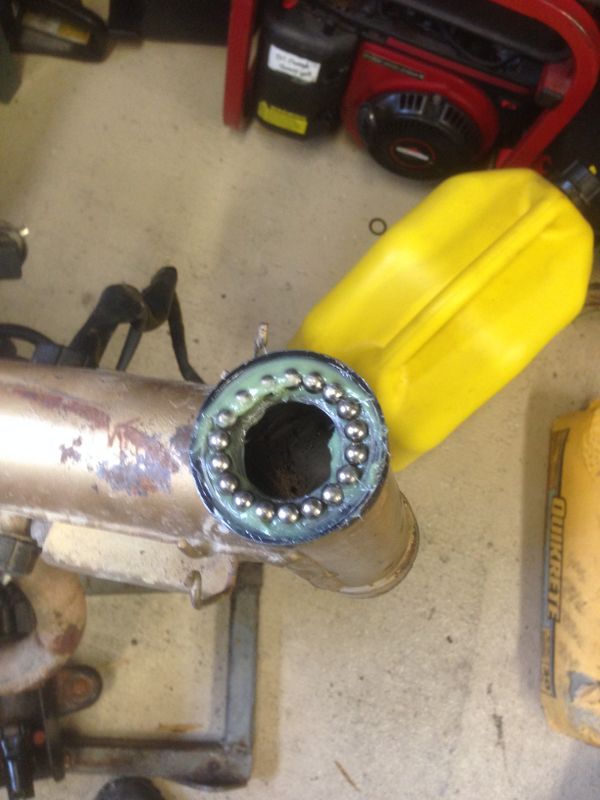
I greased and temporarily installed the triples with the OEM ball bearings, but they will later be replaced with a set of aftermarket tapered roller bearings.
Test fitting the new triple trees temporarily with the 250r forks which are way too small in diameter.
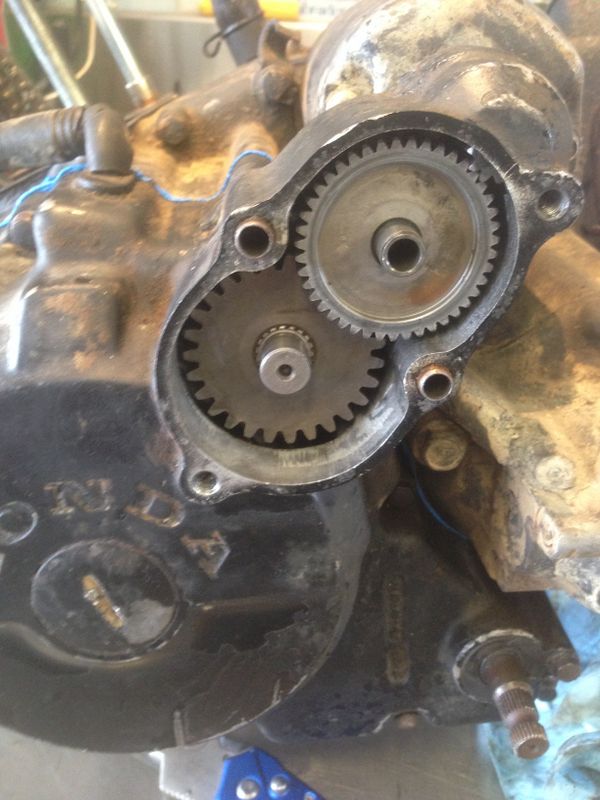
EBay also came to the rescue for the electric start. With my replacement wiring harness installed the starter worked but the reduction gears were missing, a quick search eventually found a reasonably priced set in the states and had them sent up. They fit perfectly and I now have working electric start! In the future I'll install an EBay starter rebuild kit as mine sounds a little rough.
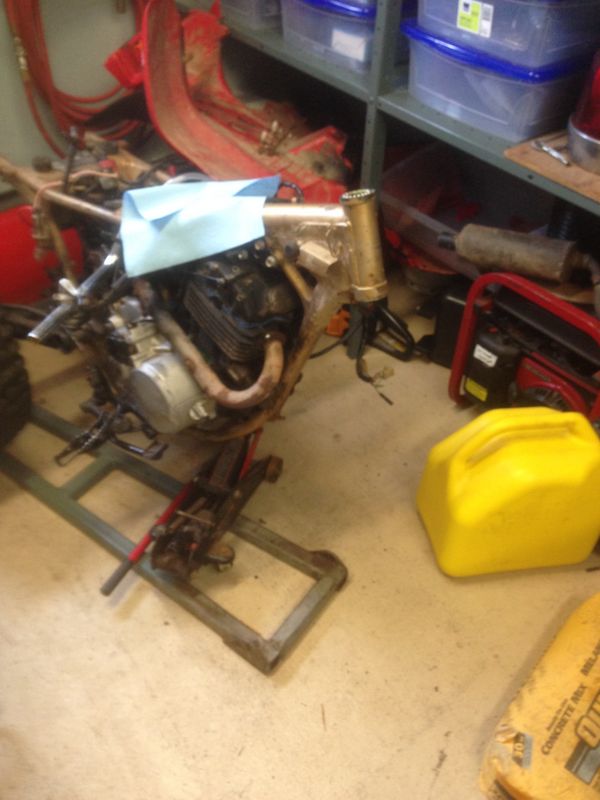
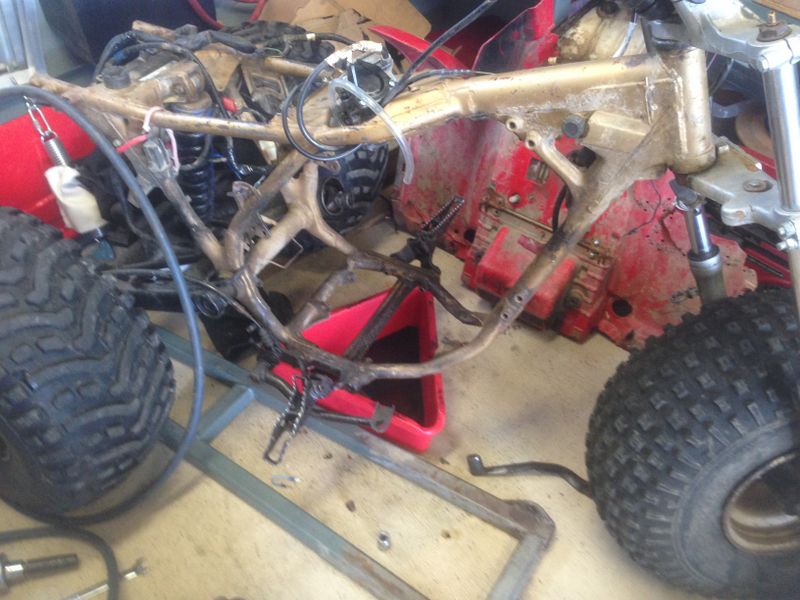
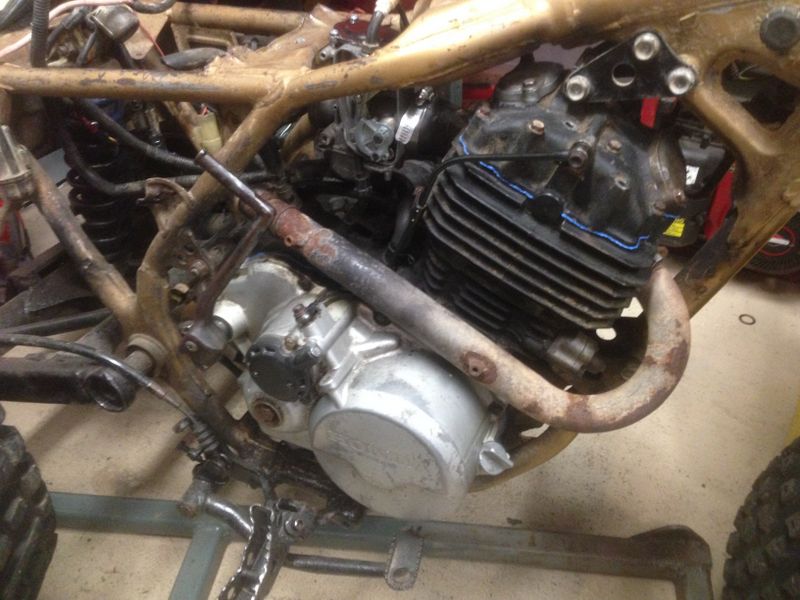
The engine that came in the bike wasn't running and the outside cases were cracked (and leaking oil) because the motor was loosely bolted in place with only two bolts as opposed to the proper four mounting points. I picked up a used supposedly good motor out in Conception Bay North and bolted it in place. My new wiring harness was delivering spark and I was getting gas through my rebuilt carb but the bike would still not start. I left the 250sx project for the summer to tackle other projects around the house.
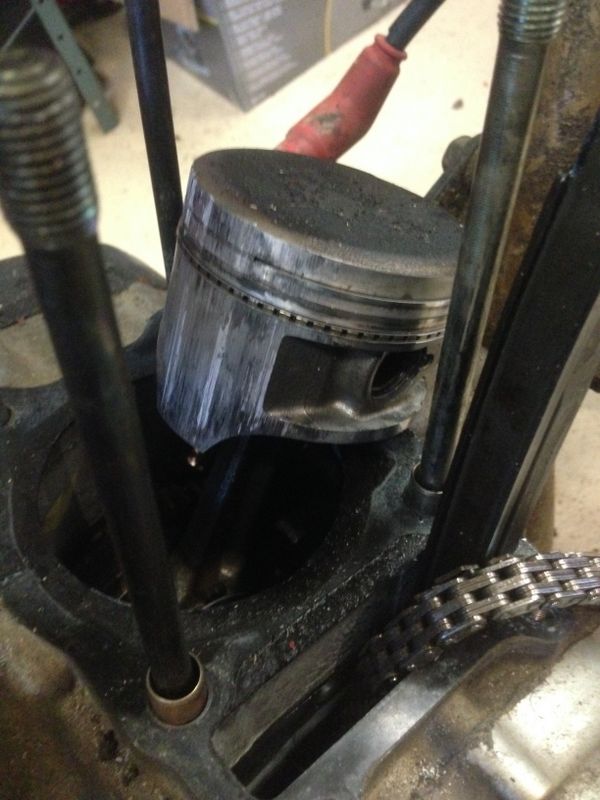
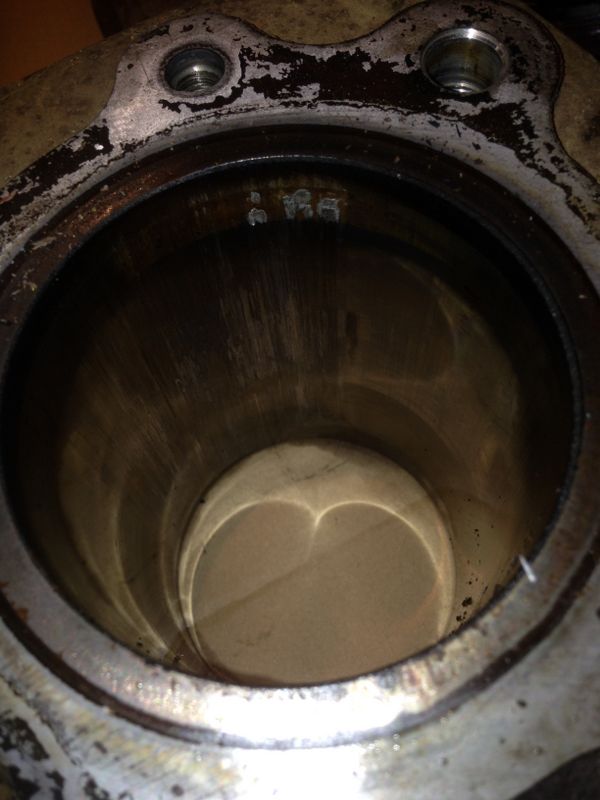
August 2016: I Recently got back at at this project, I didn't have a metric adaptor for my compression gauge so I took the off valve cover to check timing which was dead on. Next I removed the head and cylinder to find that the piston and cylinder were completely toast. Low/no compression was the reason the replacement engine wouldn't run.
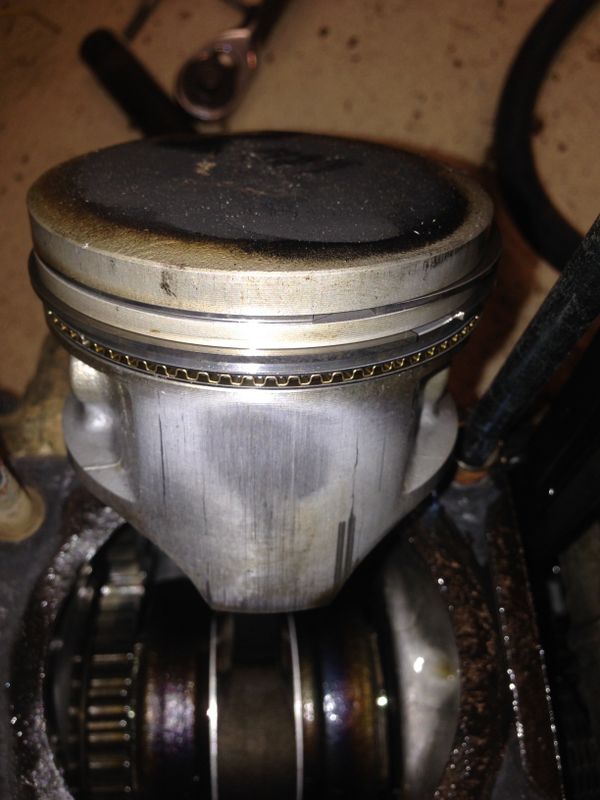
Thankfully the engine that came in my bike (with cracked cases) has a great piston and top end.
I removed the new/used engine from the frame, and between the two motors I threw together a Frankenstein one. It's far from perfect as there are a couple bolts cracked off in the head, but it has some fresh gaskets, it no longer leaks oil and it fired right up!
I ran the bike around the backyard to make sure the engine was OK and that all the transmission gears worked, I was happy to find all was good! My plan for now is to paint this Frankenstein motor and use it for awhile, eventually I'd like to swap in a 300 Fourtrax 2wd motor.
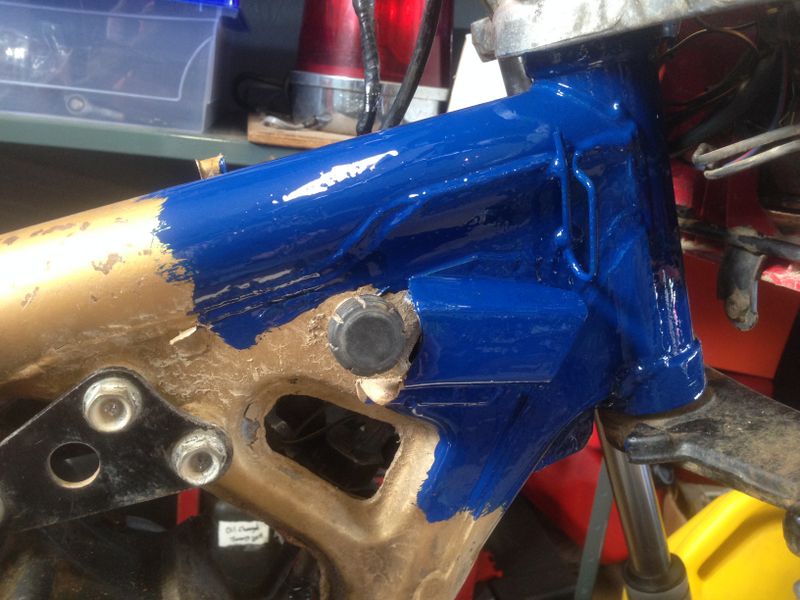
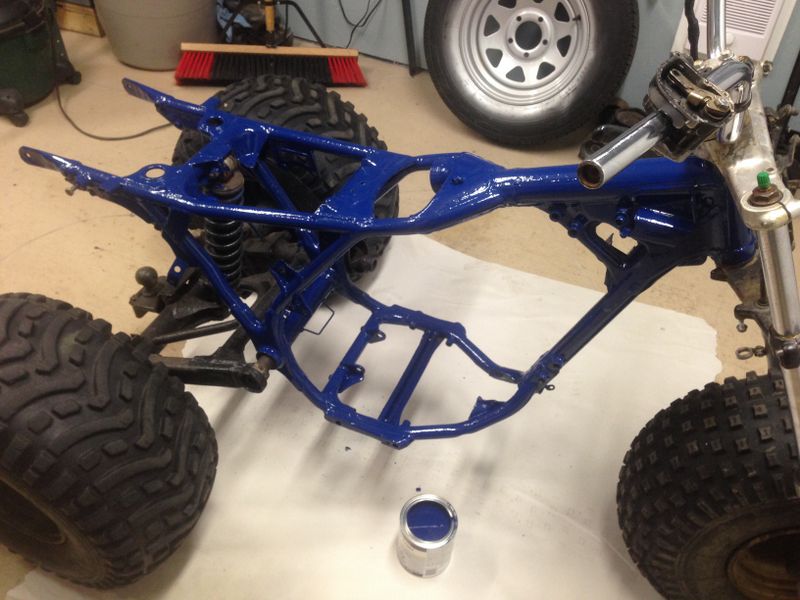
I've been contemplating the color scheme for this project and have looked at literally hundreds of combinations. With this test spot of Amour Coat Oxford Blue I think I've finally settled on a plan. Oxford Blue frame, black accessories (engine mounts, swing arm - basically anything that bolts to the frame) and white plastics/tank finished out using '86 style blue/light blue decals and a black seat.
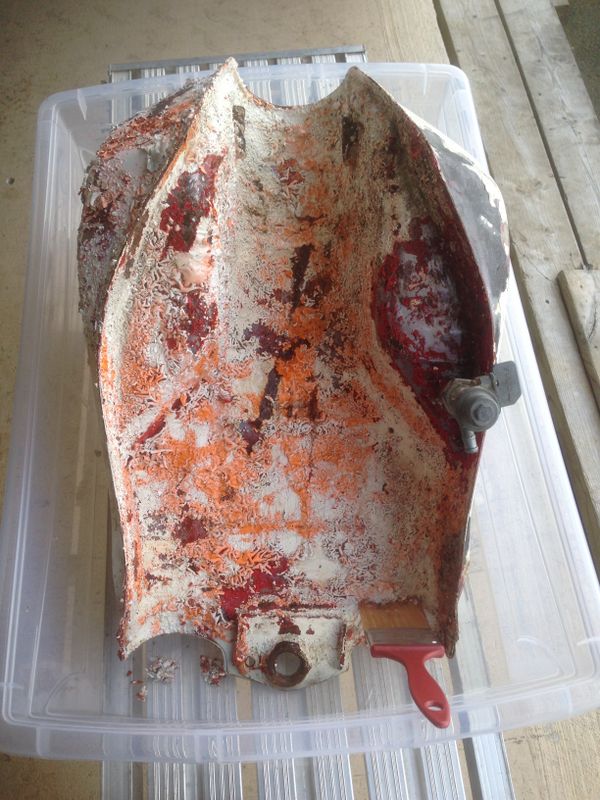
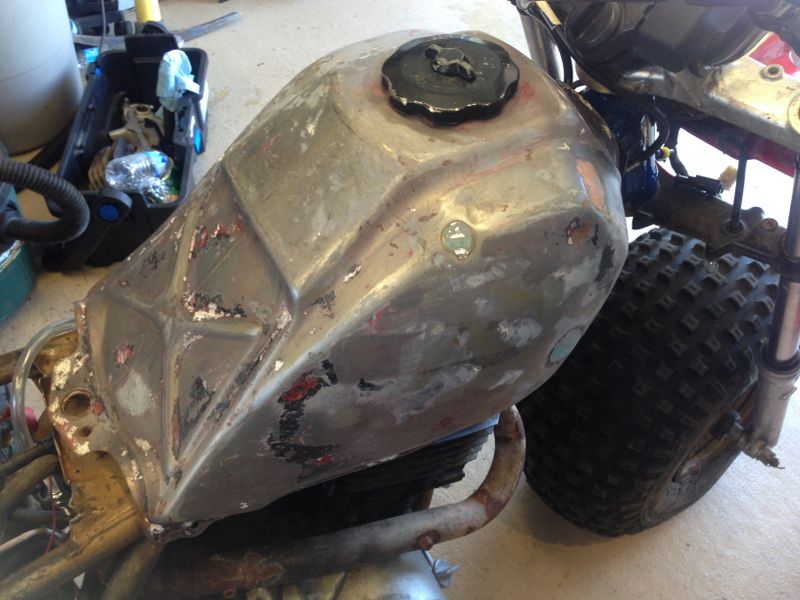
September 2016: The gas tank was in rough shape. It was originally red and at one point had a very good white paint job but had since been coated a couple times with cheap white paint. It was peeling, cracking and in terrible condition.
Since there were so many coats I decided to use a chemical stripper to remove the old paint which worked great.
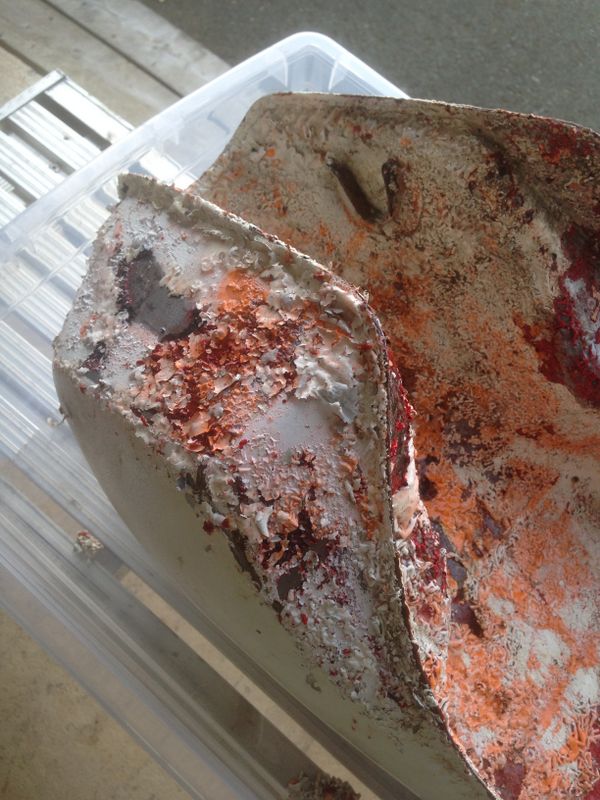
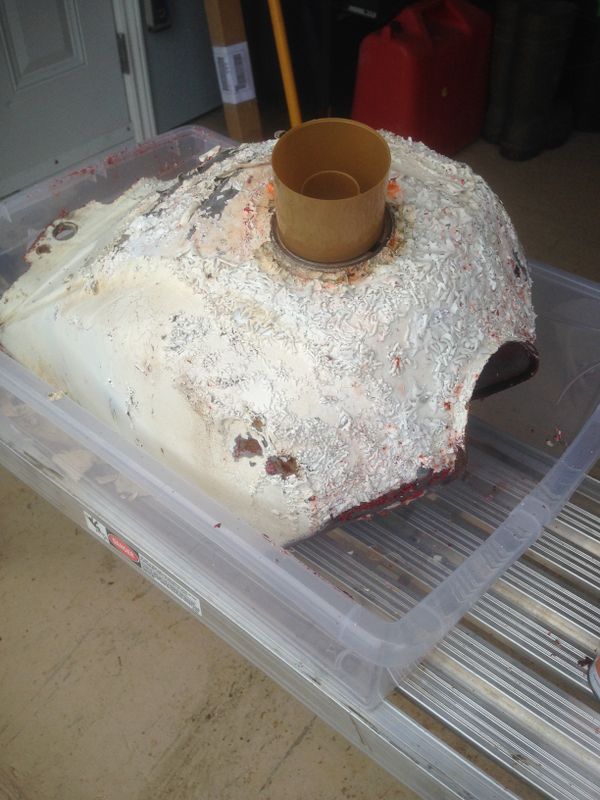
With the paint removed I found a few pin hole leaks in the bottom of the tank which I repaired with a resin epoxy repair kit.
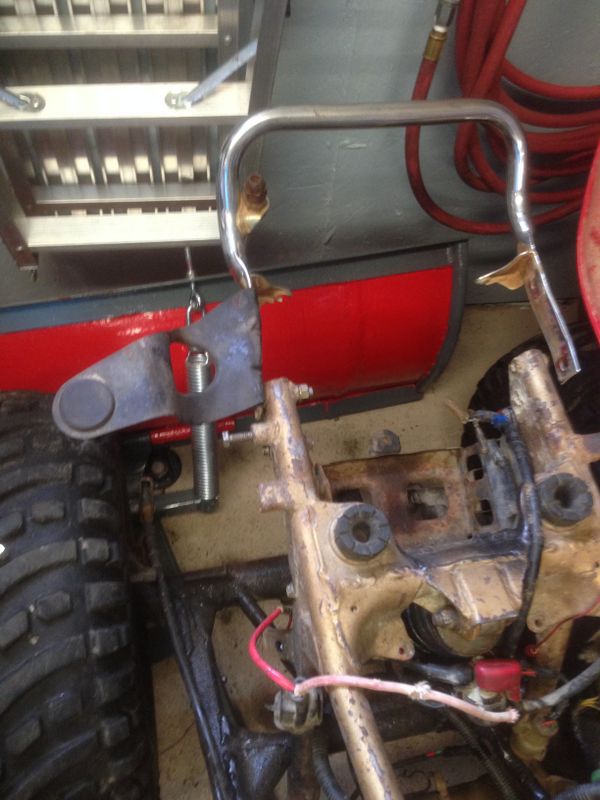
When I got the bike I found that the rear of the frame had been cut off at some point, and the Fender Support Brackets and Rear Grab Bar were missing. With decent used parts purchased via EBay, I mocked them in place using online pictures and pics from the factory repair manual. I will have to fabricate and weld approx 4-5" of frame back in place to bring the bike back to stock.
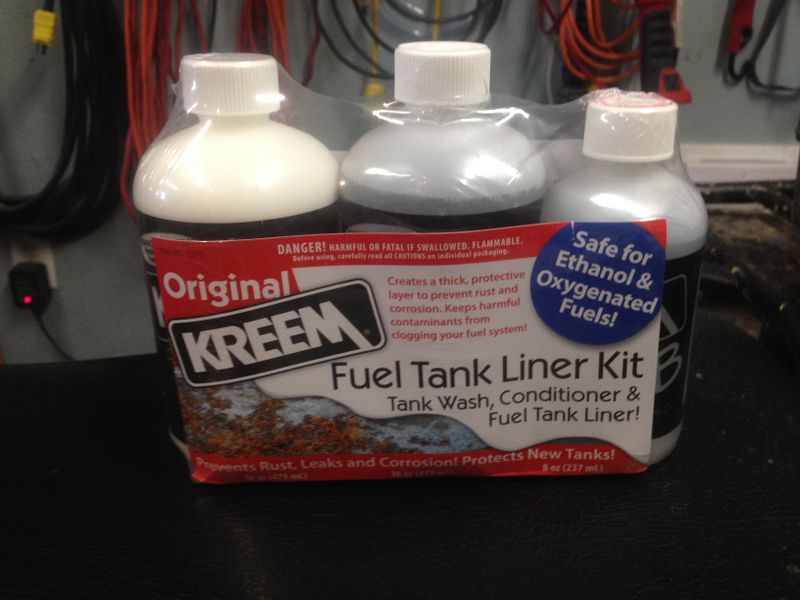
Gas tank stripped and ready for bodywork & paint. The resin tank repair kit wasn't great, I checked into having the tank coated inside locally at a cost of almost $300! I now have a Gas Tank Kreem kit on the way via EBay which is a do it yourself product. The kit strips and cleans the inside of the tank, and the last stage is a coating that creates a plastic liner on the inside of the tank. Online reviews are good so I will give it a go.
The resin epoxy repair kit that I repaired pin hole leaks with earlier started to leak again. I've since removed the Epoxy product and installed a Permatex putty repair kit which seems to be working well. My Kreem kit finally arrived so I'm looking forward to properly repairing this tank from the inside to prevent future leaks.
October 2016: Tonight I began fabricating the missing section on the rear of the frame.
The new tube was squat and shaped like the factory piece then welded in place.
The repaired frame now allows the fender support and grab bar to be fully bolted in place using two bolts.
A previous owner cracked off two bolts that held a mangled foot peg in place and welded it on instead! I cut off the bent up foot peg, drilled out the old bolts and test fit my EBay replacements to check fitment before removing them again for paint.
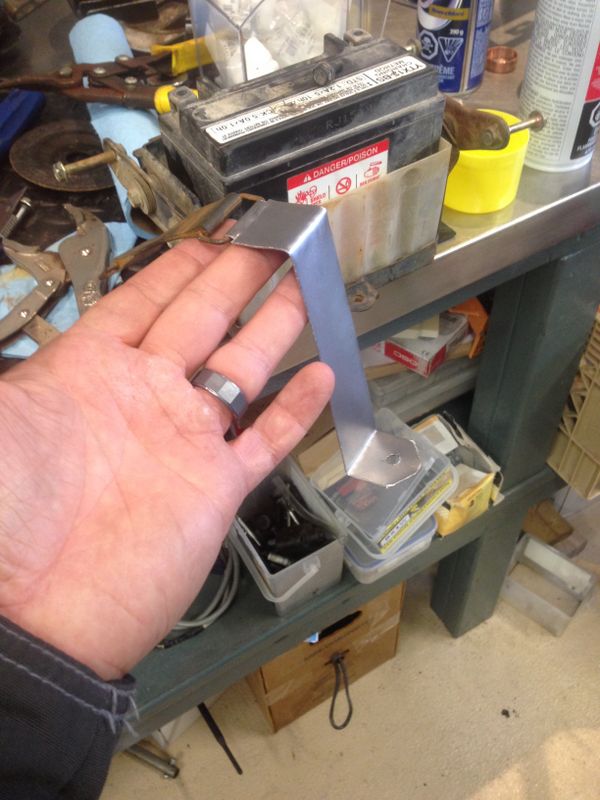
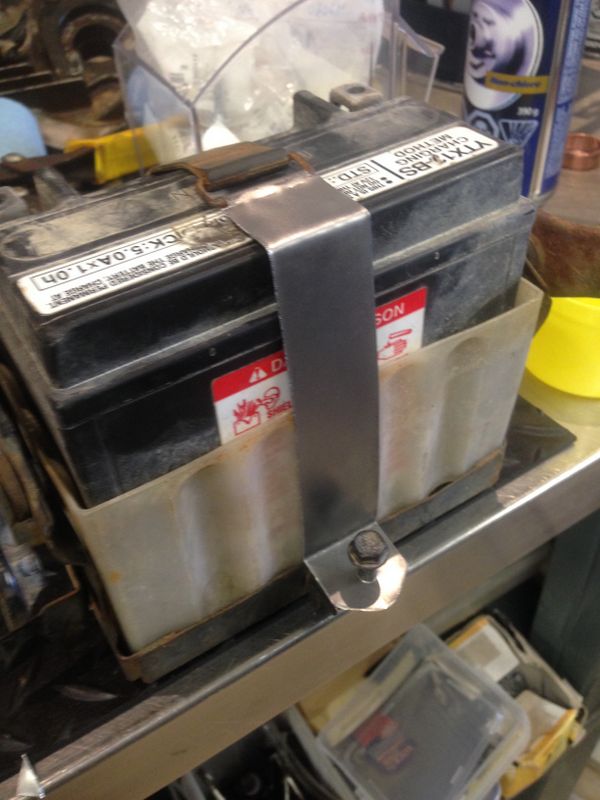
The OEM battery box was missing and someone welded one to the frame. I cut off the incorrect piece and ordered a proper replacement from EBay. Unfortunately they are very hard to find (cheap) with the hold down strap included, so I bought one without that piece. Luckily I had a spare OEM Honda rubber strap on hand, so I fabricated the rest of the part with some sheet metal I had in the garage.
This should hold the battery good and secure on the bumpy trails around the house!
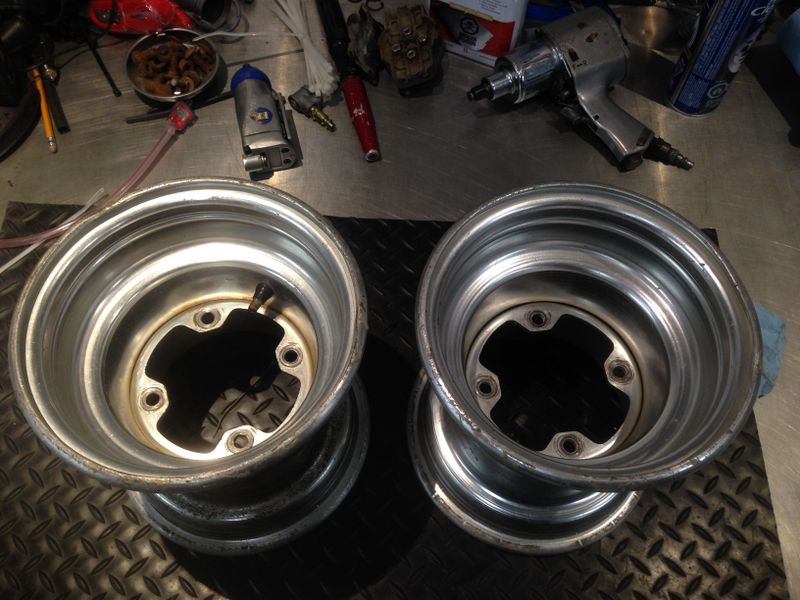
Part of working on a project like this is constantly checking EBay and local classifieds for deals. I found these fantastic OEM Honda 8" Aluminum rims originally from a 200x on our local classifieds. These will look great and eventually replace the tired wallowed out steel wheels in the back. 3" wheel spacers will be needed for them to fit with the drum brake and will provide a little more stability as well.
With frame repairs all complete it was finally time for paint!
The frame is now fully coated in Armor Coat Oxford blue. Parts like the rear swing arm, foot pegs, battery box etc will be painted black to break up the color and mimic how Honda paints the frame and accessories in the factory.
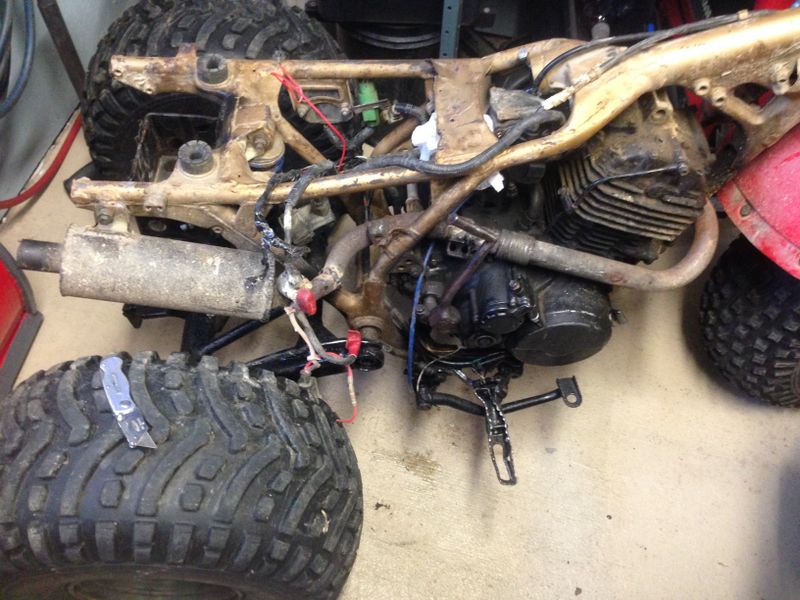
November 2017: The year is not a typo, its been awhile since I got a chance to get back at Project 250sx. Last December I completely disassembled the bike partly to start working on the rear swingarm and also to make room for Project Powertek REV & Project Foreman in the garage over the winter months. As often is the case, life got busy and next thing I knew a year went by! This month my brother Steve was home for a visit so we got a chance to get project 250sx back on track.
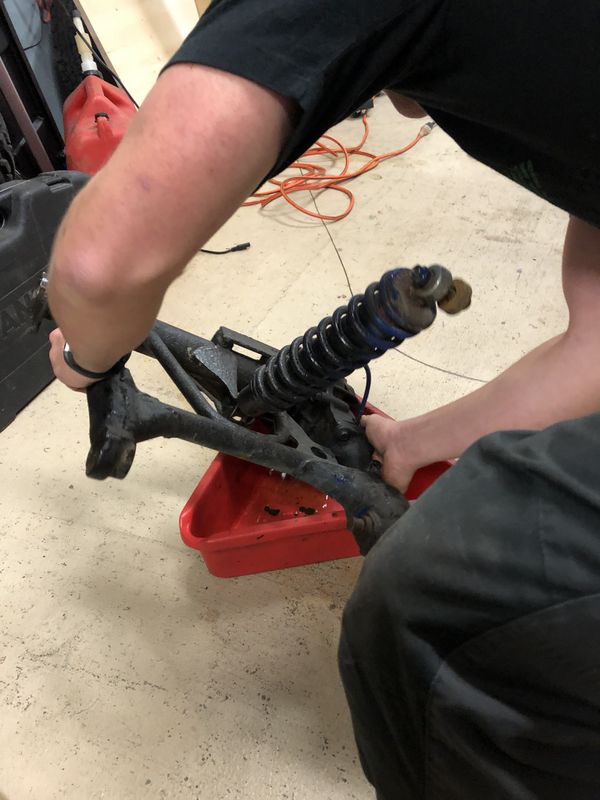
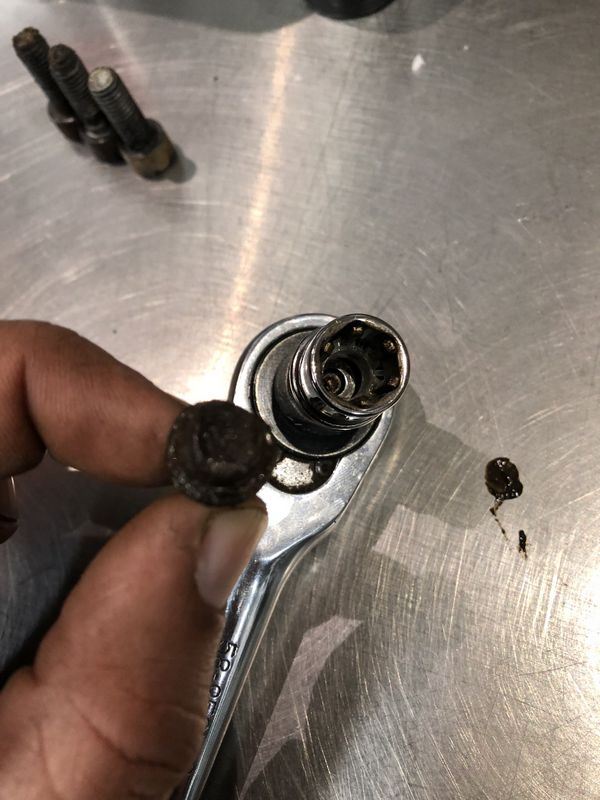
First up was laying out and organizing all my existing, new & used parts then properly cataloguing and bagging them. Then we started disassembling the rear swing arm. A few of the bolts were in horrible shape, I got a chance to try out these specialty sockets (received years ago as a gift) and it actually worked to remove bolts with rounded heads!
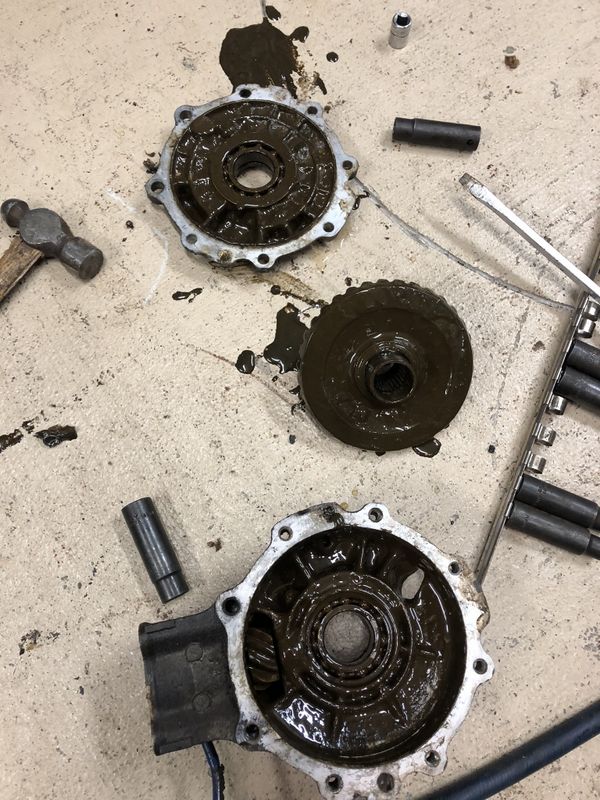
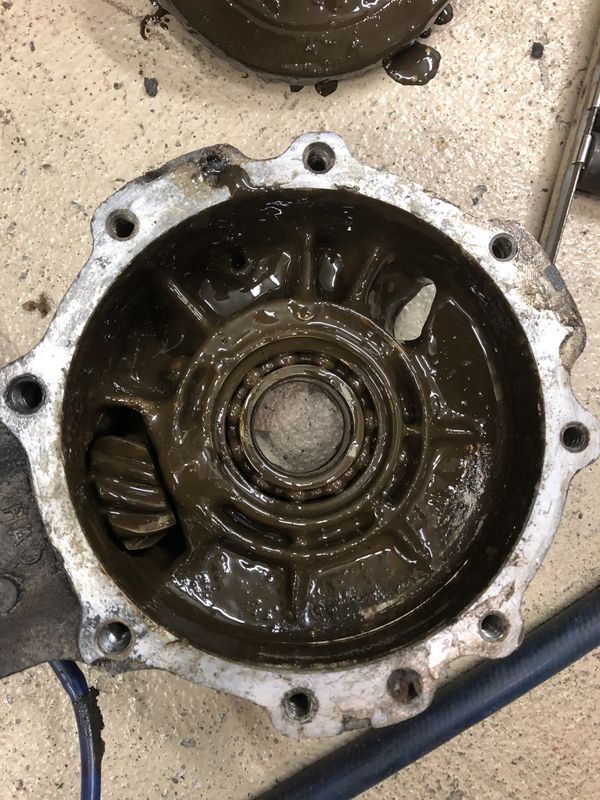
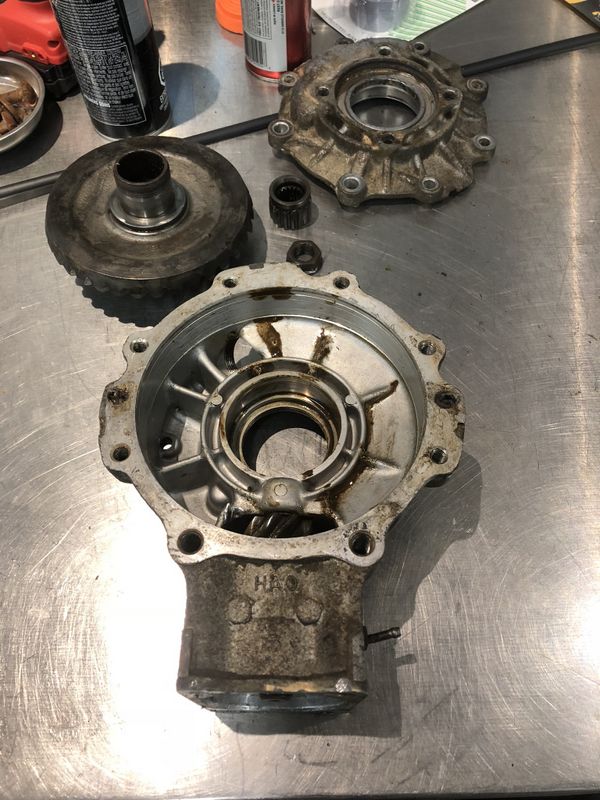
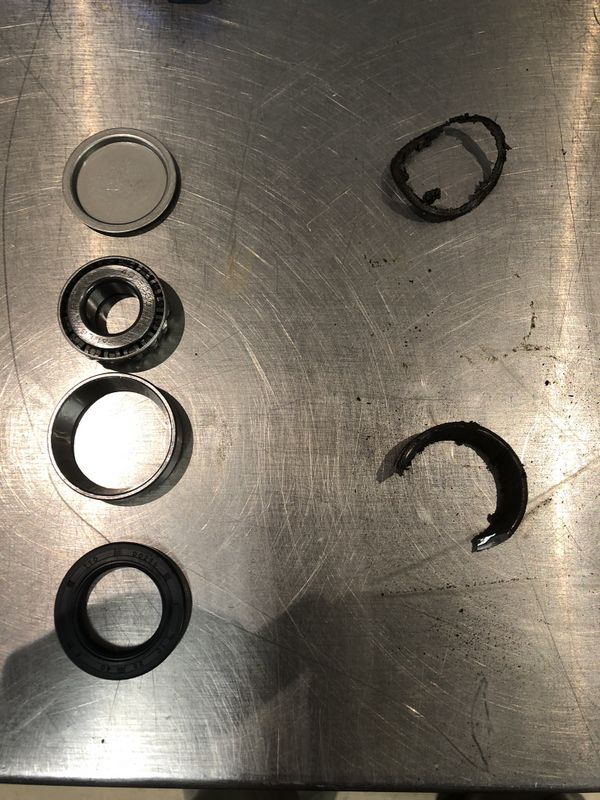
Inside the differential was a mess which was not unexpected given the condition of the rest of this machine. The ring and pinion appear to be OK but unsurprisingly all of the bearings are toast.
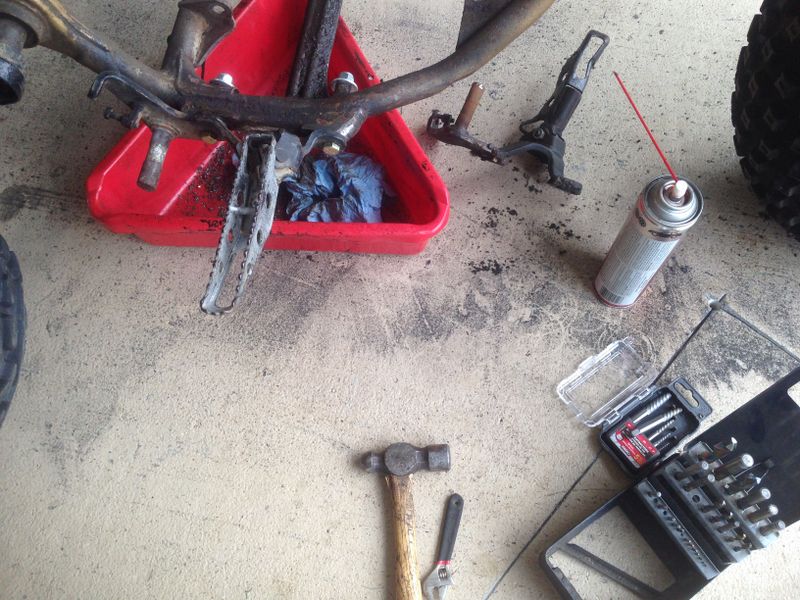
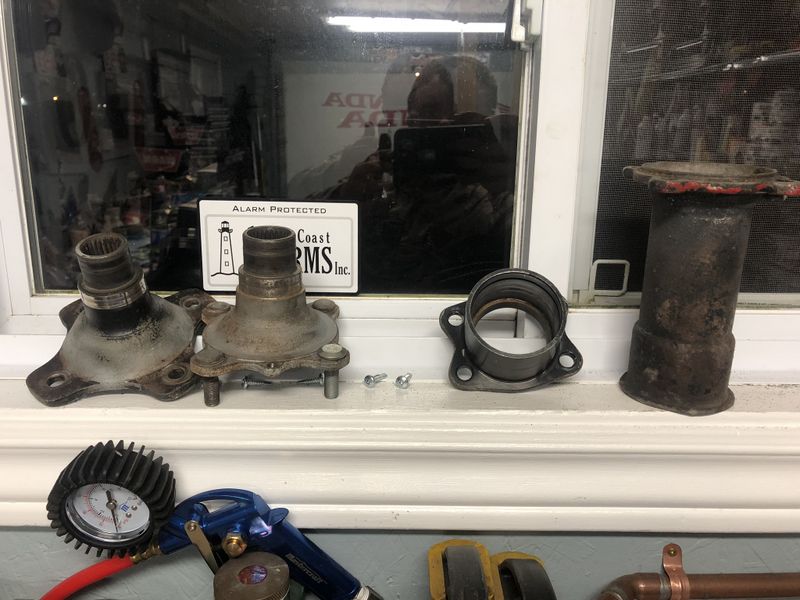
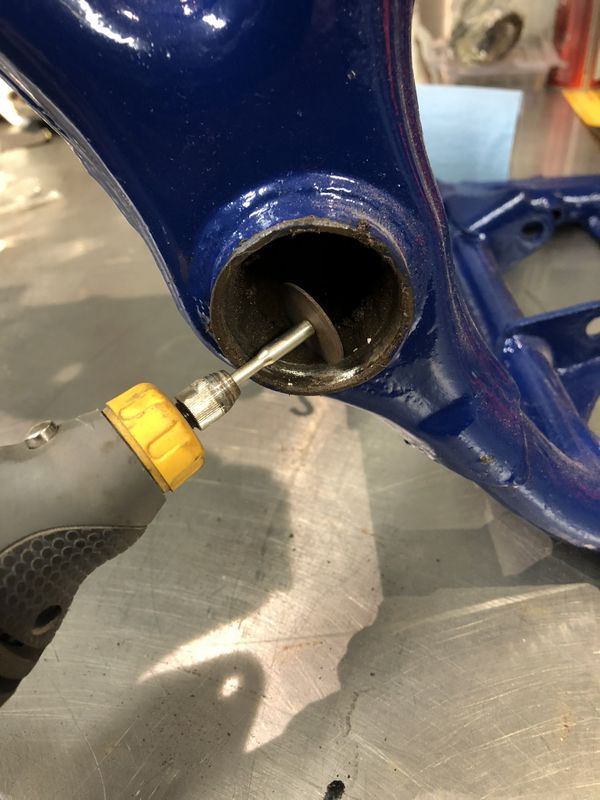
It took awhile but all the parts were soaked and scrubbed in a makeshift parts washer. The axle bearings & seals were removed, but I need specialty tools to do the pinion bearings, particularly a blind hole bearing puller.
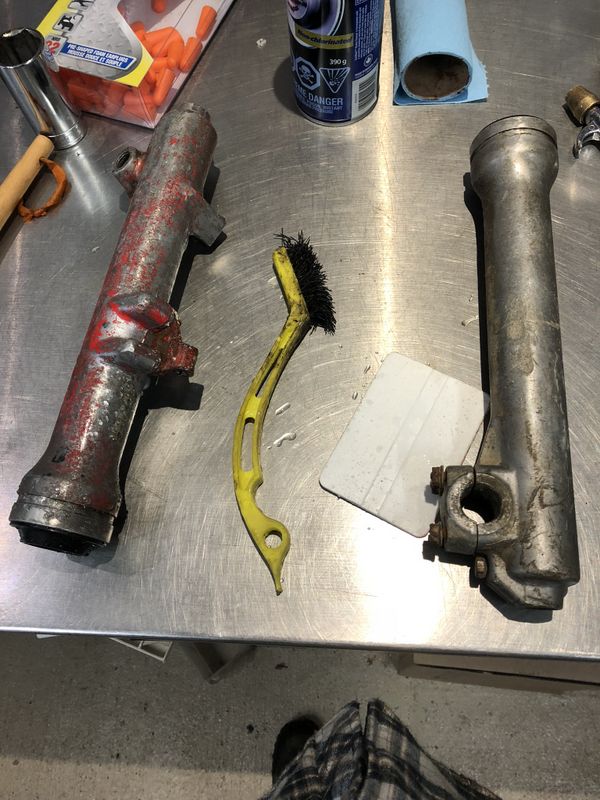
I also cleaned up my locally sourced used 250sx forks. The lower sections were chemically stripped of their previous poor paintjob and thoroughly cleaned.
I got a chance to try out my new mini sandblaster which worked very well stripping paint and rust from my swing arm parts.
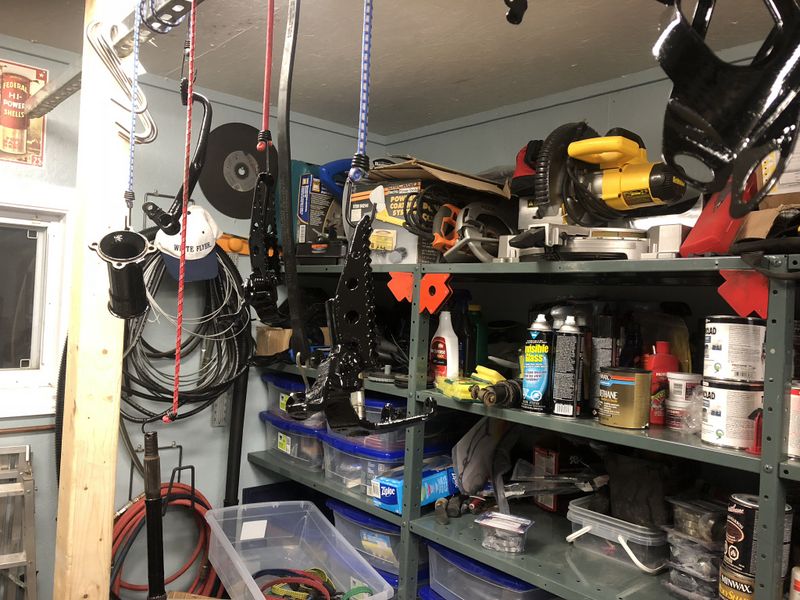
My moose hanging rack doubled as a painted parts drying rack. In addition to the swingarm parts, I painted everything else I wanted black with a couple coats of Tremclad Gloss Black paint.
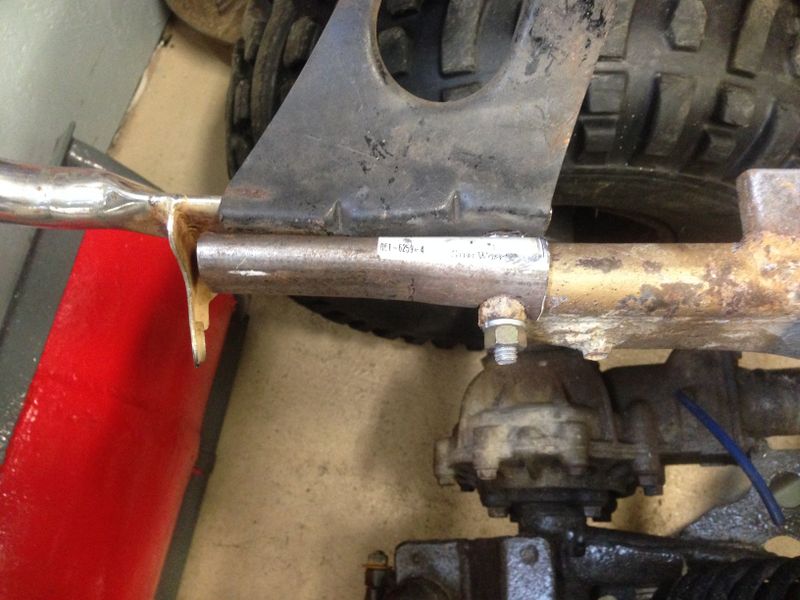
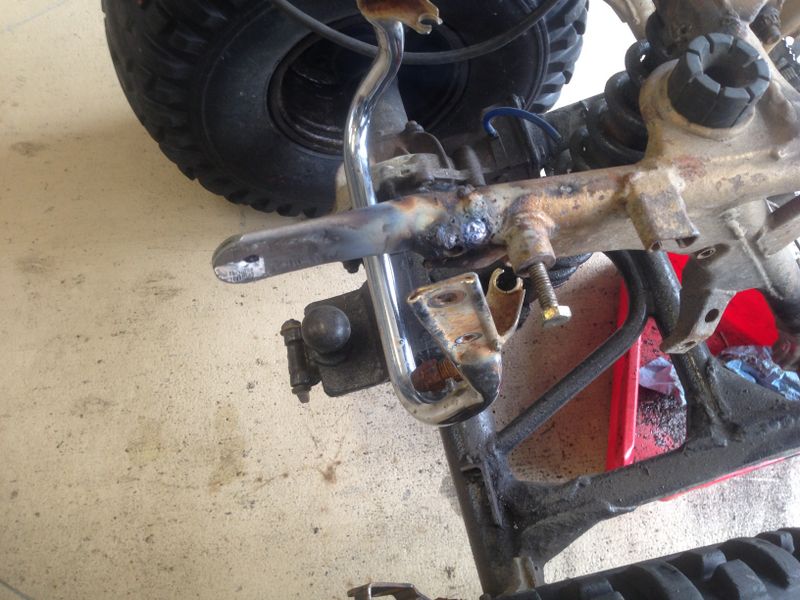
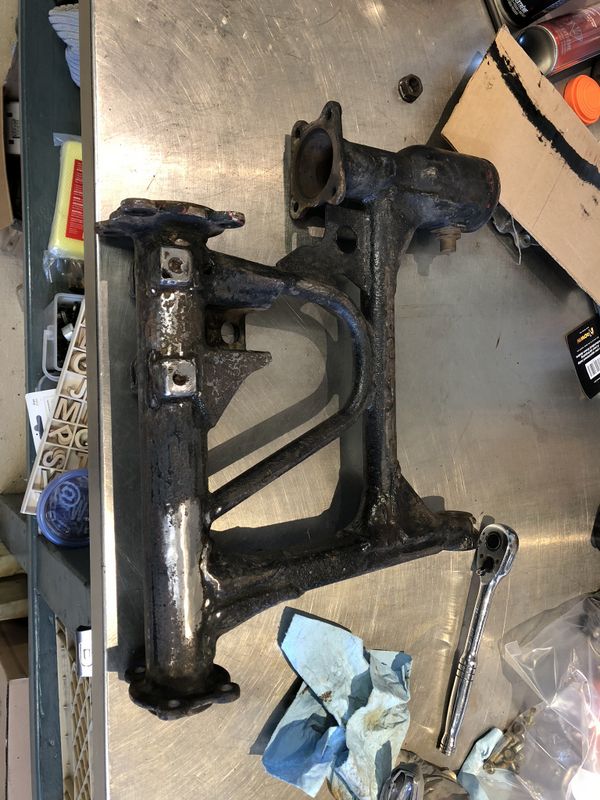
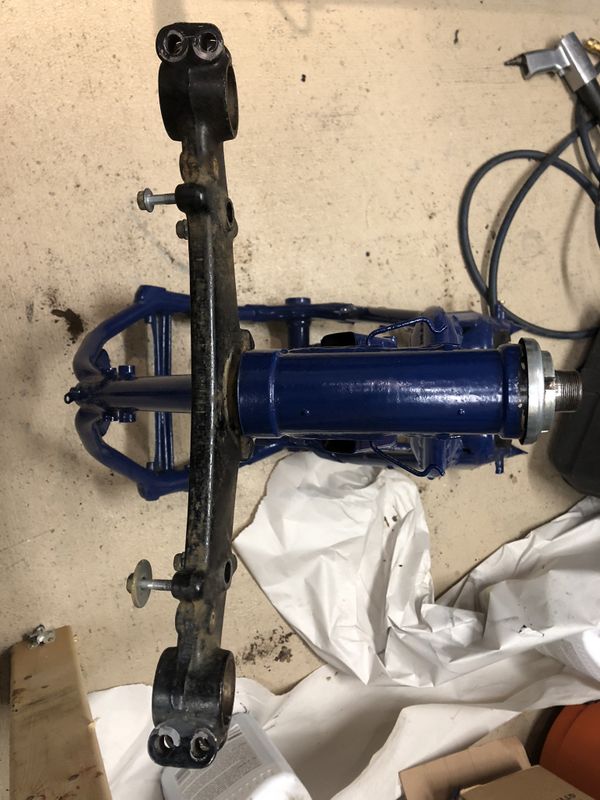
The swingarm itself was cleaned, then there were some extra bits previously welded to it including a terrible homemade trailer hitch that I cut off and cleaned up. A little welding and a fresh coat of paint will make the piece as good as new.
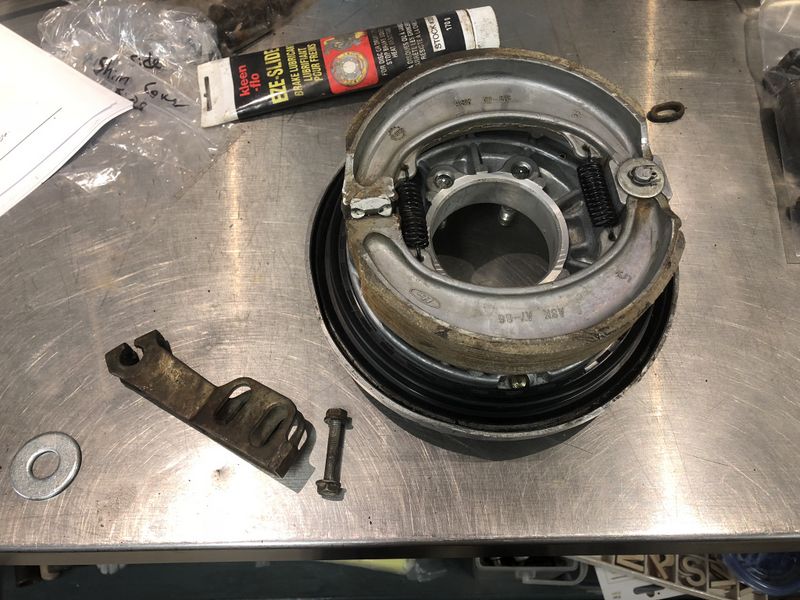
I previously discovered the rear brake aluminum mounting panel was in very hard shape. It was cracked and even the piece that the cables mount to was cracked off and missing which would mean no working rear brakes. I sourced a good replacement on EBay and had it shipped sometime last year. The brakes on my bike oddly contained a brand new set of shoes, all the parts were simply cleaned up and fresh seals installed.
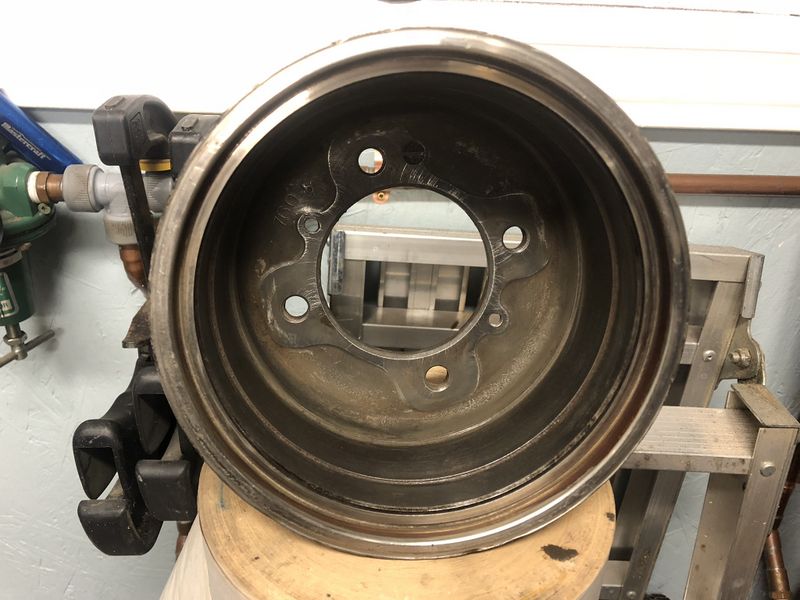
The brake drum itself was in good shape and just needed a though cleaning with a wire wheel and a coat of black high temp paint on the outside for a fresh clean appearance. This was the very first step in actually putting a part of the bike back together!
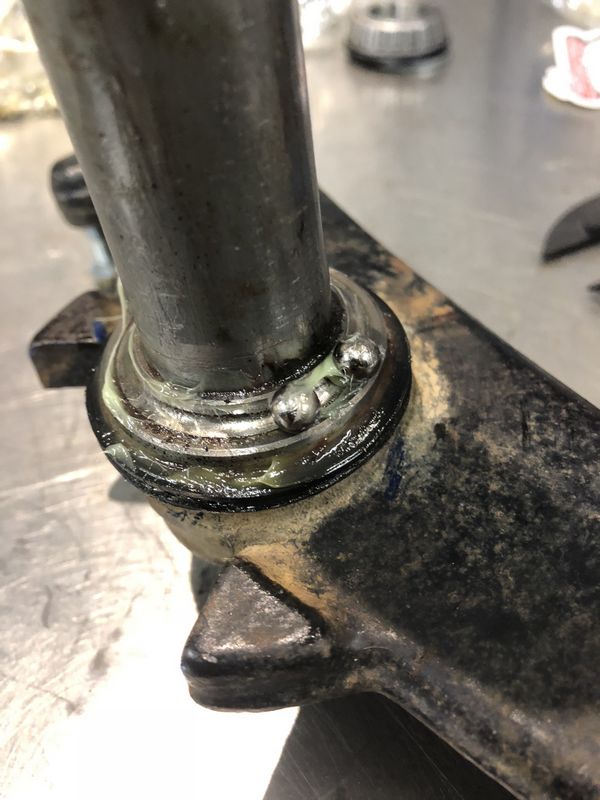
The washer and cotter pin for the rear foot brake were missing so I found a large washer, drilled it to the proper size and installed with fresh seals and grease.
As mentioned last year I temporarily installed the replacement OEM 250sx triple trees with the OEM individual ball bearings which were in rough shape.
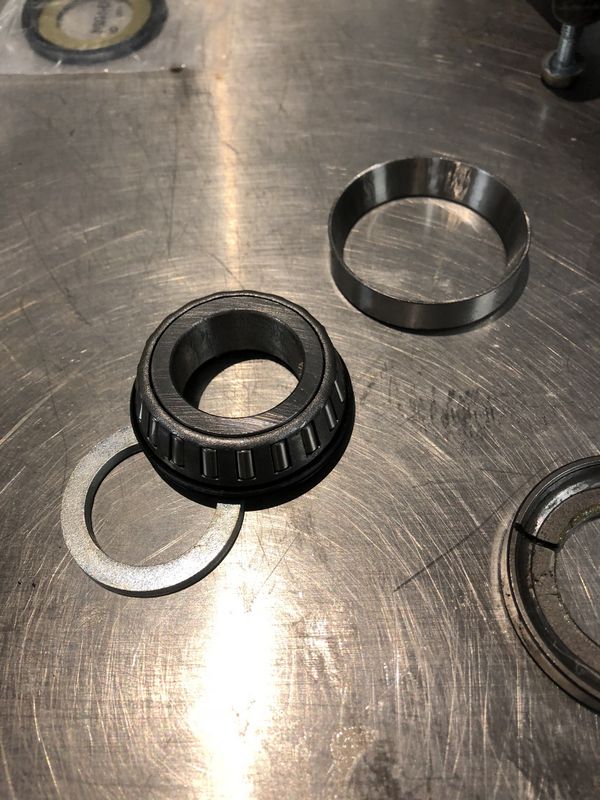
I picked up an All Balls steering stem tapered roller bearing kit and installed it following the included directions.
The old races were popped out using a long round punch & hammer, the new races installed with ease using my aluminum seal/bearing driver.
The lower bearing is a press fit, not having a press I used a piece of pipe larger than the steering stem and tapped the bearing in place with no trouble. Be sure to follow the directions and install the included washers if called for on your model bike.
The new bearings are a huge improvement over the stock style bearings. The new tapered bearings were properly packed with grease so they should last the life of the bike.
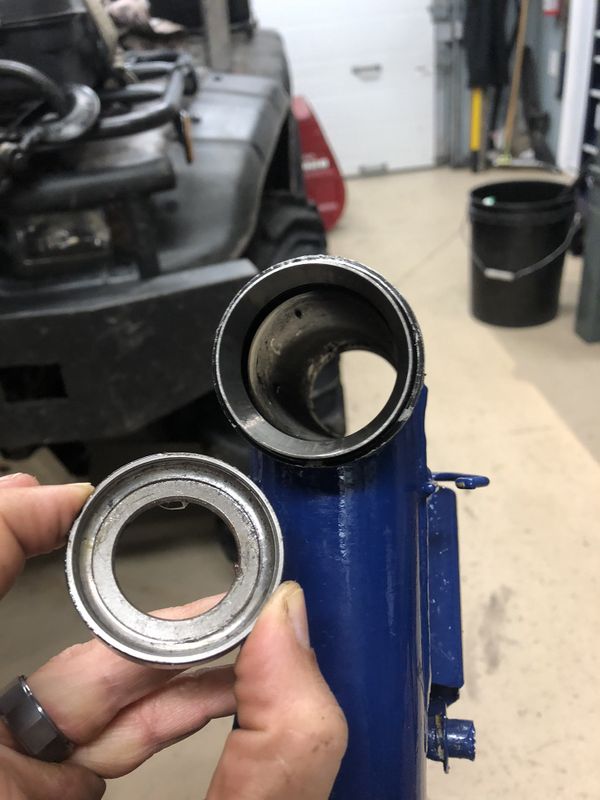
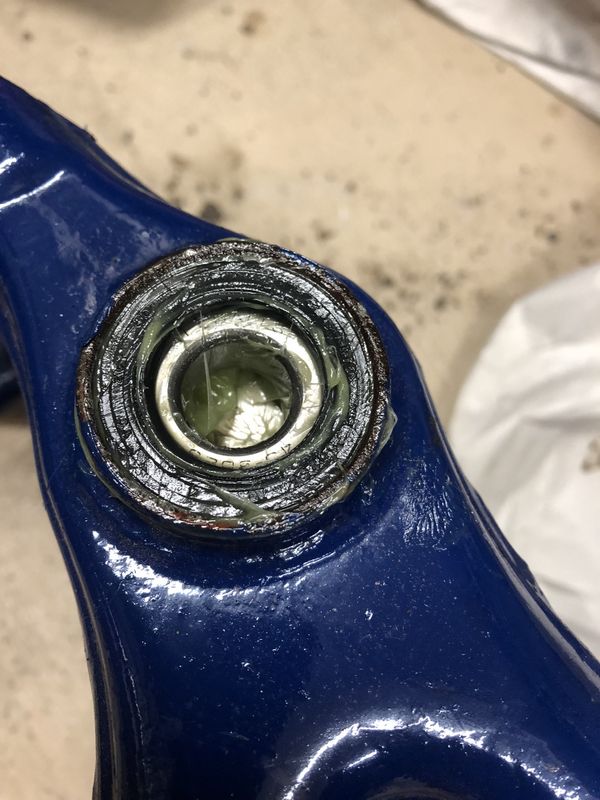
Next up was replacing the completely shot, seized, and rusted out swingarm bearings.
The races were seized solid to the frame I had to carefully cut each one with a Dremel tool, then split them with a chisel. This cut allowed them to fold inward and break free.
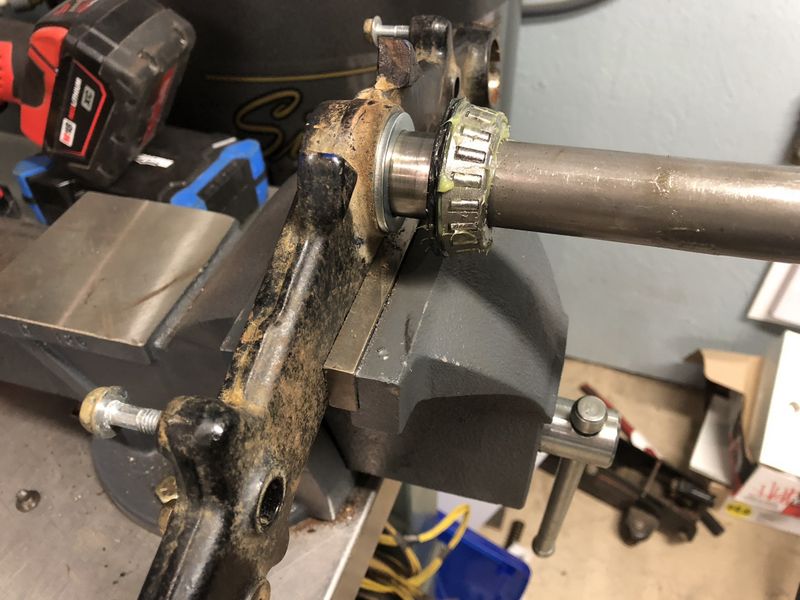
The All Balls kit provided everything necessary, bearings, races, seals and even the little backing plate that keep grease in the bearing and not leaking out into the cavity behind.
New bearings installed and ready to go. I taped over this whole area while the frame is stored awaiting final assembly.
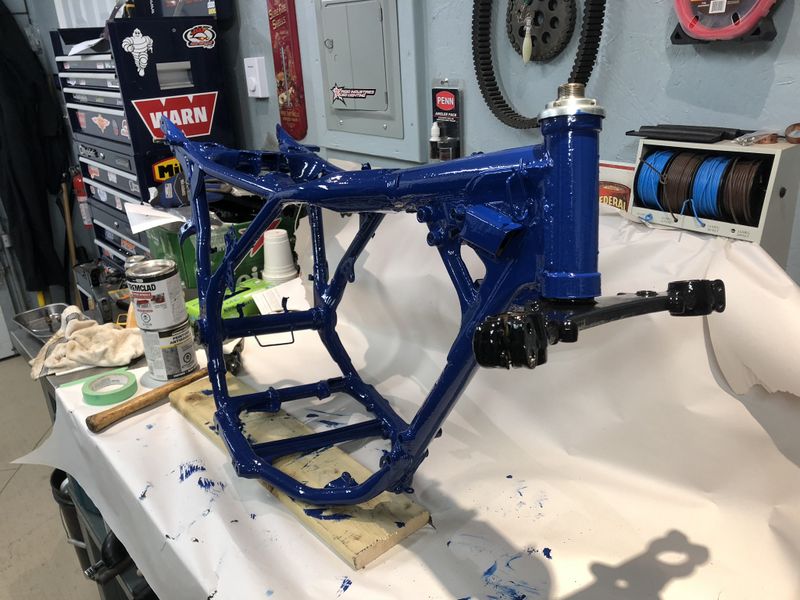
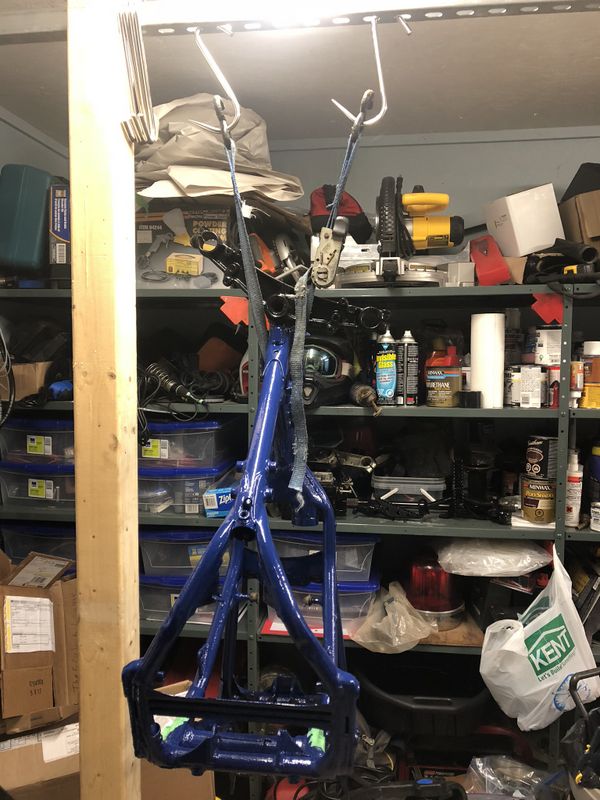
After a year of storage and only having one coat of paint I decided to give to give the frame a thorough second coat of Oxford blue. With the bike completely disassembled this time, it was much easier to give all the nooks and crannies a thorough coat. I also painted the triple tree lower Gloss Black.
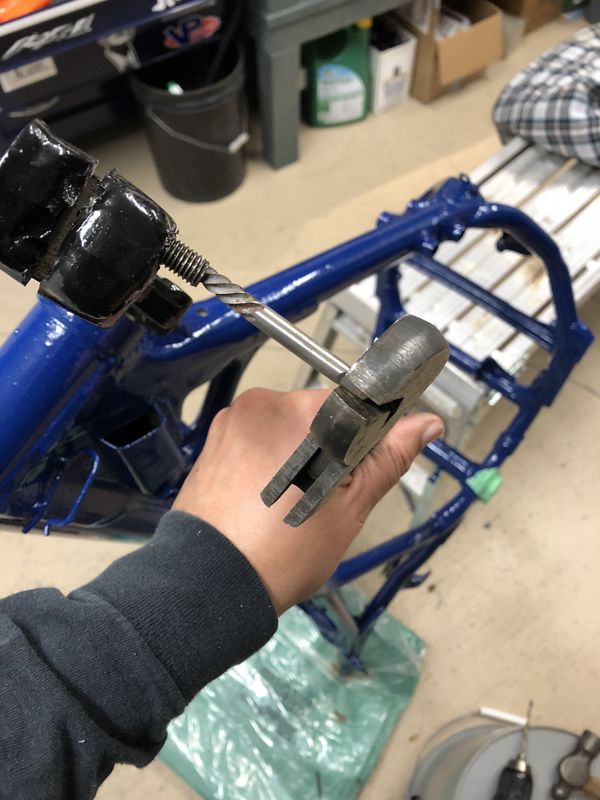
December 2017: While experimenting with the new triple trees & old slimmer 250r forks last year I manage to snap off a bolt in one of the lower bolt holes. I had tried drilling the bolt from one side last year snapping off a couple bits and later an easy out bit. This week I successfully managed to drill the bolt from the opposite side and remove the broken piece with a new easy out tool, now the forks are ready to be properly re-assembled!
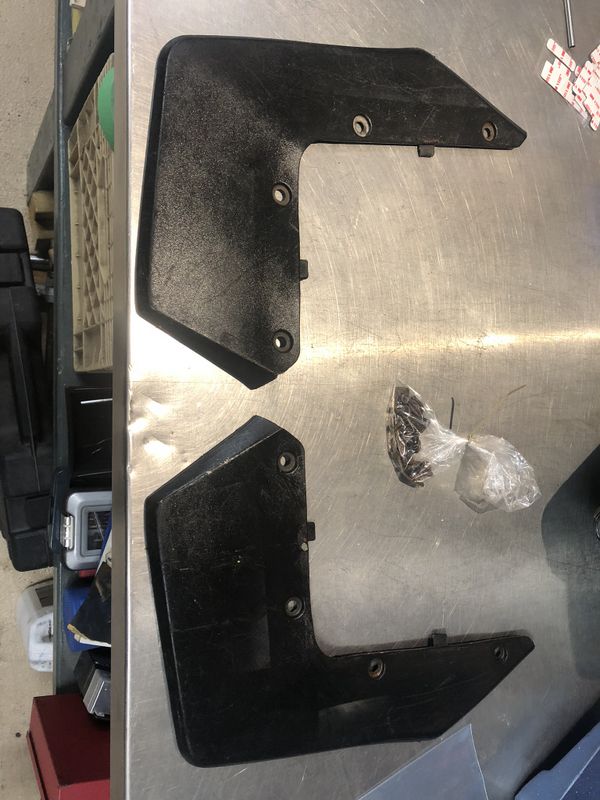
This past week another super deal came up on our local classifies, a pair of hard to find mud flaps for the rear fenders which were missing from my bike. They arrived on DRL bus from the west coast and included all the specialty hardware Honda uses to bolt them to the fenders.
So project 250sx is back on track and will hopefully continue after Christmas as I have lots of parts in stock now to keep going forward. Stay tuned for updates!
Cheers, MIKE
Copyright © 2025 Michael Smith |