|
Area51 - Mike's Miscellaneous Projects 2024: |
|
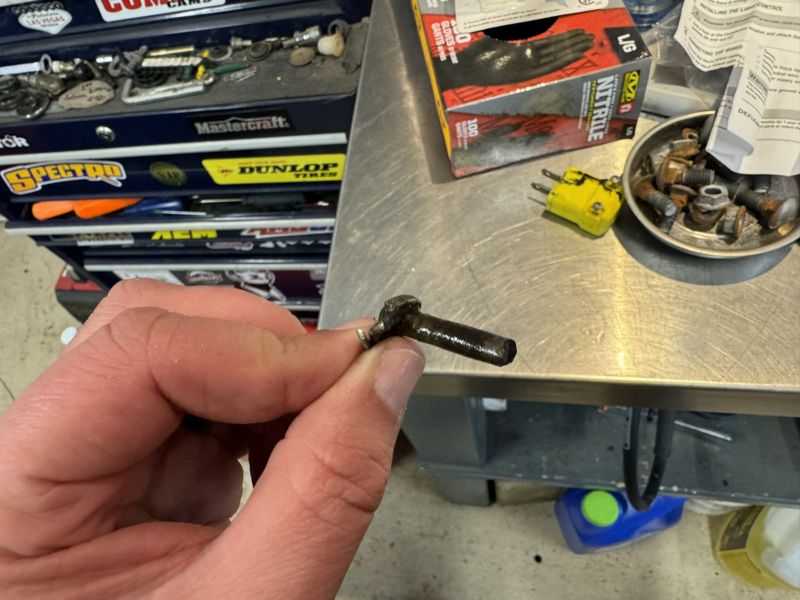
Quick repair on my Honda Snowblower: This week I cracked a shear pin in the right side wheel that engages the track. Most likely it was just worn from years of service, it was easily replaced with a spare already in stock.
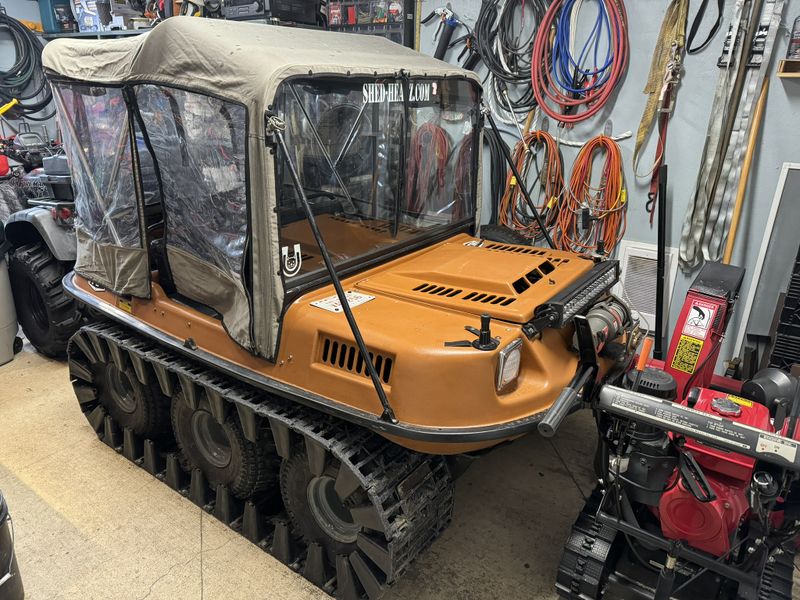
Project 6x6 is ready for winter, this week I reinstalled the 13" snow tracks, canopy and windshield.
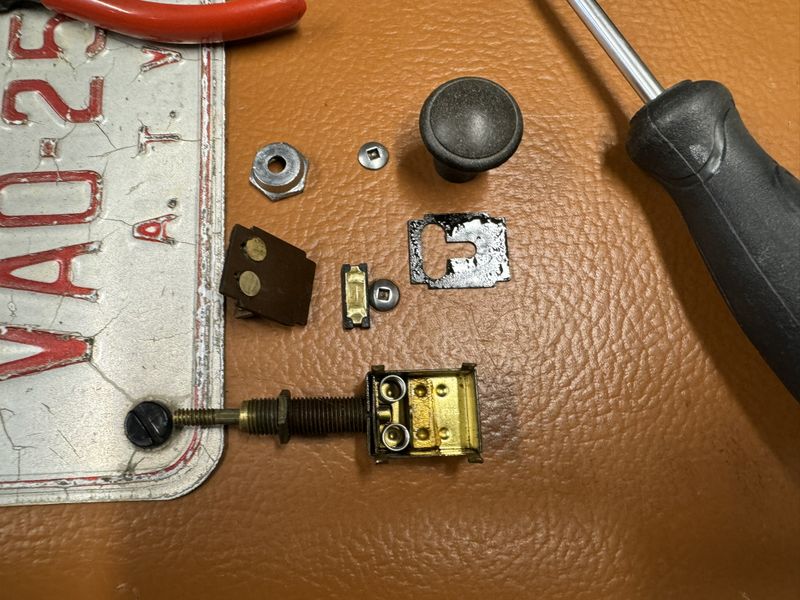
Noticed my headlights were blinking while driving on rough terrain. I took apart the old school light switch, polished the electrical contacts, reassembled and is now working good as new! I love working on old school repairable parts like this.
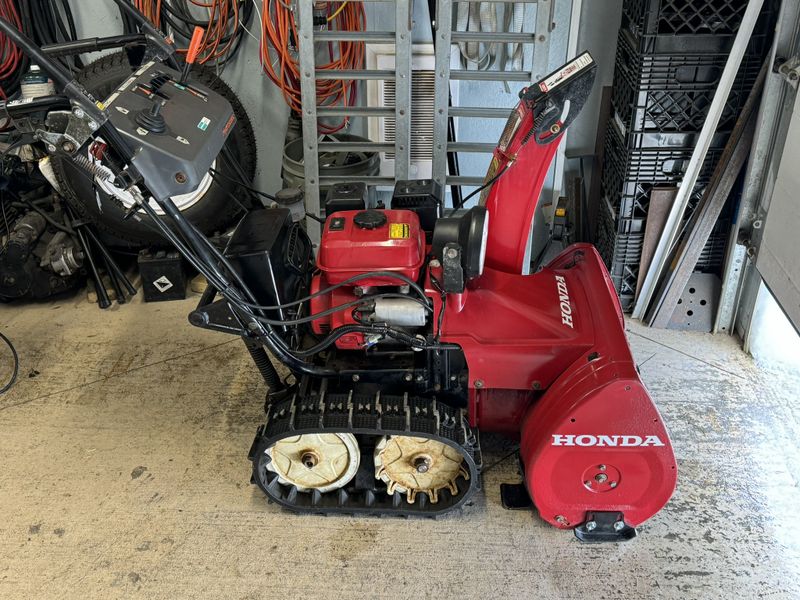
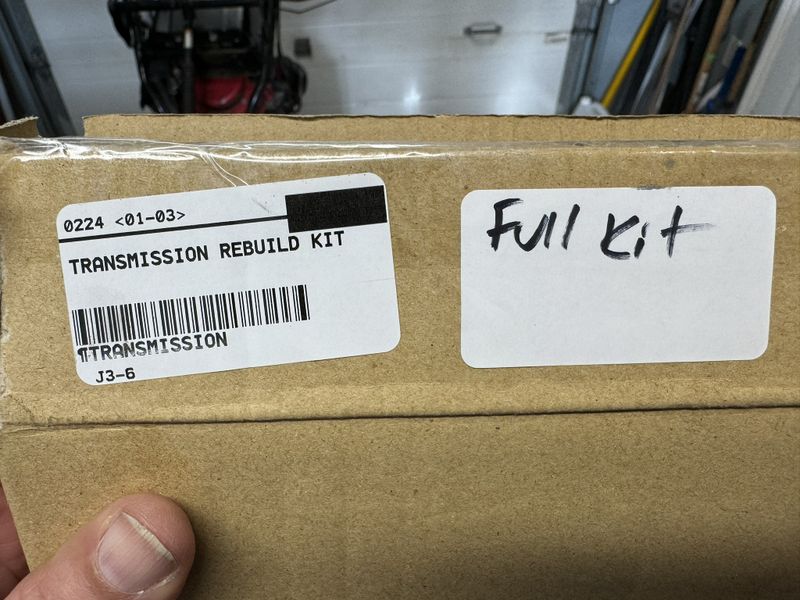
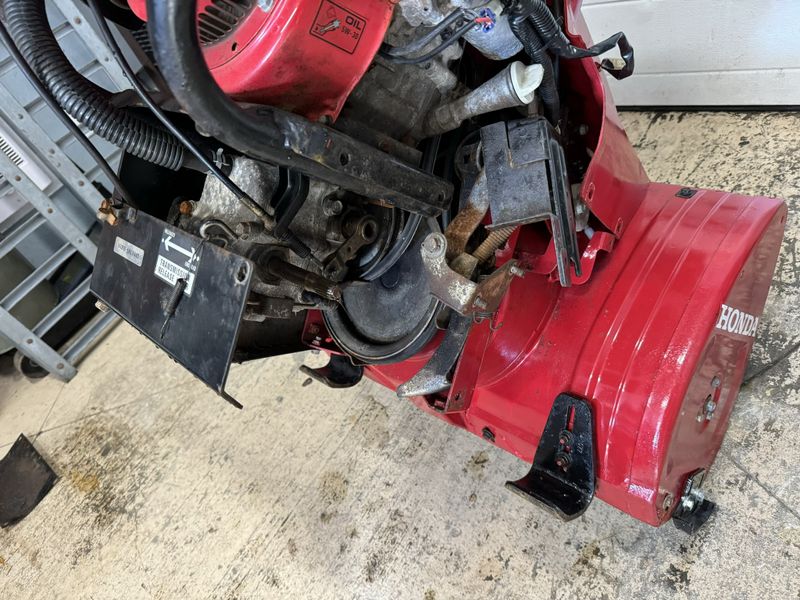
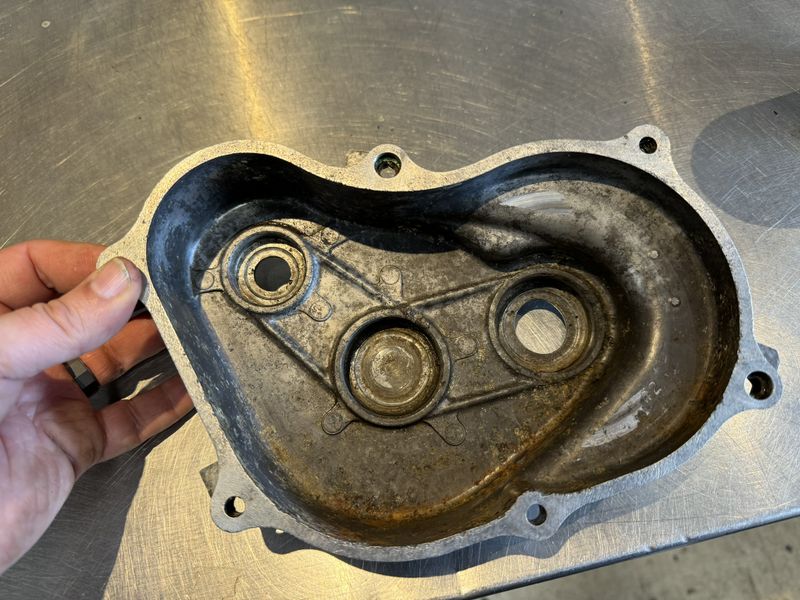
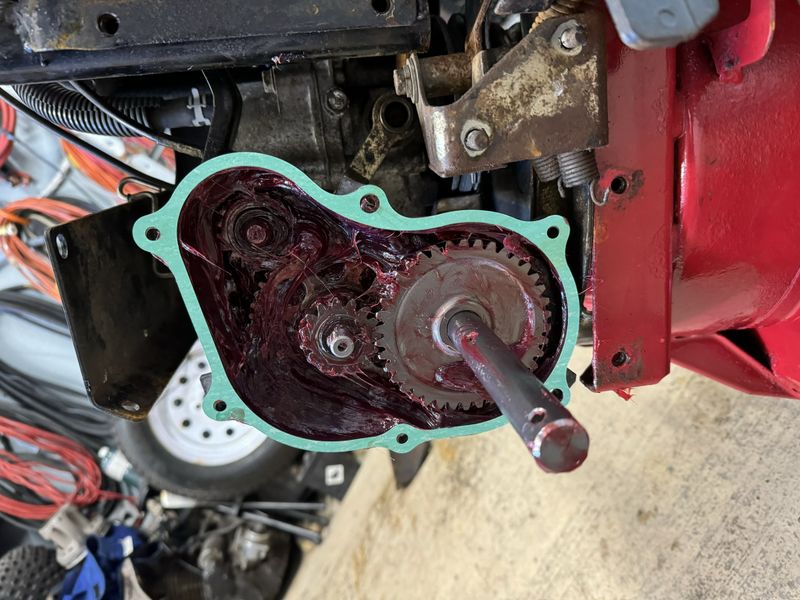
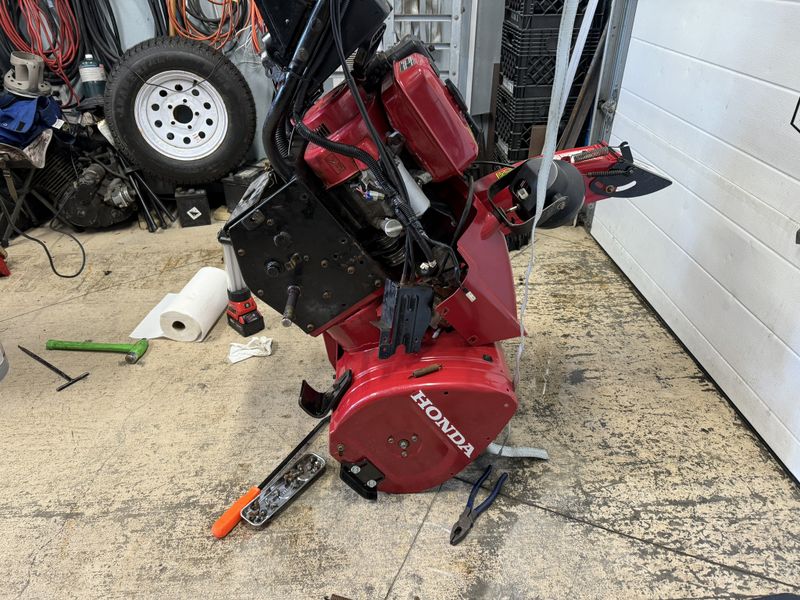
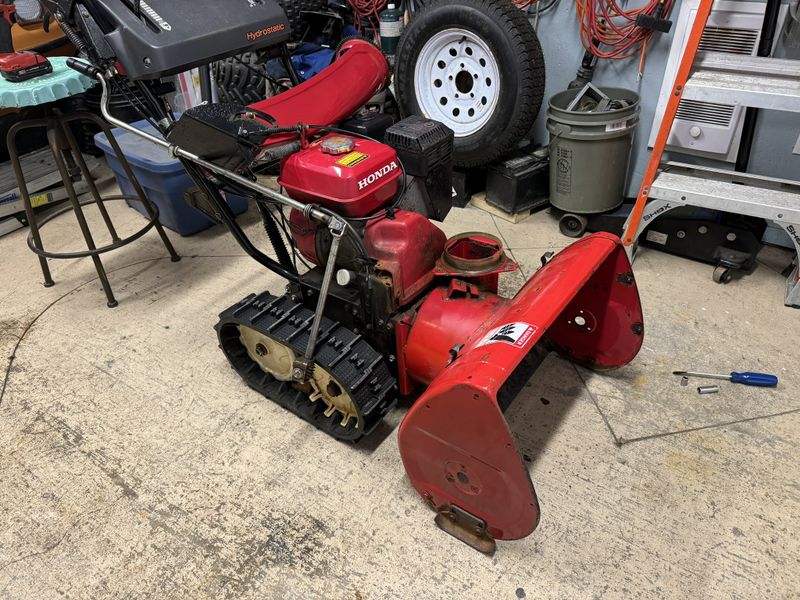
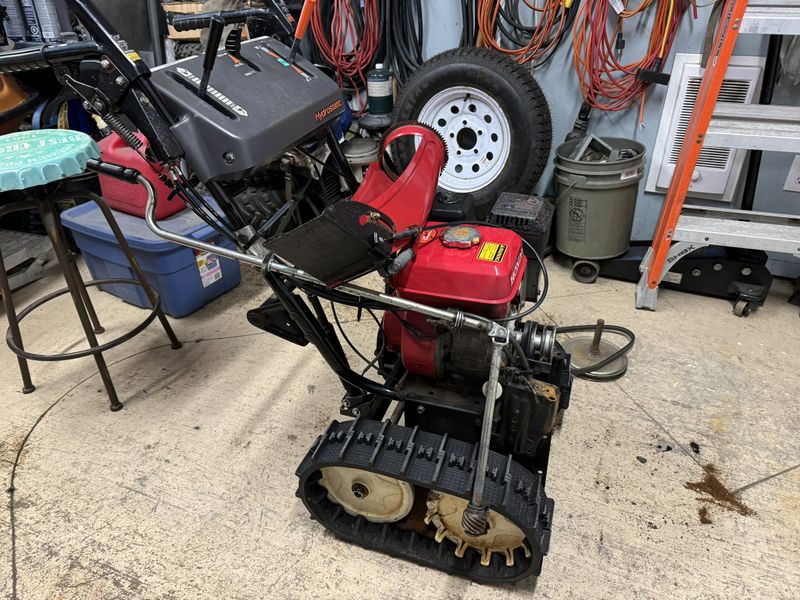
At the height of our Valentines Day Blizzard one of the boys asked me to look at his recently purchased secondhand Honda 7/24 Snowblower which lost drive to the tracks. I stopped by and diagnosed a failed crawler drive gearbox. I picked up the machine and a rebuild kit from Honda One and got to work.
For more information, check out my How To: Repair a Crawler Drive gearbox on a Honda Snowblower article.
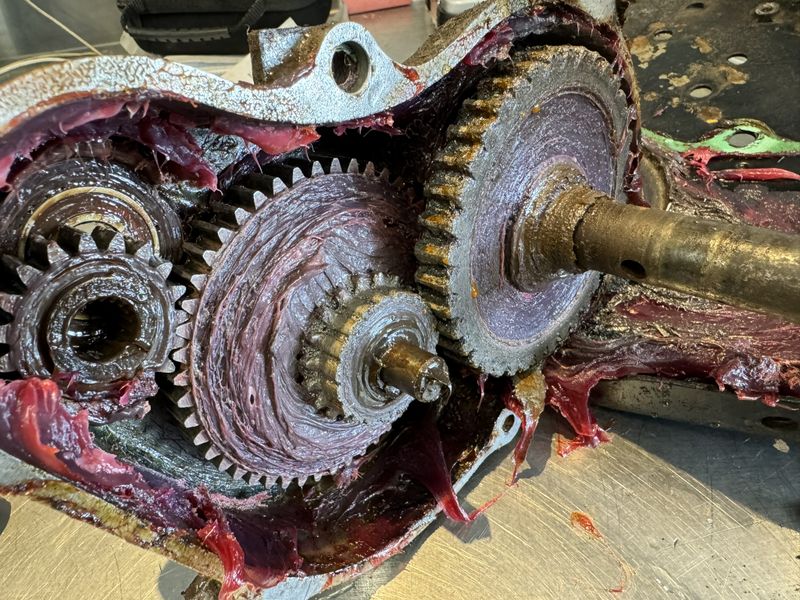
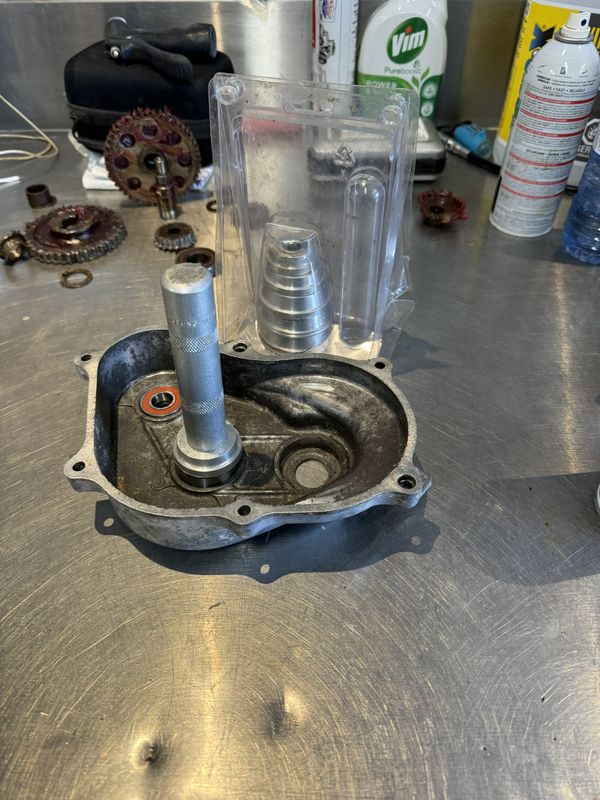
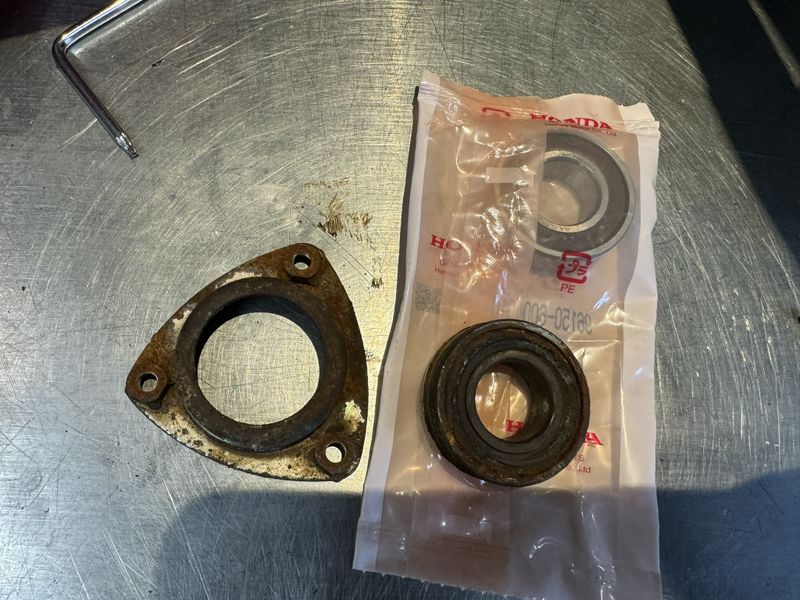
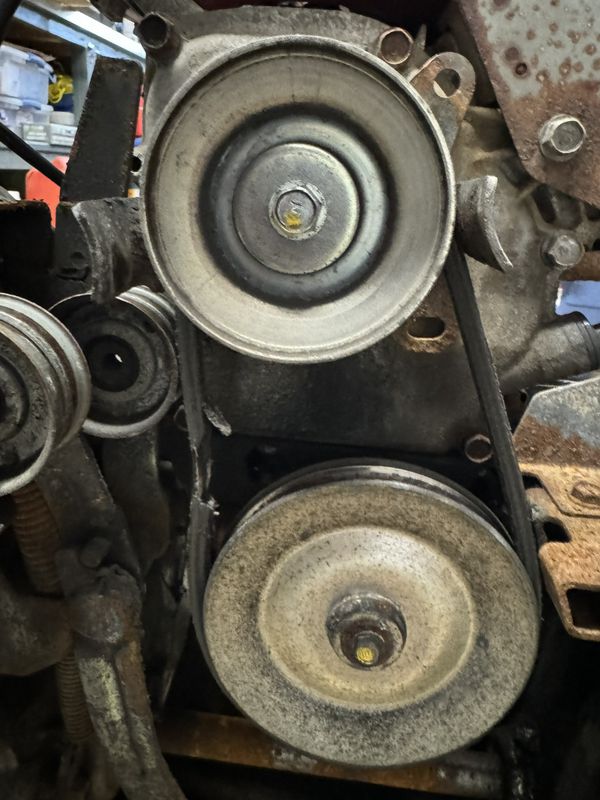
The problem became clearly obvious when I got the unit disassembled, a stripped out centre gear. I was surprised to see that someone had previously and recently been into this gearbox to make a repair. There were some new bearings present and this clean Lucas Red-n-Tacky grease which is not OEM.
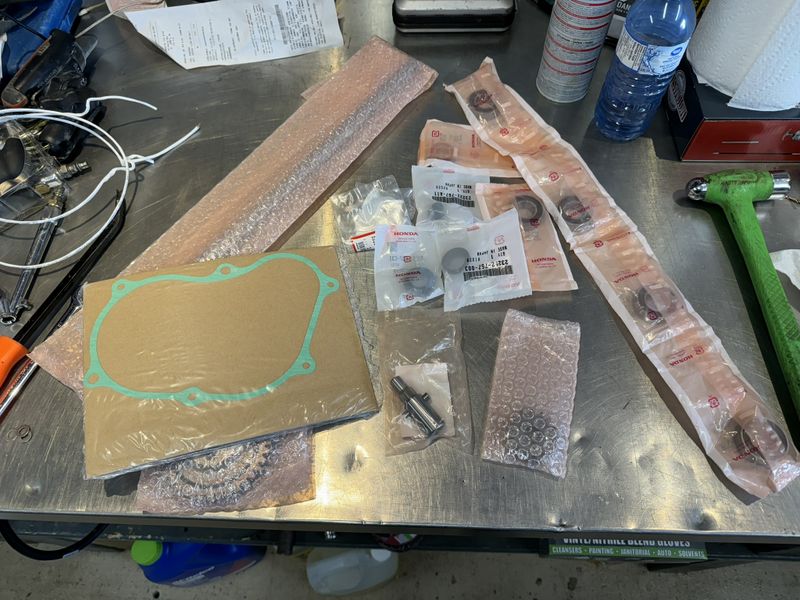
Unfortunately, the previous repair person did not install the full Honda One repair kit, rather just bits and pieces they deemed necessary to patch the machine together. Leaving "known to fail" old parts in the gearbox led to this inevitable failure and subsequent second repair.
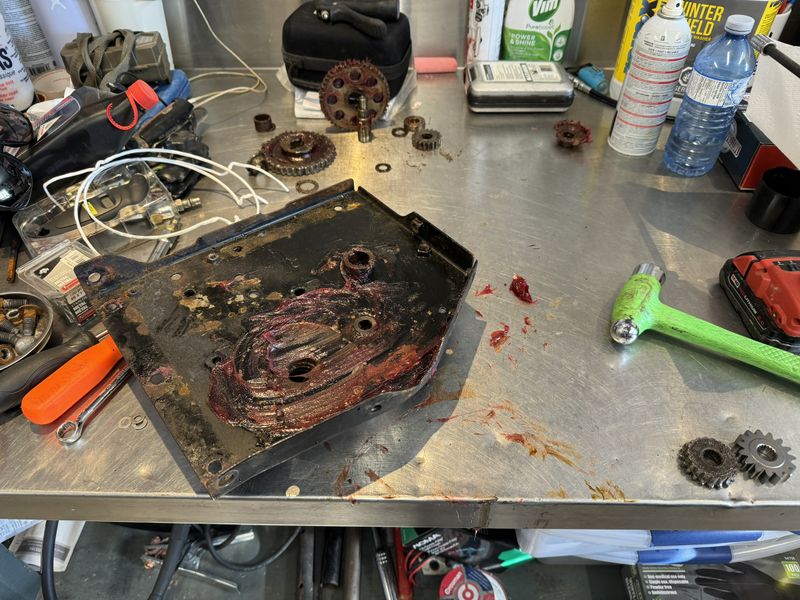
Now that I've been entrusted with the repair, I will be installing all the parts supplied in the kit from Honda One for a proper long lasting repair.
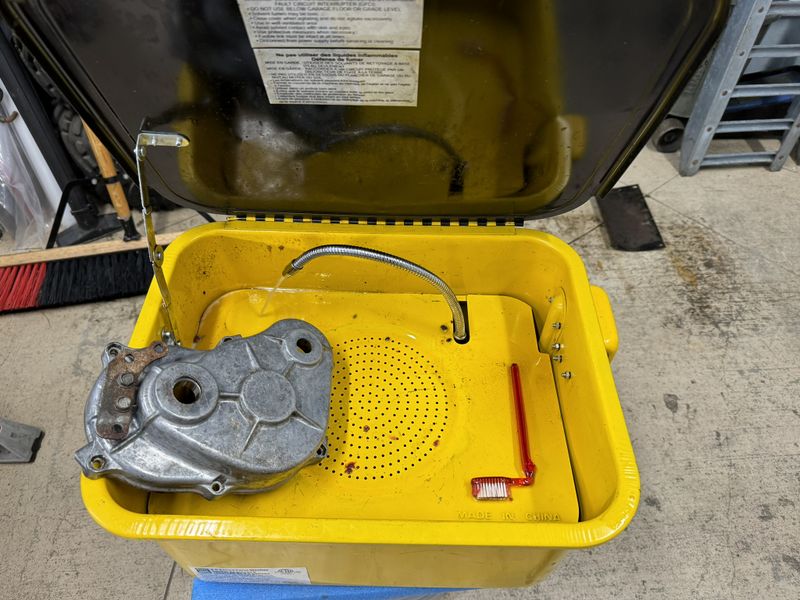
Cleanliness is very important, heavy debris was washed in the parts washer, and everything was given a final rinse with brake parts cleaner.
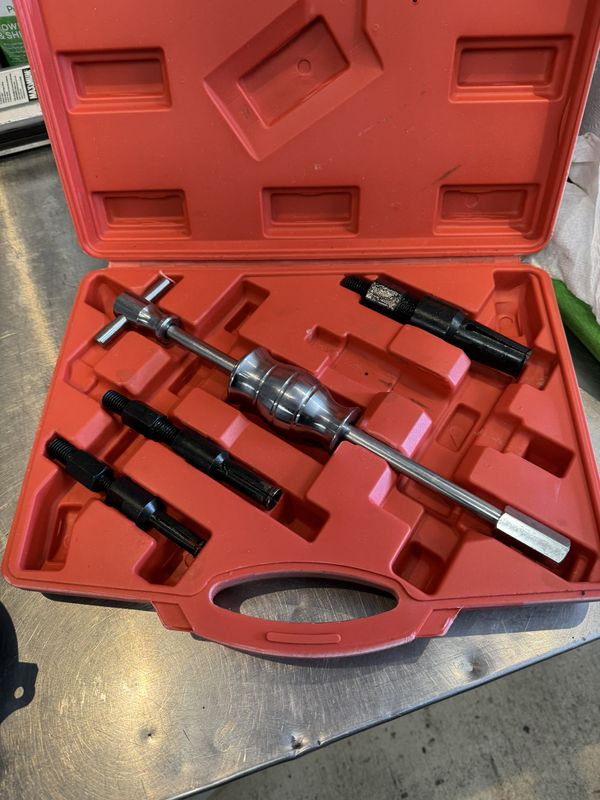
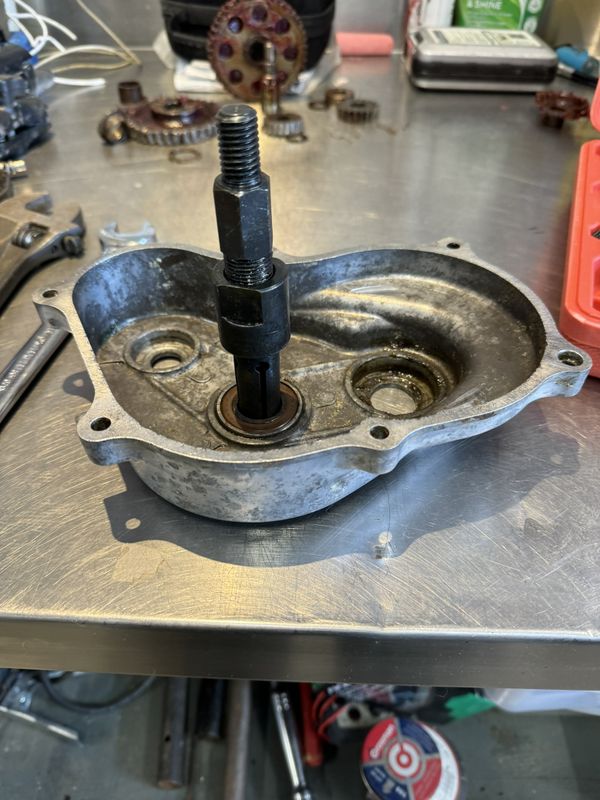
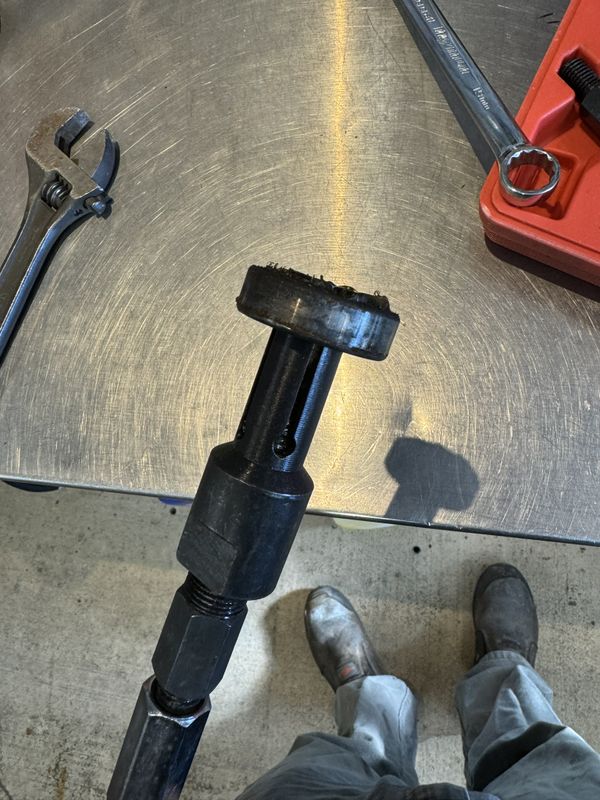
Blind hole bearing puller kit came in clutch once again.
It's the proper and easiest way to remove the centre bearings on these cases.
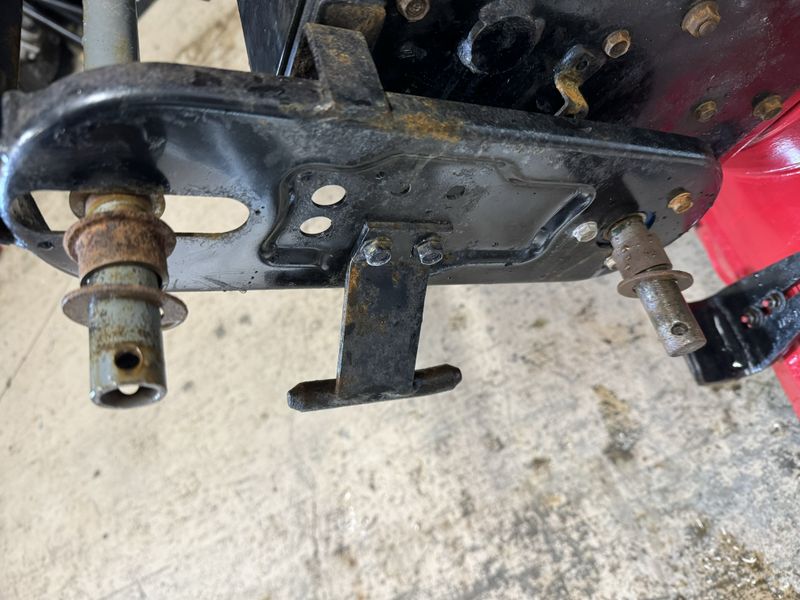
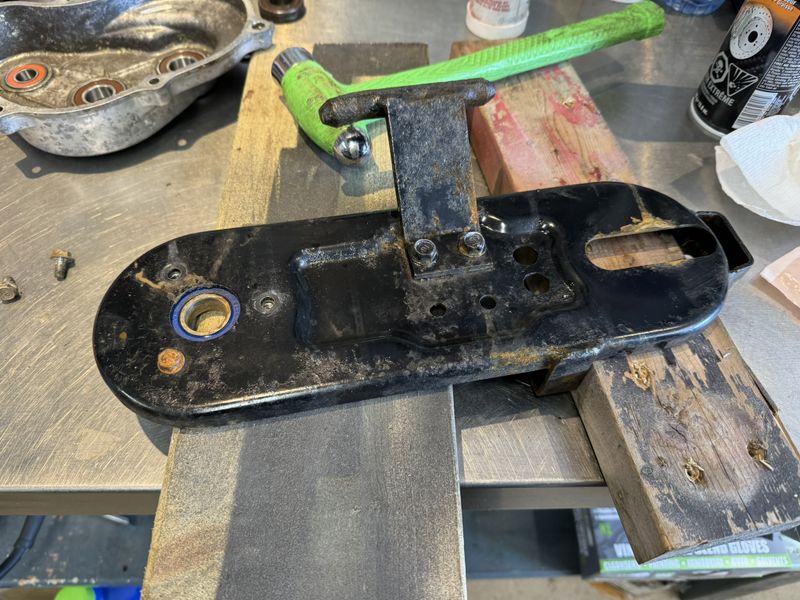
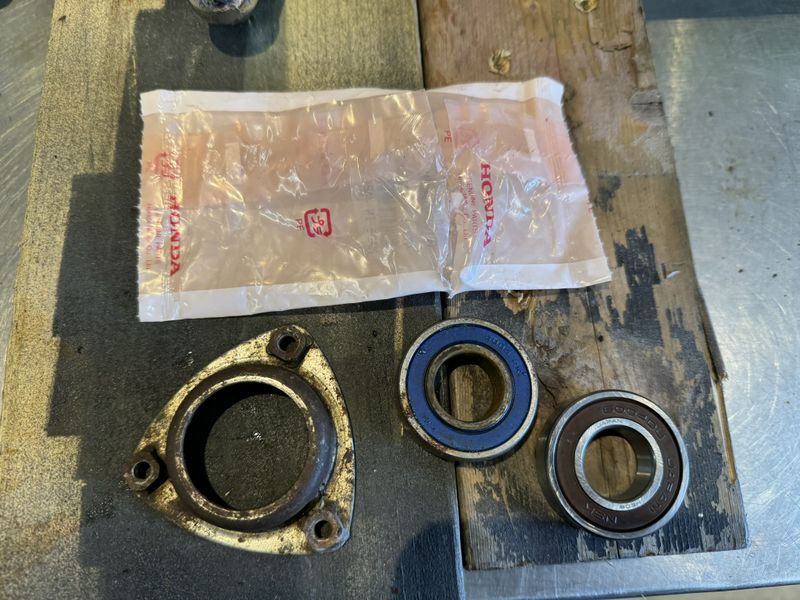
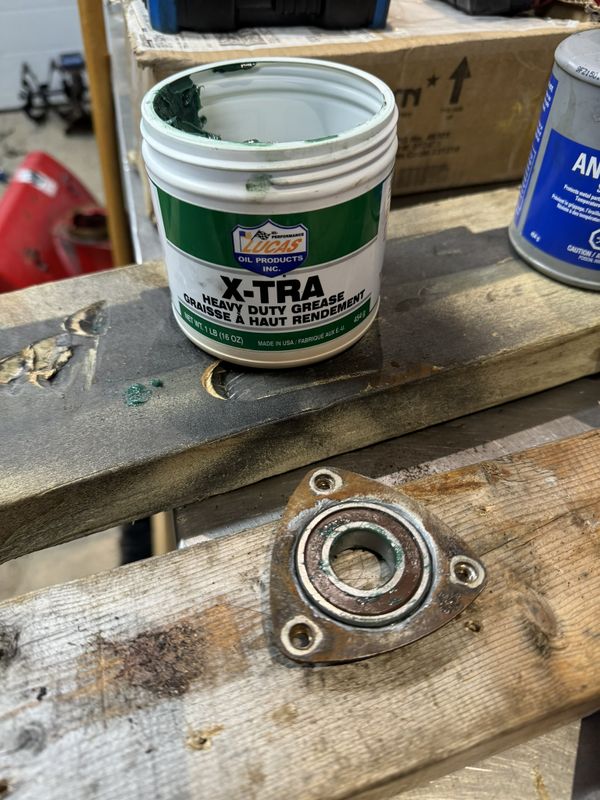
Crawler bracket bearing replacement - these are included in the Honda one kit, as well as the bearing on the left side frame that the drive axle passes through.
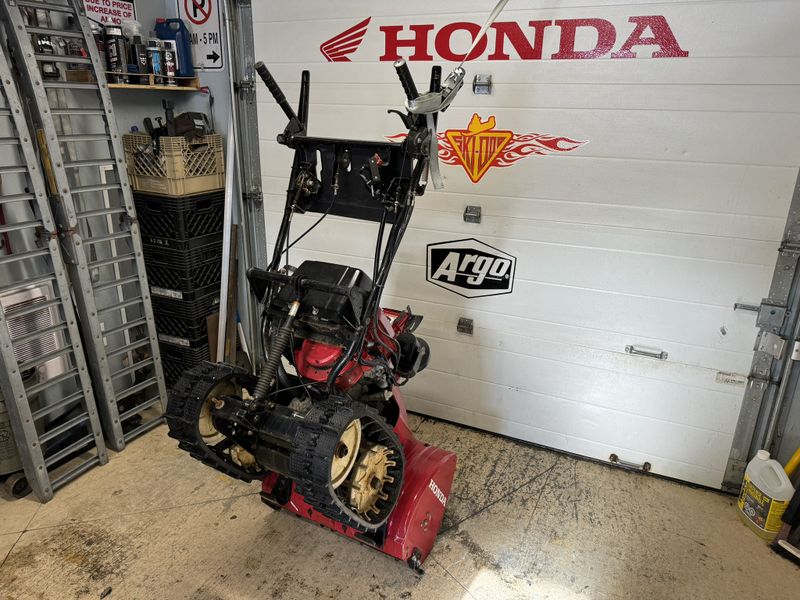
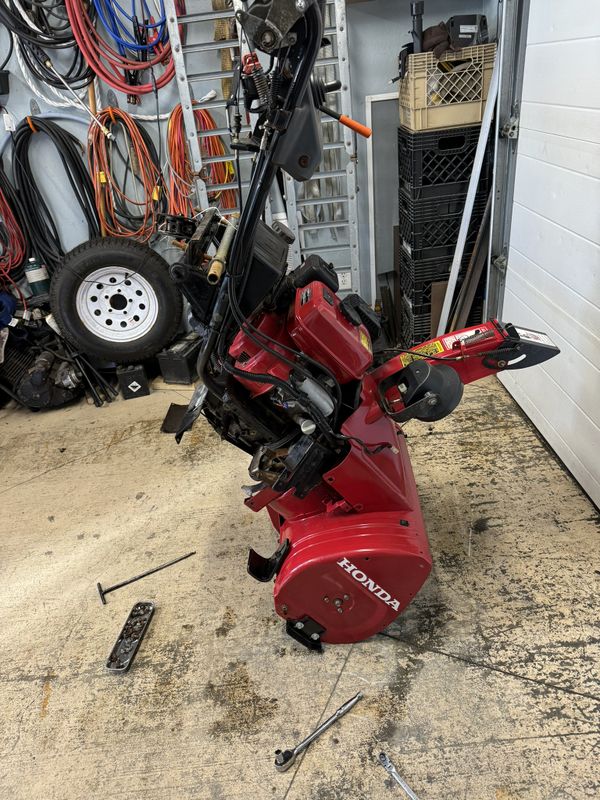
Almost fully back together and fixed just ahead of the next big snowstorm!
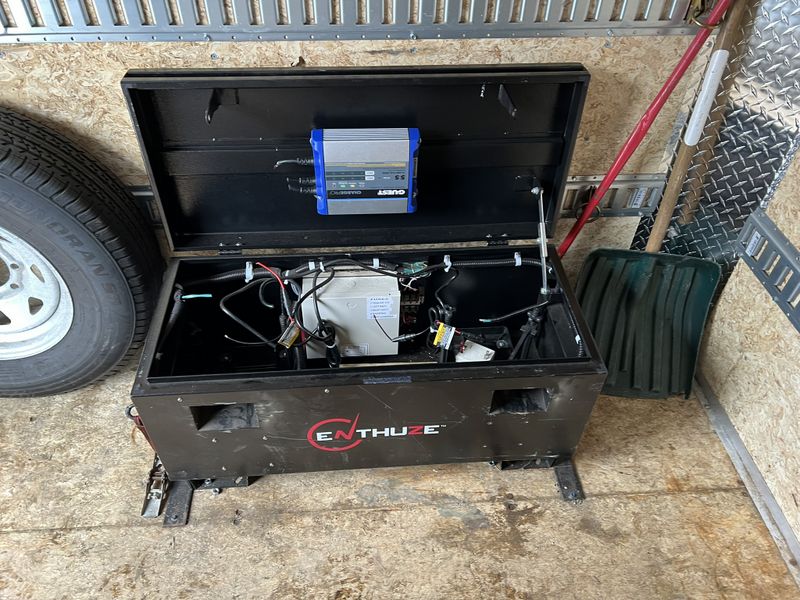
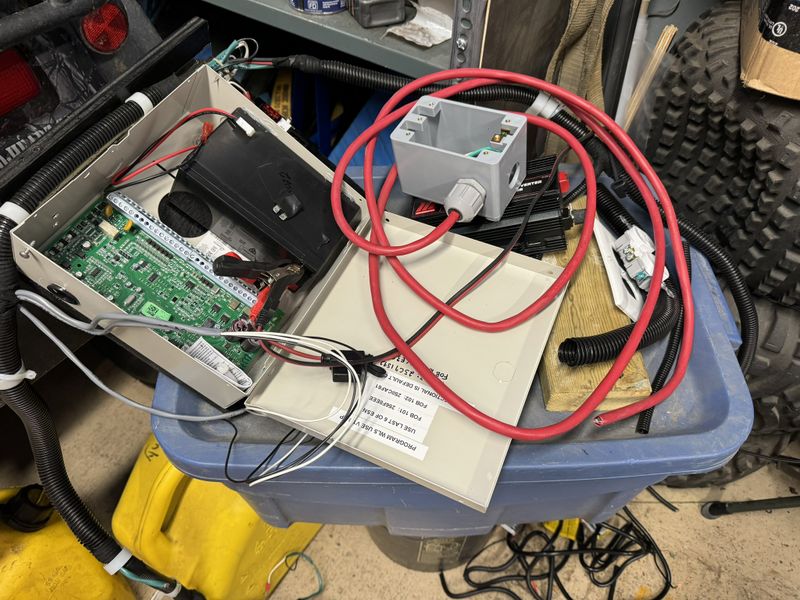
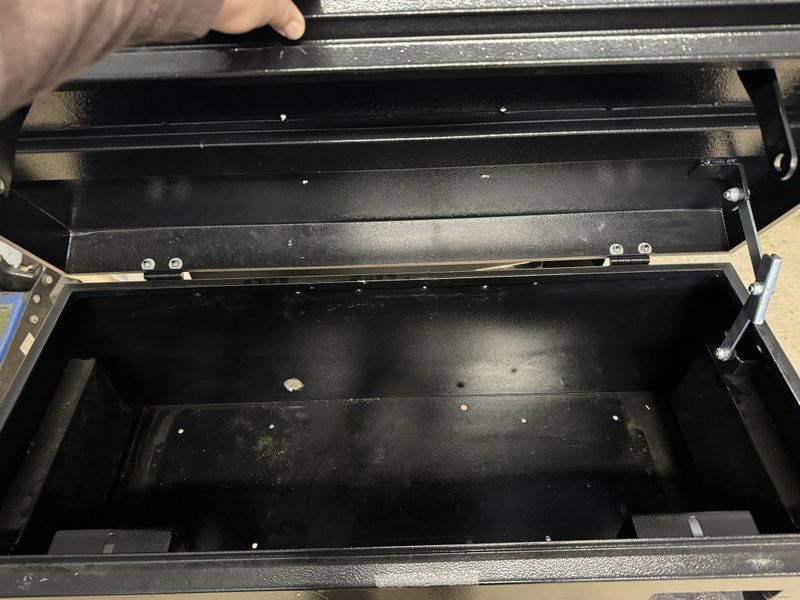
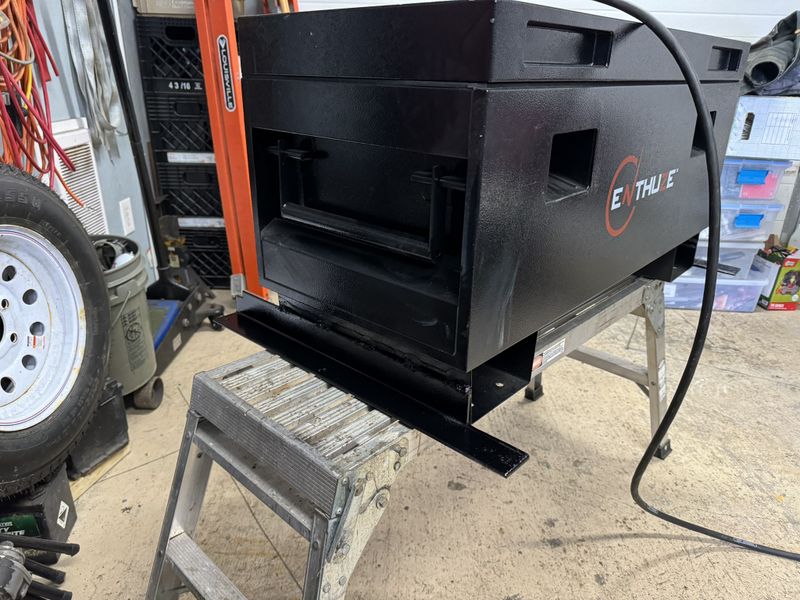
Two years ago I built a custom alarm system and off grid power supply for one of my good buddy's construction trailer. The system worked great however someone hooked on and stole the entire trailer back in December. The alarm was designed to detect unauthorized entry, not taking the whole unit. Judging by the damage it worked quite well as someone was in full panic mode trying to quiet down the blaring system!
I removed all of the electronics & wiring from the old box salvaging what I could. The locker will be replaced.
I planned to use the old box as a template for drilling holes in the new one, but the replacement box had a few updates and was about an inch shorter overall. The location of some items had to be adjusted accordingly.
First up was cutting my custom fabricated mounting brackets off the old box and welding them in place on the new one. These leg extensions ensure that the box can be bolted directly to the frame of the trailer and not just screwed to the wooden floor.
All in all it was a very tedious process to rebuild the system and get it installed back into the jobsite trailer, but I was very happy to be trusted with such an important and interesting project once again!
On March 8th we were hit once again with another major snowstorm which dumped 80cm+ here on the Avalon. Unfortunately Doug's Snowblower decided to throw a drive belt during cleanup. I ran out to Paradise with my machine, got his driveway cleared, popped the damaged belt back on, and loaded it in the truck to make a repair.
Even though it was still quiet, I suspected the impeller bearing would be in hard shape as its been about 5 years since I last replaced it.
Sure enough it was rusty & rough, so a fresh bearing was packed with quality grease and installed.
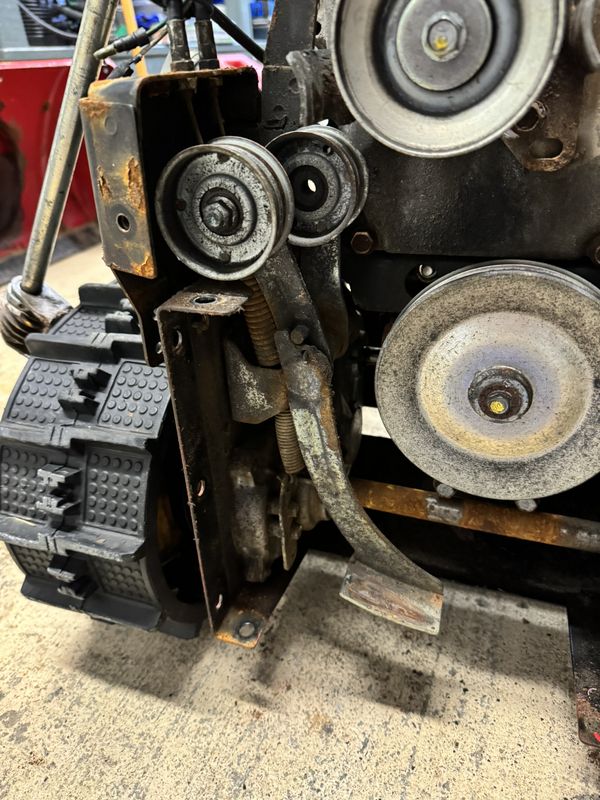
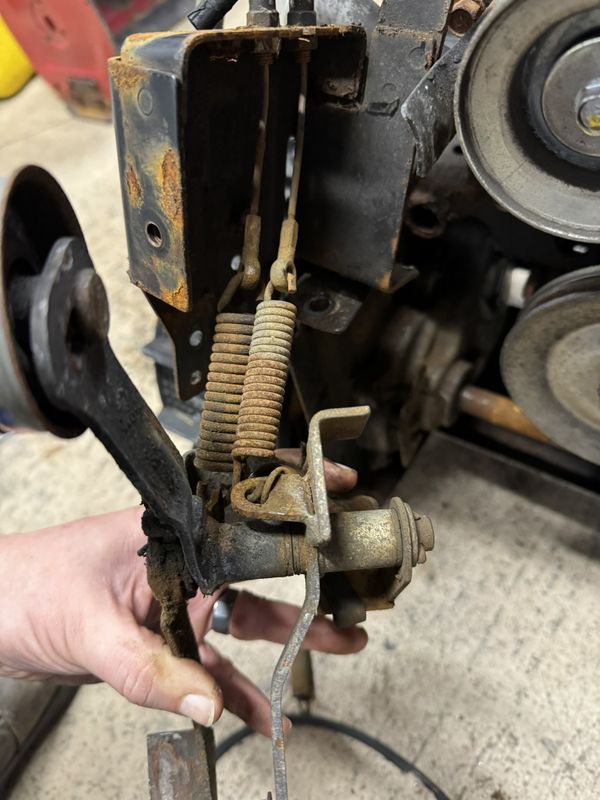
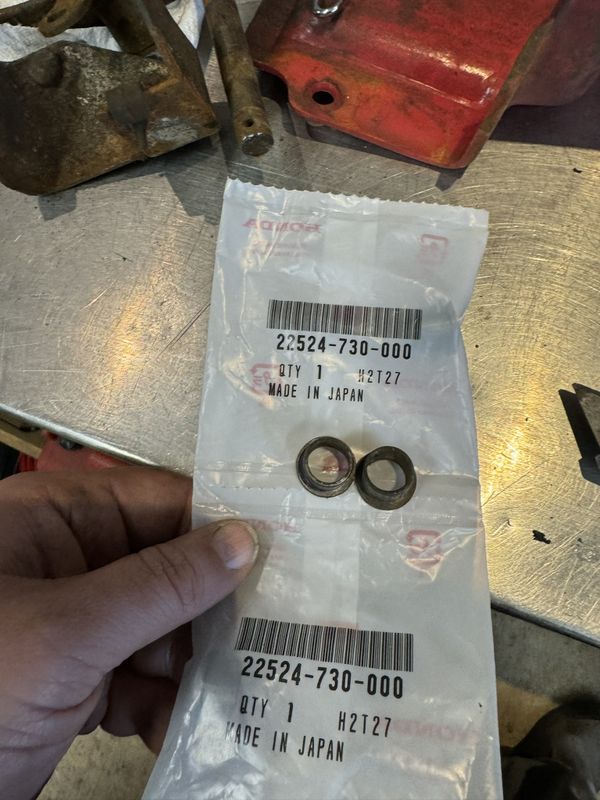
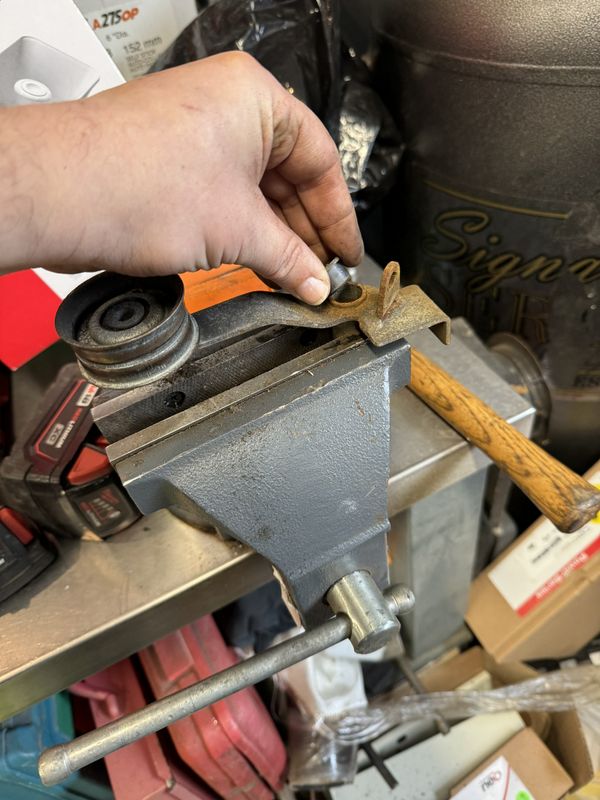
The belts on this machine were only 3-4 years old, when they fail early its usually a sign of worn bushings on the pivot of the tensioner arm. This is the arm that engages when you push down on the control levers to engage the belts, one for drive, and the other for the augers.
When the bushings go bad the tensioner wheel can cock sideways a little, enough to throw the belt off the drive pulleys.
There are four bushings total, two for the drive and two for the auger tensioners. I finished up the job with two fresh belts and got the unit reassembled.
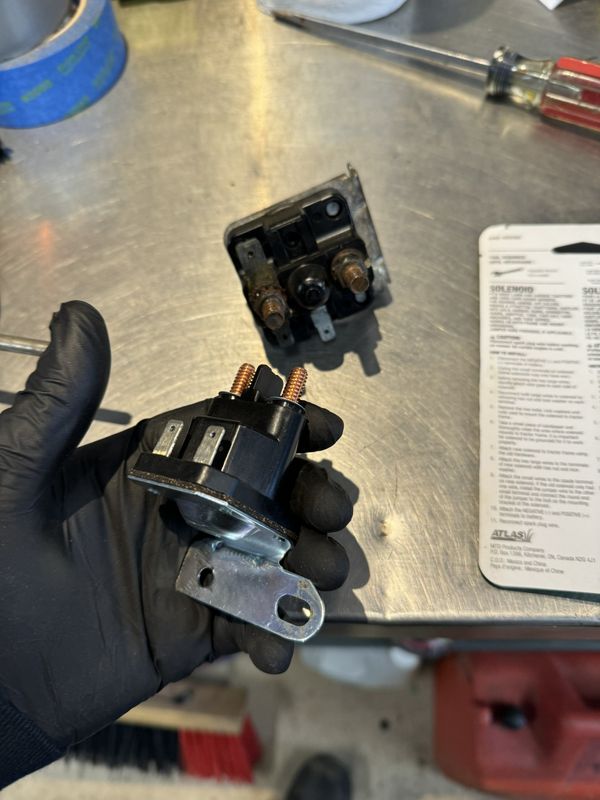
In April I discovered Project 6x6 would not start when I went to move it in/out of the garage. With fingers crossed that it was not a bad starter, I diagnosed and found the problem to be a failed starter solenoid which was easy to replace. I sourced a replacement at Canadian Tire, modified the mounting bracket, installed it and now the machine starts perfectly.
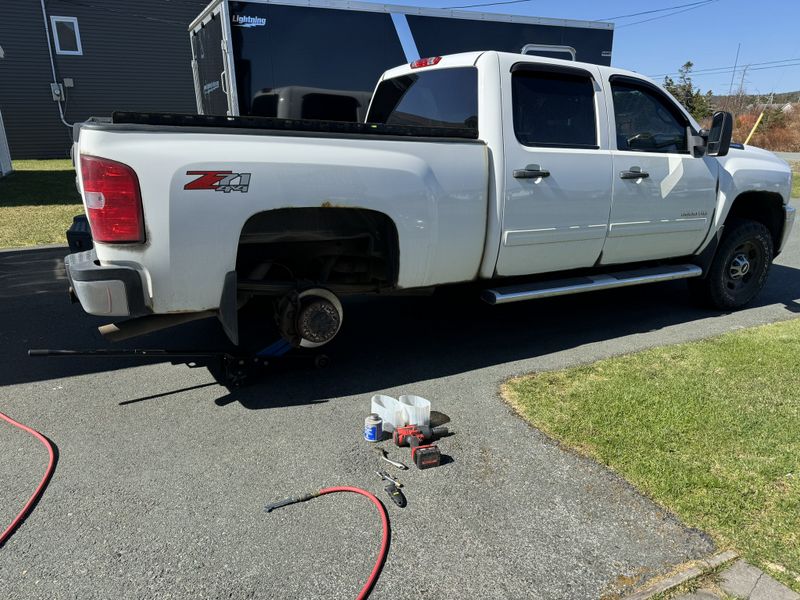
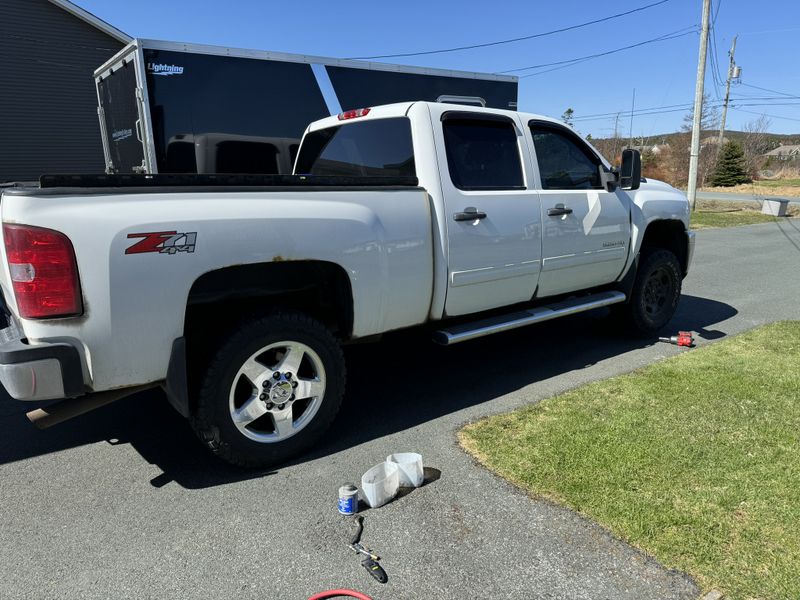
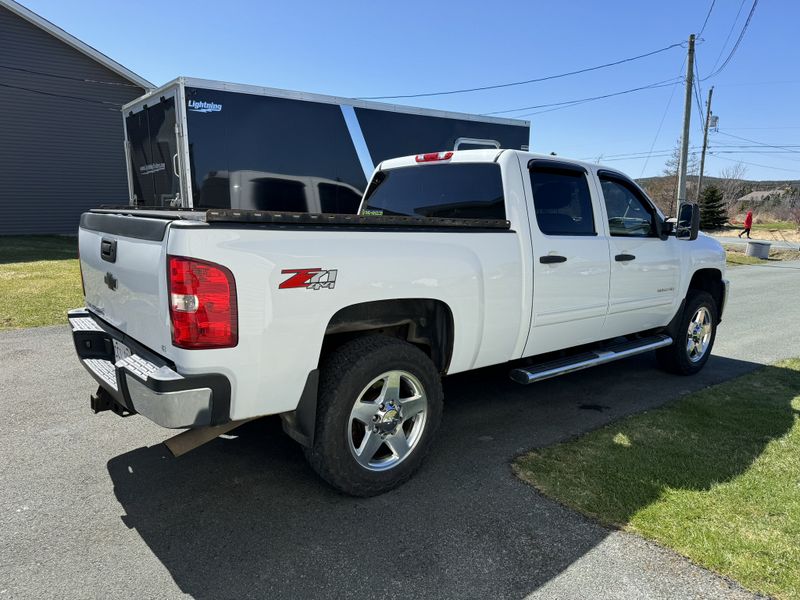
By mid April it was time to get my trusty 2500HD back into summer mode after a long hard winter. First up was swapping winter tires & rims back to my summer 20" OEM aluminum rims. I'm very pleased with how the "new to me" 285/70/17 Duratracks worked over the winter. Traction was great, they wore well and looked waaaay better than the my old 265/70/17 winters as they are much taller and filled out the wheel well.
With tires swapped I gave the truck a thorough exterior cleaning, focusing on the areas where my cocoon of winter undercoating had leached out onto the body panels. I don't wash the truck in winter, I prefer to let the undercoating do its thing and provide all-important protection against rust on the frame and bodywork.
This spring, Mark & Terry have been flat out working on their Gander River Boat project. Earlier this year they picked up a mold for the 25' version of these sturdy craft and got to work cleaning up the imperfections before laying down material for their first hull.
It's a smelly messy job, but with proper prep and care the project is coming along fantastically!
In early May I got Sandra's winter rims/tires swapped over to the OEM 20" summers. I left the winters installed longer on the Murano than the truck as the OEM summer tires are absolutely terrible in any kind of snow.
As with every changeover I always do a brake maintenance, the drivers side rear was the worst with very stuck slider pins. I fully disassembled and bench cleaned the parts before reassembling with Permatex ceramic brake lubricant.
Since the weather was much warmer today than when I swapped tires on the Pickup, I got both sets washed, dried in the sun and stored away for the summer.
I started off my May 2-4 holiday weekend by heading out to the St. John's Rod and Gun Club to perform maintenance on some of our equipment including our Kubota 15kw generator. The unit is all ready for the next 300 hours runtime with new oil, oil filter, fuel filters, and air filter.
Next I picked up the lawn tractor from storage, gave it a once over and got the grass cut for the first time this year.
I finished out my holiday weekend by putting away my broken Argo tracks. This segment cracked during my March 17, 2024 Adapt and Overcome Ride, upon further inspection I found some broken pins as well.
My plan is to order all new pins and lock collars to get these tracks (which are expensive to replace new) back in tip top shape.
Quick little job for Stroh cutting some custom registration number plate decals for his Sea-Doos.
Quick little regular job/work repairs. Liqui-tite flexible conduit was no match for an unusually hard winter where snow came off the roof of the building and sheared it off clean. This rigid conduit should hold up much better.
In June I experienced my first coolant leak of 2024 on my 2011 Silverado 2500HD. I replaced one of the last remaining rusty/broken OEM coolant clamps. These spring clamps which are a good idea on paper but don't hold up here in the rustbelt. They rust, crack, therefore loose tension and you have a leak. To reinstall the same type of clamp you have to drain the system, pull the hose off to get the OEM style on. I chose a traditional worm style stainless steel clamp which has been working well on this truck's other hoses now for years.
At the end of June it was time once again to change the oil on my truck. I used to have it done at a shop, but with ever increasing fees I've done the last couple oil changes myself. I use better quality products than that shop was supplying and I'm completing the work for a fraction of the cost.
Mid summer dump run.
In July my Lawn Tractor decided to start throwing the drive belt. I've reinstalled it twice now and tracked down the cause to a bent tensioner pulley bracket. I'm not sure how it got bent but it will require major disassembly to properly fix it, so that will be a future project.
This week I was presented with an interesting project, helping a buddy cut up their old hot tub to make way for a brand new unit. It was slow going with a reciprocating saw but went much faster when I brought over my Husqvarna 550xp chainsaw. The fibreglass dulled the chain fairly quickly, but a couple minutes with my Stihl quick file and I was good to go for another few cuts. All in all it went well.
In August I did some service and trouble shooting on Wes Tuckers classic Yamaha Snowblower. Atlantic Recreation ran the serial number and it came back as a 1988 6/24. It runs fantastic.
I did a standard service which consisted of an oil change, disassembled and completely cleaned the fuel system, and lubricated all moving parts & levers. The 110v electric start was not working, I tested everything and tracked down the problem to a defective starting motor. Unfortunately that part has been discontinued by Yamaha and Atlantic Rec. couldn't source an aftermarket alternative.
Around the middle of August I finally tracked down the cause of a persistent but somewhat intermittent coolant leak on my truck. The leak was due to a rusted out coolant cross over/air bleed pipe on the front topside of the engine. The barb on which the small coolant hose attaches rusted out, then completely broke off when I wiggled it.
I temporarily jammed a pencil in the hole to prevent coolant draining out while I sourced a replacement part.
Hickman Motors not only had the best price on the replacement part (even compared to a crappy quality Dorman alternative at local auto parts retailers), the OEM piece came with the gaskets not included with the aftermarket piece, plus they had it in stock vs. waiting 10 days.
The new crossover pipe fit perfectly and solved this important issue on my trusty steed.
Area51 all cleaned, tidied and ready for Moose Processing!
In October my injured ankle finally started to get better enough to begin making preparations for moose hunting with Dad. You can check out more of my Project 6x6 2024 Update on the project page update.
In mid October we started seeing low air pressure warnings from the drivers side rear tire on our 2020 Murano. I found a screw embedded in the worst place imaginable as it's not repairable.
We have tire & rim warranty remaining, but for the time being I just swapped over to the winter tires & rims as snow and cold temperatures are rapidly approaching.
Near the end of October I performed a post ride inspection on Project Foreman and found both front wheel bearings completely fried. Check out the Project Foreman 2024 Update page for more details on how I tackled this repair plus some general maintenance on the bike.
Just after Halloween I got straight into Snowblower maintenance season starting with a full service on Doug's Honda 7/24 which continues to run great. My full service includes fresh Honda GN4 oil, a new sparkplug, draining the carburetor bowl & sediment cup, and lubing all moving parts (control handles, chute etc) as well as some strategic corrosion protection.
Next up was Dad's Yamaha YS928 Snowblower. With the engine fully encased it's notoriously more of a PITA to work on compared to the Yamaha 7/24 or any of the Honda machines.
Draining the carb is very easy, place a container under the drain hose and turn the fuel valve to the drain setting. Cleaning the sediment cup means taking off the side cover, then unbolting the bracket that holds the fuel switch/sediment cup assembly in place.
Now the bracket is in the way of easily removing the aluminum collar holding the cup in place, but I got that part of the job done and put back together.
To drain the engine oil it's best to remove the entire side cover to provide better access and get a better view the drain and fill ports.
I jammed one of my plastic transmission funnels in place to make this step clean and easy (same idea as using an old windshield wiper package on the Hondas).
One thing I really do not like on the Yamaha machines is the dual shear bolt setup on the augers. Honda uses one small 10mm bolt, they are super easy and quick to replace if you touch a step, planter or pickup a stone. Dad obviously hit something pretty serve and pretzeled one of the augers without breaking the shear pins.
The last job on my immediate to-do list was a full service on my own machine using quality Royal Purple oil.
Don't forget to periodically check the drain holes in the bottom of your vehicle's doors. The passenger side rear door of Dad's F150 was 1/3 full of rainwater, I cleared the drain which let the water out. This could have been bad if left to freeze!
With more cold weather in the forecast, salt trucks will be out in full force. So it was time for undercoating and swapping my aluminum summer wheels for steelies with chrome centres for the winter season.
The last little job for this year was replacing the LED headlights in the truck. The last set which had a great warranty came from NL Lightbars which unfortunately went out of business this past fall.
This time I decided to go with a quality part from a well known supplier, at least getting warranty coverage will be a little easier if necessary.
That's it for 2024! Stay tuned as projects will continue over the winter into 2025 and beyond!
Cheers, MIKE
Copyright © 2025 Michael Smith |