|
Area51 Project - Mike's 1980 440 Invader:
Machine Specs:
1980 Kawasaki Invader Kawi 440cc Liquid Cooled, Piston Port 2 Stroke Front: Leaf Springs Rear: Vari Ride Skid 121"x15"x0.75" Track Stock Gearing, No Reverse Custom Replica Racing Windshield Restoration in Progress Custom Cut Factory Decals & Paint
When most people take on a restoration project, the goal is to strip the machine down completely then carefully restore each piece before reassembly. Solving problems, locating parts and sometimes realizing the machine isn’t worth the trouble is all part of the game. This project is a little different then that! Note, just like on TV, this story has been shortened for readability and space/time limitations. Frustrations, broken bolts and thrown tool episodes have been omitted since all repairs went perfectly (as they always do).
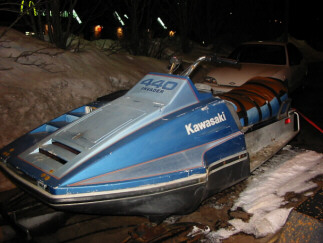
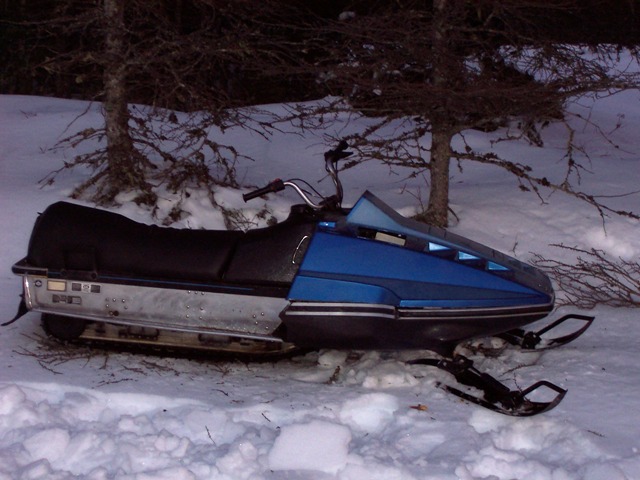
In 2003 I was given a 1980 Kawasaki 440 Invader snowmobile by my uncle in lieu of service work I performed on his newer Scandic 377. It hadn't rand in quite awhile and spent a few years stored outside under a tarp. The sled was hard looking but all the major parts were there and I thought it had potential as a unique restoration project. My first task was to go on the internet to find some information on this 25 year old relic, heck, Kawasaki hadn’t even made snowmobiles since 1982!!! A quick Google search found www.kawitrax.com which has since been an invaluable source for finding parts, information and repair techniques for these old Kawasaki sleds.
I did not have a big budget to restore this sled so my goal in the first year was to get the beast running and repaired enough to ride. At least then I could see what it needed further in repairs, or decide if it was worth fooling with. I started by replacing the dried up/cracked/missing Fuel and Oil lines and installing a new pick up hose in the gas tank. The carburetors were taken apart and meticulously cleaned, which removed years worth of crud that had accumulated during storage.
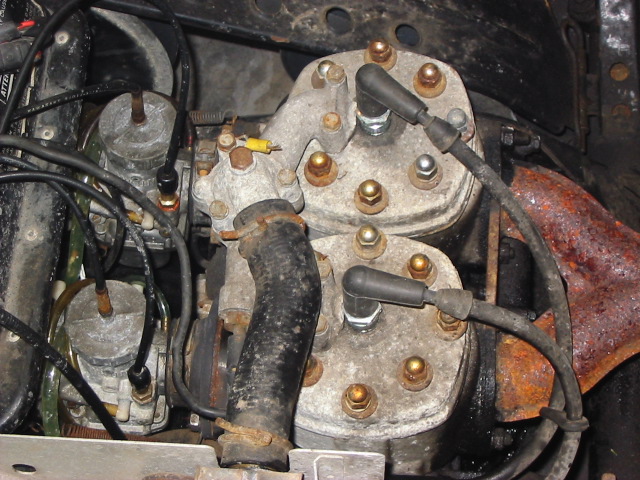
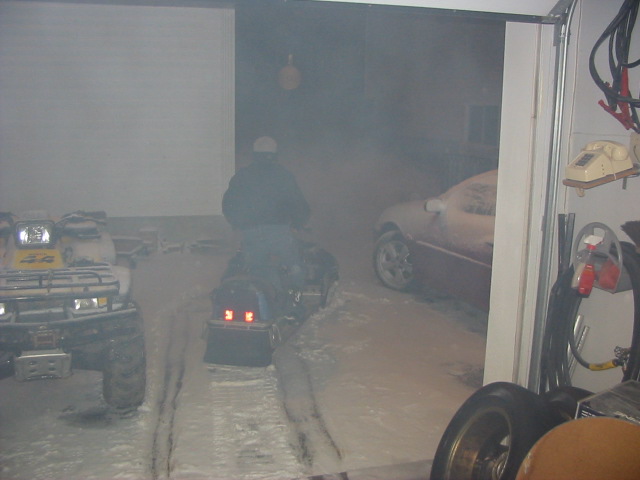
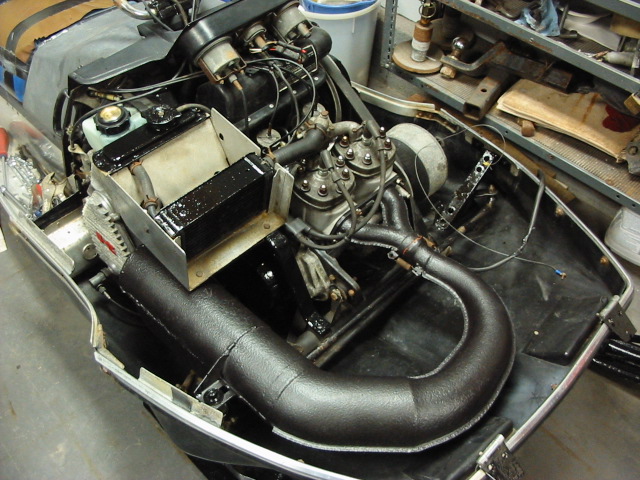
Next I installed new spark plugs, put some fresh fuel in the tank, and got ready for the first pull of the starter rope! Remarkably the beast fired up on the fourth pull, completely enveloped the garage in smoke, but purred like a kitten. This Invader came with the optional liquid cooled 440cc twin cylinder two stroke piston port engine. Its unique two stroke technology by today's standards and the engine runs smooth with a very unique sound.
Since stage one went well, stage two commenced. The hood hinges were missing so I fabricated a set from hardware store gate hinges, cut down and drilled to fit the sled. The result looked identical to stock.
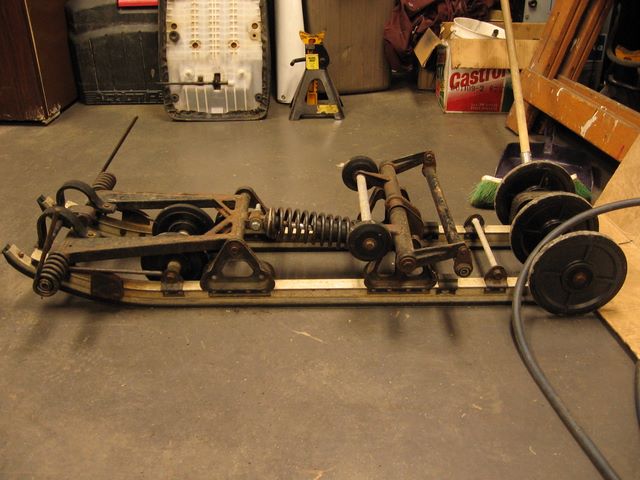
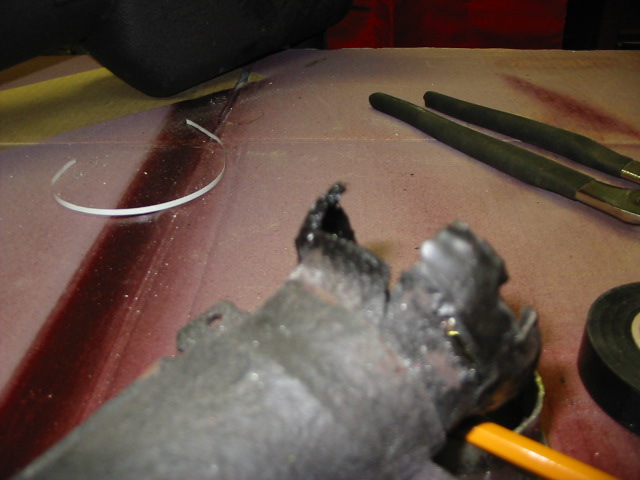
Next, I hauled out the rear suspension skid for a full inspection. I replaced the seized coil over shock with a freebie from Bill that I custom fit, I replaced the worn out hyfax, greased all the cross shafts and inspected all bogy wheels and bearings. I took the front skies/leaf springs apart and replaced the main ski bolts, cleaned up and greased the ski legs where they go into the body and replaced one tie rod end. With the sled reassembled I still had to deal with the dry rotted seat cover. Time was not on my side so I quickly fastened a scrap of brown vinyl with some fancy black duct tape in preparation for the maiden voyage.
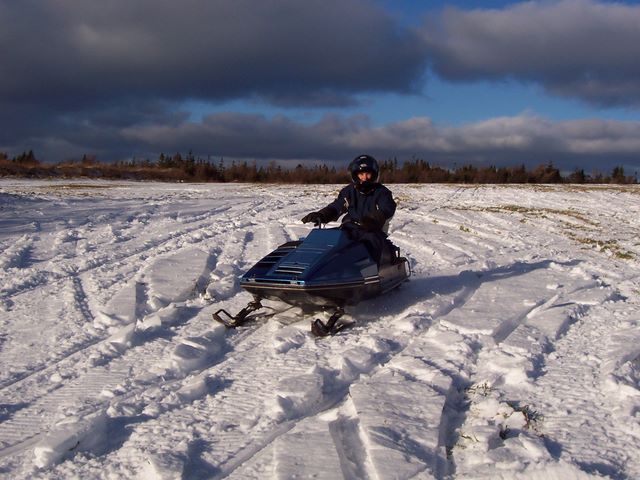
That voyage took place at the annual winter trip to the Sooley Cabin in February 2004. Upon riding the Invader, I found that the engine had a bad hesitation when the clutch engaged to about about 10 Mph but seemed OK after that. This old sled sure could move, it really surprised me that this old piston port technology engine could hang so well with much more modern sleds. Since the sled was so low and had suspension travel of a Bravo, its actually quite scary to ride at high speed! Some tuning of the carburetors helped the hesitation problem but didn’t cure it, a hill climber it wouldn’t be on this trip. By the end of the weekend, one of the bars in the rear skid cracked, small holes in the exhaust manifold developed, and the hesitation in the engine worsened (possibly due to the exhaust leaks). Over all its was a successful trip, I still had my newer Grand Touring 500 to ride, and the Invader provided a great time riding a different kind of machine. After the initial shake down run at the Annual Winter Cabin Trip, the invader took a well deserved rest wrapped up in a fancy blue tarp behind the Garage for the rest of the season and the following summer. That fall (around the same time my back fully recovered from riding the Invader) I resumed work on the restoration project. Apparently the hesitation in the engine is not unique to my sled and the famous "Kawasaki Bog" could be fixed.
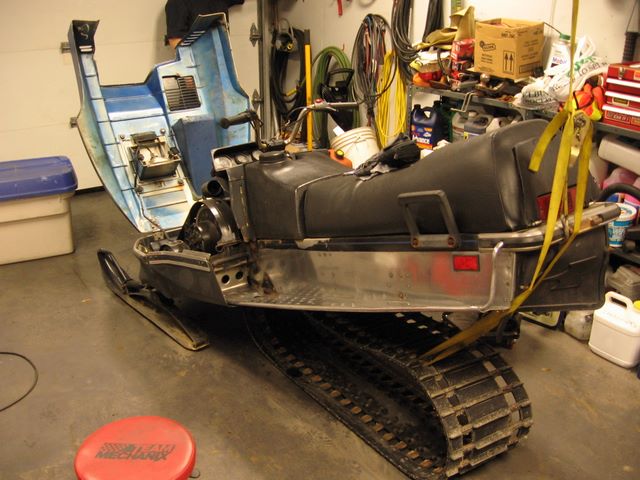
I took the carburetors apart again to clean out summer storage crud, I checked all the fuel lines and tested the fuel pump. Through research on the internet I found that the wrong drive belt had been installed, and I also found that Kawasaki recommended using BR9EV spark plugs as opposed to the common BR9ES. With help from Terry at Honda One in St. John’s I picked up and installed the correct drive belt and spark plugs. To further eliminate any source of "bog" from the ignition system, I installed a new ignition coil, spark plug boots and the correct BR9ev spark plugs. I also made (what became a temporary) repair of the leaking exhaust Y-pipe. Next, the rear suspension was removed to address the cracked suspension arm. Since replacements are non existent in Newfoundland I cleaned the arm and rebuilt the mounting bracket with scrap steel and my trusty welder. At this time I was fairly confident that my engine troubles were resolved, but since we still had no snow for a test ride I decided to start working on the cosmetic side of the project.
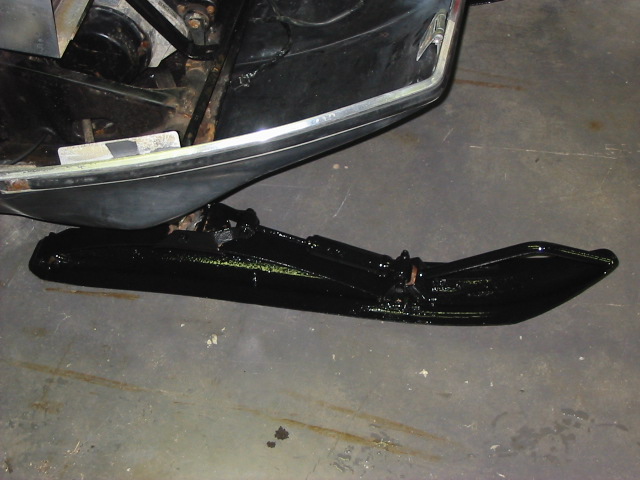
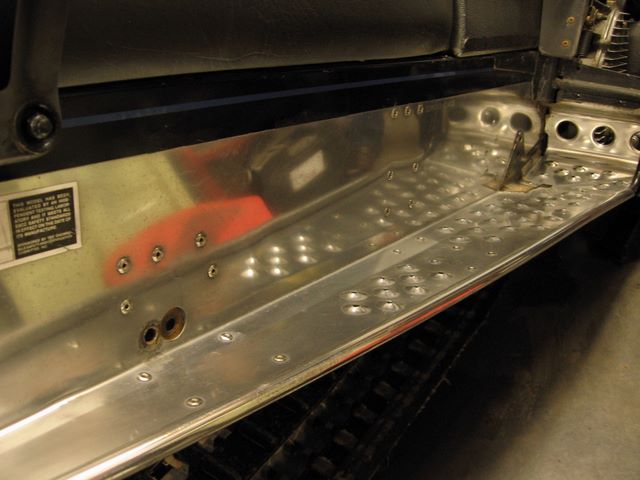
First I had the seat professionally recovered with nice black four way stretch vinyl to replace the worn out blue vinyl/brown vinyl/black duct tape mess that I sat on last year. I cleaned and painted up all the rusty steel bits under the hood, painted the exhaust, skies, and various tunnel supports and brackets. Also, I took a lot of time and polished the tunnel and all the aluminum trim with a metal polish to make it look better then new.
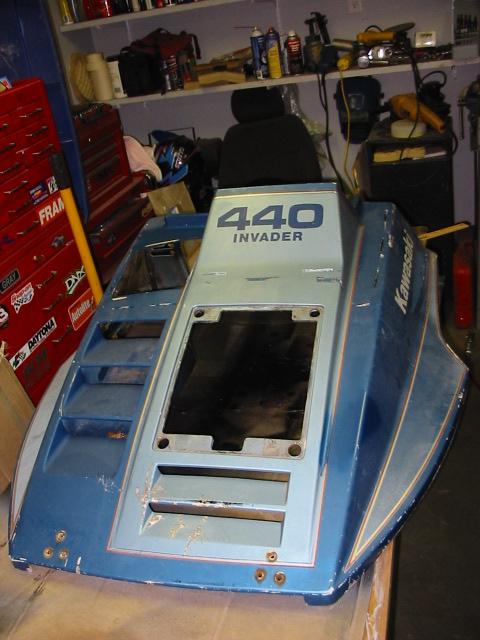
Now it was time to refinish the hood which was in pretty sad shape. The paint and decals were scratched and faded but it was in one piece and wasn’t cracked. I took a lot of digital pictures to keep a record of the process, to use as a reference for have new decals made, and for masking off for the two tone paint scheme.
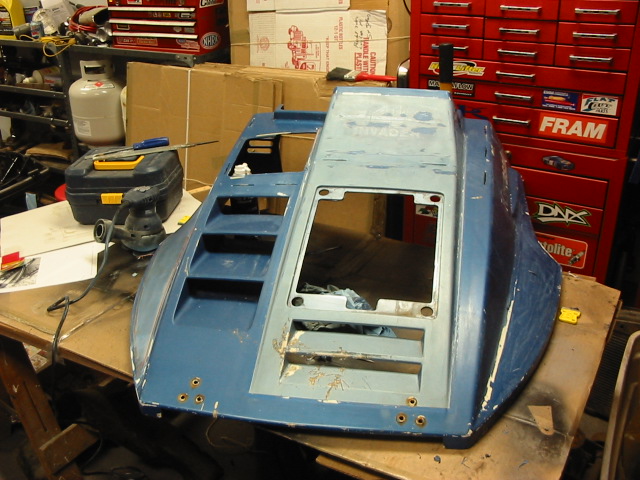
First to be stripped were the factory decals and pinstripes (what was left of them). The use of a heat gun and rubbing alcohol sped this process right up to a blistering snails pace.
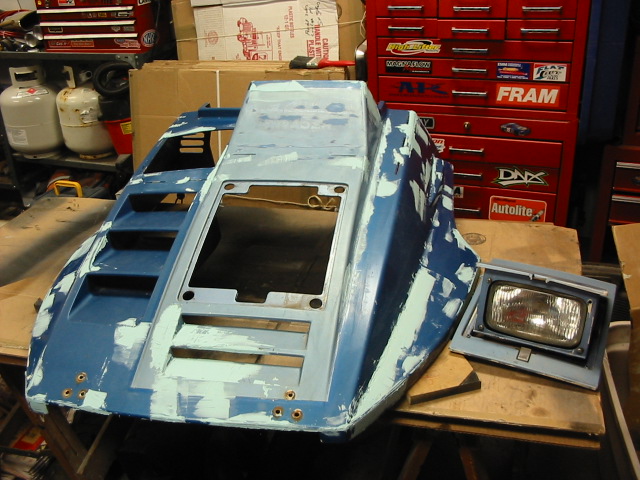
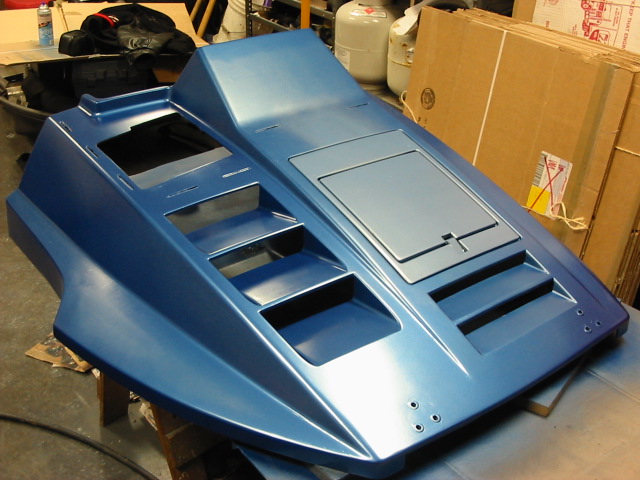
Next came a lot of sanding, filling in scratches with spot putty followed by more sanding. I wont get into all the details of the painting process as it is very similar to my previous article Project Cheyenne" . Some painting tips can also be found in the "How To's" section of this site. Once again I choose to use a 3 step paint process Primer, Colour & Clear using duplicolour spray cans. Once I was happy with the body work I sprayed the entire hood & pop up headlight in high build grey primer, sanding lightly in between coats.
I researched the ‘net and found the paint codes that closely matched the factory colors for the 1980 sleds which consisted of a metallic dark blue body highlighted with a metallic light blue scheme. (Previous years used a dark Metallic Blue & a black accent.) I started by applying the dark blue color to the hood, trying not to apply too much in the areas that were to be painted light blue.
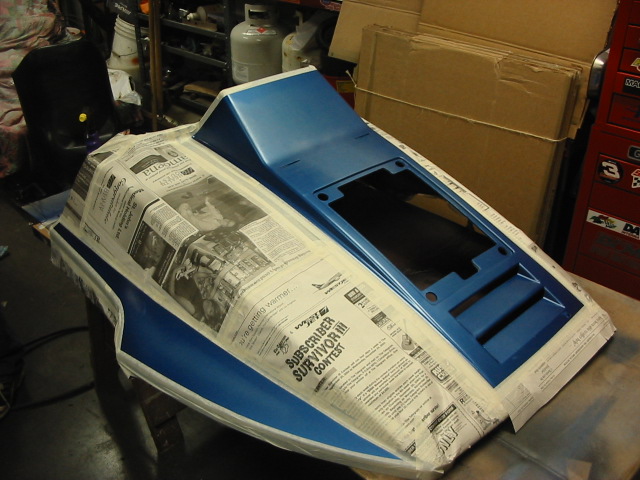
Once I achieved a nice even color using many light coats of paint, I taped off the hood for the light blue color using my digital pictures as a reference.
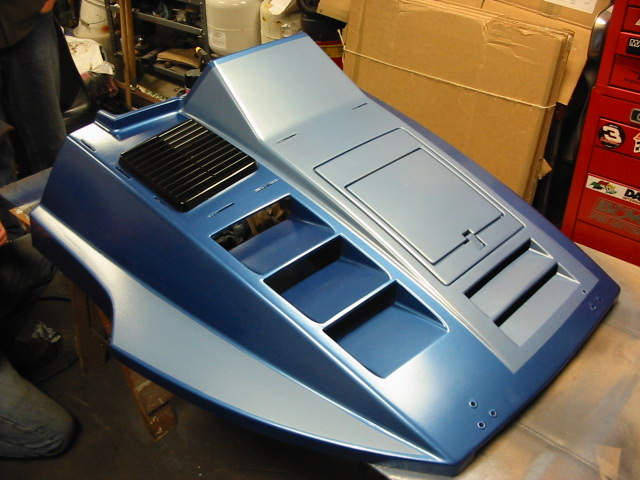
The light blue was applied the same way as the dark blue in many light coats until I had the right shade and an even color. Once I removed the masking tape and paper, I gave the hood a light sanding and applied many coats of clear to add protection and a beautiful high gloss finish.
By now, we had finally received a little snow, so another test run was in order. This run took place in the Goulds on a beautiful sunny Saturday. This time the Invader ran very well, the hesitation seemed to be fixed, and I had a lot of fun.
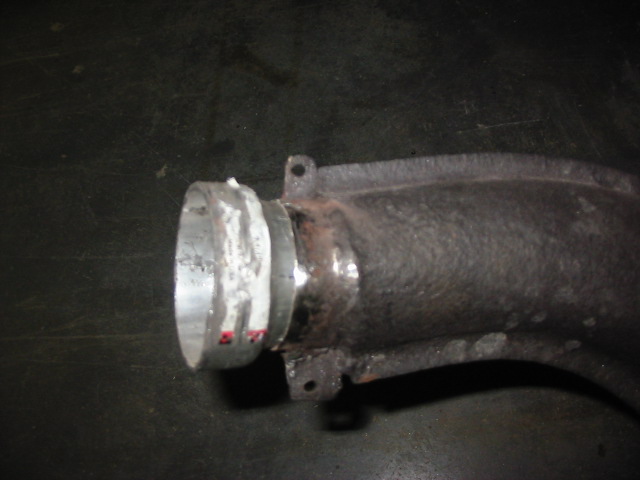
Late in the afternoon I ran into a small problem with the exhaust. My previous Y-pipe repair failed leaving a rather large hole in the manifold. Also the collar on the end of the head pipe that slips on over the manifold cracked completely off.
When I got home I sent the Y-pipe over to a friend with a Mig welder for a proper repair, and I repaired the collar on the muffler myself. I fabricated a new collar from a piece of exhaust adapter pipe and had it Mig welded in place. The Invader’s second trip that year was the annual Winter Trip at the Sooley cabin in February. On the very first run on the very first day I hit a dip in the snow at the edge of the pond at mid speed and flipped the Invader upside down. The machine slid upside down about 50 feet up the frozen pond with me just ahead of it on my back. Luckily I survived, and more importantly the Invader survived with only one very small crack that I will repair later...and NO scratches in the paint! This really demonstrates the benefit of using clear coat when painting! The Invader ran perfectly for the rest of this trip and for the rest of the season. That summer it was gracefully stored behind the shed again...in a fancy blue tarp.
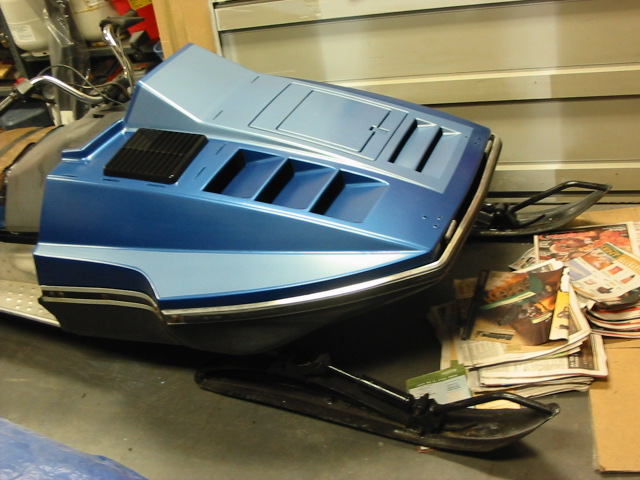
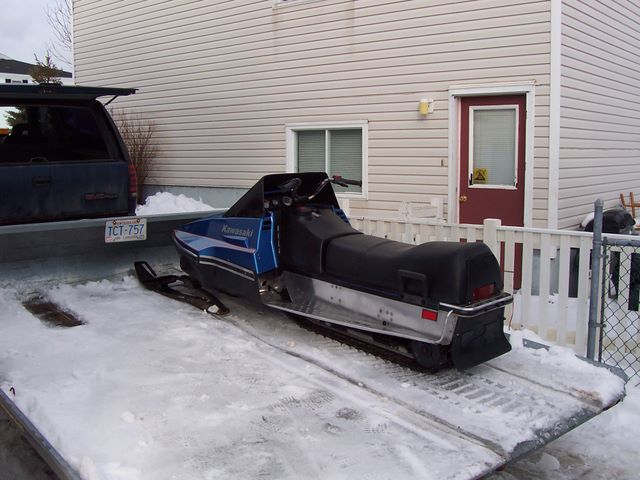
The following Fall I finally installed the decals I had custom made for the hood, and installed original looking pin stripes. I also fabricated a low black windshield from a piece of crazy carpet as factory windshields are hard to find for such an old sled. The old Invader never looked better so I loaded it up and headed to the Goulds for our first ride of 2006. On that trip I started the sled and took it off the trailer, it shut off about 15 feet from the truck. An electrical gremlin continues to devoid my engine of spark. So far I have replaced most of the electrical wiring, ignition coils and cleaned all of the connectors but I suspect a defective stator plate is the culprit. I hope to have this problem solved soon to have the Invader in back riding order. 2012 Update: Having sat not running, outside, and uncovered for over 5 years, I finally decided to part ways with Project Invader. The paint is faded and most of my work reversed by mother nature, I just don't have the time nor desire to bring the sled back to the condition I once had it, plus get it running. The man who bought it restores old sleds as a hobby and is going to perform a full restoration of this unique sled! Maybe I'll even have the opportunity to purchase this sled in fully restored! Cheers, MIKE
Copyright © 2025 Michael Smith
|