|
Area51- Our Backyard Vegetable Garden-Year One 2025: |
||||||
I've been entertaining the idea of improving our large, mostly empty backyard by putting in a vegetable garden ever since we moved to Torbay back in 2014. Sandra didn't have much interest in doing so, and it's a lot of work for one person so plans got shelved, that is until now. This year I finally set to growing our own produce in an on-ground vegetable garden and a backyard greenhouse.
April 26th: Today we set about planting seeds for starter plants. Here on the East Coast of Newfoundland our growing season is relatively short. To make best use of that time some plants are best started indoors, hardened off, then transferred to an outdoor garden, planter box or greenhouse depending on the variety.
Plastic planter cups were filled with Pro-mix soil.
Paper cups were used for our onion starters, we planted the seeds at the depth indicated on our seed packets.
In the end we have a wide variety of onions, peppers, sunflowers, lettuce, herbs and finally some perennial flowers for the planter boxes in front of our house.
May 1st: First signs of life as our Lettuce has sprouted already!
May 3rd: Within a couple days of our first sprout all of our lettuce plants are up, these were quickly followed by sunflowers.
May 13th: This week our housemate came back from visiting her parents on the West Coast, she brought home a car load of Tomato Plants that her father started a few weeks ago.
May 19th: The awful paper cups we used for the onion seeds became moldy and smelled very musty despite lots of airflow and proper watering. We ditched all of the paper then at the same time separated out double occupancy pots. We transferred our onion crops to larger plastic pots which should work well until they are ready to transplant outdoors.
Shelagh's sunflower plants were also separated out into individual large cups and are doing great!
All of our pepper varieties (Green, Jalapeño and Banana Peppers) are up and doing great. The only things that didn't come up were chives, rosemary and catnip.
We planted sugar snap peas later than the rest on May 7th, within a week they were sprouted and today are doing extremely well!
So far everything is coming along very well!
June 7th: All of the starter plants have really taken off!
We've already begun moving plants in and out during the day. The rooms indoors only get sun in the evening so putting them out on the back deck on beautiful sunny mornings will both harden them off and take better advantage of those ever important sun rays!
In dealing with the greenhouse permit I picked up a couple packages of Marigold seed which just happen to be the town's flower of the year! These flowers are supposed to be a great natural pest deterrent when planted alongside pepper and tomato plants later in the greenhouse. Stay up to date on our seedlings in the Planting section of the page from here on!
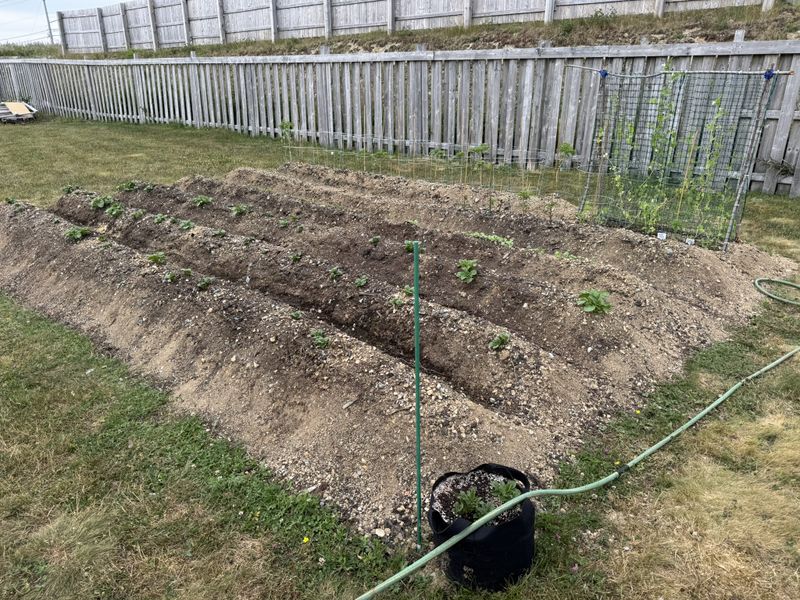
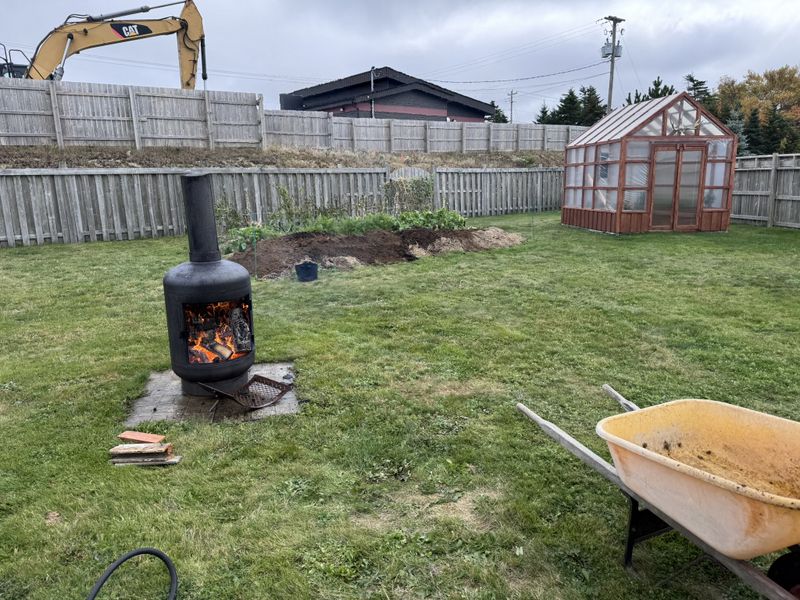
My plan for this year is to do an on-ground planter bed. There is pretty well no topsoil back there, the ground consists of sod which is really a mat of moss, grass and weeds grown right on top of gravel a leftover from the previous owners. My goal is to grub off the grass and pile it up to eventually break down into compost.
I staked out the garden beginning with the rear line eight feet out from our back fence to take advantage of unobstructed morning sun. Next I staked out the rest of the plot creating a garden fifteen feet by thirty feet, we plan on using one tandem load of topsoil so we are flexible on the final length. Drainage here is very good and the area receives great sunlight just about all day long.
May 15th: Topsoil delivery day! Sandy, although not heavily involved in the physical labor part of the garden build, has been instrumental in tracking down deals on supplies. This gentleman had the best deal by far over anyone else for a tandem load of screened topsoil, was local here in Torbay and showed up on time.
With soil on the ground and showers in the forecast for Sunday and Monday of the holiday weekend I immediately set about grubbing off the area previously staked out.
It was steady monotonous work tackling this by hand, but the cost savings over renting a mini excavator will itself pay for a large chunk of the greenhouse build.
By Friday mid-day I had an area approximately 15'x18' cleared off so I decided to begin hauling in soil to get a handle on how far it would cover. I didn't want to have a pile of ground cleared off and not enough soil to adequately cover it.
I piled in the soil stacking it about 15-18" high as it will undoubtedly settle. By the time I roto-till in peat moss and compost then shovel it up into drills I should have approximately 20" of planting depth for root vegetables.
By the end of the day Friday I already made a good dent in the topsoil pile out in the driveway.
With the initial area mostly filled in I called it a day around 6pm. Tomorrow the job will continue by grubbing off more grass.
Saturday morning I was back at it grubbing off another five feet of sod then wheeling in more soil.
I left enough soil out in the driveway for the Greenhouse planters and a couple odd jobs around the house, so the final garden size came in at 15'x22' which will certainly work well for this first year of gardening.
June 7th: Today I got up early and headed to the Robin Hood Bay landfill to line up with the crowd at the Residential Drop off facility. It is here residents can pick up free community compost which has been crafted by city staff from compostable materials collected from residents. There is no limit on the quantity of compost available but you have to load it up yourself by hand. When you get to the head of the line the traffic director will point you in the right direction.
We had a pretty good system. One person loaded up fish pans while the other lifted them aboard the truck and dumped them out onto a tarp, eventually loading the bed quite full.
It took us approximately an hour to get through the busy Saturday morning line-up and another 45 minutes to load the truck by hand.
For this load I got the truck into the backyard and unloaded directly onto the vegetable garden which saved a ton of work wheel barrowing it in from the driveway.
The following weekend, Sandy and I headed out to the Goulds to gather some peat moss for the garden. ATV's have this area of wetland mulched up perfectly while warm dry weather of late had it dried out and was quite easy to shovel.
We had a further distance to lug this weekend so I used my Pelican slide which worked out very well moving the peat moss.
Just like before, I parked the truck alongside the garden and shoveled the peat moss right on top of the compost.
The last step in the garden build out was renting a rotor-tiller to get everything well and truly blended. Home depot rented this mid size Honda on a four hour rate for 1/20th the cost of purchasing one. For a machine that realistically gets used once a year, this was a tremendous value plus I don't have to store it!
My plan right now is to begin planting root vegetables in the main garden in June. Greenhouse plants such as peppers and (for awhile) tomatoes will depend on when I get the Greenhouse finished and from there also depend on the weather.
June 7th: Although our main vegetable garden is not yet ready to fully plant out, some of our sugar snap pea seedlings are getting way out of control and really need to go in the ground. Today I headed out on Project Foreman in search of some fairly straight alder (or similar) limbs to build a trellis in the garden.
This cost effective plastic mesh from Home Depot was the final piece. It's not fancy but I really like the look of the natural sticks and modern plastic mesh, in any case it should work great to support the climbing sugar snap peas.
First I shoveled up the first couple drills into which I planted russet potatoes. We ended up with three full length drills of spuds which should yield very well.
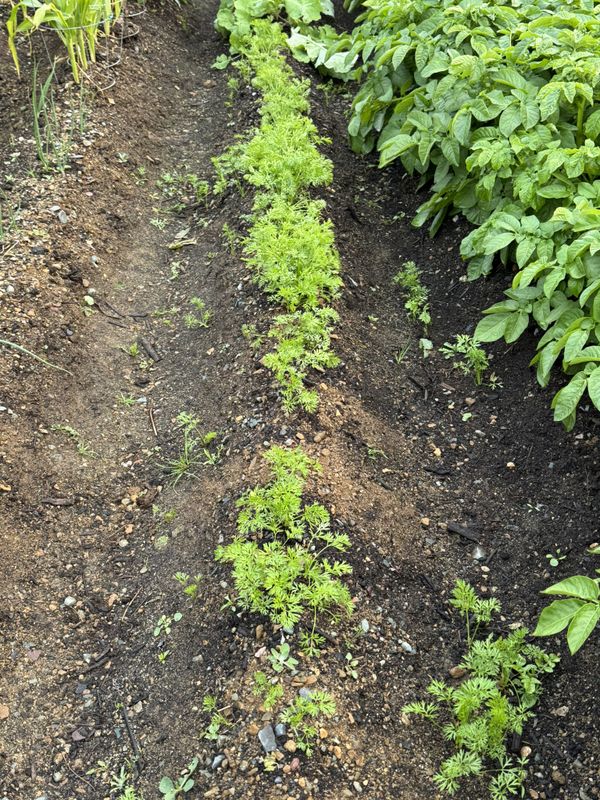
The next drill (fourth from the right) is seeded approximately 2/3's with carrot and the remainder turnip.
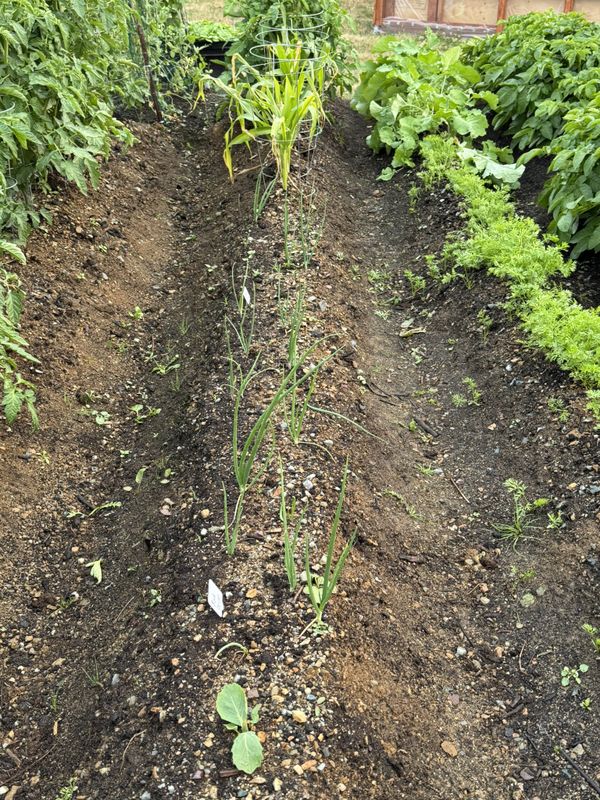
Into the fifth drill I transplanted red and white onion seedlings for the first 2/3's the remainder will be tomatoes.
The final drill has our sugar snap pea trellis and beefsteak tomato seedlings placed inside tomato cages (all ty-wrapped together) and a bamboo stake.
June 26th: We have our first flower on the snap peas!
June 30th: Turnip was the first of our garden seeded veggie crop to get out of the ground and so far it's looking great!
July 2nd: Carrots weren't too far behind sprouting just a couple days later.
July 4th: Finally the first of our russet potatoes poked their way out of the ground and are joined daily by more and more growth.
July 7th: We have our first pod on the snap peas, so we're well on our way to having actual food from our garden!
July 11th all plant types have broken through with new growth appearing every day!
July 15th
July 19th
July 25th
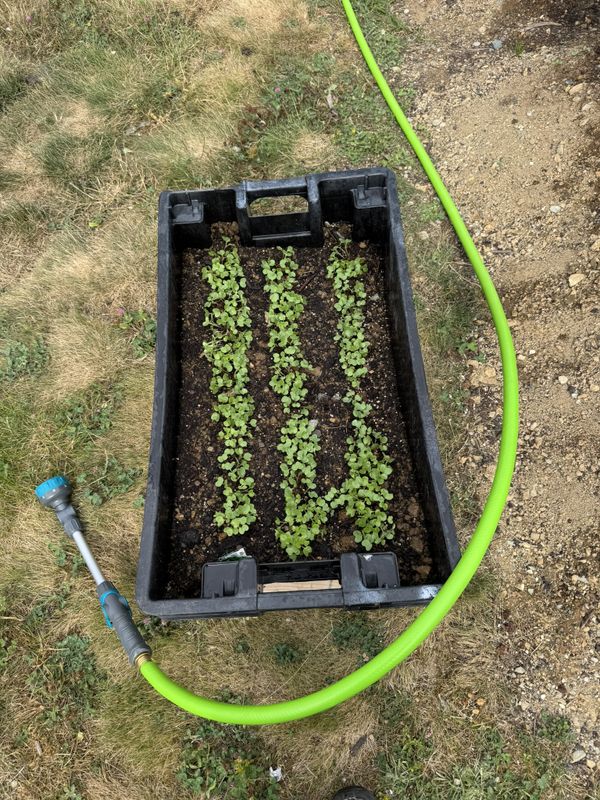
Last week I planted some turnip top seeds, I was out of room in the main garden so I threw them in a fish box along side the garden.
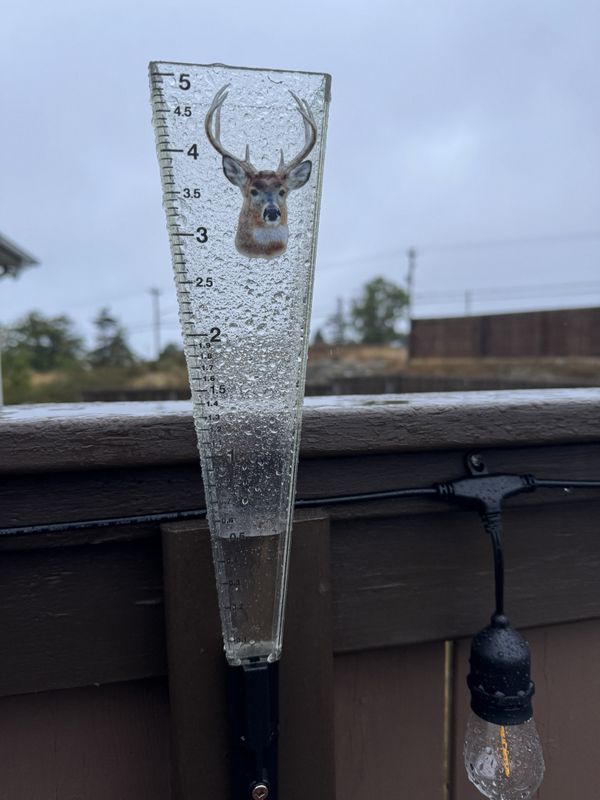
July 28th: The garden is doing very well despite the dry spell with daily and sometimes twice daily watering. The same can't be said for our poor grass!
A couple weeks ago I planted cabbage seeds. I put them in fish boxes so that they are up off the ground to prevent damage from slugs, and covered in net to hopefully prevent damage from moths/caterpillars.
August 4th haze from the many wildfires just west of St. John's metro area is quite heave these past few days.
Our sugar snap peas are doing very well and we've been picking pods for awhile now!
August 11th: First flower on the potato plants!
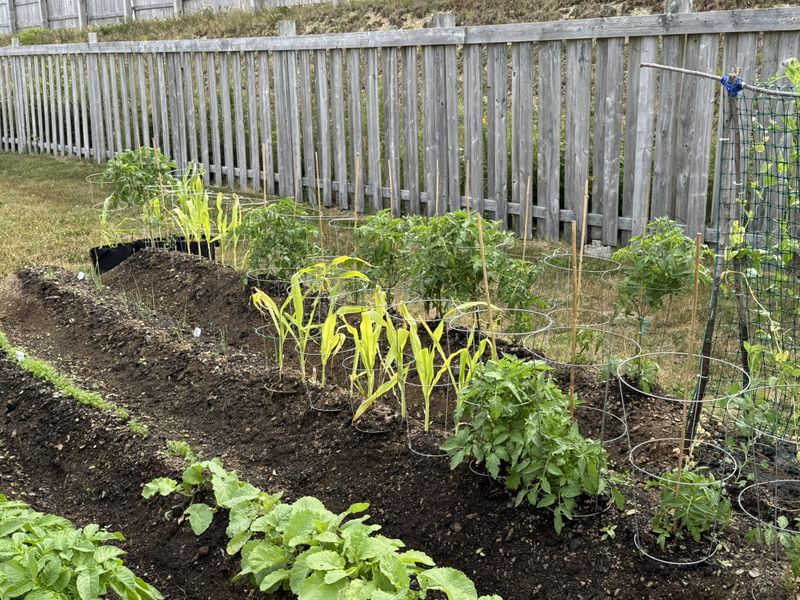
August 13th: Don't know what's going on with these beefsteak tomato plants.
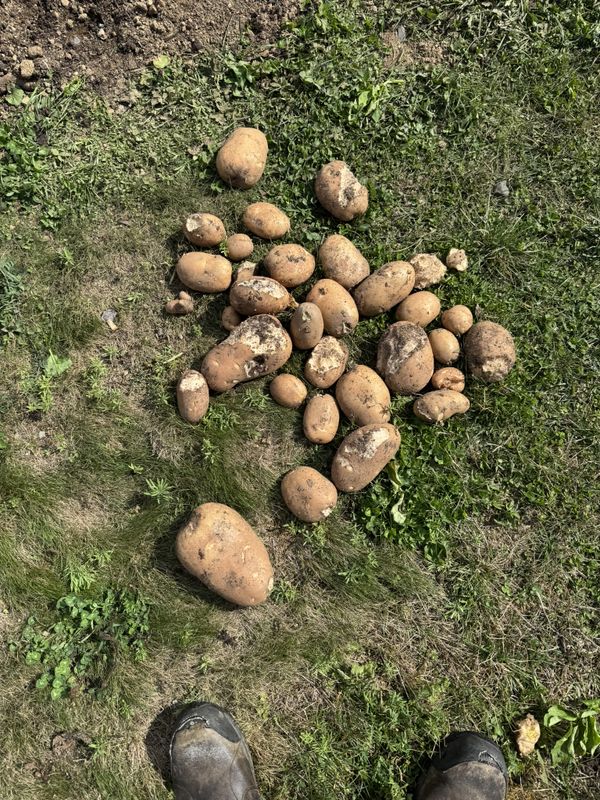
August 25th: Today I pulled a potato plant just to see how they are doing as the plant was leaned over. I was surprised at the ample size of these potato already!
September 25th
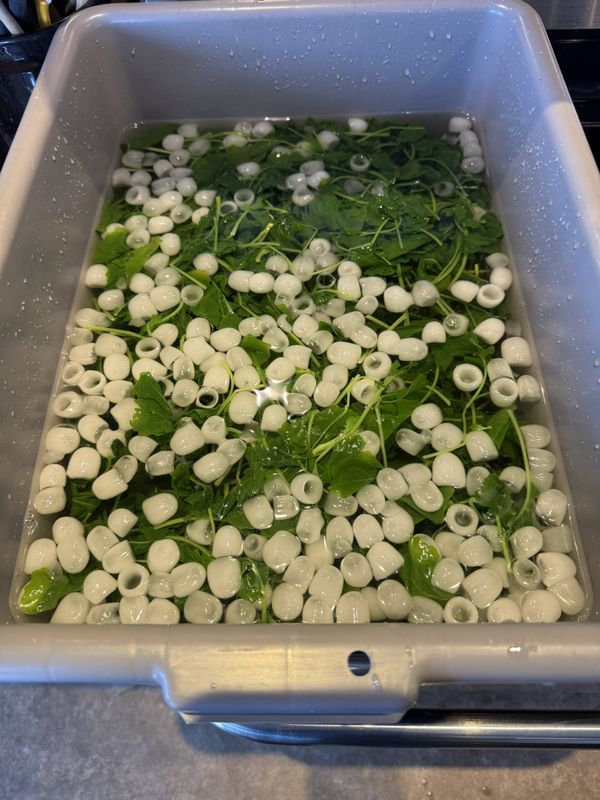
August 13th: One of the first things harvested out of the garden was a first cutting of turnip tops. I picked through them to remove damaged and yellow leaves then stored in bread bags for now.
We were a few days late as some leaves turned yellow, but overall not too bad for a first harvest!
August 16th: Sugar Snap Peas!
Lettuce from the greenhouse.
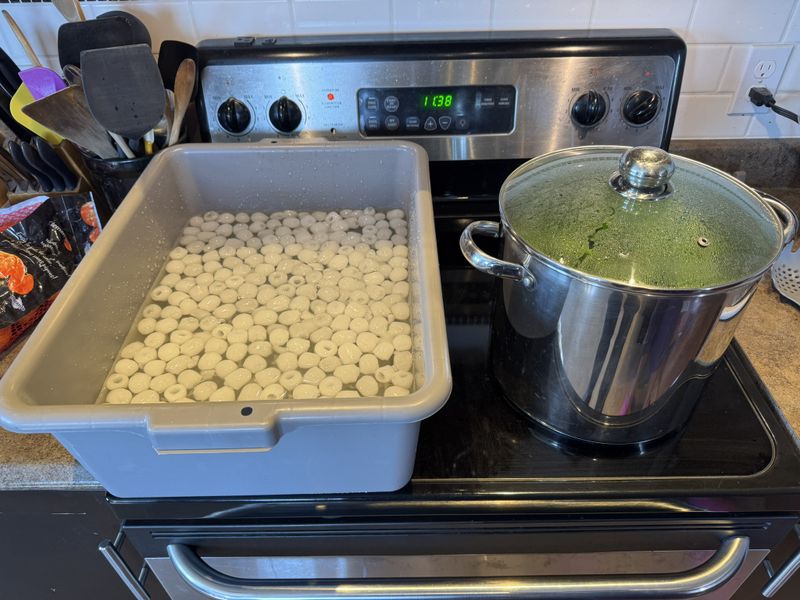
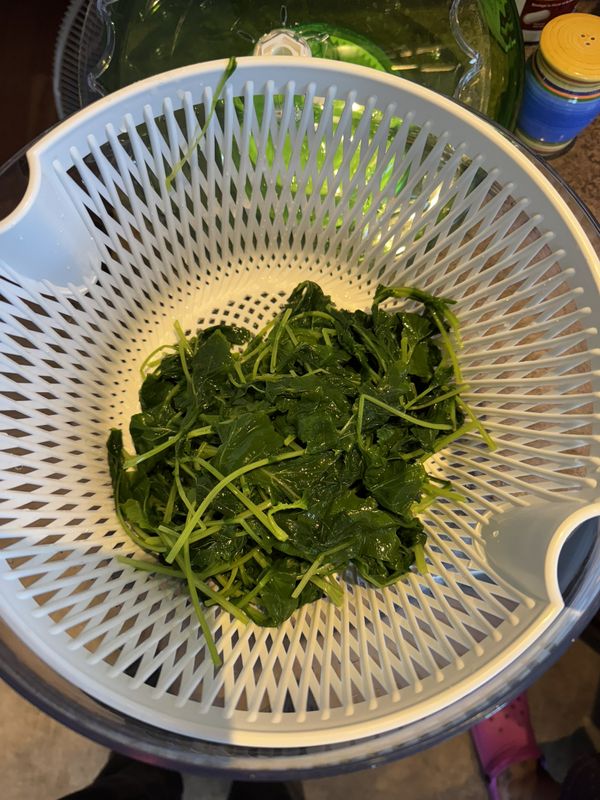
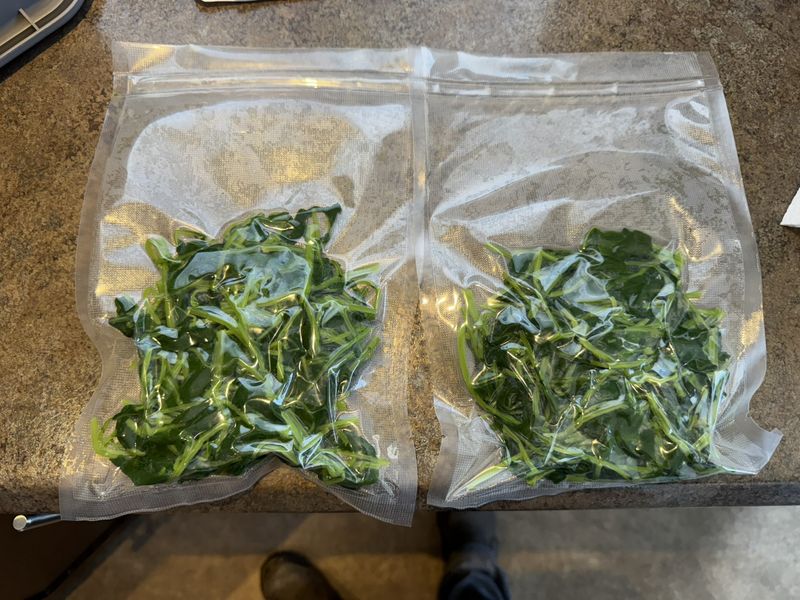
August 17th: Today Sandra and I blanched our turnip tops, which involved par-boiling them, cooling in ice water before straining, vacuum sealing and finally freezing them.
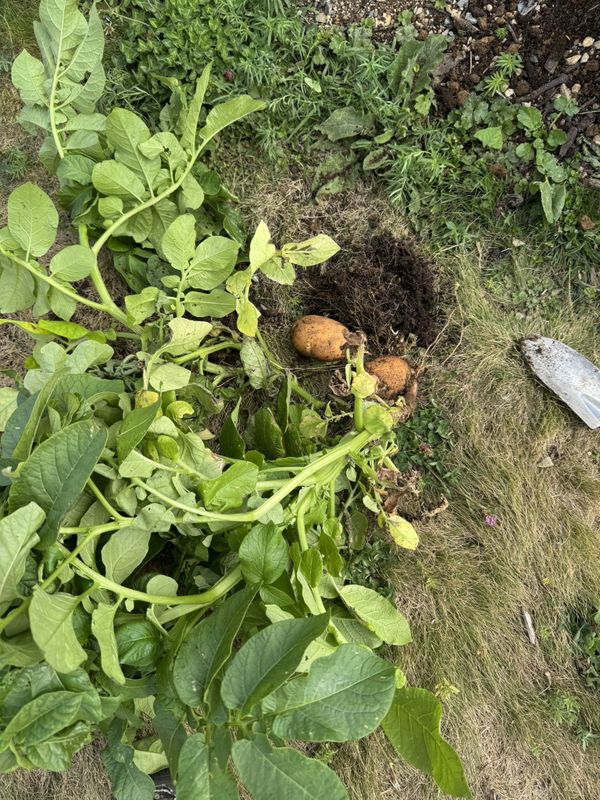
August 25th: Today I pulled a few leaned over potato plants to gather fresh spuds for supper and to have a few extra on hand in the kitchen.
September 16th: Our carrots are coming along very well, however the leftover potato seed planted in grow bags did not do well at all.
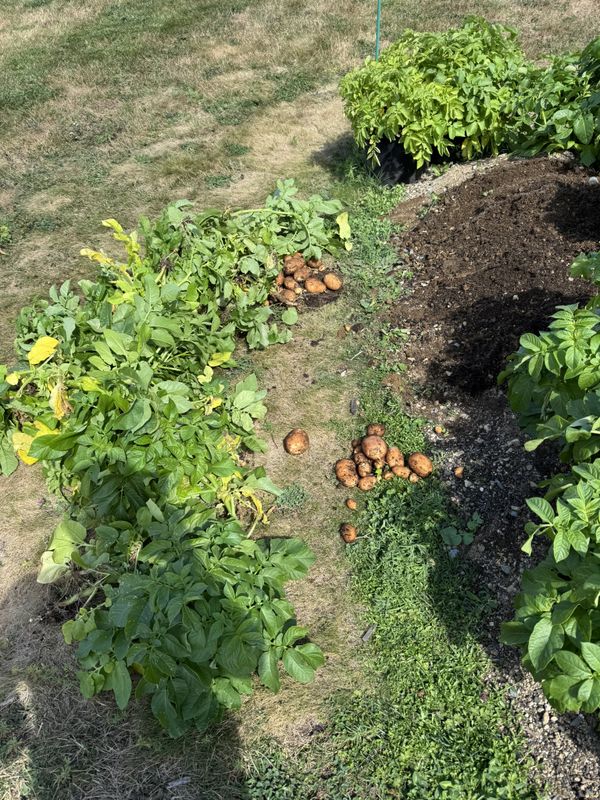
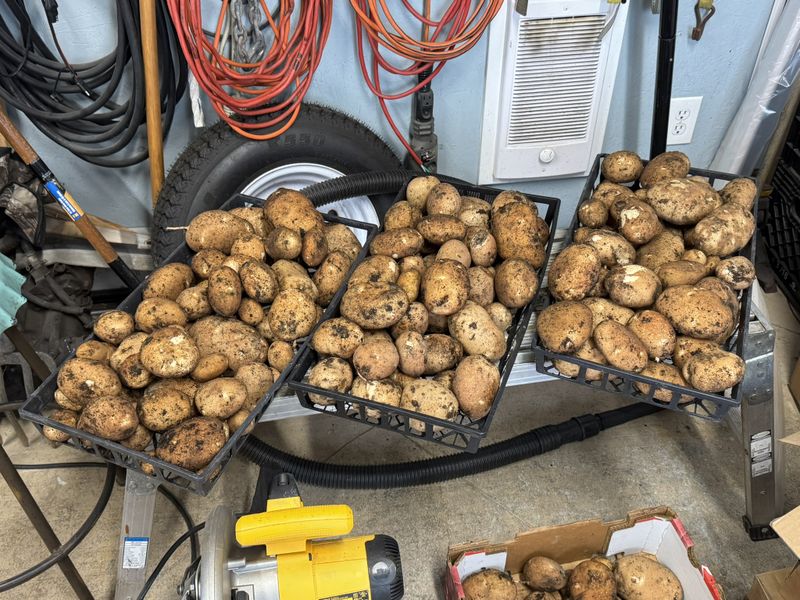
Upon inspecting the garden today we found a critter had bored into one of our potato drills and ruined a few plants. I decided to immediately harvest all of our potato crop and get them drying on racks in the garage before we lost any more.
The loss wasn't too severe, we pitched everything that had a bite mark, unfortunately part of the loss were some of the very largest potatoes we grew!
September 26th: After 10 days of drying down it was time to pack the potatoes away for long term storage.
In each plastic container I laid down layers of wood shavings and potatoes. The potato were dry and unwashed, I wore cotton gloves and rubbed off any loose dirt before placing in the storage tote.
All in all not a bad haul for our first year of gardening!
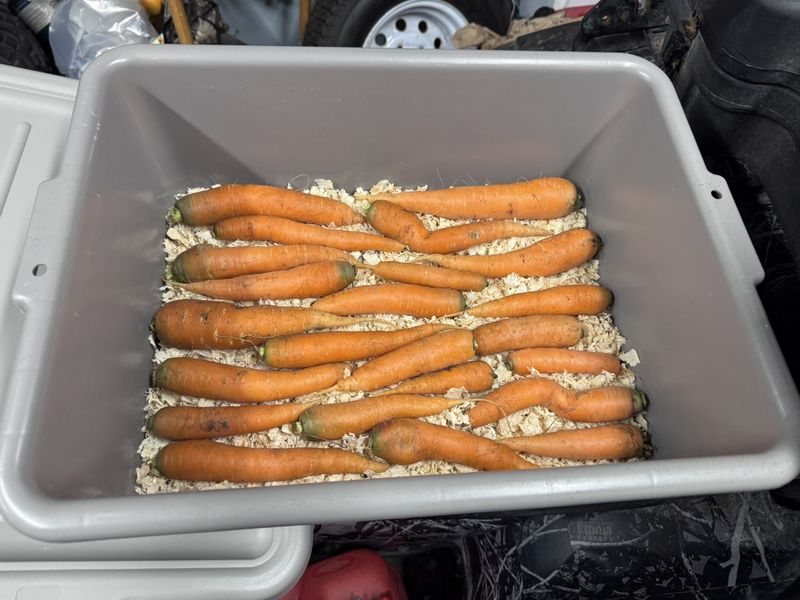
September 27th: Today I pulled a few more carrot for the kitchen. They are doing very well and overall I'm very happy with the harvest and the quality/size.
I also checked on the corn today, a critter got into some but none of it was of much use. Probably something I won't bother planting again.
October 8th: With weather turning cold the weird shaped beefsteak tomatoes never ripened, with some rotting on the vine I harvested the rest to hopefully ripen up inside the greenhouse. Update: some ripened, most of them had rotten spots from the deformities. None tasted very good so overall this variety was a complete loss.
October 13th: Today I discovered that every head of cabbage was infested with caterpillars despite being covered in net. However Thanksgiving Dinner forged ahead with a store bought cabbage but the rest being vegetables from our garden. With only one light frost the turnip was a little bitter, all but the one harvested for dinner remain planted out in the garden. It was absolutely awesome to share a meal with friends using vegetables we grew ourselves!
November 1st: Today I wheeled the last few loads of leftover topsoil out of the driveway and stacked it up in the garden where the potatoes were grown.
November 3rd: With a few good frosts under our belt I decided to harvest the rest of our carrot, onion and turnip ahead of a forecasted heavy back to back rainstorms which will turn the garden to mud.
About 10 days later I stored the carrot and turnip just as I did the potatoes. Rubbing off loose dirt with cotton gloves and storing them in the same wood shavings.
Overall I'm very pleased with the yield from our first year vegetable gardening. I will rotate crop plantings next year and I'll make some changes to what I plant. I won't be planting beefsteak tomatoes or corn again, I would like more space for turnip greens and possibly add broccoli and cauliflower to the mix. Red and yellow onion did OK but would have been better if we didn't start them in those awful small paper cups. Sugar snap peas, potato, turnip, carrot and onion will all make a return for sure!
Cheers, MIKE
Copyright © 2025 Michael Smith |