|
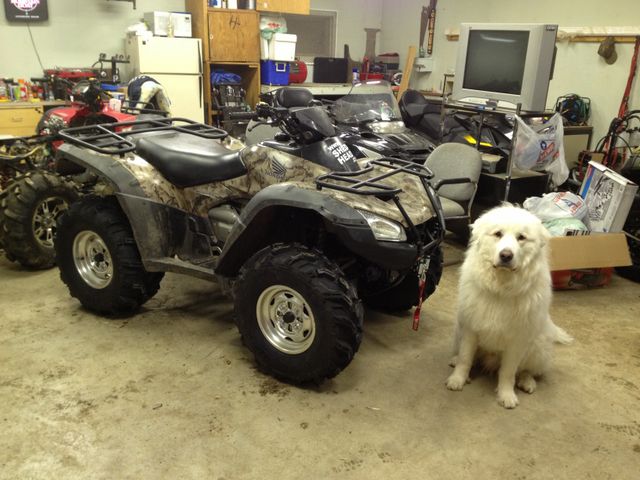
Area51 Project - Steve's Rincon 650:
Machine Specs:
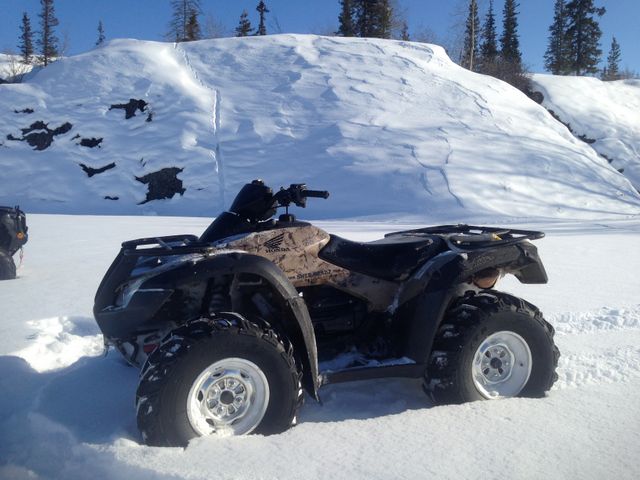
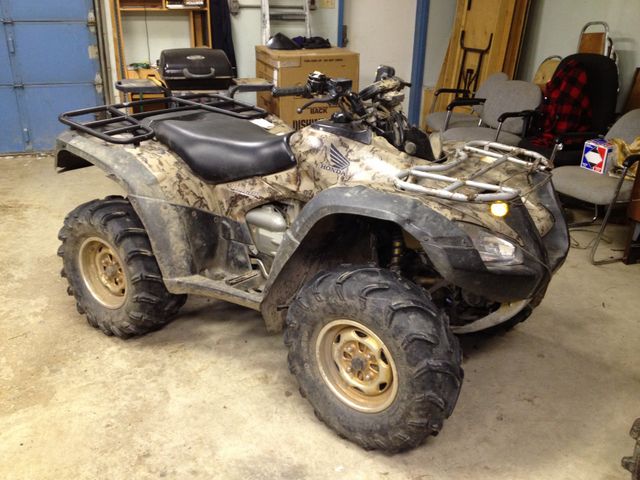
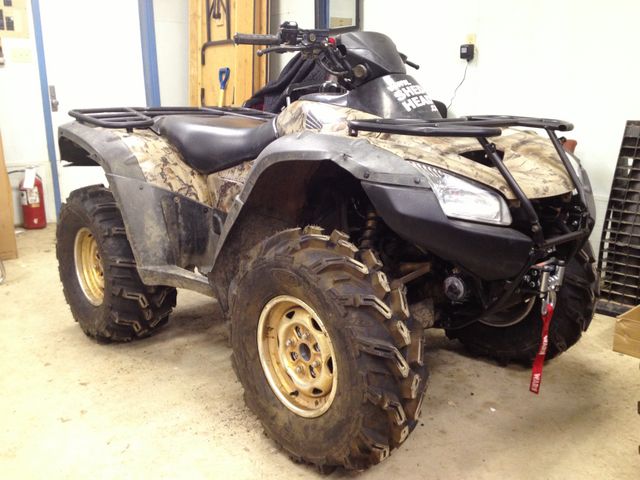
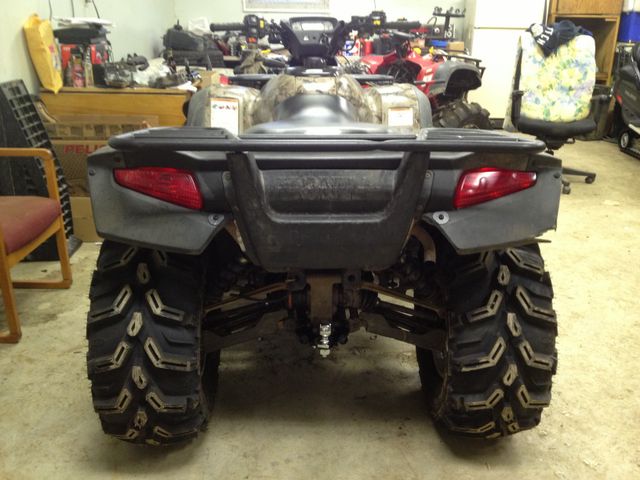
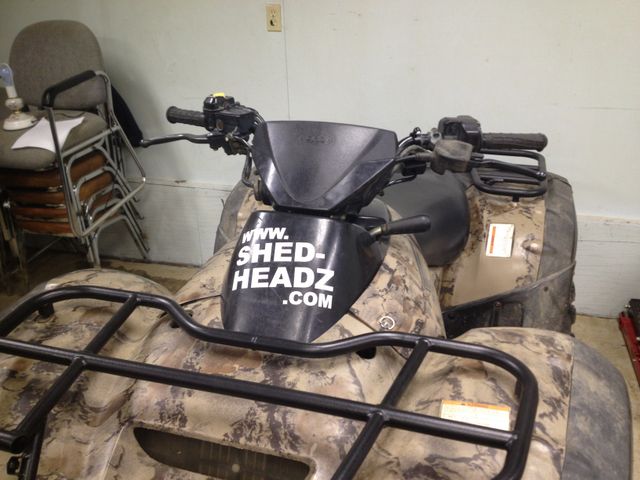
2005 Honda Rincon 650 - camo 650cc Single Cylinder Four Stroke Liquid Cooled 3 Speed Hondamatic Transmission Front Double Wishbone Independent Rear Double A-arm Independent 27" ITP Mud Lite XTR Radial Tires Stock 12" Aluminum Wheels Warn 2500lb Winch with Synthetic Rope Kit Full Ricochet Aluminum Skid Plates Super ATV Front Disc Brake Kit
Project from the Great White North, submitted by Steve Smith, AB/NWT.
March 2016
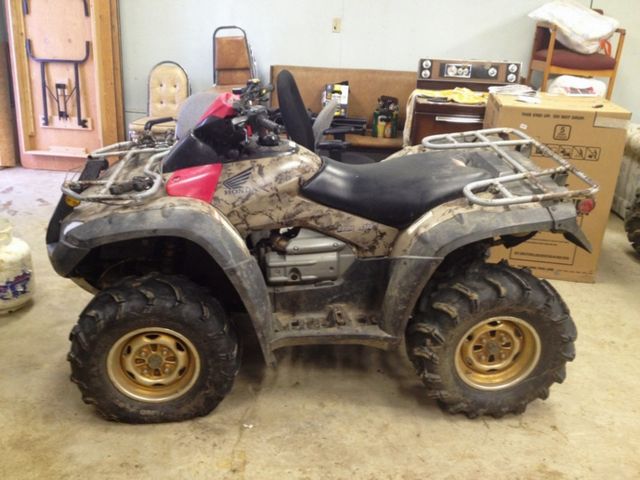
I picked up this quad on a pretty sweet deal, impossible to turn down to say the
least.
I had seen it running earlier this year, but knew it had been sitting in
the sub zero temps (-25 and colder) and under 4 feet of snow for over 2 months. The
deal was struck, money exchanged and I dragged it back home.
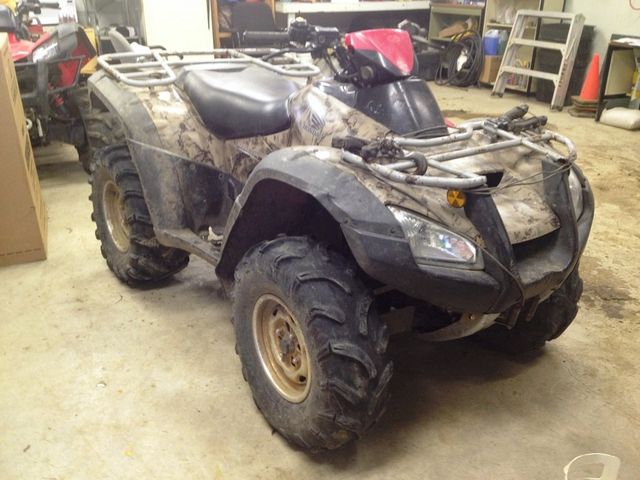
The winch installed on the bike was a no name brand and was fried. The
controller was damaged and the cable was wrapped around the front rack. I
checked around and found a smoking deal on Amazon.com for a brand new WARN 2500lb winch kit which also came with synthetic winch rope. The order was placed and
it should arrive sometime after Christmas.
Day 3 began with a trip into town got me some bed liner, miscellaneous supplies,
my ignition/key and a new camo panel to replace the red one! I also picked up
some black Krylon Fusion paint to cover the red cluster plastic. When I got home
I finished painting the back rack and put it aside to harden overnight. I'll
reinstall it on my next days off. I did install the ignition, however, the
battery was dead and refused to take a charge. I was able to use the pull
starter and got it going, but there was an electrical problem somewhere. I could
hear a noticeable clicking which was drawing down on the electrical system, then
the bike stalled.
When I removed the rear rack I had to take the taillights off and found a few
broken clips which caused the lights to dip in the housing. I made some new ones
and pieced everything back together. With the rack painted and dry, I reinstalled it. I cleaned up all the bolts and
replaced a few that had some threads missing. I used anti-seize on all the
threads to prevent problems in the future. The new clips for the taillights
worked perfect and they are reinstalled, sitting right and solid with no more
play!
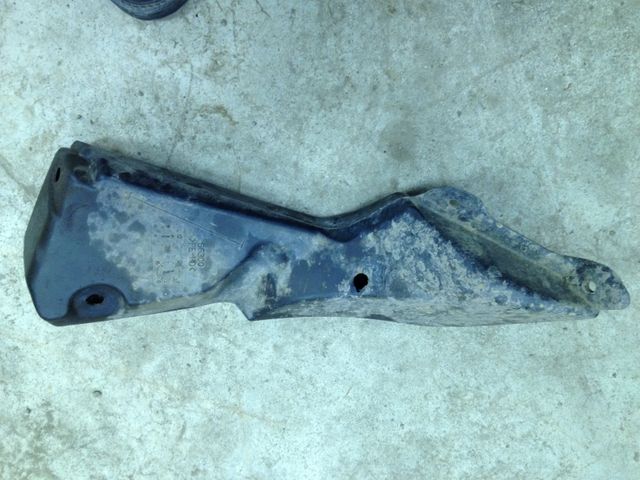
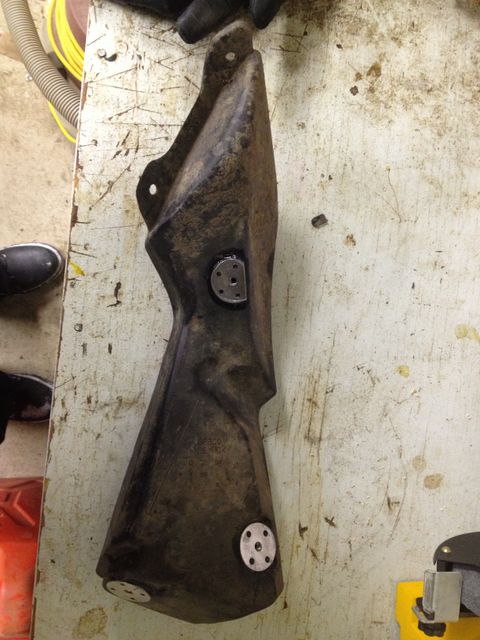
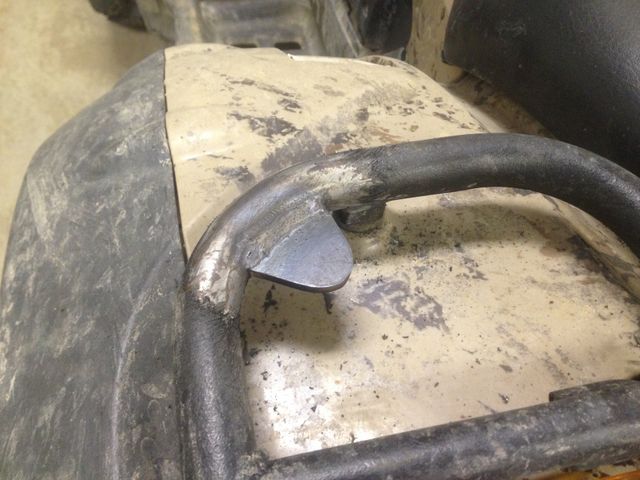
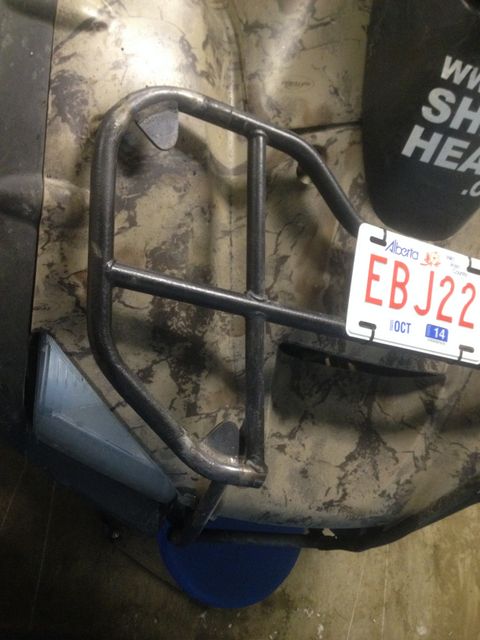
While taking apart the front plastics, I found the plastic 'bumpers' were being held in place with a coat hanger! The bumpers bolt to a metal sub frame with rubber grommets which fit in a 1/2" hole in the plastic. Over time the holes have stretched so the bumper came loose and is now hanging/falling off. I came up with a solution to solve the problem and to allow the bumpers to be easily removed in the future for maintenance and access to the headlights.
I made 3/4" x 1/4" inch rubber washers which I will use between the frame and the bumper to allow some flexibility like the original mounts had for going over rough terrain so the new mounting hardware will not break free. Ill post an update when its all back together.
The next small project is a thorough cleaning of the radiator and oil cooler.
The temp light came on after riding it the other day and a check on
hondaforeman.com revealed it's a common problem on the Rincons. The rad and oil
cooler become caked with mud and will need to be taken apart and cleaned
thoroughly. I will be adding a spacer between the rad and oil cooler as it is
supposed to give more air flow for the rad and make it easier for future
cleaning while installed on the bike.
Since the last update, I have been working on numerous mini projects with project Rincon:
Rreinstalling repaired the front ‘bumpers’ Replacing front a-arm bushings Fixing the seat mount Painting the odd red plastics black Clean and replace the brakes Fixing the cooling gremlin...
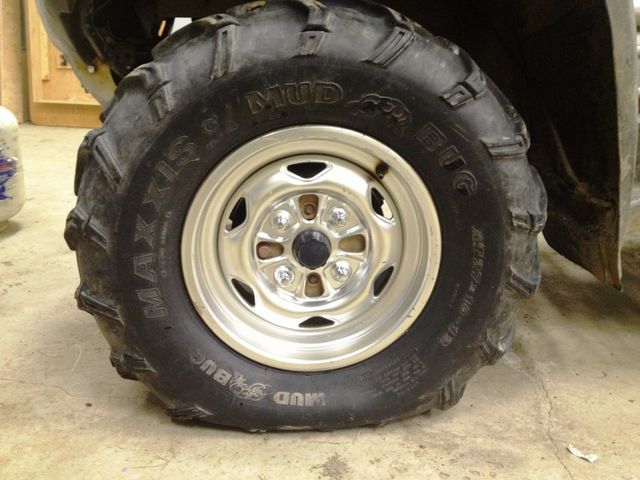
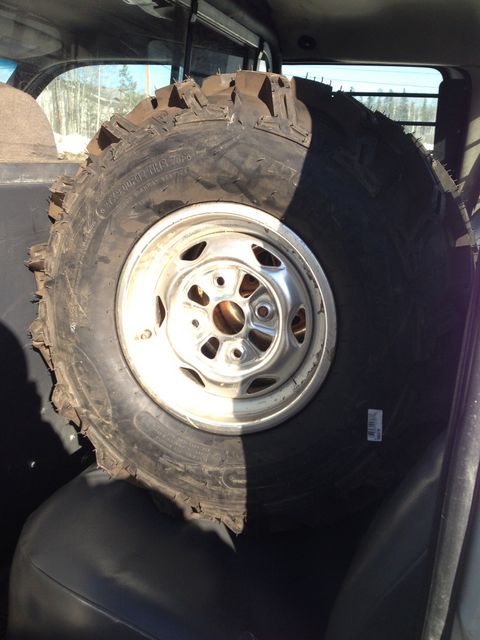
T he worn out Maxxis Mud Bug tires have been replaced with ITP Mudlite XTR radial tires 27x9x12" in the front and 27x11x12" in the rear. I got a pretty good deal on them and after speaking with my brother who uses XTR's on his Foreman, I was sold on them! With the tires replaced, all the wheels have now been cleaned and, wow, what a huge difference from when I first saw them. Just goes to show what a bit of elbow grease can do!
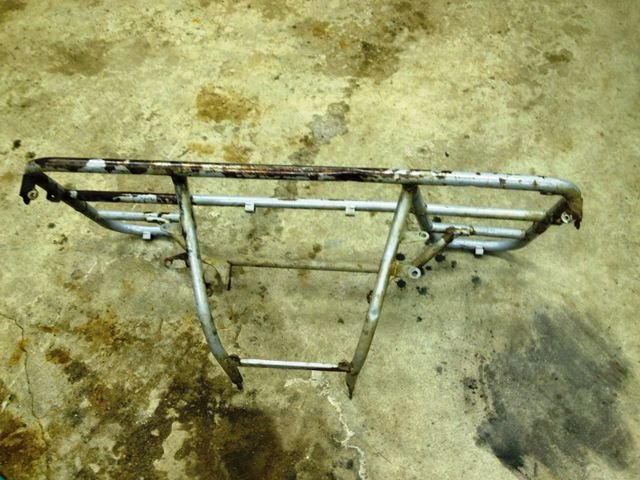
The front rack has now been cleaned, prepped and repainted with bedliner. As with the tail lights, I fixed the brackets and housings for the headlights and cleaned everything up. The front rack was reinstalled using the original hardware which I cleaned up and coated with anti-seize. This stuff is cheap and saves so many headaches when doing maintenance down the road, highly recommend taking the time to apply this on reassembly.
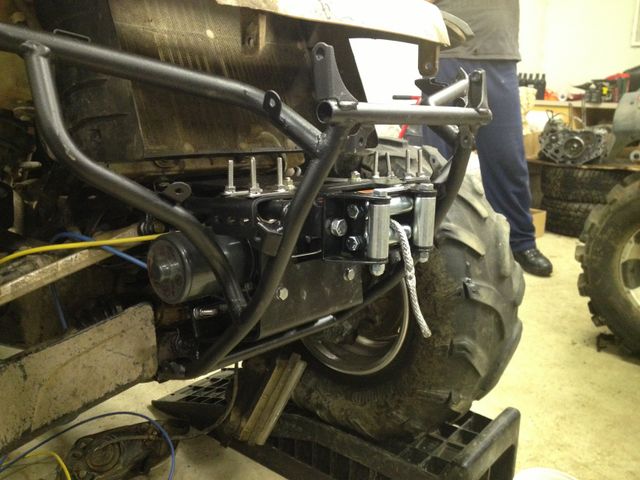
Next on the list was to install the the new winch. I previously removed the seized Warn 2000lb winch and it didn’t come willingly! It made a valiant effort to stay attached to the bike as all the u-bolts were seized, luckily all of them snapped off despite being soaked in WD40! The winch I chose to replace the original with is a Warn 2500lb with a synthetic rope. I got a pretty sweet deal from Amazon.com, almost $200 cheaper than from the dealer including shipping and duty. I replaced all the mounting hardware with stainless steel as I didn’t want to run into the same problem with the original hardware down the road. The winch mounting brackets were also cleaned, prepped and repainted in the same bed liner paint that I used on the front and rear racks. Everything installed with relative ease; the wiring was pretty straight forward and everything worked first try upon completion!
With the front rack and winch reinstalled, the front bumpers I repaired earlier were installed along with the headlights. Everything seems to be working fine and they seem pretty solid. The modified rubber mounts I made seem to be working; time will tell to see how they hold up under riding conditions.
In between painting the front and back rack, I had been pondering what to do with the plastic trim that surrounds the electronic gauge cluster. When I bought the bike, someone had obviously broken the original and replaced it with a red one. I've had previous success with Krylon fusion spray paint (a paint specifically designed for plastic) on other projects so I opted to prep and paint it black as opposed to replacing it. A few coats later and using a finish coat of Easyliner bed liner to give it a textured look like the rest of the plastics, it looks as good as new!
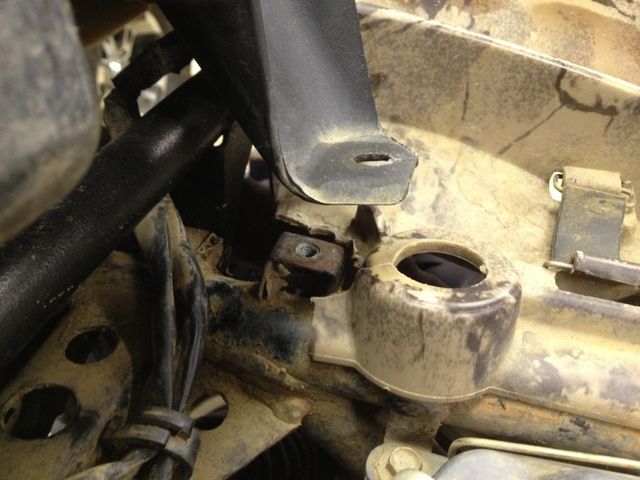
Project Rincon has a cooling gremlin and it continues to haunt me. The Rincon’s are known to have cooling issues and the most common solution is to give the radiator a thorough cleaning. In their wisdom, when Honda designed the Rincon, they mounted the oil cooler directly in front of the radiator and it sits only a ¼ inch off of it, so it is very common for mud, dust, etc to build up in between causing the engine to over heat. The Rincons are known to run hot, so any amount of buildup drives the temperature up and turn on the dreaded red temperature light. With the weather finally warming up, I pulled off the oil cooler and sure enough, there was about an 1/8" of mud packed in there. I cleaned it all out with a tooth brush and garden hose. Threads found on hondaforemanforums.com recommended that I install spacers in between the oil cooler and the radiator so that less dirt and mud will get trapped in between the two and make it easier to clean in between rides. I checked my miscellaneous nuts/bolts kit and found ½ inch automotive grade plastic spacers. Further rummaging found 8 stainless washers and bolts that were the same thread as the holes in the radiator. I used a Dremel to trim the spacers and reinstalled everything with the oil cooler now sitting approximately 5/8" off the radiator. Hopefully this will provide some much needed ‘breathing room’ for the rad. Knowing I had a cooling gremlin, in my last parts order, I bought a new thermostat, oil temperature sensor and rad temperature sensor. Living in the North, I have quickly learned that there is nothing worse than having to wait a few weeks to get parts, especially when ordering them from the states! I drained all the coolant and changed the thermostat which went surprisingly well. I had asked one of the guys I work with to pick-up Engine Ice, an aftermarket coolant product which reduces engine temperatures up to 50 degrees Fahrenheit, however, in a breakdown of communication, only 1 bottle was picked up, not enough to do a full change. So, in the meantime I replaced the coolant with the standard Prestone, hoping my cooling gremlin would finally be gone! ...not so much...I ran the engine finding no leaks and no issues, but after 15 minutes of riding the dreaded red temperature light came on. The cooling gremlin remains! I am waiting on my second (and third bottle as a spare!) of Engine ice to show up next week and I will do a complete flush of the system in hopes that this may solve my problems. I have one sensor I am going to attempt to replace on the rad, so I hope a combination of all these things will solve the problem.
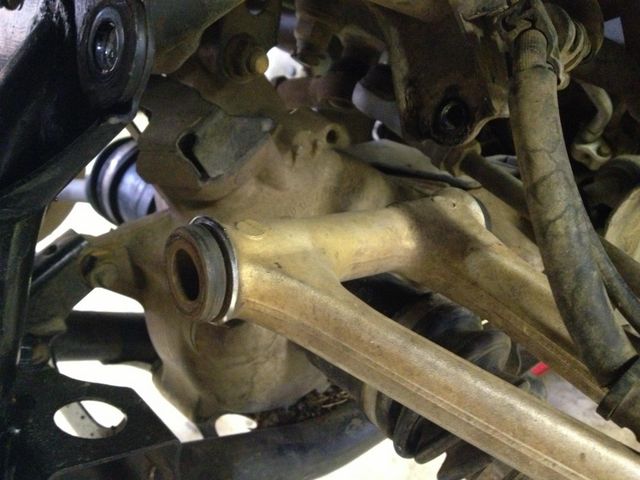
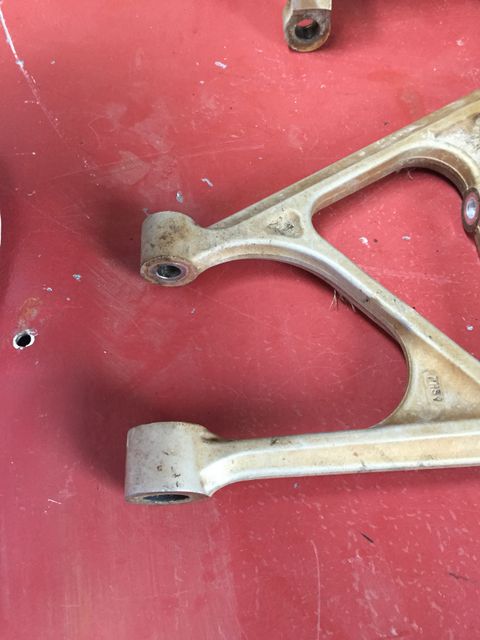
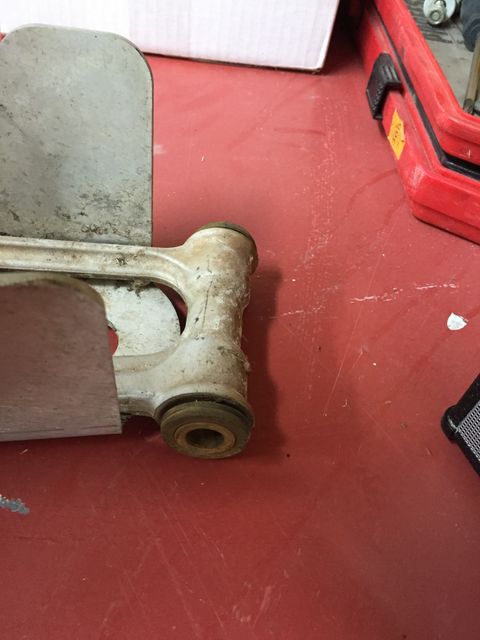
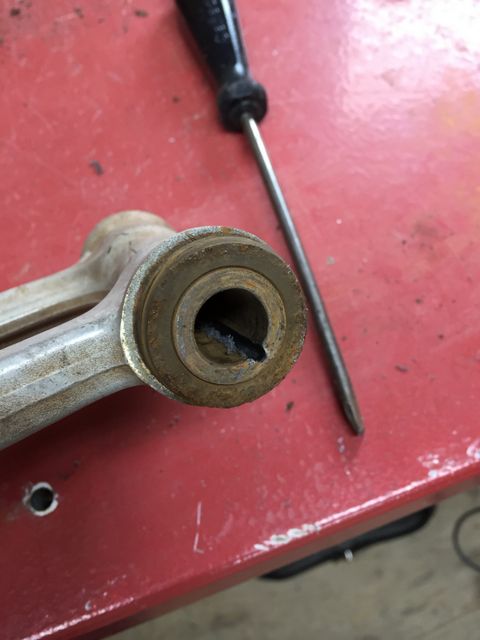
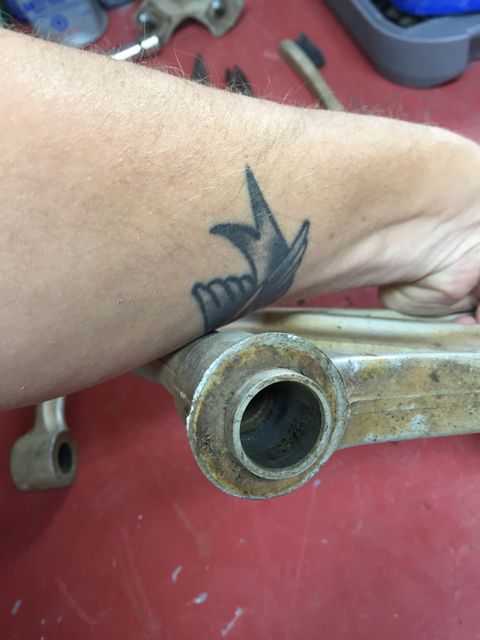
In between all of my cooling gremlin issues, I tackled a long awaited project which was replacing the front a-arm bushings. I had started it a few weeks prior, however, when I finally got the a-arm apart, I realized there was a metal tube inside the bushing which the bolt goes through. This was quite worn, and the dust seals around it had seen better days. On top of that, when Honda designed the Rincon, where the front shock bolts to the a-arm, they use a bearing inside a metal tube protected by dust seals. The bearing was completely worn out as I don’t think anyone had greased it since the bike was new. So, to the parts list I added 2 new bearings, dust seals and tubes for the bearing and front and rear a-arms and brakes for the front and rear.
While I was waiting for my latest parts order to arrive, I tackled another mini project. The plastic under the seat houses a rubber seat mount and mounting point for the plastic to bolt to the frame. This plastic had cracked and a piece approximately 2 inches by 2 inches was missing, this then caused the rubber seat mount to fall off. Without the rubber mount the seat would not sit level and rocked up and down.
My solution was to create a fiberglass patch to replace the missing piece. I had previously picked up a replacement rubber mount, so it was off to Canadian Tire where I picked up a fiberglass repair kit. I used a piece of tinfoil to create a template which was then transferred to a thin piece of cardboard which was then used as a base. I drilled numerous 1/16 inch small holes in the plastic around the entire area to allow the resin to seep into which allowed the new fiberglass to bond to the factory plastics. Over the course of a couple of days, I laid 4 layers of fiberglass to make the thickness even.
When everything was hardened, I trimmed the fiberglass with a Dremel tool and re-drilled the mounting hole to the frame and installed a new rubber mount. It may not be the prettiest thing in the world, but it works perfect. Everything lines up perfectly and is solid. The seat now sits level and doesn’t rock up and down. Finally, my long awaited parts arrived, and on my first days off work, I tackled the front end. I had previously disassembled the a-arm on one side with the exception of removing the bushings. The bushings on the a-arm were incredibly stubborn to come out. After cutting a gouge into the bushings with a hacksaw blade, and using some heat they finally came out. I used a bore brush to clean out the tube then greased the new bushings, metal tubes and dust seals and reinstalled them. Next on the list was to tackle the replacing of the bearing for the shock on the a-arm. The removal of this bearing proved to be an even bigger pain than the bushings. I ultimately resorted to using a dremel to cut a gouge into them and they reluctantly came out. The reinstall fortunately was a piece of cake. With a new bearing, metal tube and dust seals installed, the a-arm was all bolted back together and I moved onto the other side. Now knowing exactly what to do, the second side was completely disassembled and reassembled in just over an hour. With everything back together, the front end is nice and tight and feels like new! Another item on the list was an oil change. Not knowing when the last oil change was done, I figured it was a safe bet to do so. So with the oil drained, the oil filter was replaced and the oil topped up with fresh Honda 5W 30. I realize this was a massive update and there is still a few things left to do. Next on the list is to get the cooling gremlin sorted! Hopefully a good flush of the system, a second more thorough cleaning of the rad and oil cooler and the addition of Engine Ice will finally solve it for good. Beyond that, I will be replacing the rear a-arm bushings. Now that I know the process, it should be a straight forward job. Other than that, I am just planning on getting out and riding! I pieced together a trail kit with the help of my brother. It currently includes the “ultimate Honda fixer” as coined by my brother (socket set, brake plugs, plug kit, etc), a Warn snatch block kit, tow straps, spare oil and coolant, a compressor and a first aid kit all housed in a pelican case strapped on the rear rack.
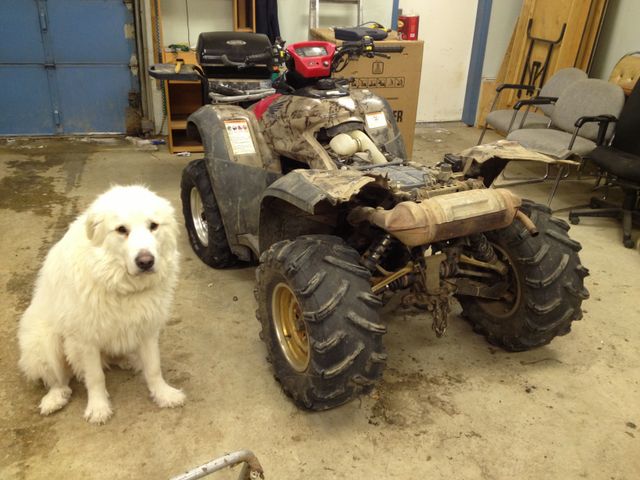
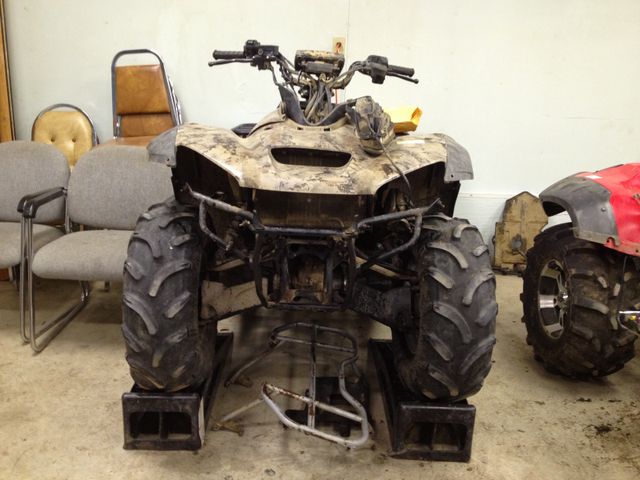
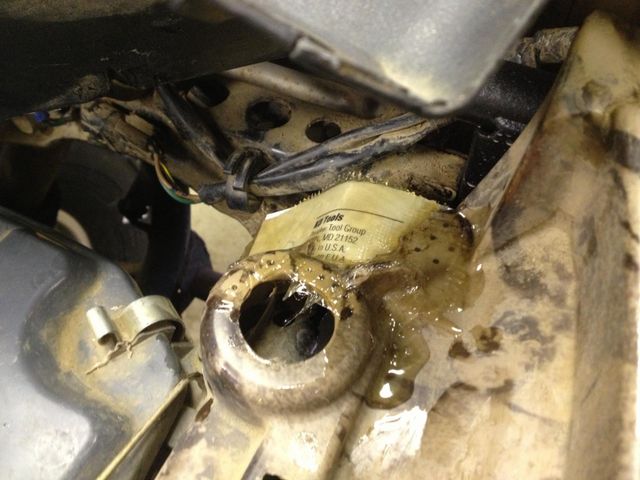
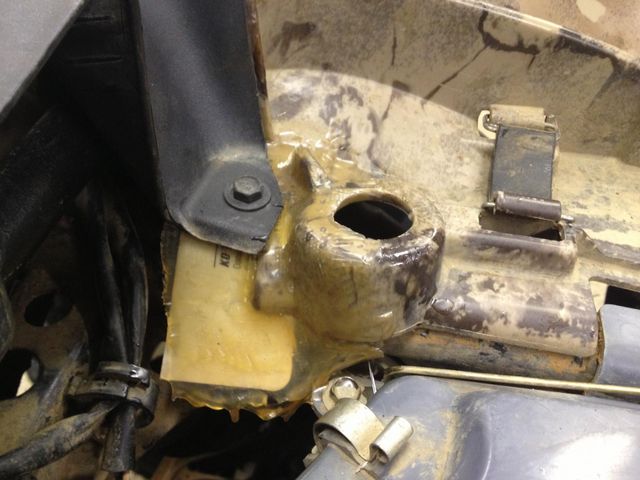
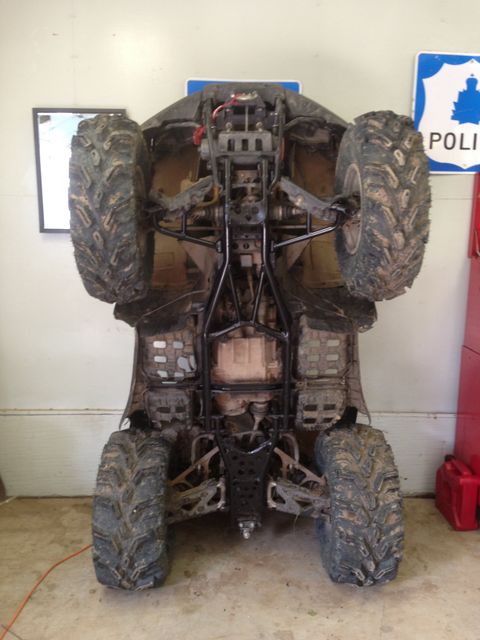
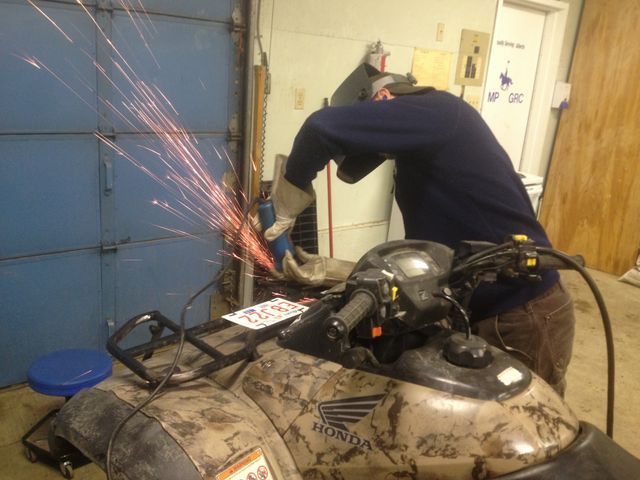
Just a short update despite the face that a month has passed, I managed to get out to the Northern Alberta Area51 facility and log some hours on Project Rincon with my faithful companion Dawson (the big white dog). I’m sure you have noticed by now that he likes to keep me company when I’m out turning wrenches! I have spent the last few weeks attempting to sort out my cooling gremlin which has definitely been a sore spot for me. In between attempting to sort that out, I decided to paint the silver plastics which cover the engine black. Just like the factory racks, Honda in their wisdom painted the engine plastics shiny silver on a camo quad. After seeing Mike’s success in painting teh engine covers on project Foreman, I opted to do the same as it looks much better and cleans up the scratched plastics. I spoke with my brother and after some diagnosing, I found that the fan was not cutting in...at all. I attempted to trace the wires to see if there was a cut or short somewhere along the way with no success. I couldn’t see anything that would be causing a problem After checking all the fuses, I still couldn’t get it sorted out and was unsure if this was a problem with the fan motor, a sensor or a wire. I ran power direct to the fan from another ATV battery and it worked perfectly. One problem solved, the fan works! The solution I came to in talking to my brother was to wire the fan directly to the accessory outlet which gets power when the key is in the run position. This solution is recommended by many members on hondaforemanforums.com and would work great for my application as the fan would always be on when the engine is running. In my opinion, since the Rincon is known to run hot it should not cause any harm. After tracing the wires and ensuring I wired the fan correctly so that it was sucking air through the radiator and not pushing it back through I tidied everything up and topped up the coolant. I fired it up and ran it for about 20 minutes with no sign of the dreaded red temperature light! I quickly threw on my riding gear and went for a ride for just over an hour with no issues! Thinking I had finally defeated the cooling gremlin I came home, washed it down and put it away until the next day when I could get out for a good day of riding. When I woke the next day, my Engine Ice engine coolant showed up! With the engine cool, I drained, flushed and topped off the engine with Engine Ice and ‘burped’ the system to remove all the air. With that done, I took project Rincon out for a ride and everything was going great until about 30 minutes in when the dreaded red temperature light came on. I stopped on the trail and checked the coolant level which was fine, then thinking there still may be some air in the system, I attempted to ‘burp’ it once again. I started the engine again and the light was off, so I started my way back home and about 10 minutes later the light came on again. I managed to limp home having to stop occasionally to allow the engine to cool down, unsure if it was overheating or just a red light false alarm. After allowing everything to cool down, I started diagnosing what the problem may be with no success. I was pretty much at a loss as to what it could be at this time and was hoping that I was not having a water pump problem... After sleeping on the problem for a few days, I conceited defeat and brought project Rincon into town which is just over a 115 km away and dropped it off to the local Honda dealership and asked them to diagnose the problem. The next day I got a call and they stated there was a sensor which was not working which caused the water pump to not engage and pump coolant through the system. In ordering sensors previously, I thought I had ordered and replaced them all, but I missed one, and sure enough it appears this one may be causing my problem. Honda did a test and the water pump itself appears to be fine which was awesome news. They ordered the new sensor and will install and ensure it fixes the problem. I am hoping this will be the end of my cooling gremlin. The weather has been great and I am really looking forward to getting it back to get out for some riding. I still have to do the rear a-arm bushings, but they are not all that bad in comparison to the front, so I will be logging some riding time before I take that apart. The only other project I will be doing is replacing the worn out factory grips. Not a big deal, but it’s the little things that make a difference. The gremlin remains!!! As you can well imagine, I was pretty upset. After getting project Rincon back from the dealer and heading out for a ride, the light came on after about 5 minutes. Back to the garage I went. I went on-line to www.rinconriders.com, a website dedicated just to the Honda Rincon in hopes someone may be able to help me out. After spending a few hours searching the site, I found a post that made reference to my dreaded red temperature light coming on after about 5 minutes and he said it was triggered by an oil temperature sensor at on the back of the engine above the oil drain bolt. Off to the garage I went and sure enough, I found the wire going to this sensor completely cracked off. I had been working on the cooling system, but the oil temperature system activates the same warning light. I got the part number and ordered up a new sensor which was only $15. While getting under project Rincon to look at this sensor, I noticed the factory plastic skid plate was cracked pretty bad and came off in 2 pieces when I removed it to access the oil temperature sensor. I scoured the internet and found a company out of Ontario, www.2koolperformance.ca who sells Ricochet skid plates and front and rear a-arm plates direct from Ricochet at a pretty good deal. The order was made and they should be here just in time for my bother to travel up North for a garage day!
In this update, my brother made the venture West to the great white North for a visit. It was an awesome time, lot’s of great riding, shooting, and times were had. See the Rips and Trips section for a more detailed account of the trip and pics!!! On another positive note, with Mike being here, we made some serious progress on Project Rincon. Mike put his electrical skills into action and wired the new oil temperature sensor with a new custom connector which replaced the old corroded, cracked factory piece. With the new sensor installed, Mike took it for a test run and alas the dreaded cooling gremlin is gone!
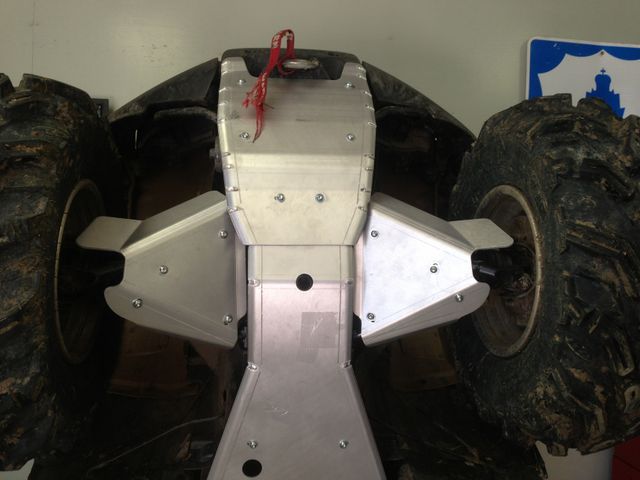
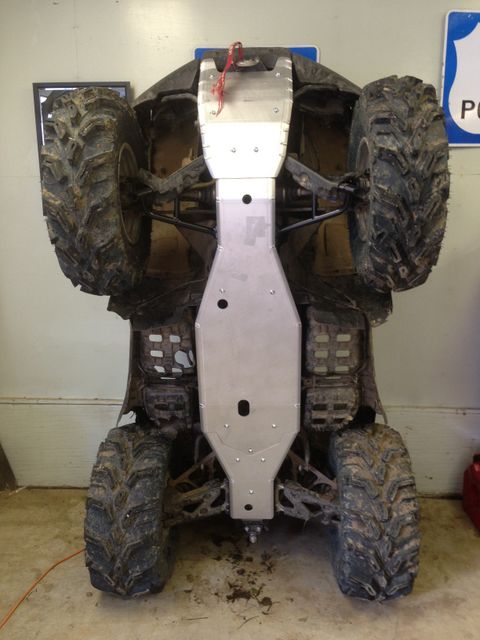
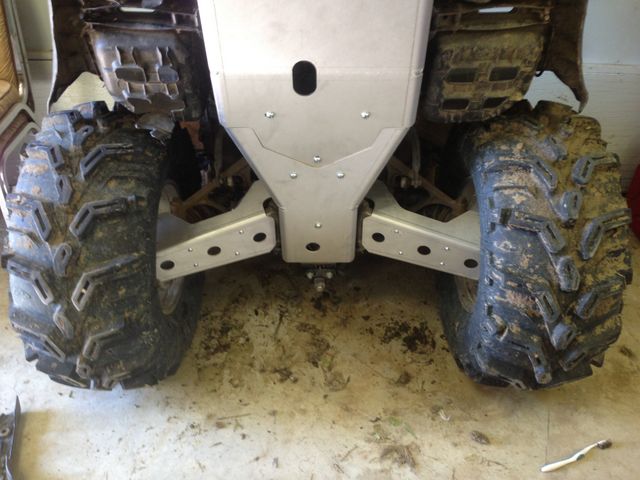
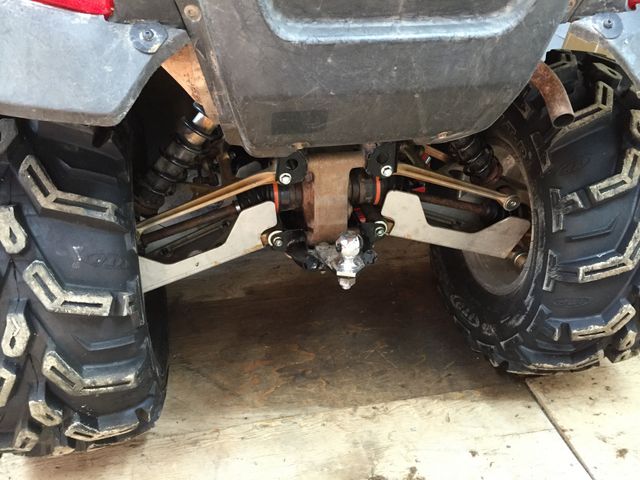
With this positive result, the next morning we decided to dig in and install my new Ricochet skid plates. This kit is hands down one of the best out there; all the pieces are cut and bent and welded to curve around the frame to keep from any obstacles from getting in and bending the plates or causing the bike to get hung up. Wtih the stock skid plates removed we painted the frame of the bike to protect it from rust.
The set I ordered included the full skid plate, rear diff plate, front bash guard as well as the front and rear a-arm plates. To say the entire bottom side of Project Rincon is protected would be an understatement. The whole install went pretty smooth with the exception of the rear a-arm plates. The Allan bolts were a little stubborn to come off, but with the assistance of a hammer and impact gun, they finally came out.
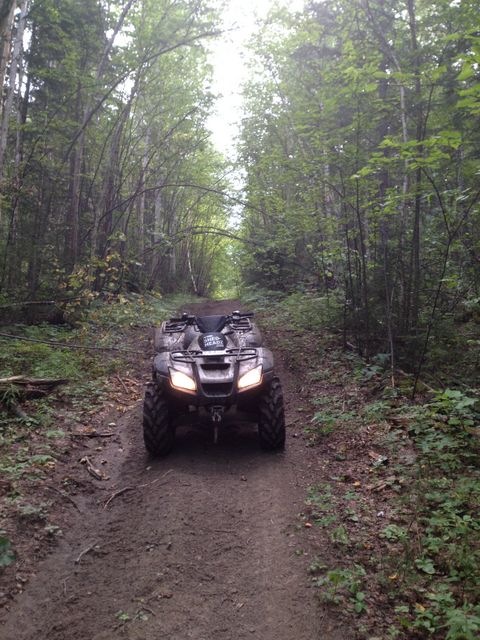
With the cooling gremlin finally gone, the new skid plates installed and a can of Seafoam in the tank, Mike and I hit the trails on the hunt for the infamous mud holes I have been telling him about for the past few months. Again, check out the Crew Adventure section to read up on some of the mud holes and trails we tested Project Rincon on! The smallest update to Project Rincon to date, but an update none-the-less! I picked up a new set of grips and end caps a few months ago but somehow never got around to pick up a can of hairspray to install them on with. At long last I finally remembered and took the 5 minutes to install them. Such a small detail, but they feel so much better and makes my bike feel like new again. I stuck with factory grips as I had no issues with them, other than the fact that they were wore down.
Not much new with Project Rincon, just lots of riding. However, on one of my rides, I was carrying some utility boxes using rubber tie down straps which I was simply hooking around the rack. The problem I ran into was that the straps were sliding side-to-side and my boxes fell off a couple of times. A huge pain to say the least. With the assistance of my friend Jared, a former millwright, we bought some 5/16 inch flat bar and went to work making 8 tabs for the front and rear racks.
Jared then welded the tabs onto each corner of the rack and we drilled holes in the middle creating a secure point for my rubber straps. The only thing left to do is re-paint the rack which will be put on hold as I am in process of moving to my next post, even further North!
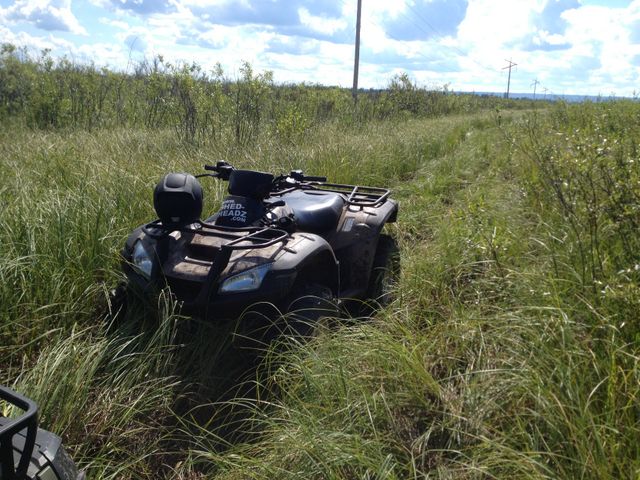
September 2014: Its been about a year since I've last worked on Project Rincon. In that time I've moved from Northern Alberta, all the way to the North West Territories. After an amazing summer of riding September is here, the weather is turning cold and the riding season is coming to an end. With approximately 1,000 km’s logged on Rincon, I will be doing some much needed maintenance. While riding the summer on an intense back trail I popped a tie rod end off. Granted, they were the original tie rod ends with on 11,000 km on them. Fortunately I was able to make a trail side repair and limped Project Rincon back to our campsite. Later that week, ordered all new tie rod ends, nuts and pins and installed them. It was a very quick easy install, taking about 1 hour to do both sides. At this time, I also did an oil and filter change and cleaned and re-oiled the air filter.I made a parts list and made a parts order. The winter repairs/maintenance list includes: all new bushings, bolts, seals, O-rings, etc for the rear a-arms, a new choke cable, all new coolant hoses as the current ones are beginning to crack on the ends causing the coolant to weep out. I will also be pulling the skid plates off and cleaning all the grass, mud, etc out from under there. No amount of pressure washing was able to get it all out during the summer cleanings.
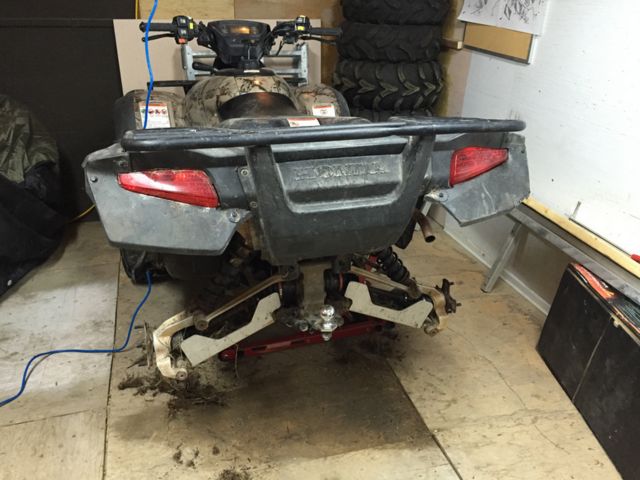
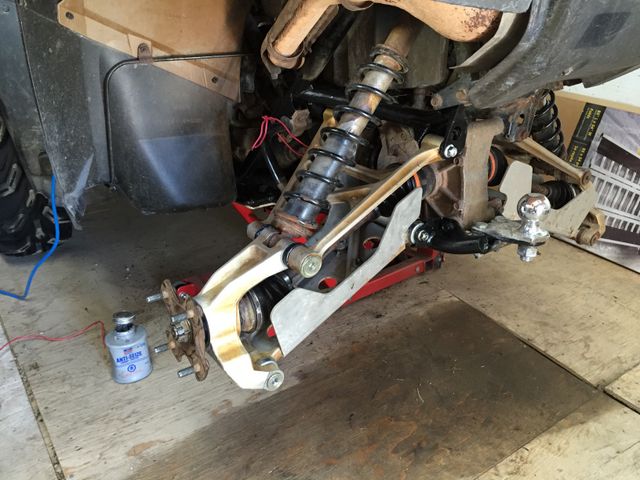
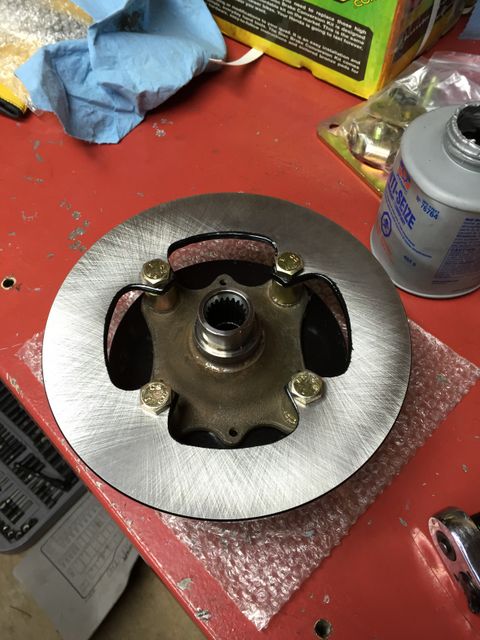
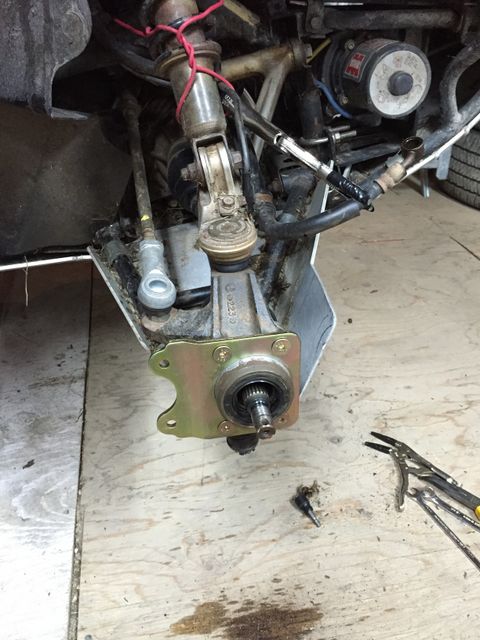
With my new Northern Area51 Facility fully renovated, I set to work on Project Rincon. After first acquiring my Rincon while living in Alberta , I completely rebuilt the front suspension, replacing all the bushings, bolts, nuts and ball joints. Well, almost two years and a couple thousand kilometres have passed so it’s time to do the rear end. I love using micro fiche schematics when working on a project. It helps when trying to figure out how something comes apart and more importantly, how it goes back together! Another reason, and this comes from experience, is that you know what parts were there when it rolled off the assembly line. There have been a couple of instances in which the previous owners had taken something apart and reassembled without replacing a O-ring, or a washer, etc. By reviewing the micro fiche schematics, you know exactly what parts you need for re-assembly! With this in mind, I went through the entire rear end of Project Rincon and compiled a list of every nut, bolt, bushing and seal I would need to completely rebuild the rear suspension. The rear shocks are still in good shape and doing the job, so I will not be replacing them at this time. During the winter rebuild, I decided to do an upgrade I have had on my mind for a while now and just haven’t gotten to. Mike had installed a disc brake upgrade on Project Foreman and was incredibly happy with the results. Given poor Project Rincon was stuck with drums in the front, I decided it was time to make the switch and ordered a front disc upgrade from www.superatv.com From all the reviews I read, they made the best kit for the Rincon, so the order was placed! At the same time, I ordered all new brake hardware for the rear disc. Honda runs a single driveshaft mounted rear disc which has been a staple for their designs dating back to the 1980’s. Project Odyssey also runs the EXACT SAME rear single disc set-up. Well, I guess if it works, why change it? I won’t be changing it out, but I will be rebuilding it!
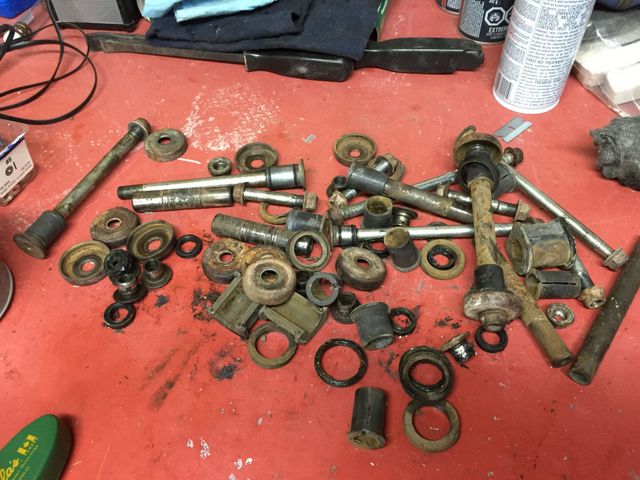
With parts on their way, I decided to jump ahead and start pulling apart the rear suspension. I did this one side at a time as I always do to mitigate confusion when it comes to reassemble. Remembering all the tricks from the front end, all the bushings came out with relative ease and I set to work scrubbing and clearing the upper and lower A-arms and rear knuckle. I also took the time to scrub and clean the A-arm skid plate. I cleaned all the bolts and up with some steel wool and set everything aside.
Parts are here! I eagerly set to work reassembling the left rear suspension. I had a box full of new parts and went about sorting it all out only to discover… all the bushings in the front and rear suspension are exactly the same with the exception of the rear knuckle. They use a slightly larger bushing, which, when I ordered was supposed to be the correct one. The one I received was definitely not correct. I made some calls and found out that Honda does not sell this bushing for the knuckle on its own; the only way to buy it is by purchasing a brand new knuckle at $400. Yeah, ah no. I went to the interweb for a solution and found an answer with an awesome company I've used many times before, All Balls Racing. They heard of this issue and make a rear knuckle rebuild kit which includes this particular bushing! I ordered 2 and waited patiently for them to arrive. In the meantime, I set about rebuilding the upper and lower A-arms with the parts on hand and repacked the rear wheel bearings in the knuckle. Both seem in ok shape on this side, so I will not be replacing them at this time. I decided to take the time and remove all the skid plates and clean out all the grass and mud that has built up there. I am very diligent about cleaning my quads after each use, especially when it comes to the mud. It is amazing how much crap builds up there, even with regular cleaning! With all the moss, mud, grass and sticks removed, I repainted the frame with some fresh paint. I reinstalled the skid plates once the paint was dry and put some anti-seize on each thread to ensure I don’t have issues down the road when I have to take this all apart again. I swear by this product, definitely a time and part saver!
Good news, the front disc upgrade kit and the rear knuckle rebuild kits arrived after a two week wait! The bad news; the brake kit came with 2 right side callipers! This is an issue as the bleeder is not in the correct spot and I won’t be able to bleed the left side. I called the manufacturer and explained the issue and much to my surprise, they were incredibly helpful. They apologized, refunded me a discount for my trouble and sent a replacement left side calliper by Purolator! The All Balls Racing kits are great quality, easily the quality of OE if not better. The new knuckle bushing went in with ease and I set about reinstalling the entire rear suspension. Everything looks so fresh and new and there is now no play what-so-ever. I moved over to the right side and went about pulling everything apart. With the right side apart, I went about stripping the A-arms and rebuilding them. With that done, I decided to take apart the rear disc brake and rebuild this as well. The access to the rear disc is on the right side, so what better time to go about this with the rear suspension removed!
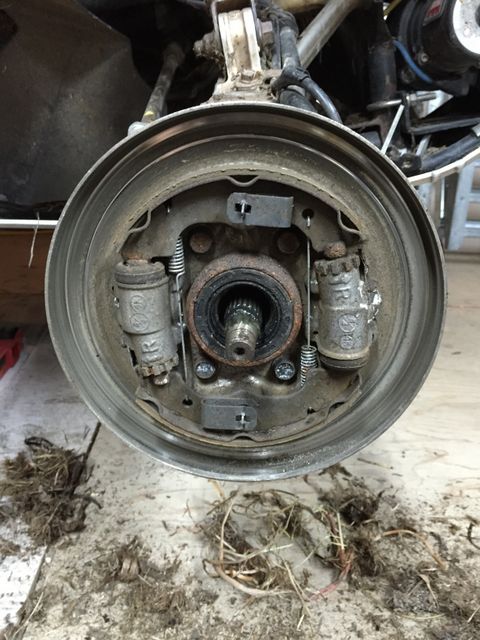
Everything came apart with relative ease, the pad was pretty well worn down. Apparently the slide on the calliper in which the indicator sits was seized and completely explains why the last ride of the year I had some serious braking issues. With everything stripped apart, I went about cleaning and prepping the calliper for its new pads. The disc was in good shape with no cracks grooves or gouges, so no need for replacing. With everything all cleaned up and lubed with high heat brake calliper grease on the sliders, everything went back in with ease. With the rear brakes done, I bled them out. I really wish I had a self-bleeding kit, however, I do not. The rear master cylinder is conveniently under the seat, so I was able to access that with ease. I used a rubber strap to pull on the brake handle while I bled the entire system replacing it with some fresh fluid. With the rear brakes all done, I shifted focus to finishing the rear suspension and reinstalling everything. It all went in with ease and no hiccups.
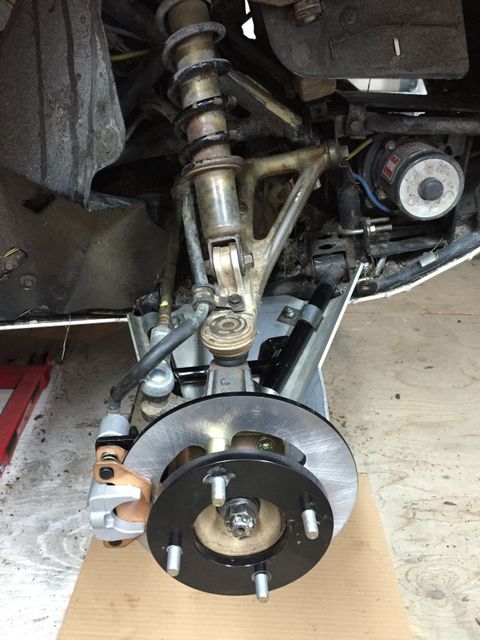
With the winter drawing to an end and spring starting to poke its head around the corner, I switched focus to the front brakes. I have never installed a disc brake upgrade before, but the instructions were pretty straight forward. I started by stripping the left side front brakes. The kit comes with everything you need to do this kit right. I took my time, cleaned up and repainted some of the suspension and frame as I went, and followed the instructions provided with the kit.
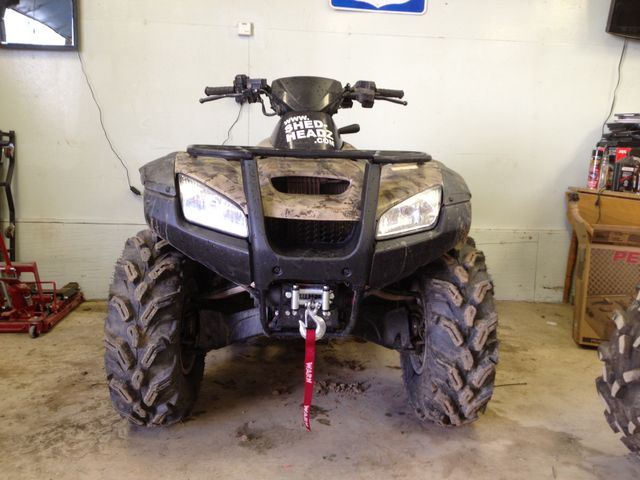
With both sides complete, I began bleeding the front brakes. Did I mention how awesome it would be to have a self-bleeder kit? Well, fortunately the front brake reservoir is on the handlebar so I was able to do this with relative ease. With some fresh fluid in and the levers all adjusted, I put the wheels back on. It was a balmy minus -30 out, but I had to go for a test ride to see how the new brakes work and log some break in km’s. I bundled up and headed out. It was a quicker ride then I would have liked, but it was a good ride none-the-less! Maybe the next upgrade will the heated thumb warmer and grips! The new brakes work wonders and are a massive improvement over the stock drums. I am sure the drums serve their purpose however, they do not hold a candle to the discs in anyway. Again, if you are in the market for a disc upgrade kit, head to www.superatv.com .Cheers, STEVE
Copyright © 2011 Michael Smith
|