|
Area51 Project Foreman - 2008 10-Year Refresh:
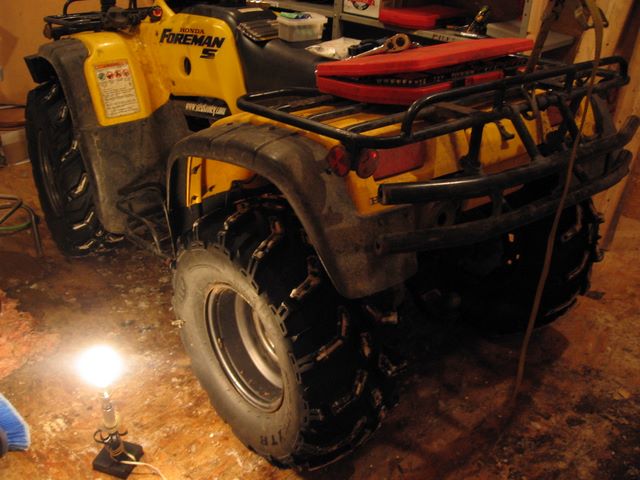
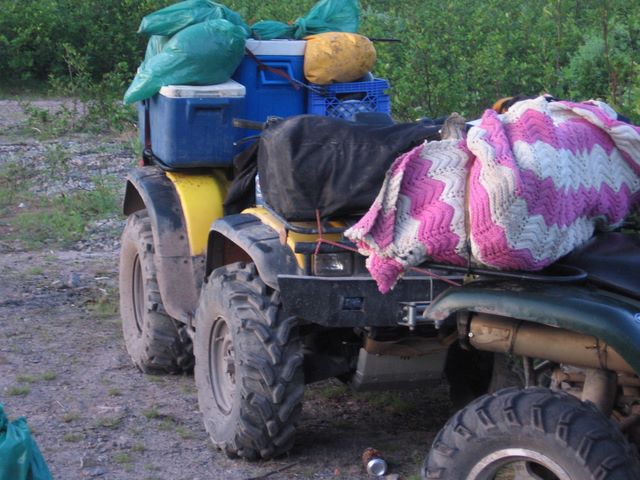
February 16, 2008 ATV Run & Boil-up with the Southern Harbour Crew! Last run before bike comes apart for 10-year refresh!
Project Foreman Restoration has finally begun!!! This year my 1998 Honda Foreman 450s turns 10 years old and I’ve decided it's time for a thorough cleaning, frame painting, inspection and perform necessary repairs to maintain reliability, longevity and appearance. Crappy weather this winter means very little snowmobiling for me as I'm not travelling to the West Coast, so I'm making use of free time to get this project started. I hope to have it back together when the spring riding season begins. This is also the first project in the latest Area51 Facility, our new house in Mount Pearl.
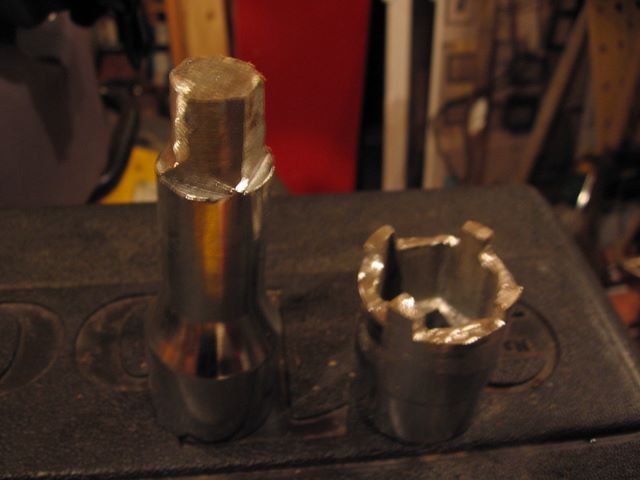
I started this project working on the rear of the bike. I knew I'd be replacing all of the rear axel bearings & seals, as well as the swing arm bearings, the latter of which have been bad for awhile now. It took a couple hours and the fabrication of some custom swing arm bolt removal tools, but the rear end is out of the bike.
The next step will be the removal of stubborn swing arm bearing races, a thorough cleaning, some fresh paint, and the installation of new bearings and seals.
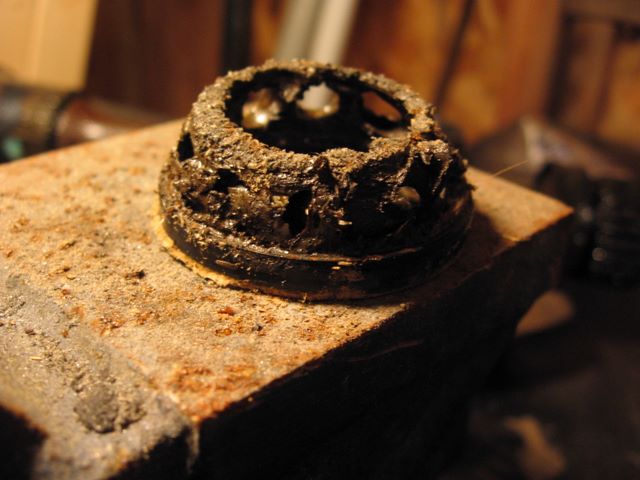
I got another hour at this project last night and finally got the swing arm bearing races out. The bearings were literally in pieces, and the races seized in their bores. I had to cut them with a Dremmel Rotary Tool, split them with a chisel, and pop them out. Ahhh... the work continues.
Its amazing where sticks and tree limbs can end up!!!
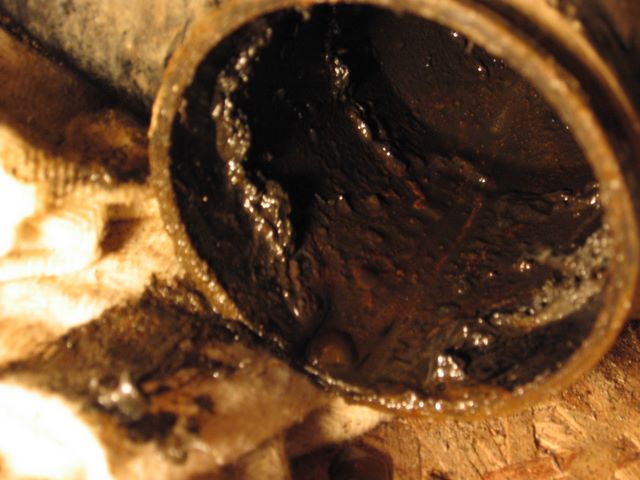
Another couple hours spent in the Shed tonight. I decided to completely disassemble the rear swing arm as I’ve discovered a little water has seeped into the axle tubes over the years. I'm drying everything out, cleaning/painting the axel tubes & the rest of the swing arm assembly, and replacing all of the O-ring seals as well. The gear case is in great shape and will get a fluid change with fresh synthetic gear oil. I was glad to see the rear brakes I replaced a couple years ago are still in great shape, dry, and not seized. Goes to show that properly installed and maintained drum brakes can work fine despite their bad reputation.
I made some great progress this weekend. It took awhile to reassemble the swing arm as I thoroughly cleaned all the parts as I went and installed new bearings and seals. I checked the rear axle and found it to be straight and true, it had gotten a little rusty from water leaking into the tubes, so I gave it a coat of paint. I cleaned up and greased all the pivot points in the rear brakes and re-assembled them.
Next I removed the OEM engine skid plate - it's in hard shape and really
needs to be replaced so a new full skid plate has been added to the parts
list.
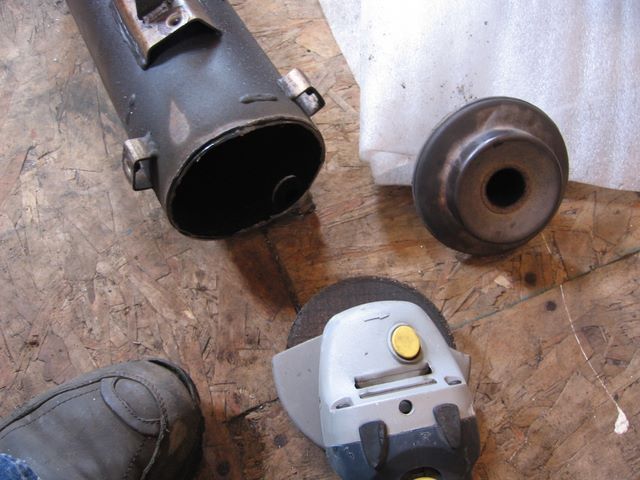
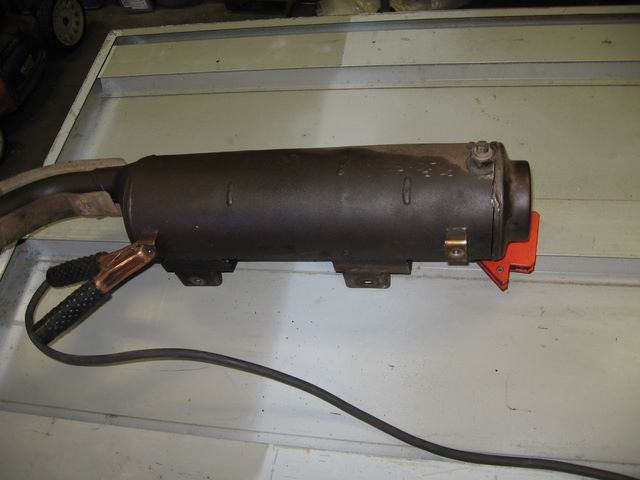
I also got the muffler off the bike. The baffles let go in it a few
years ago and the rattling has been driving me nuts ever since. Since
a replacement muffler for this bike is about $450 to buy, I will fixing the
baffles myself. The case itself is in good shape since it's stainless steel.
The rear section of the bike frame and the swing arm are now painted and once dry I will install new swing arm bearings, then bolt the swing arm assembly back on the bike.
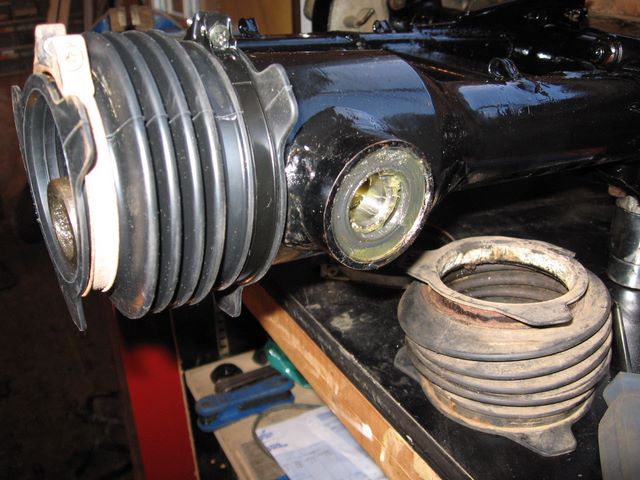
The rear swing arm is ready to to be reinstalled. The paint is dry and swing
arm bearings/seals installed and ready to go. I hoped that I'd be writing that
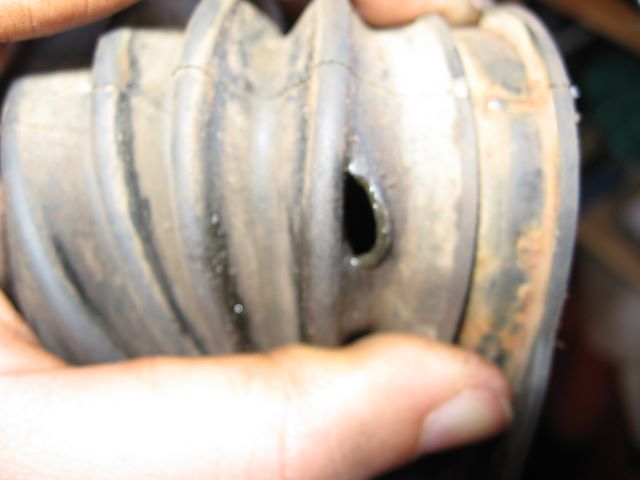
it's installed but at the last minute I discovered a hole in the drive shaft boot so I had to abort! I made a call to Honda One and
ordered a new boot and clamps.
This left me without much to do, so I tackled removing the rest of the lower black fenders. Most of the old bolts were Philips head and were stripped out, some I had to drill but most I got out with Vise-Grip Pliers. They will all be replaced with the new style hex head bolts during reassembly. Having the lower fenders off will give me better access for checking/cleaning/painting the frame.
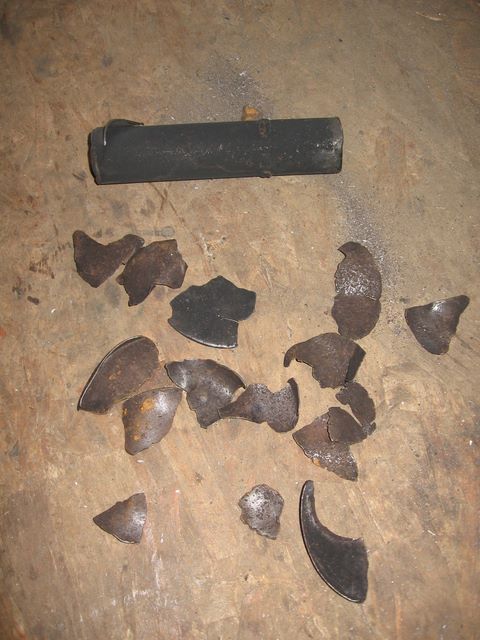
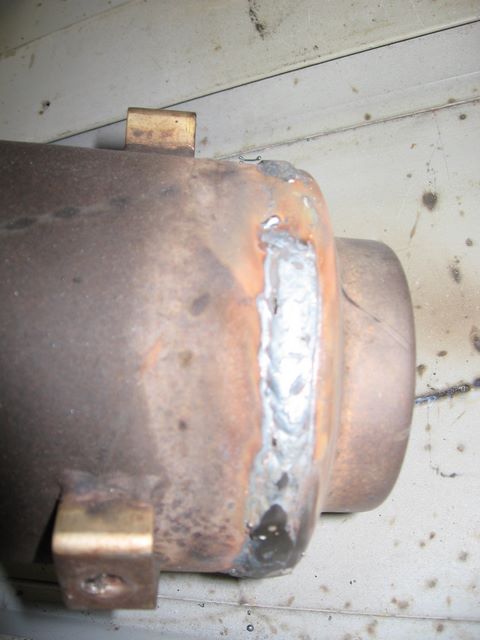
Next I decided to cut the end off the muffler to empty out the rattling baffles inside.
While taking off the fender extensions I got a good look at the after market foot peg extensions I bought new with the bike 10 years ago. At some point the left side had taken a smack which I didn’t think was all that bad. With both off the bike, I compared the damaged side to the good (right) side and found that its bent like a pretzel. I removed both and will make repairs later. So now I’m in a bit of a holding pattern until my drive shaft boot comes in, as I’d like to get the rear end back together before I lift the front to start work there. It will be a bit unstable to have it all hanging from the rafters at one time!!! (I have the rear of the bike hung as it allows free access to the underside).
Well my parts came in at Honda one and the Rear
Swing Arm has been successfully reinstalled. The new boot fit perfectly and will now keep
everything clean and dry! Once the swing arm bolts were in and torqued, I reconnected the
shocks, and checked all other bolts for proper torque. Next I coated the axle castle
nuts and wheel lugs with anti-seize (which I have been doing since new and
haven’t had anything rust or seize up yet) and reinstalled the rear tires.
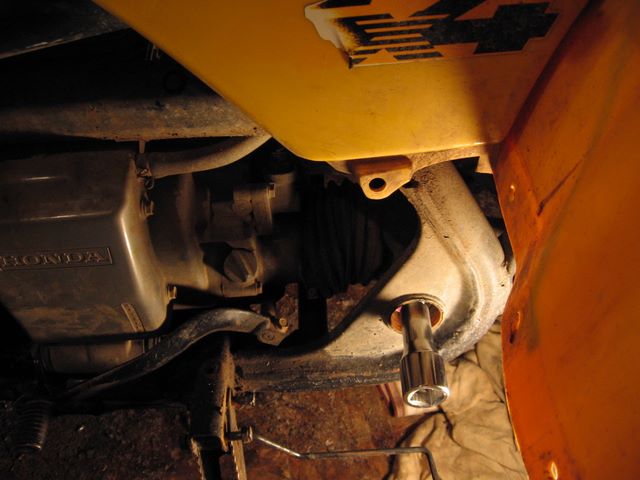
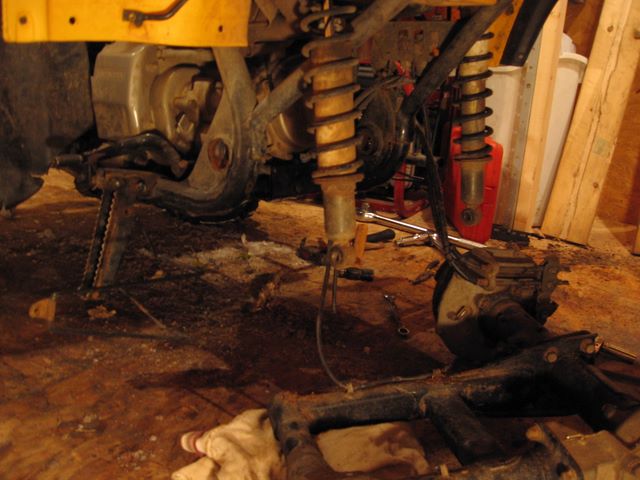
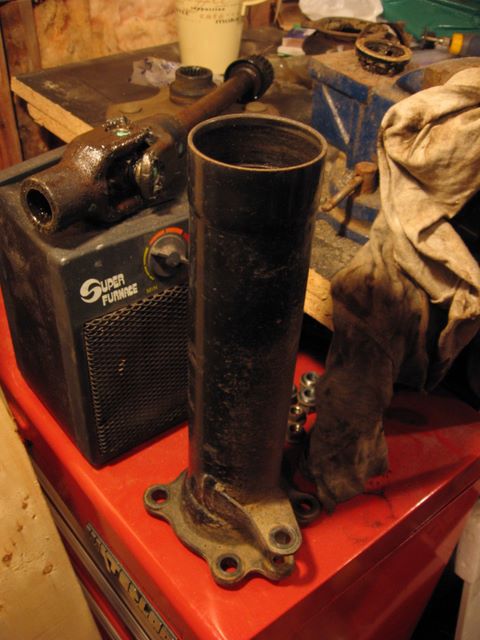
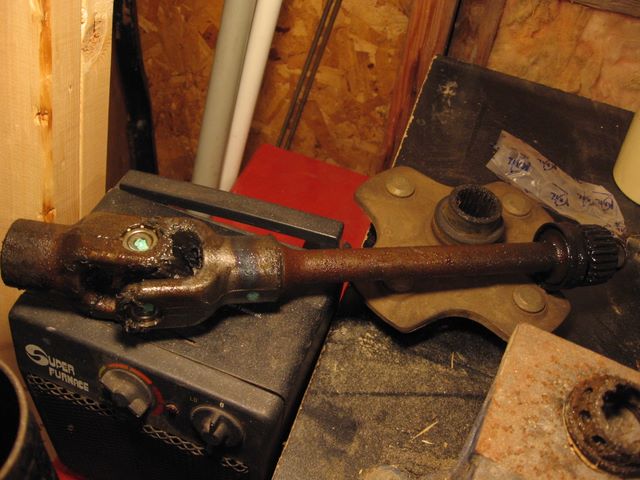
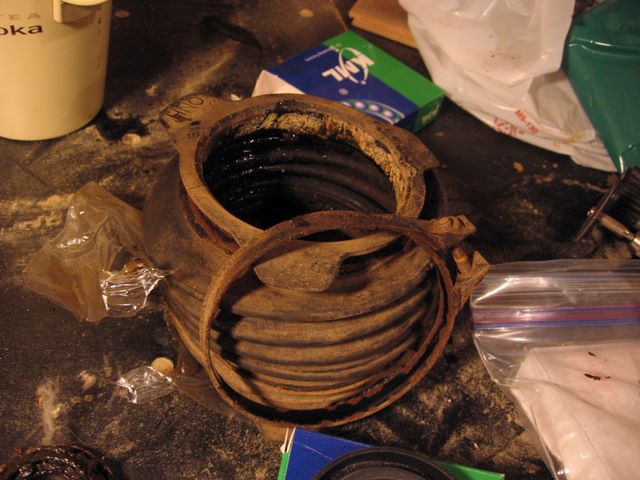
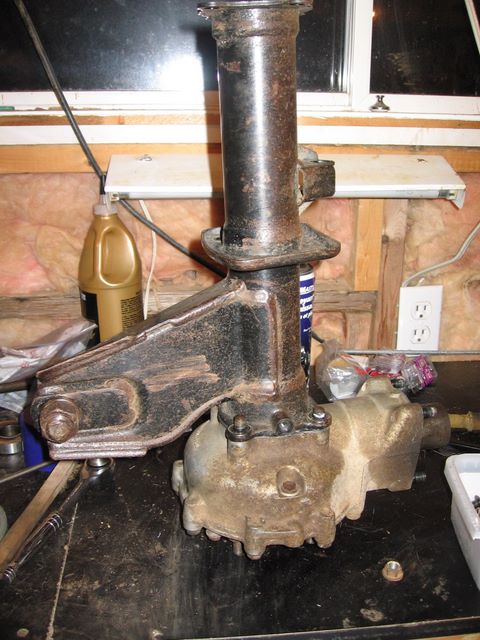
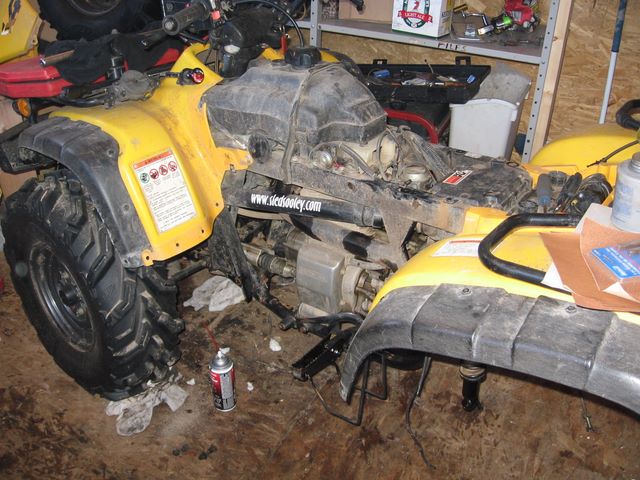
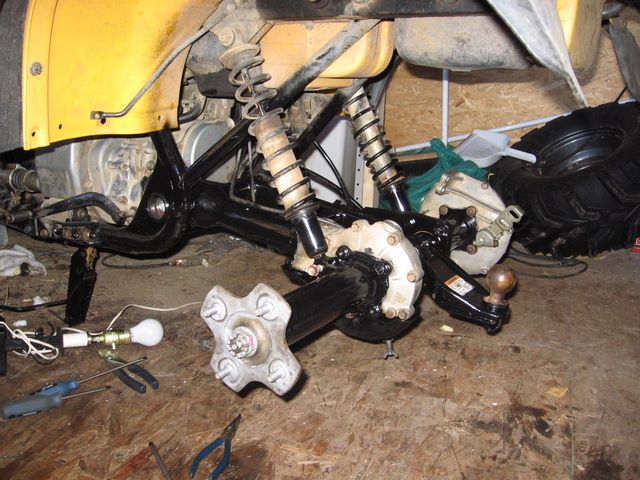
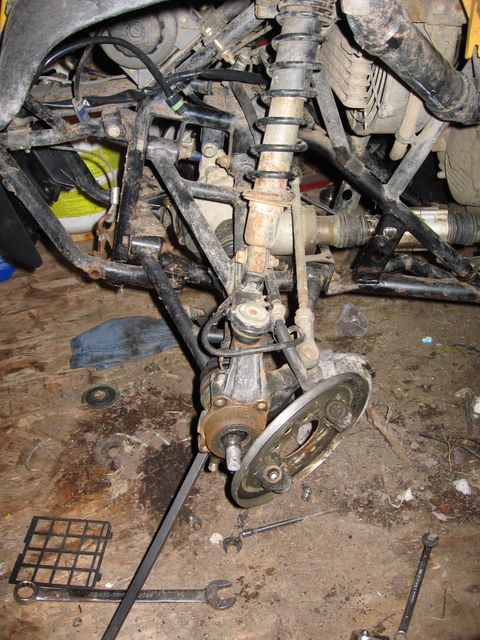
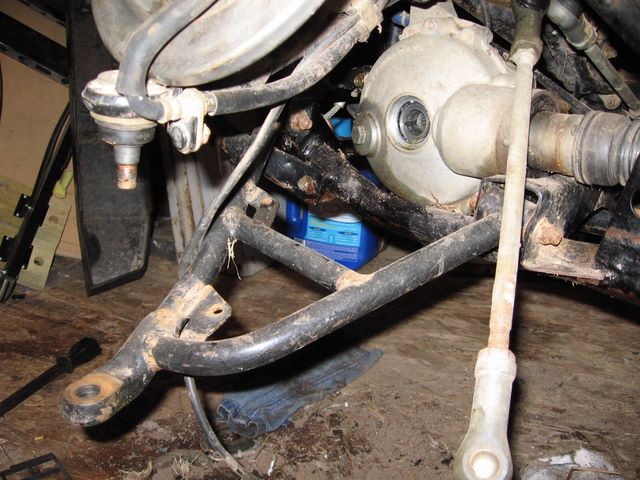
Next came the disassembly of the front suspension, I disassembled the brakes (mainly for regular cleaning and maintenance) disconnected all 4 ball joints and both tie rod ends to free the knuckle and then removed both CV axles for inspection.
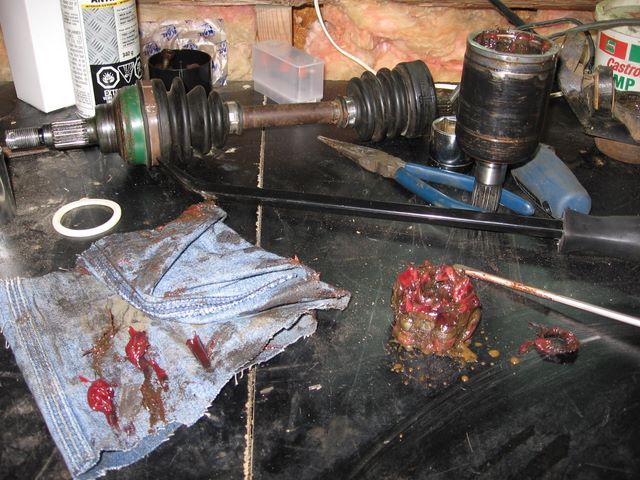
The right side checked out OK and it’s the side I've never had trouble with. In 2007 I had to replace the Left side inner CV joint due to bog and water getting into the joint due to broken CV boot clamps. I have no idea why, but the large clamp on that CV boot CONSTANTLY breaks which lets the boot slip and water/mud/bog to enter. Unfortunately the brand new Honda clamp that I installed with the new joint last year broke again this year. I have the joint taken completely apart for cleaning, luckily there is no damage, and when I reassemble I will be trying something else! All the A-arm bushings are perfect so I wont disassemble the suspension any further at this time.
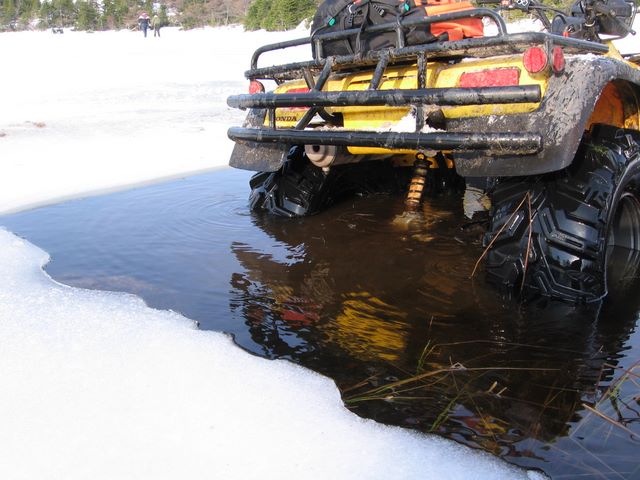
Late last fall I was on a ride in Southern Harbour and we were searching for a trail the guys use snowmobiling in the winter. We made a path through thick Alder Bushes breaking out in a little brook. We drove up the brook a little ways and eventually found the trail, but where the path crossed brook, the bank was heavily eroded and about two feet high. Of course I tried to climb it, and my Mud Lite XTR Tires grabbed right in and popped the front of the bike up on the bank with ease. Since it was steep I stood on the rear rack leaning as far forward as possible. On the first attempt to get the rear tires up the bike nearly stood on end. Not wanting to face defeat I tried again! On this attempt, leaning even further forward, the rear tires hooked but the bike stood straight throwing me off flat on my back in the brook. I lay there watching the bike teeter then slowly fall towards me, I rolled out of the way in the nick of time as the bike came down wheels up.
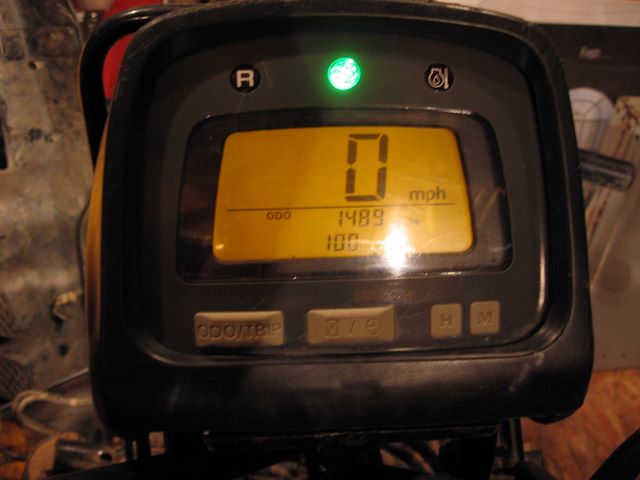
We got the bike upright very quickly but the digital dash was smashed and the handlebars slightly bent. Fortunately the bike still started and worked fine, even the neutral, reverse and oil lights were OK. I knew this fix would be an expensive one which was confirmed by the dealer. Finding a good used unit would really be the only sensible solution but finding one proved very difficult. Well my luck finally changed today, after 6 months of searching I found one on EBay and placed the winning bid! I may also replace the handlebars as they are tweaked and not quite right.
Well not too much has happened until tonight as I have been waiting for parts. I did get the front brakes properly cleaned up, the CV joint cleaned, dried, greased and reassembled and I started disassembling my Gauge pod in anticipation of my new unit arriving from EBay.
To get at all the connections for the gauge, I had to take off the front rack, remove the gas tank and heat shield, and the front plastics. While everything was apart, I dielectric greased every electrical connection, and tidied up the dealer installed winch wiring.
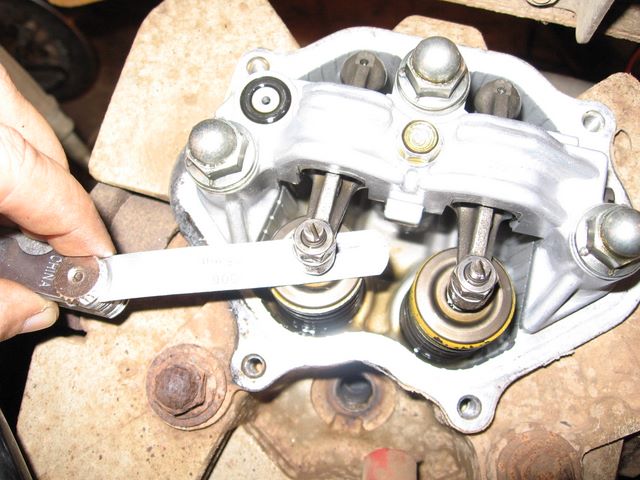
Tonight I made some real progress. Since the gas tank and plastics were already removed and out of the way, I did an engine intake & exhaust valve adjustment. They weren’t off too much but proper valve adjustment is the life of a 4 stroke ATV.
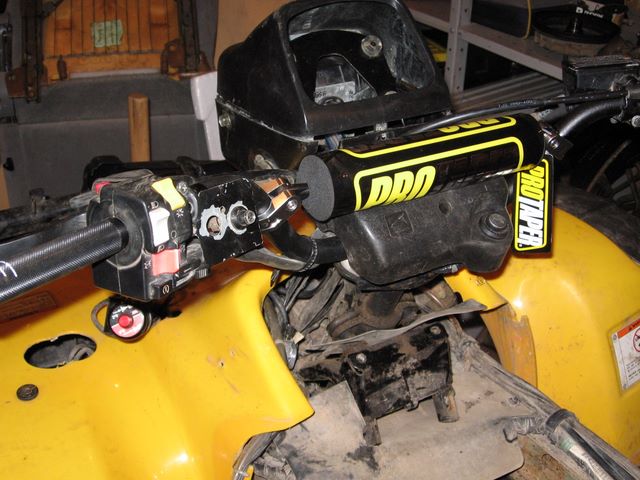
I finally received my new gauge pod and new Handlebars! The bars are ProTaper SE, black ATV High which are7/8" high strength aluminum and end up about an inch lower than the stock bars. They are much higher quality then OEM and were actually cheaper! To replace the Pod or the handle bars, you have to pretty well disassemble both as all the cables/wires run through the mounting bracket for the pod. (I replaced this bracket with the one from my new EBay unit as mine was bent). Rather then disconnecting all the controls, I simply removed them from the old bars and passed them through the gauge pod bracket one at a time. This worked great and saved a lot of time adjusting all the cables. Installation of the bars and the pod was pretty straight forward. When my new Scott hand grips arrive and the seat is back on I'll adjust the final location and angle of the controls. I ended up later removing the bar pad as it's unnecessary and didn't fit well over the Honda cover.
With the bars in place I plugged in the new digital dash and was very happy to find that it worked perfectly. The new gauge is in Miles per hour instead of Kilometres per hour as it came from the states, but that's a minor issue that I can live with. With the front plastics still out of the way I finally got a chance to straighten out one of the metal brackets that hold the front fender by the headlight. One got bent years ago (I have no idea how) which caused the plastics to always be loose on the front left corner. My old Blackwater tires cleared the loose fender, but my new XTR's hook it so I'm glad to finally have that fixed. This project has been a mountain of little projects that I wanted to fix long ago, but it was too much of a PITA to complete. Now with everything disassembled and out of the way, all these tangly fixes are now a breeze.
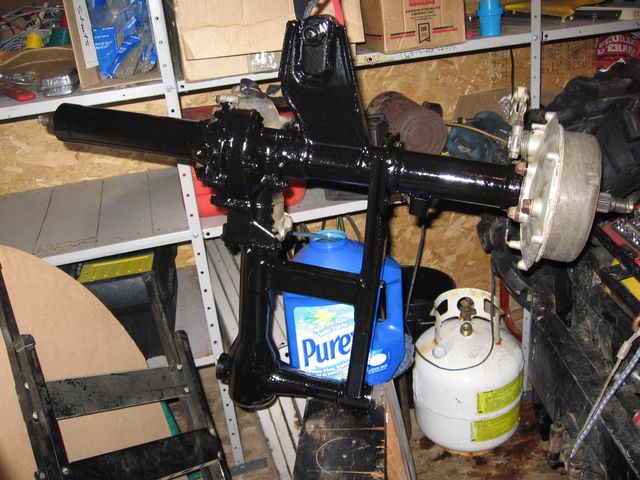
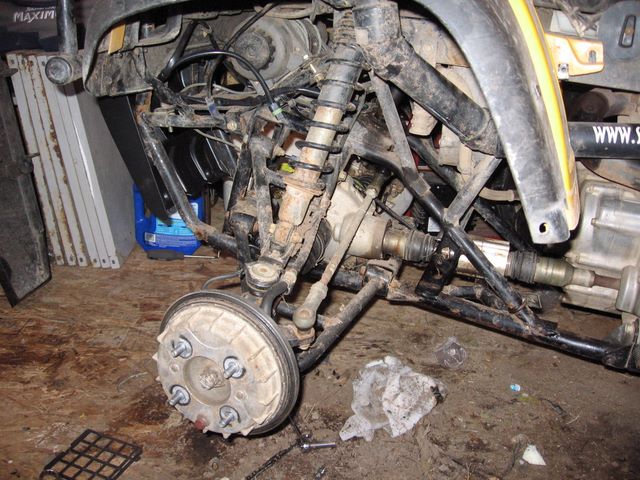
Well this restoration is finally nearing completion. The front end is finally painted, back together and finished. The brakes are adjusted and ready to go.
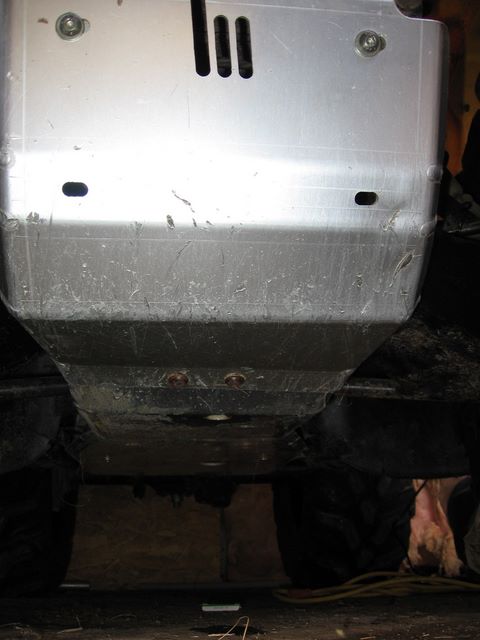
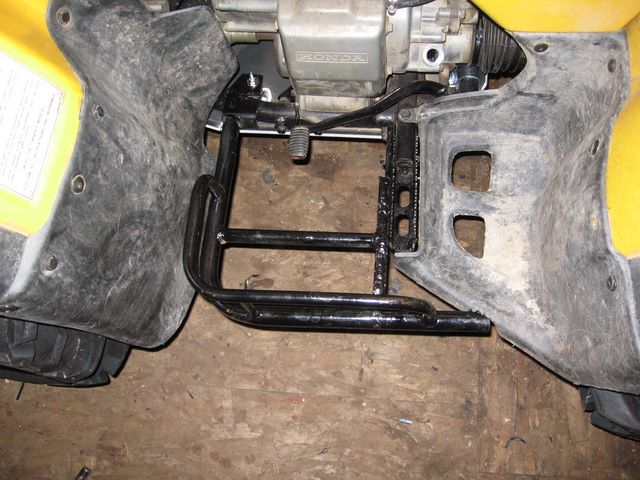
This week my Moose Equipment skid plates arrived (these are made for Moose by Ricochet). They are aluminum, about 3/16" thick, and completely cover the bottom of the ATV from the front differential to the back of the engine. The factory skid plate was thin steel that easily bent, and only protected the bottom of the engine. This new skid plate will provide great protection to the frame, running gear and engine. It will also let the bike slide easily over obstacles on the trail. (I forgot to take pics when installing in 2008, but this more recent pic shows that they do their job!)
This week I finally repaired the left side foot guard, painted both and reinstalled them on the bike.
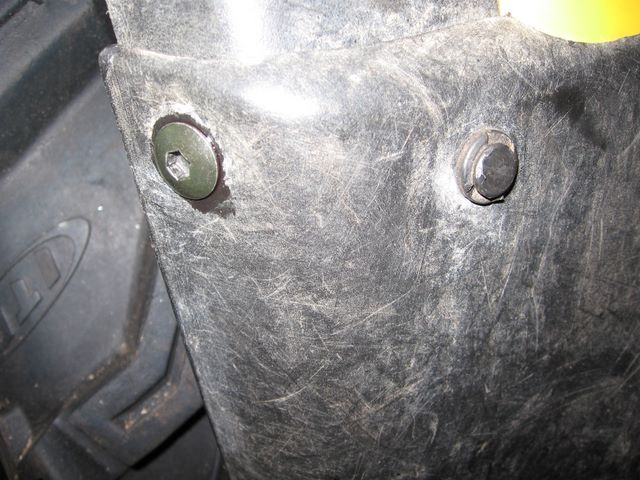
I then reinstalled all of the black lower fenders with new hex head bolts replacing the rusted/stripped Phillip's head parts. Interestingly my 1998 Foreman used plastic push pins on the outer edge of the black fenders which constantly broke or came unhooked when impacting obstacles on tight trails. Honda's newer bikes use the Hex head bolts with a washer and nut on the outside corner so I completed this little upgrade to Project Foreman as well.
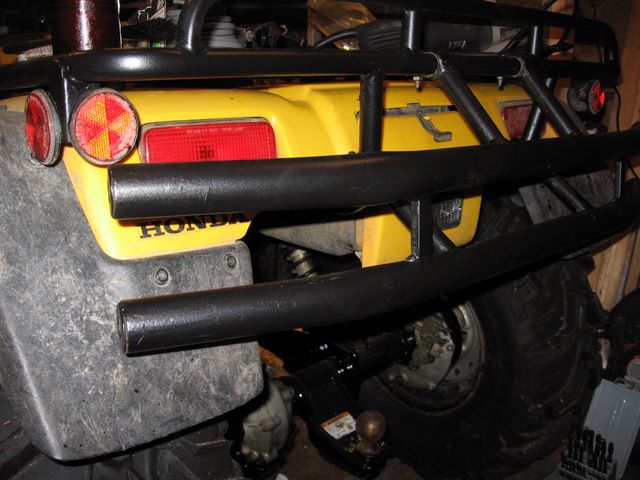
While the racks and bumpers were off the bike, I sanded, cleaned and repainted them with black Duplicolour truck bed liner. This is a great product that is much more durable then regular paint, and textured for a nice clean appearance. It's also skid resistant so items on the rack will stay in place much better than before.
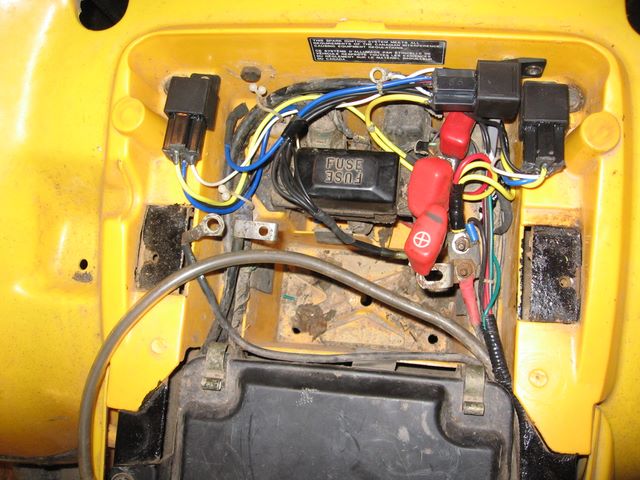
This week was also became "electric week". I installed three new relays and dressed in all the wiring very neat as I like to do when I have the time to be picky. First was a new relay for my air horns, the next sends power to two fog lights in the front bumper, and the last will power a reverse light when the reverse indicator in the instrument cluster is illuminated. My shed in Mount Pearl is unheated so it was the first year Project Foreman was stored in the cold which seems to have killed my 2 year old battery. This OEM replacement will no longer hold a charge so I installed another new one. This time I also purchased a battery tender unit to keep the battery fresh while the bike is stored between rides. Link: Product Review Battery Tender Jr.
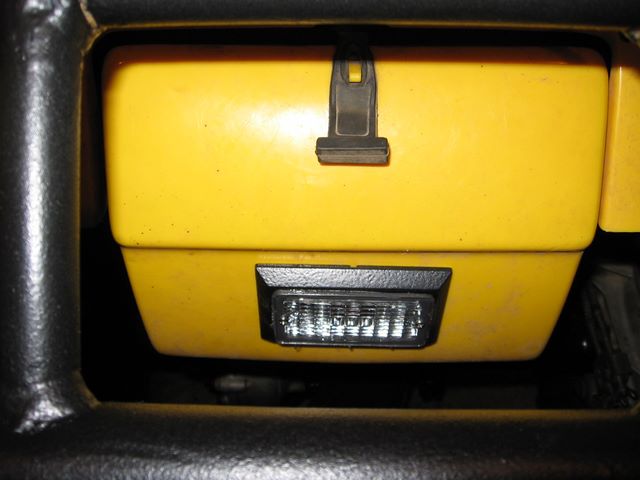
The reverse light I mentioned earlier is a low profile unit with a halogen bulb. I flush mounted the light in the cover of the rear trunk for a clean appearance.
Also I finally got a chance to weld my muffler back together so the bike will be fairly quiet but rattle free. I re-installed it with a new gasket, new clamp and new bolts.
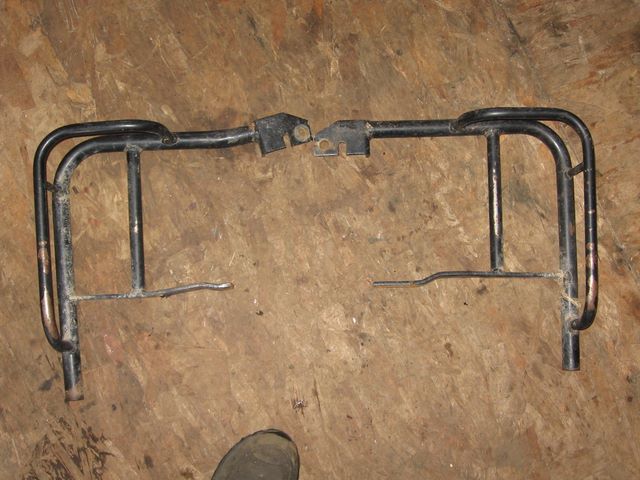
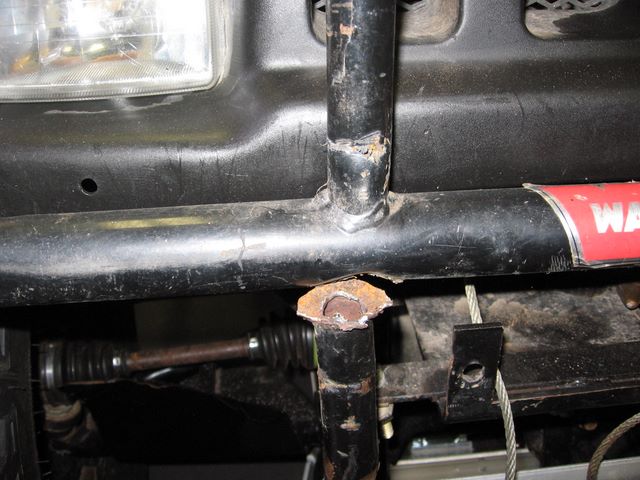
Since I simply ran out of time (summer is here and I’m itching to ride) I’ve postponed the fabrication/replacement of a new front brush guard/rack support until later. I patched up the cracked/rusty stock unit for the time being. So that's it for now, Project Foreman is back together and ready to ride!
First ride of 2008 post refresh took place June 21st leaving from Southern Harbour where we rode to LaMache Placentia Bay and visited the old lead mine.
All those new parts were really put to the test on our three day ATV camping trip in July.
October 4, 2008 another awesome day on the bikes near Arnolds Cove. Cheers, MIKE
Project Pages:
Copyright © 2011 Michael Smith
|
|