|
Area51 Project - Dad's 19' Food Fishery Boat Re-build: |
||||||||||||||||||||
|
Specs:
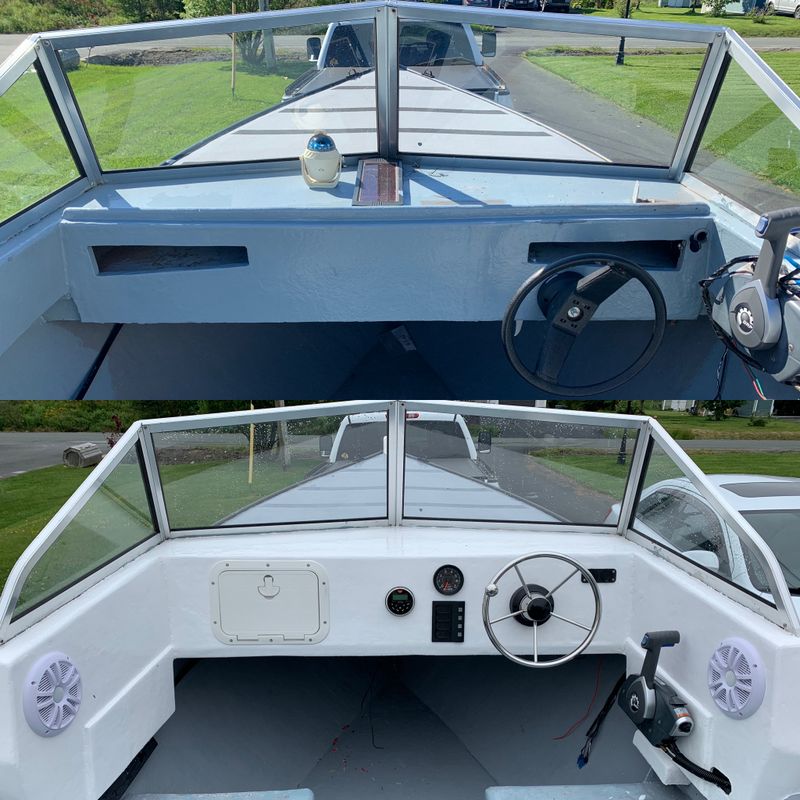
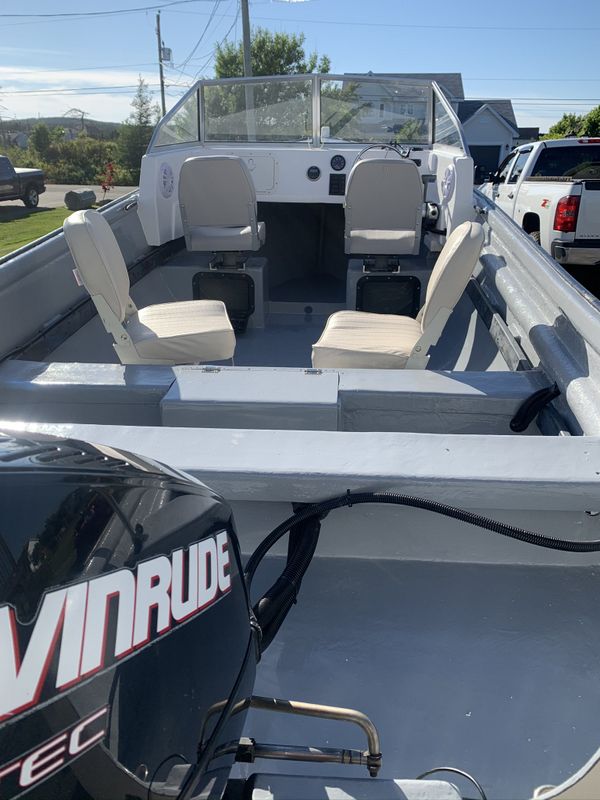
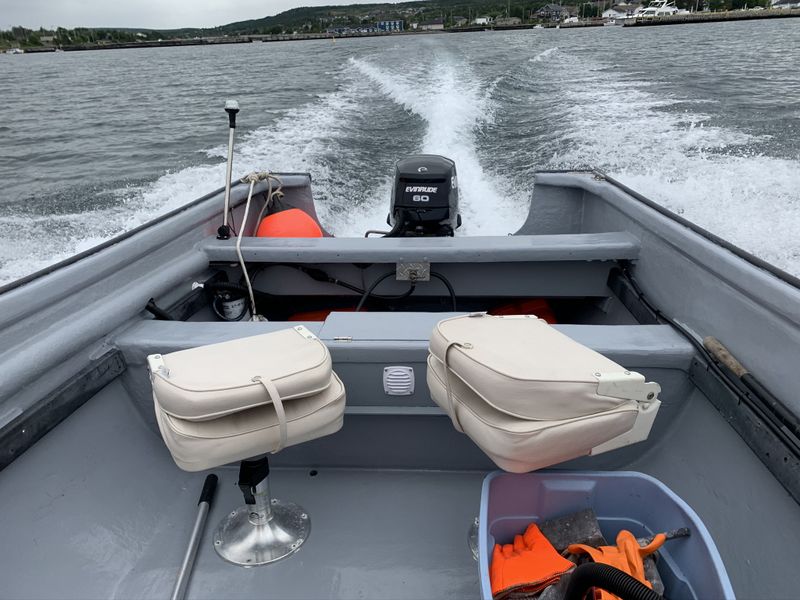
Quick project intro: before and after pic of the new dash I built for dads boat June, 2020.
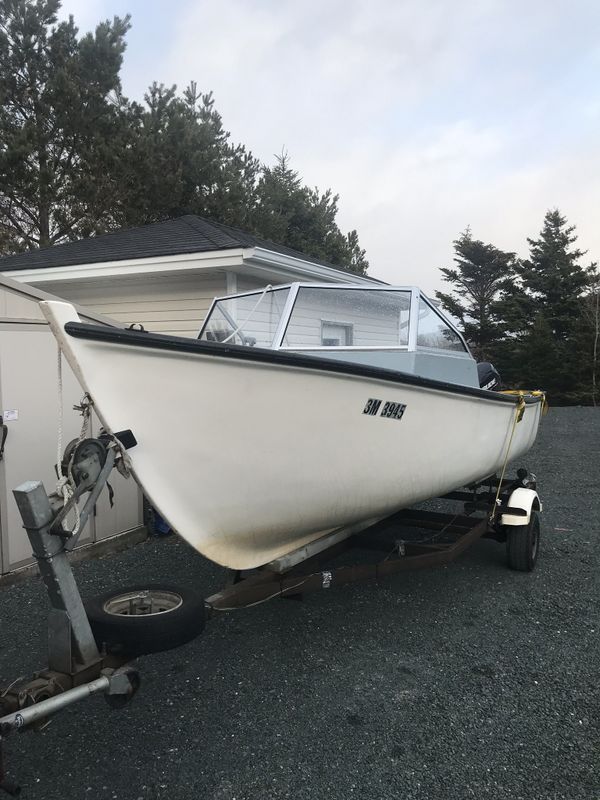
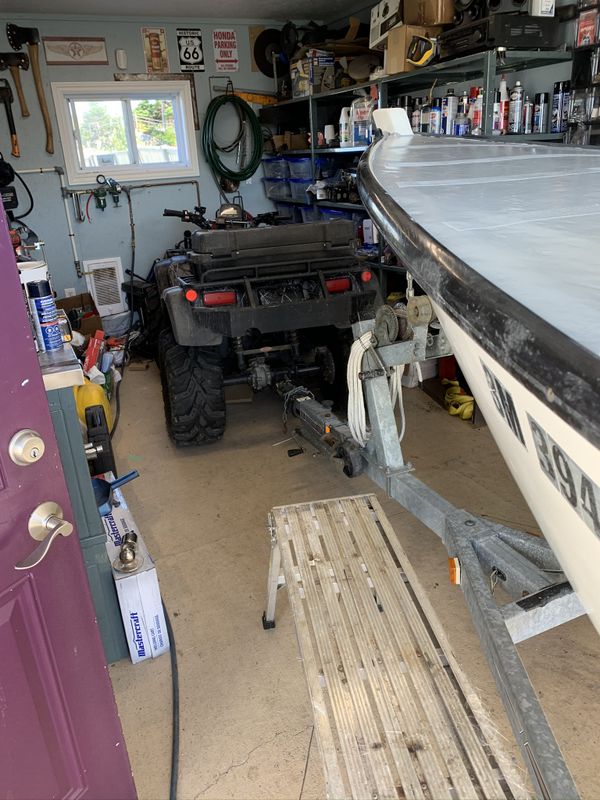
Ever since dad parted ways with his old boat, a 1998ish 21' open fishing boat, he had been regularly shopping for a replacement. Amazingly a family friend was looking to upgrade to a larger boat and was selling his 19' fibreglass boat in the spring of 2019. The boat was located in Lewisport where Dad & Iris have a summer home, this also happened to be the exact same time and place where I picked up my 1989 Argo 6x6 project!
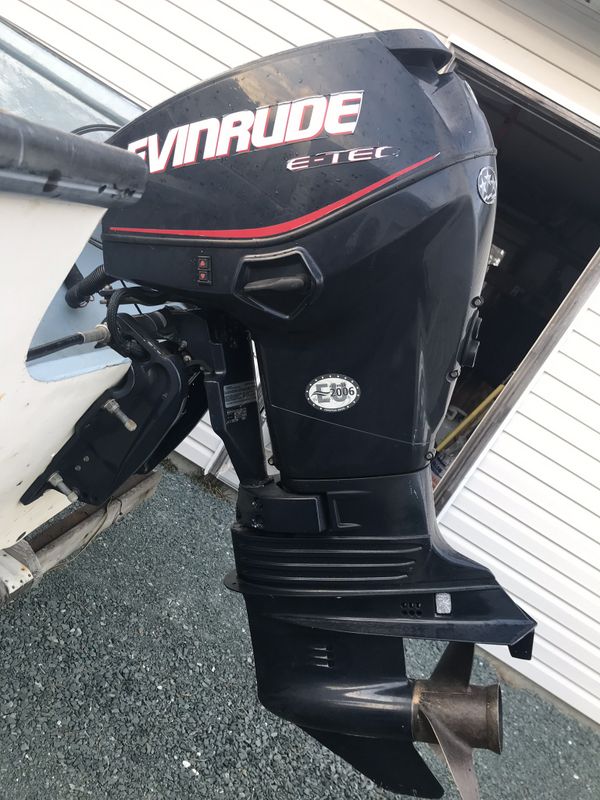
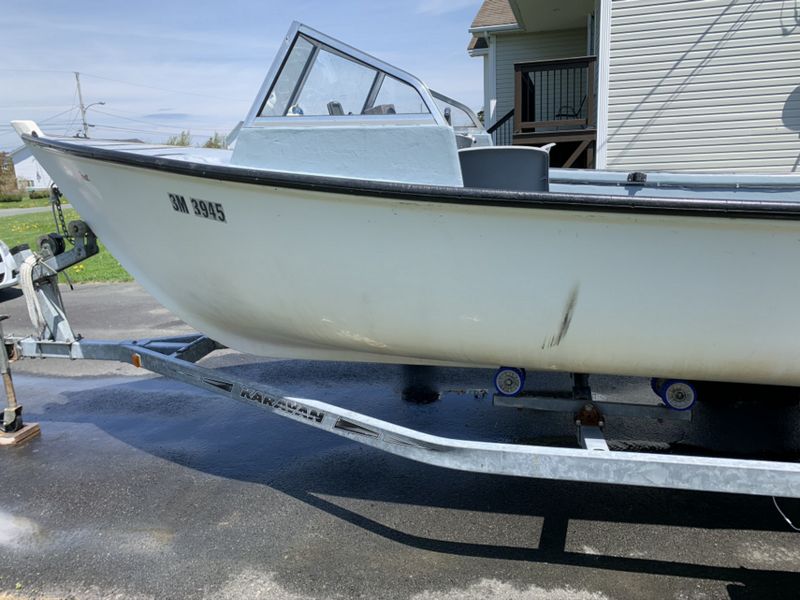
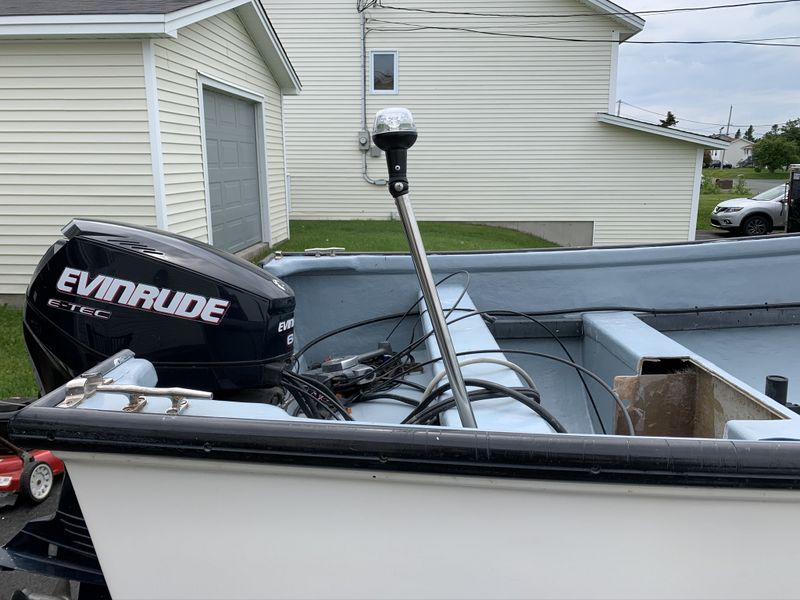
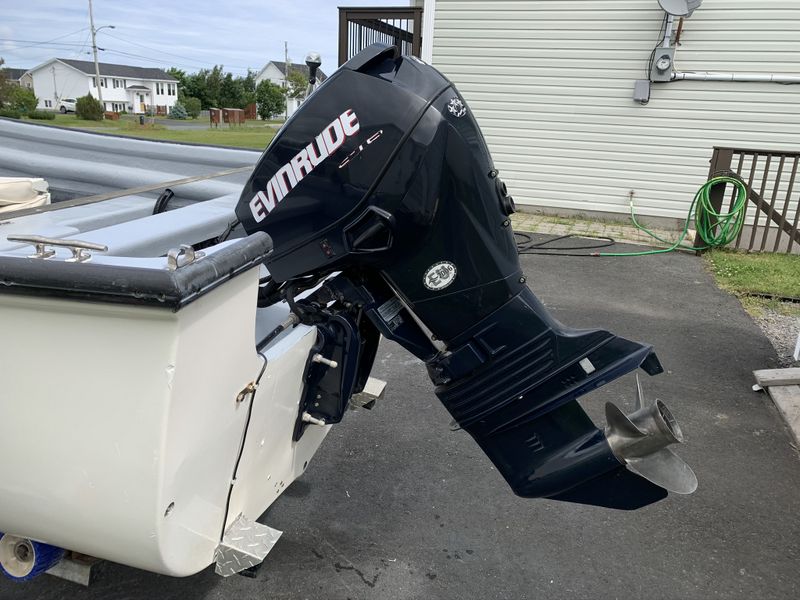
Dad's boat came with a sketchy trailer which was no big deal as he still had his 2008 galvanized Karavan boat trailer from the old boat. The dash was sloppy and seats uncomfortable but it had great bones and a nice 2006 Evinrude E-TEC 60hp outboard motor.
The motor also had annual service records from the BRP dealership in Lewisport.
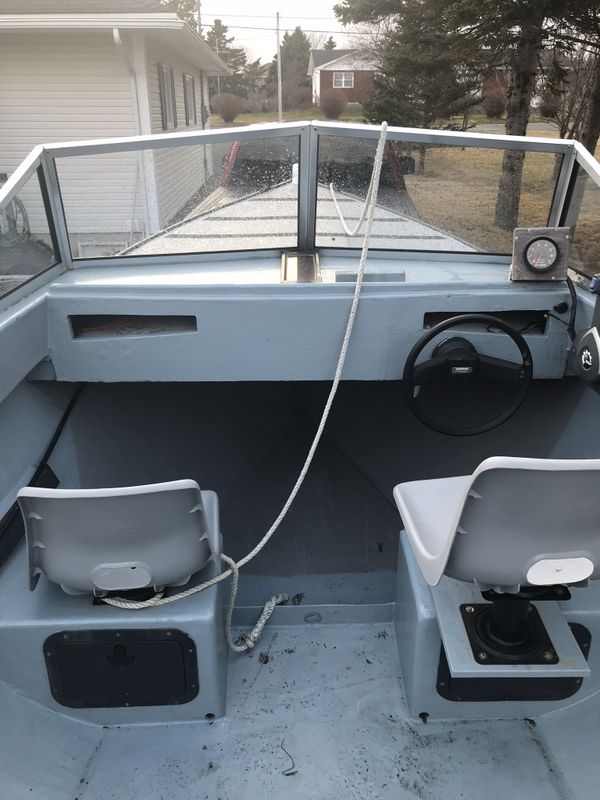
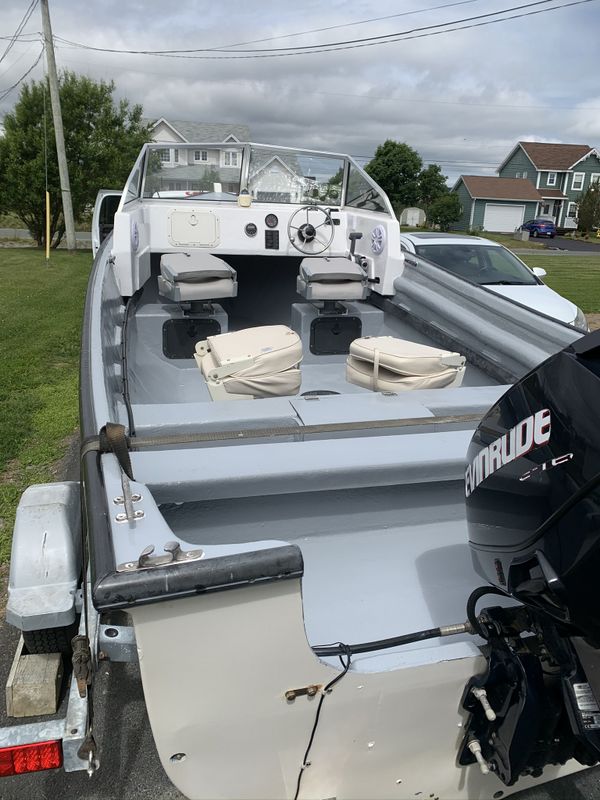
For the 2019 recreational food fishery dad installed 2 rear swivel seats, his GPS, depth sounder and fuel cans from the old boat to make this one useable for the summer.
The boat ran very well, with direct oil injection this outboard uses straight gas, is very fuel efficient, quite oil efficient, and much quieter than the Mariner 60 on the old boat.
Outside Hull Refinishing:
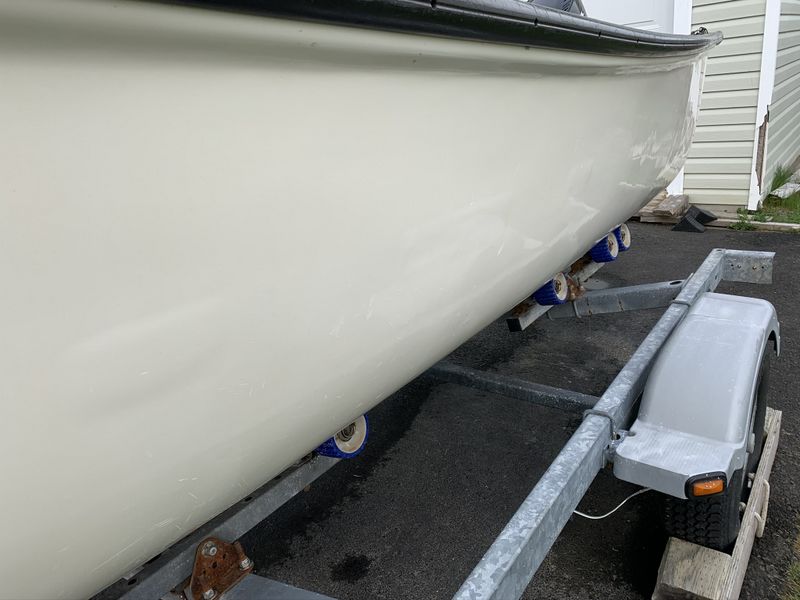
Fast forward to May 2020, dad brought the boat to my house for an overhaul and update to make it nicer and more user friendly as a recreational boat. My first task was refinishing the outside of the fibreglass hull which had gone very dull & chalky and had quite a few rub marks and scratches from over the years.
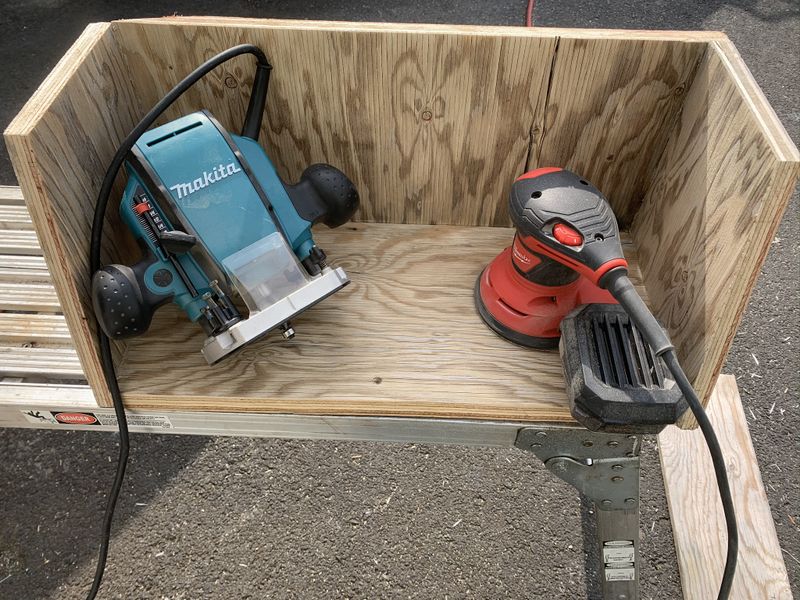
I wet sanded the entire hull with 800, then 1000 and finally 1500 grit wet sandpaper. Next I used polishing compound and my Makita orbital buffer to polish out the hull to its shiny former glory.
The final product I used on the hull was turtle wax's new ceramic spray on coating. It's very hydrophobic and offers great protection. I applied two coats 24 hours apart.
The boat already looks so much better, a little elbow grease took years off its appearance!
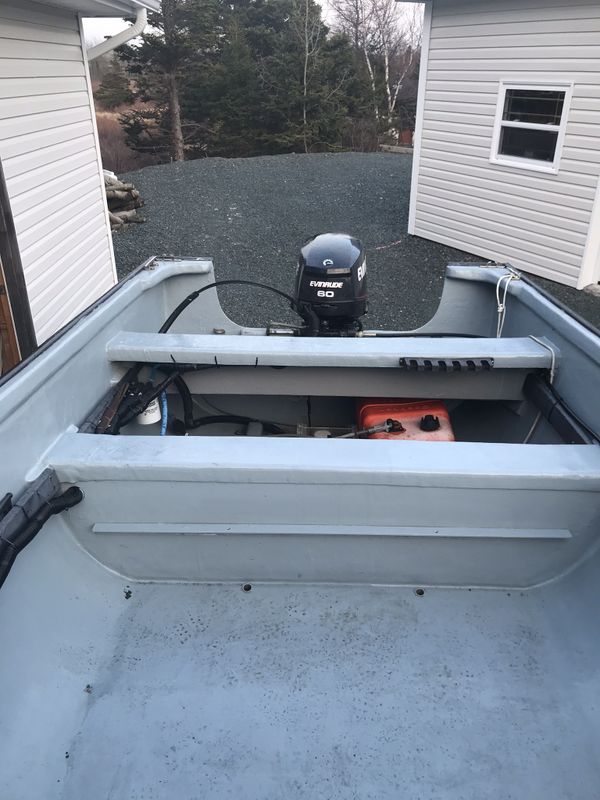
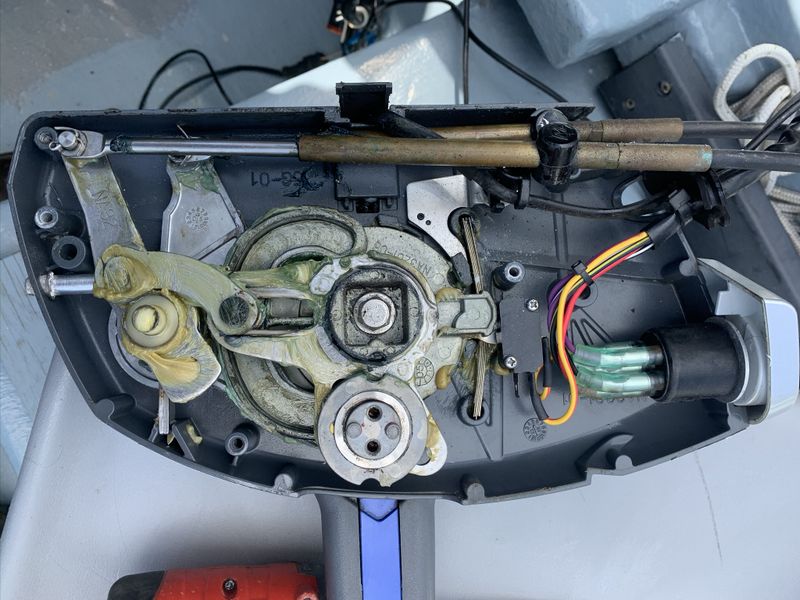
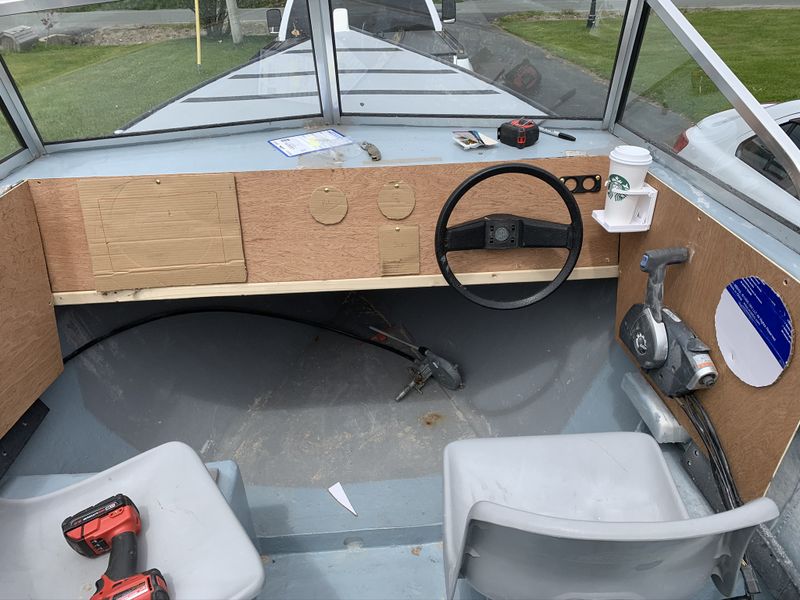
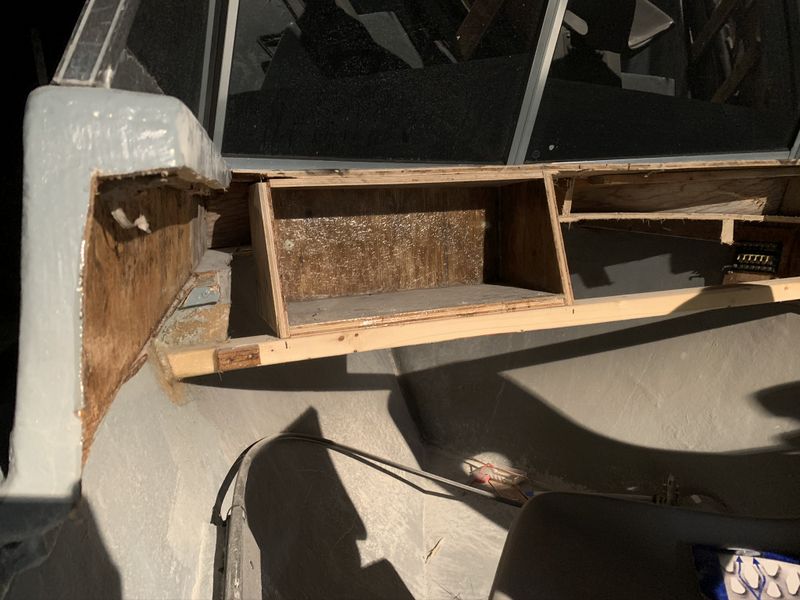
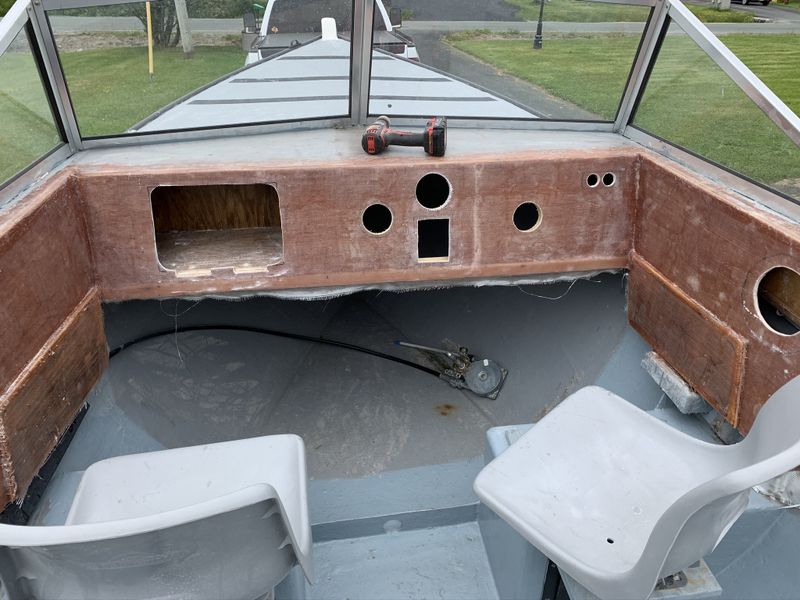
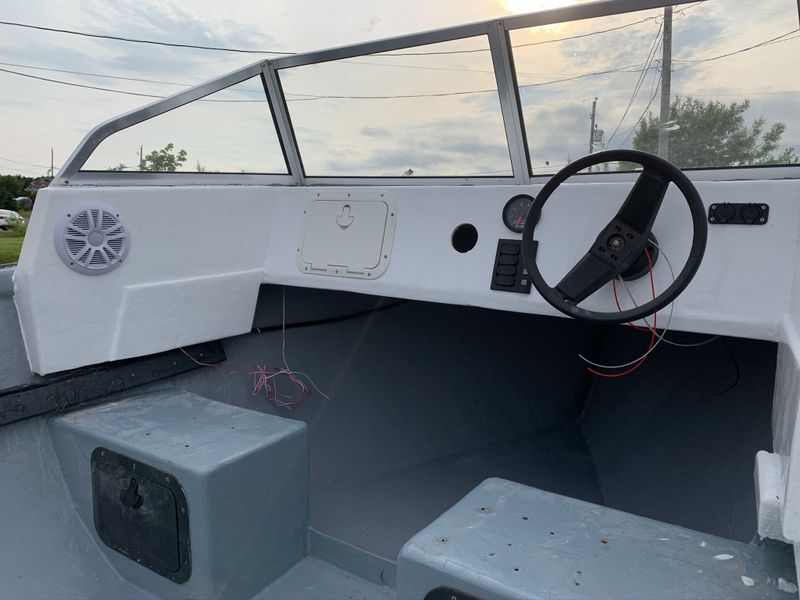
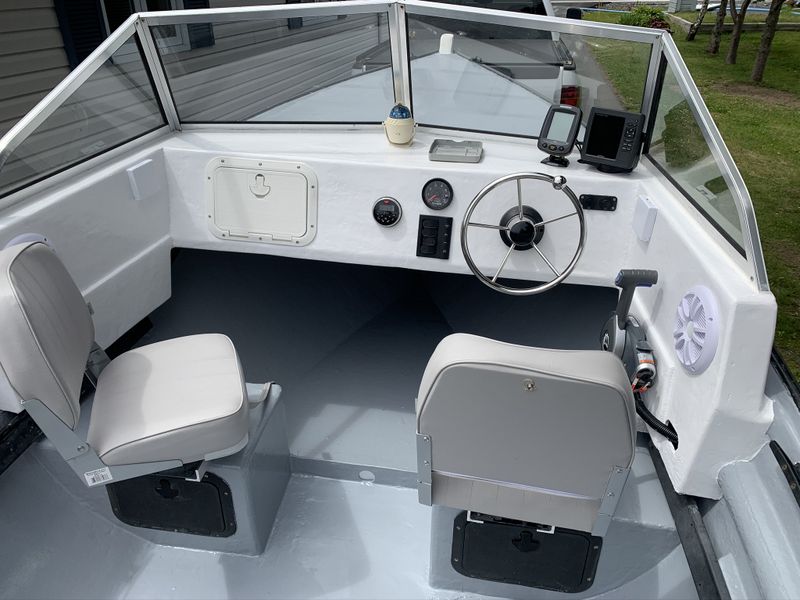
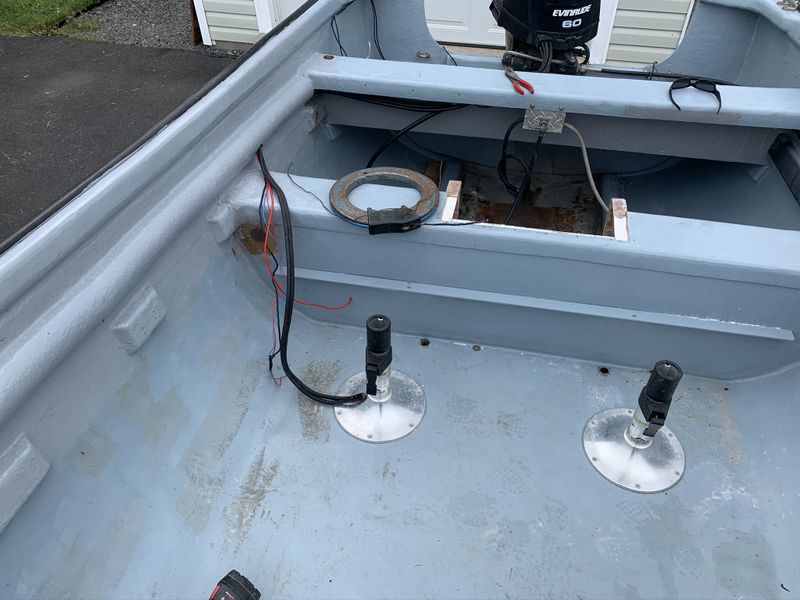
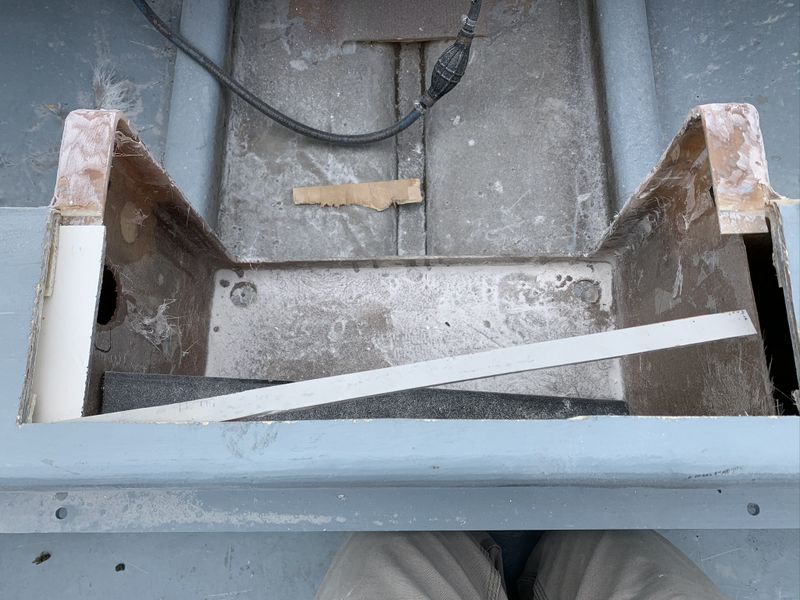
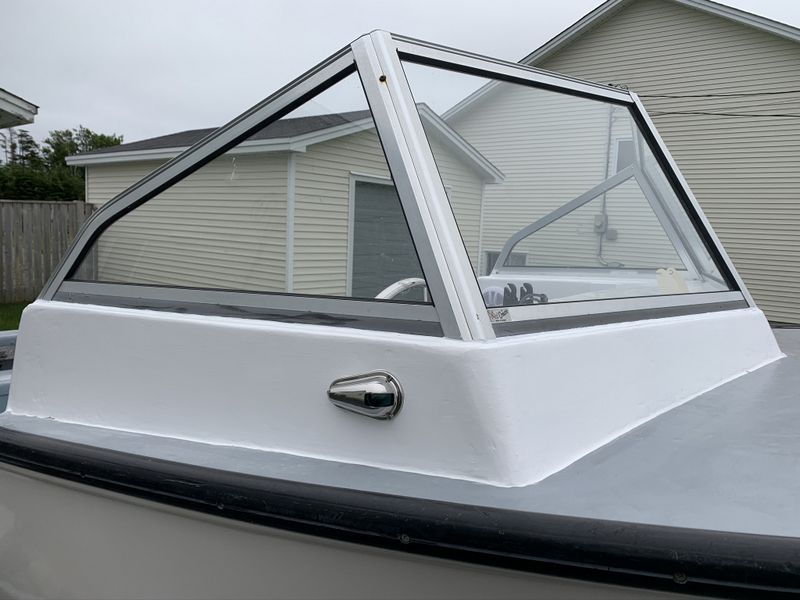
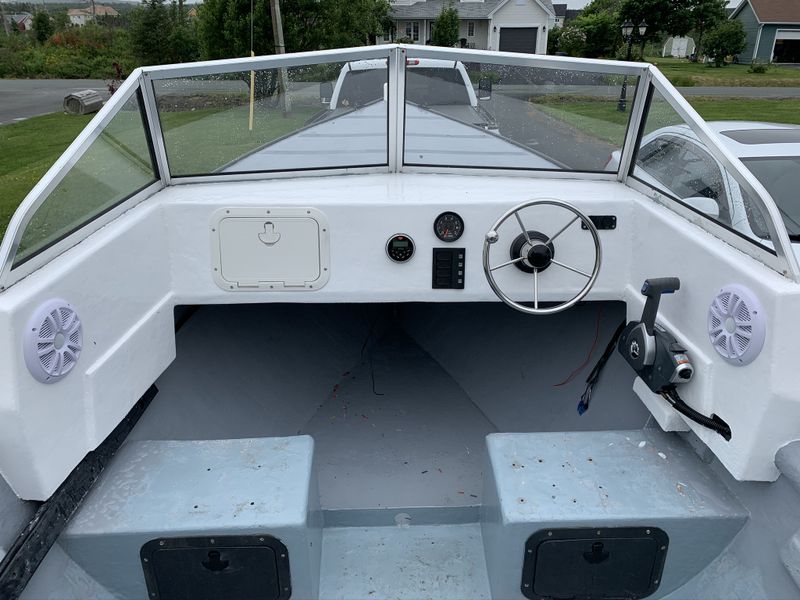
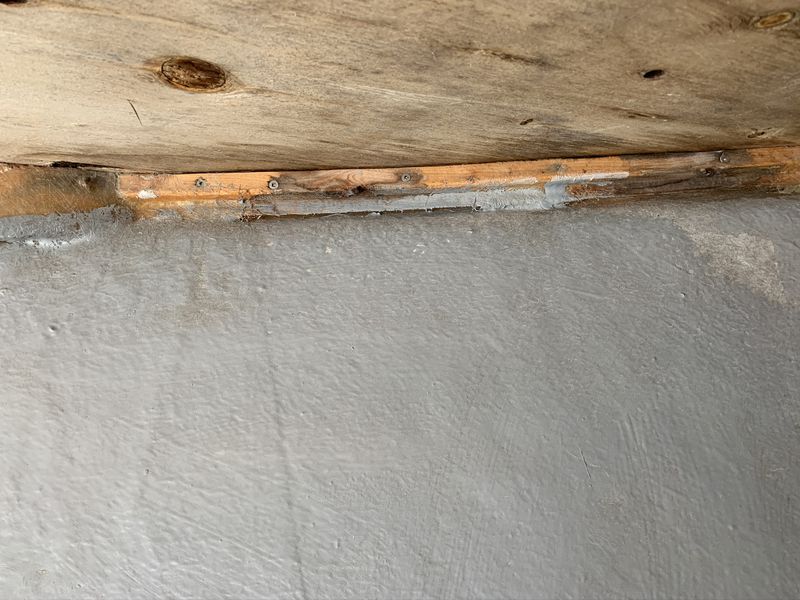
A former owner of the boat converted it to a bow rider with a closed in cuddy and fabricated this dash. It was straight up & down with two weird openings which were useless for storage. The gauge for the Evinrude motor was mounted in a home made wooden box screwed to the top of the dash.
During disassembly I always take lots of pics so I can reassemble important items, in this case the motor control cables, correctly especially when reassembly will take place weeks later.
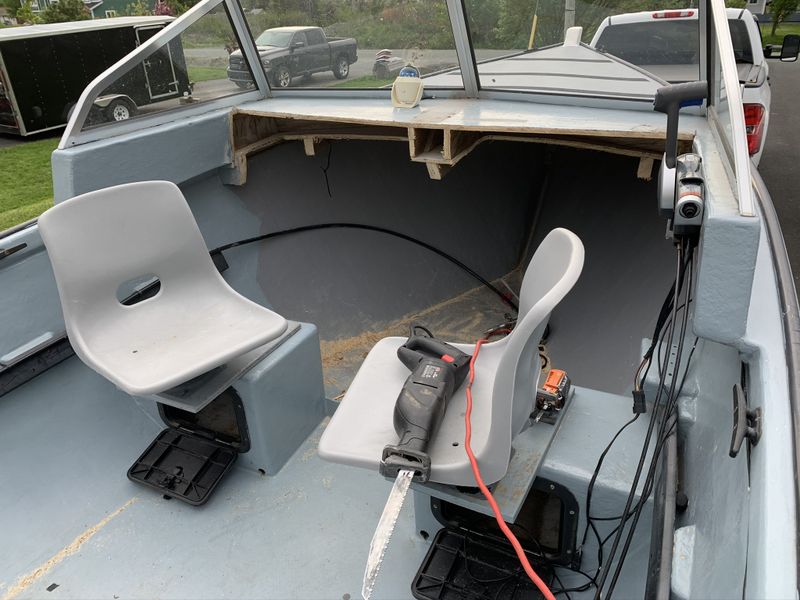
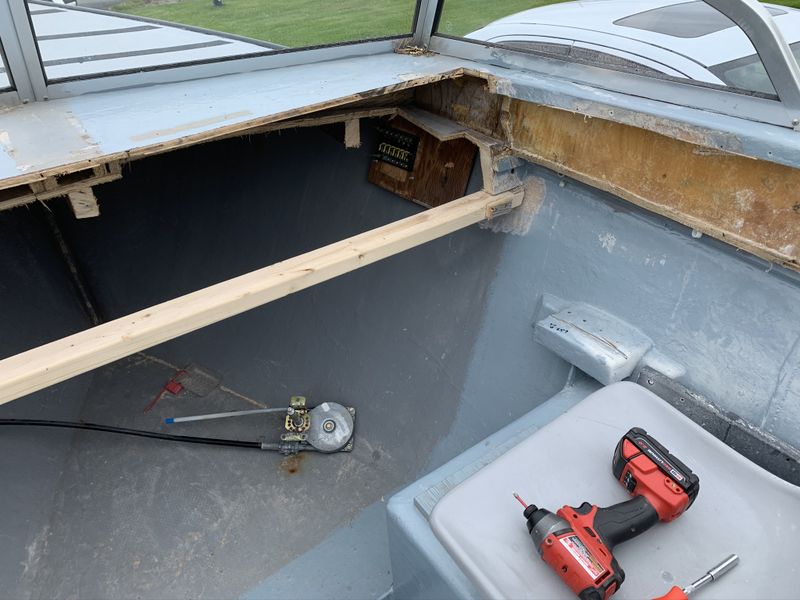
Next I broke out the reciprocating saw, grinder and pry bars and started cutting out the old dash.
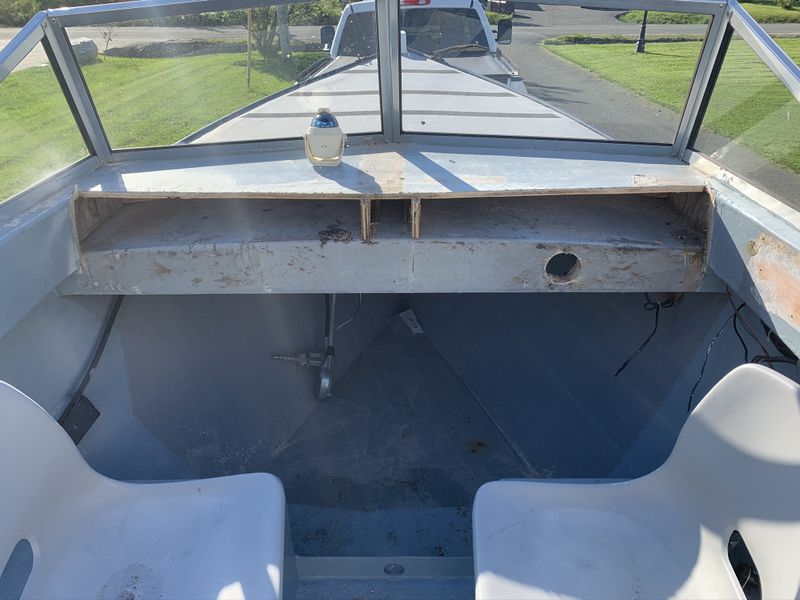
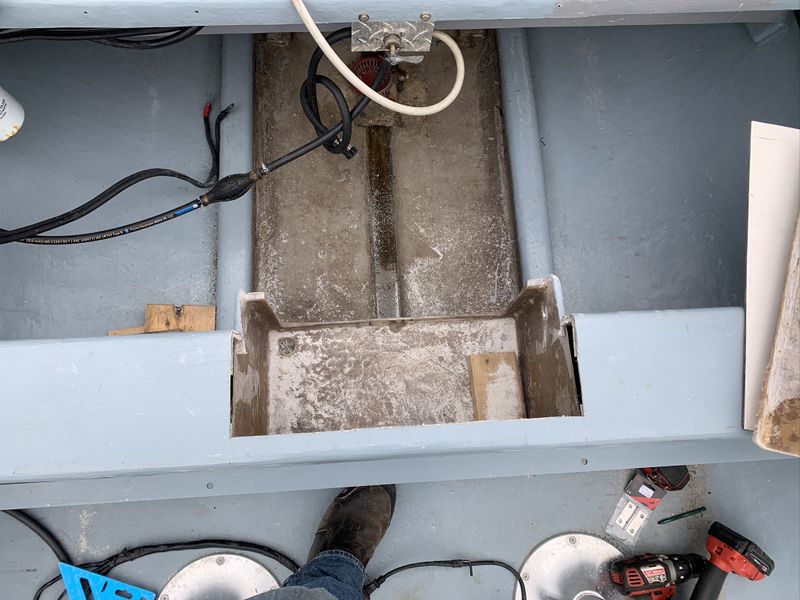
As each layer was removed more cutting commenced.
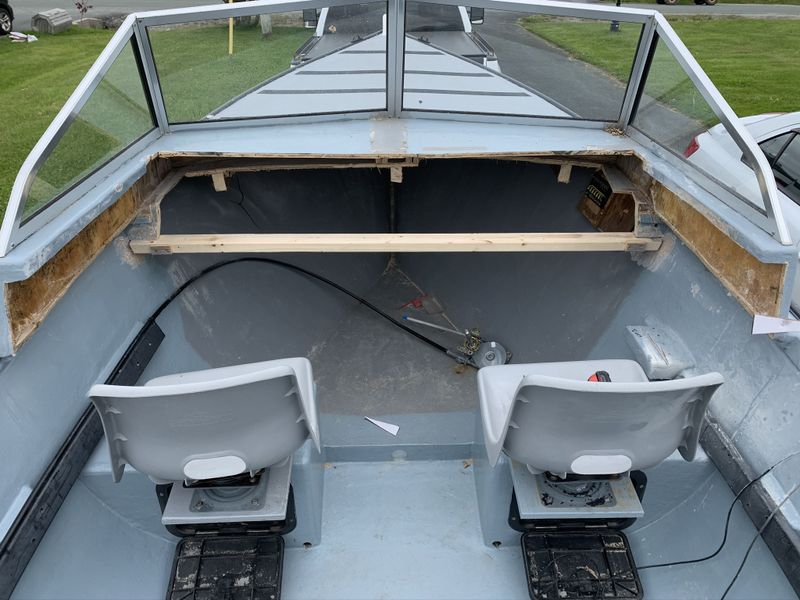
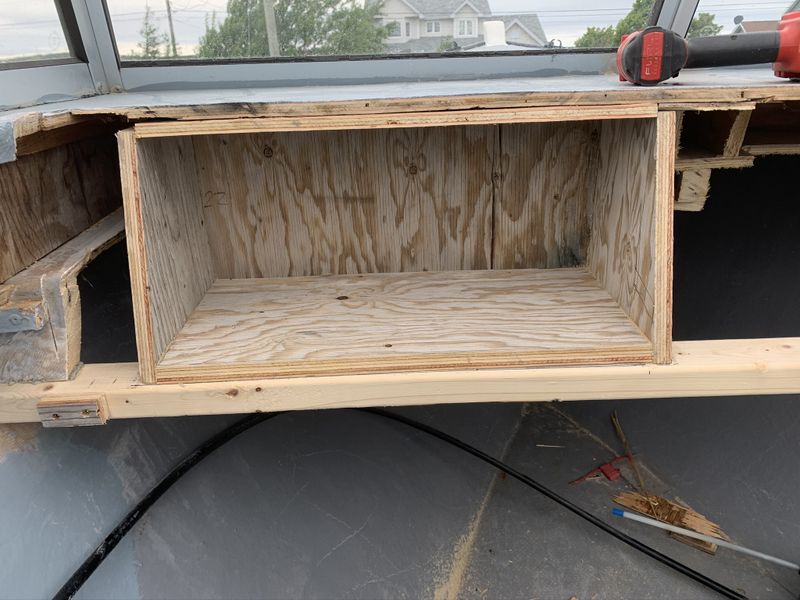
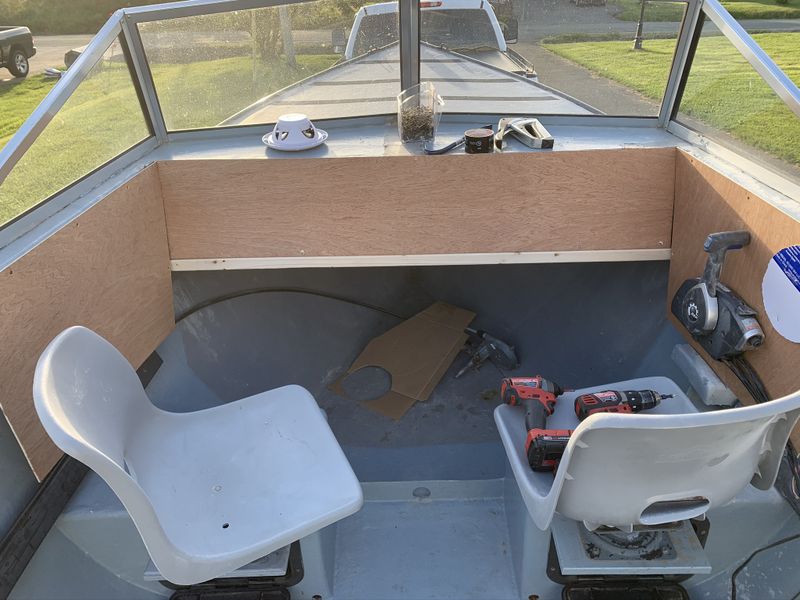
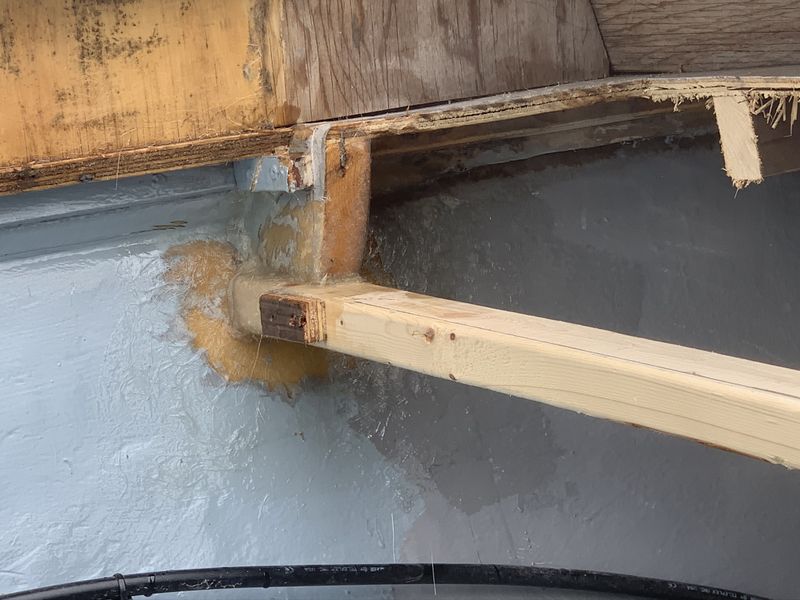
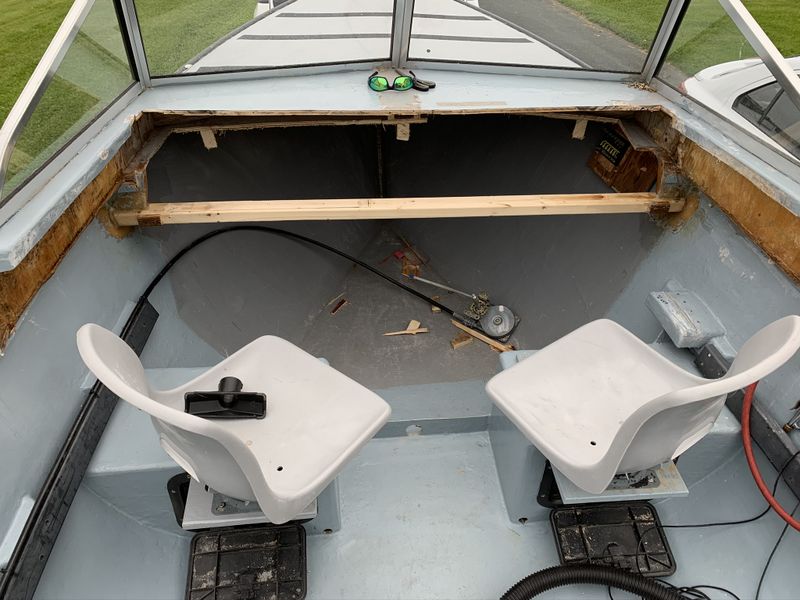
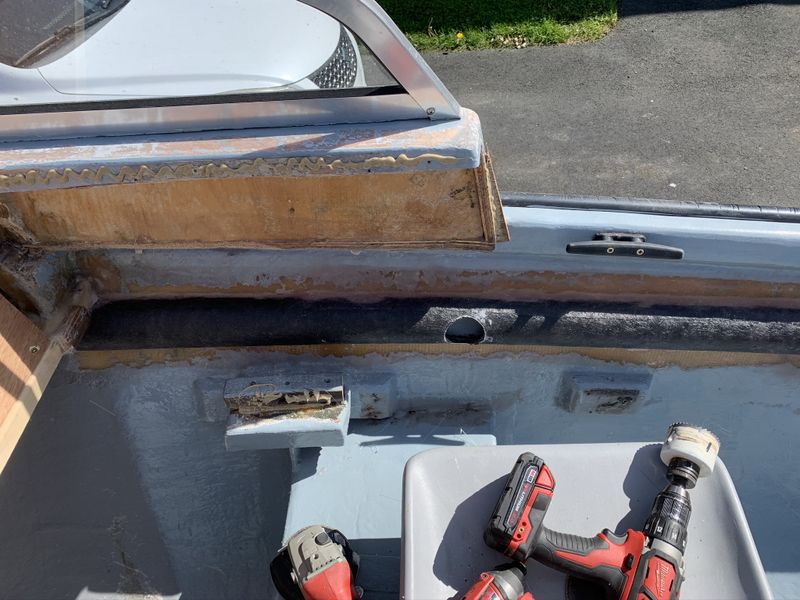
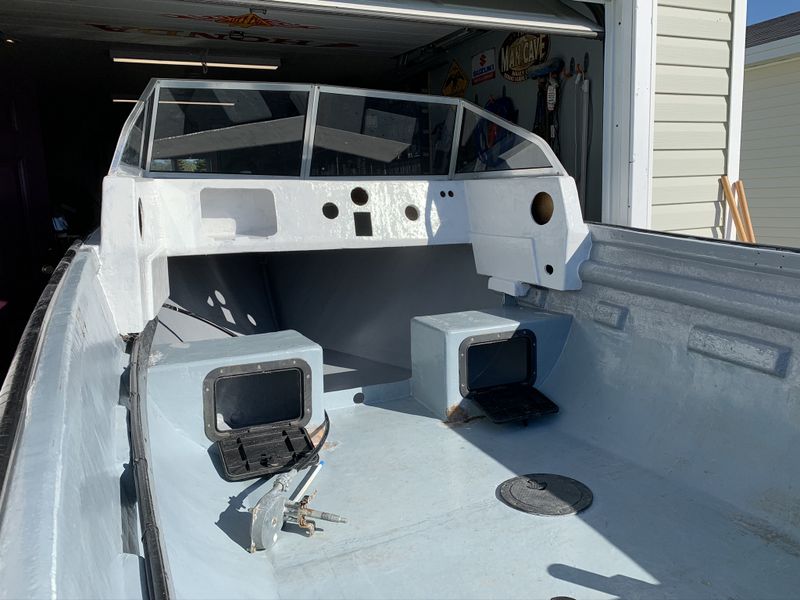
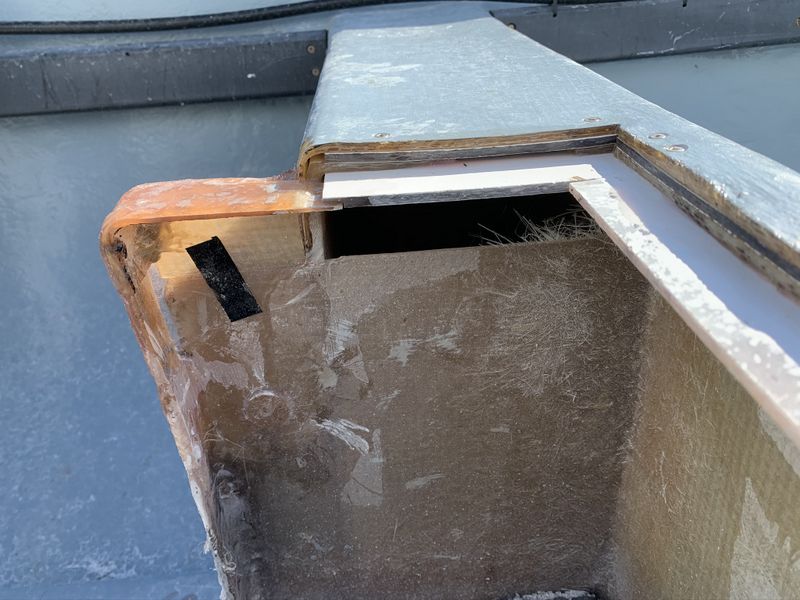
Finally I had all of the old dash, side panels and old support structure removed. This would allow the new dash to fit well and create ample room for my planned weather tight glove box and easy access for wiring gauges & accessories. Since I removed the old side to side support structure, I fitted and installed a new support beam.
I cut back the top of the dash about 3 inches to rake the new dashboard back on an approximate 15-20 degree angle. This will look a lot nicer and make the steering wheel much more comfortable. The new support bar was affixed to the remaining old support bar above with PL Premium adhesive and 3" stainless screws. It will later be fibreglassed to the boat like the old structure.
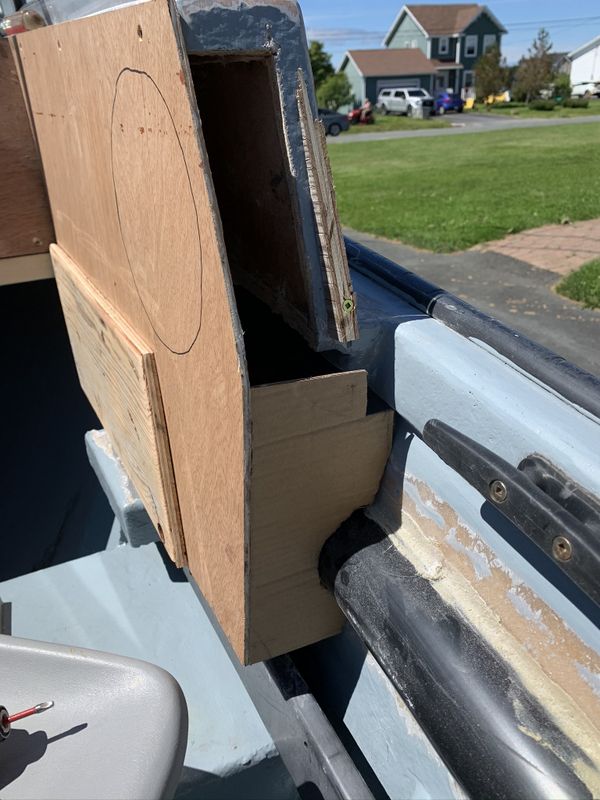
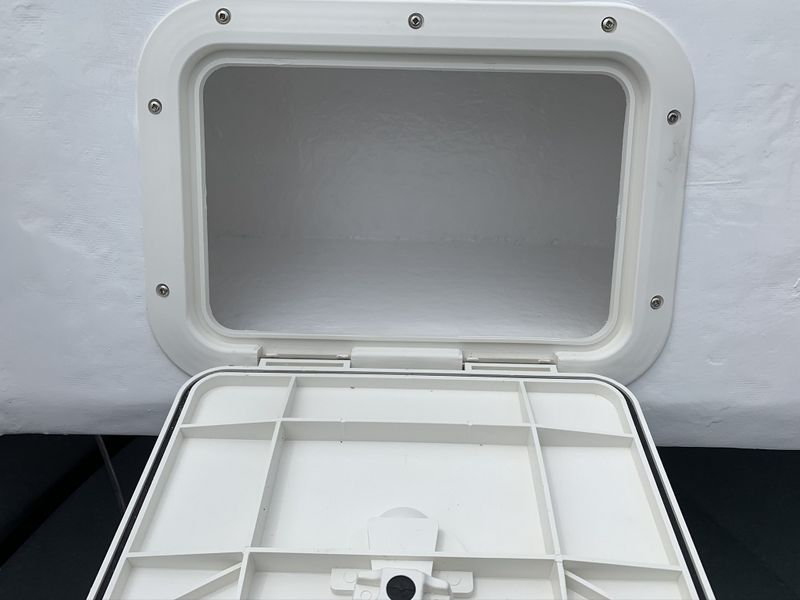
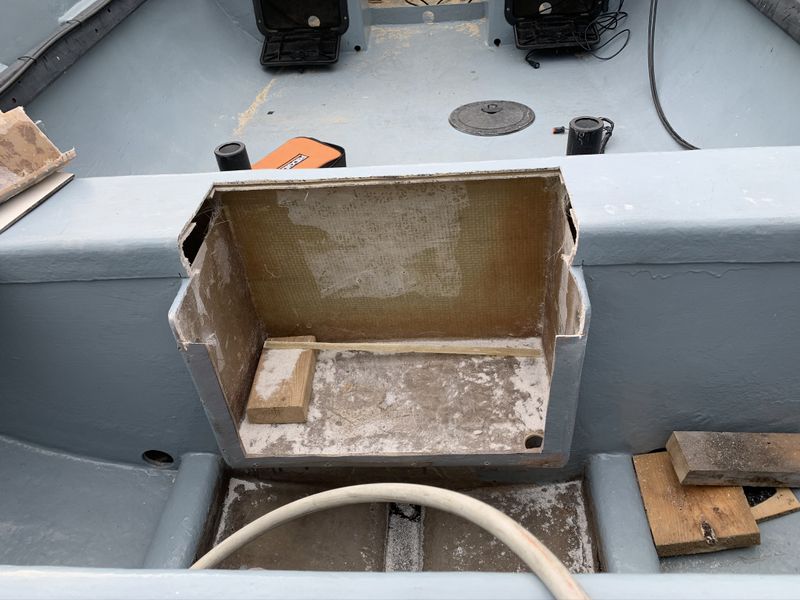
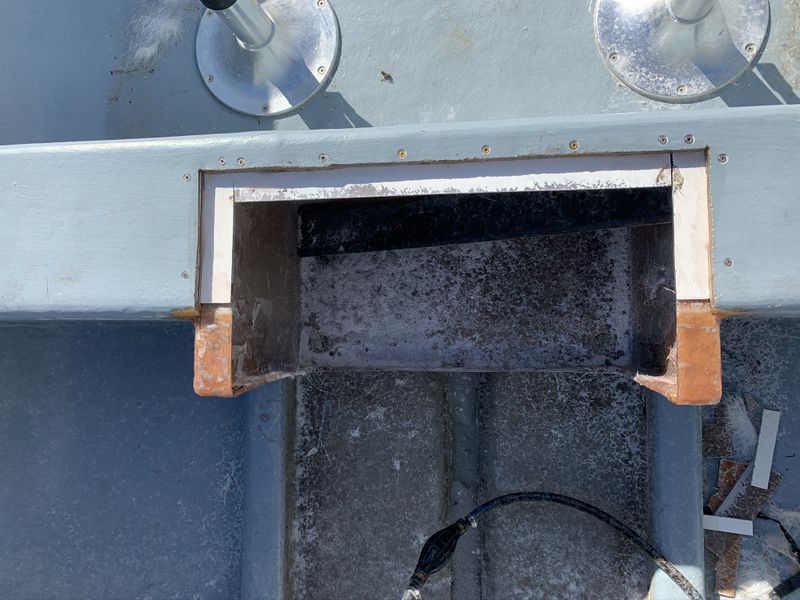
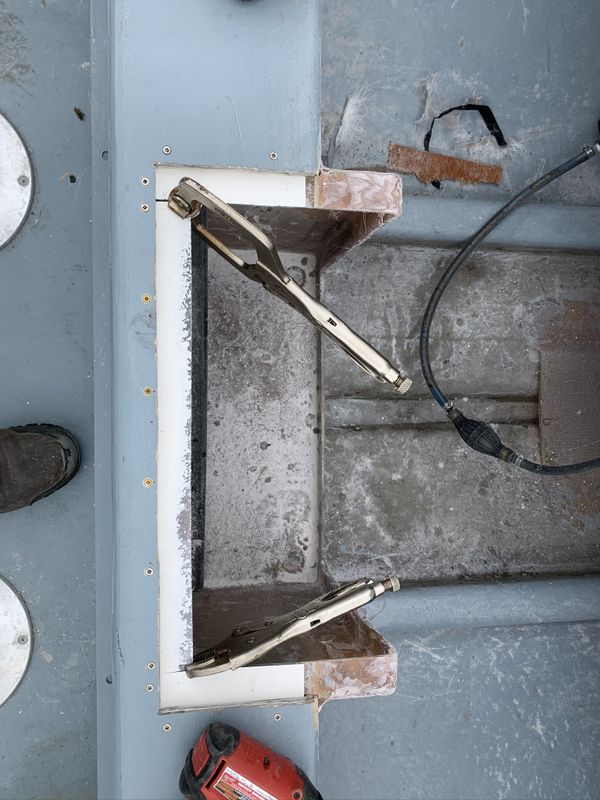
The new glove box not only adds clean, tidy, dry storage but it also adds a lot of support from the top of the dash to the new lower support bar.
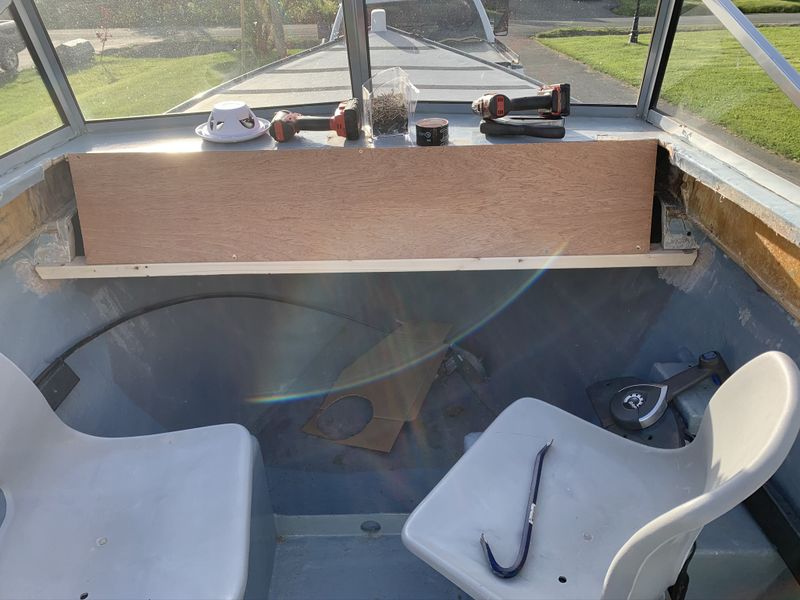
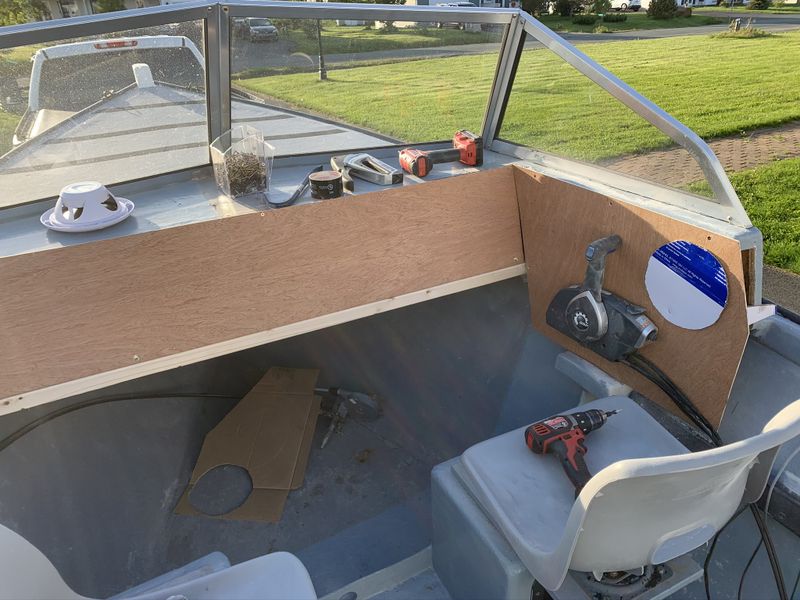
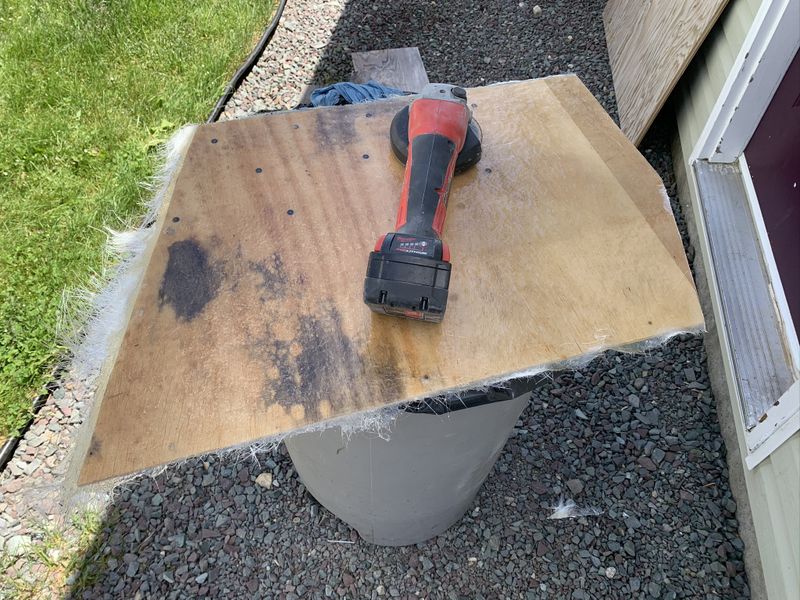
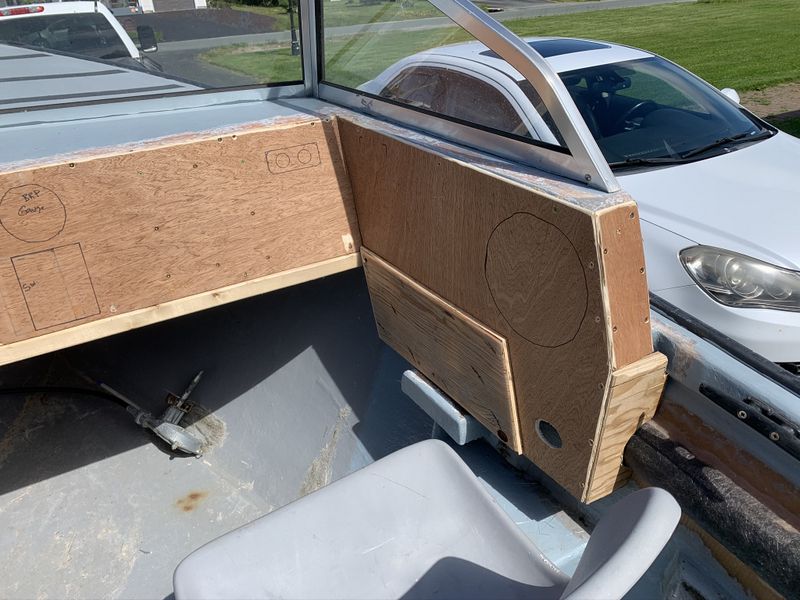
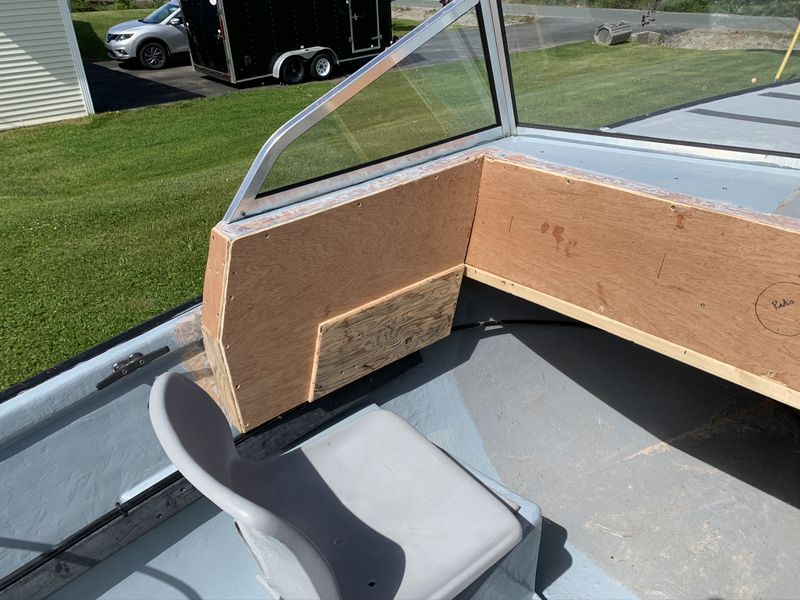
The main dash panel was pretty straight forward, but the side panels were mocked up with cardboard, adjusted and trimmed before cutting the final pieces out of 3/16" board.
Next I mocked up the wheel, controls & accessories with full scale cardboard cut outs to determine the best layout before proceeding any further.
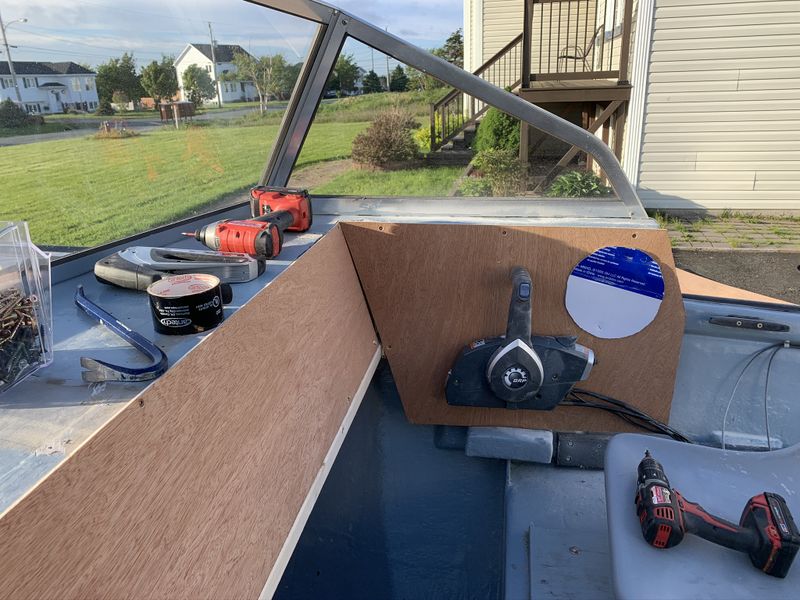
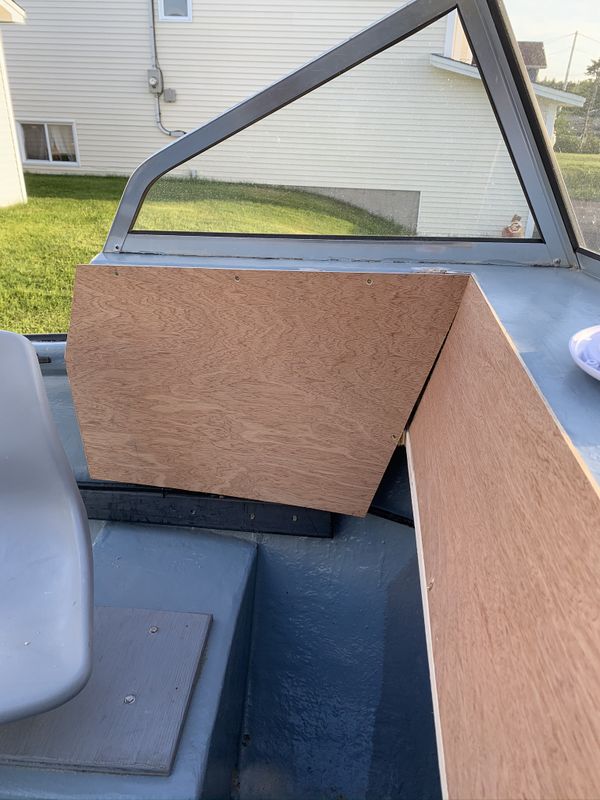
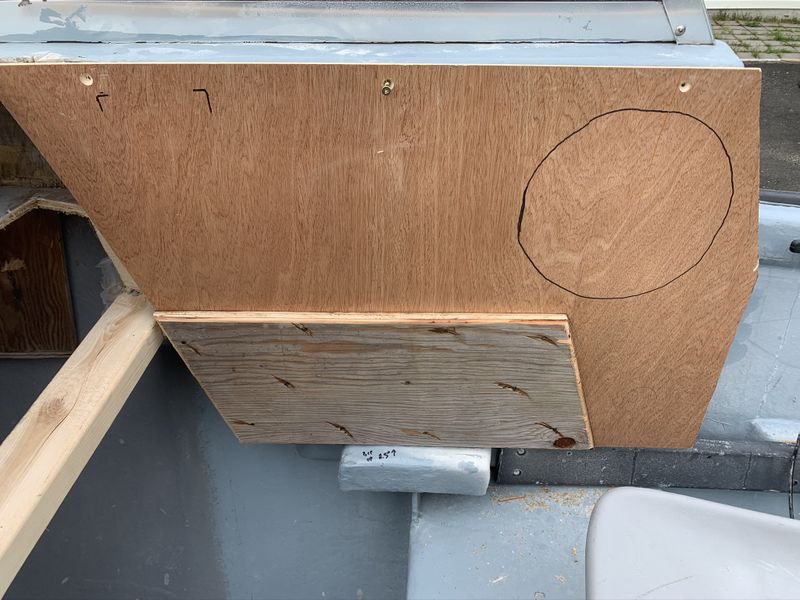
On the side panels I added 3/4" plywood for strength, a neat 3D appearance and to space the motor control handle a little further off the side panel for maximum comfort. This piece was mirrored on the passenger side for a uniform look.
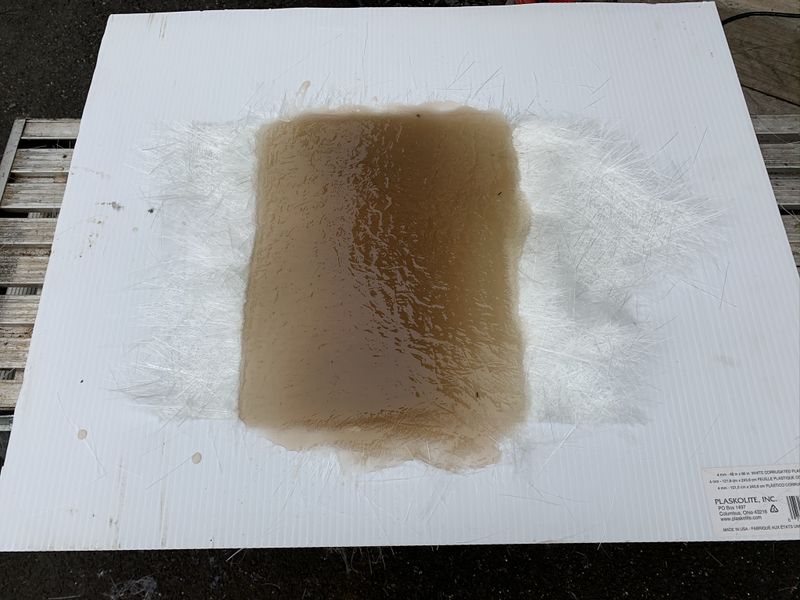
Next the messy task of fibre glassing began.
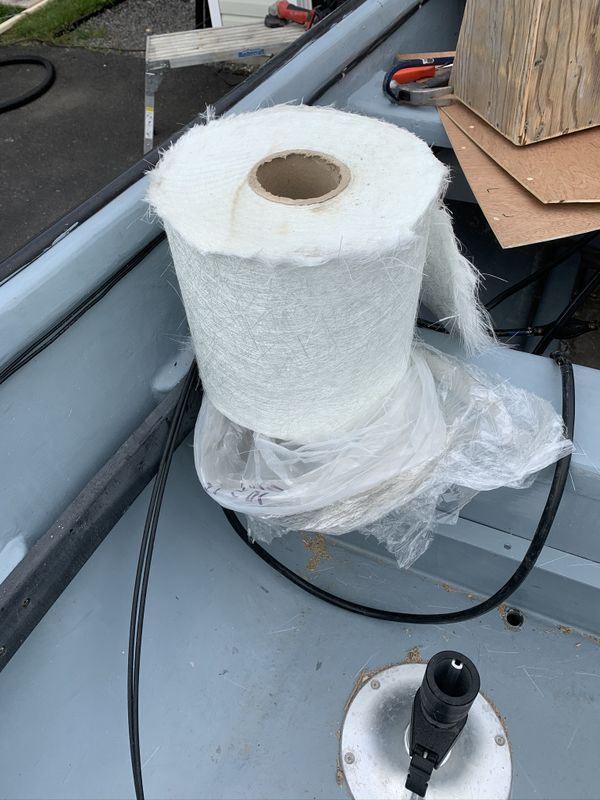
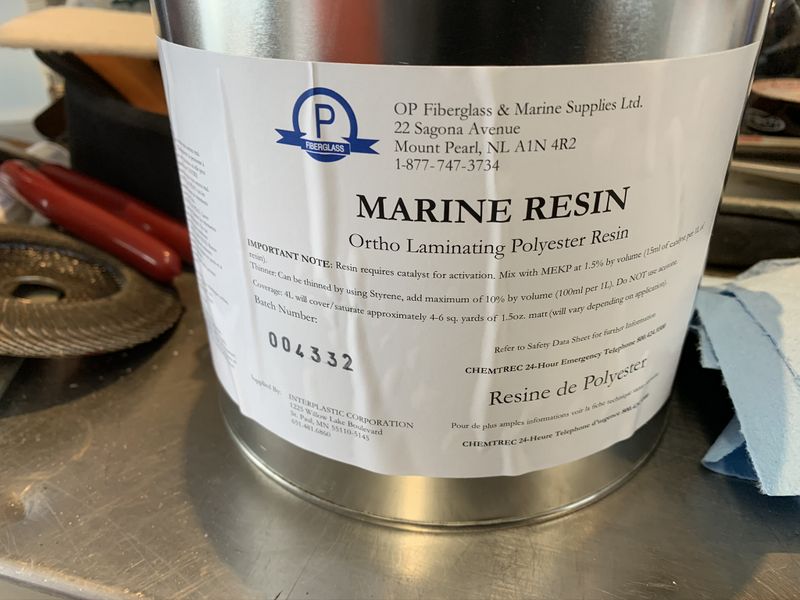
I started the project with a one gallon can which was used up quite quickly! I went back and picked up a 5 gallon bucket of resin & matching catalyst at Outdoor Pros in Mount Pearl.
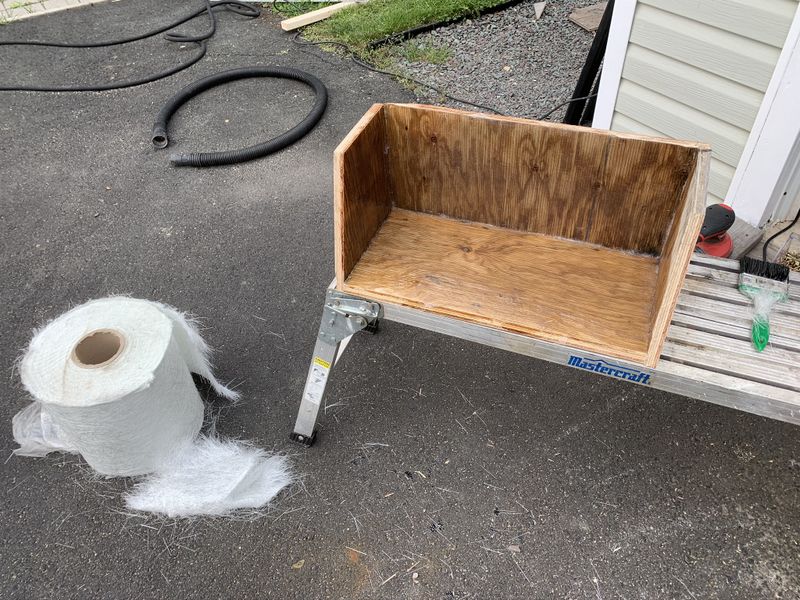
I used cut down windshield wash containers for mixing which worked out great. I had two and would swap back and forth as I worked. Once the resin started to go hard I would swap containers, when the unused product cured residue could easily be removed from the container as it did not bond to this type of plastic at all. I also had a full box of disposable gloves on hand, and acetone for clean up of spilled product and my fibreglass roller.
First up was fibre glassing the inside of the glove box, followed by fibre glassing the new dash support structure to the side of the boat.
Note: Old paint must be removed for the new fibreglass to bond to the old. A flap disc in my angle grinder worked great!
I also painted resin over all the existing exposed wooden structure to make it much more weather proof than before.
The new glove box was permanently installed with PL Premium adhesive and coated screws.
Next all of the new wooden dash panels were coated with a layer of fibreglass matt and resin on the inside before final installation for maximum strength and weather resistance.
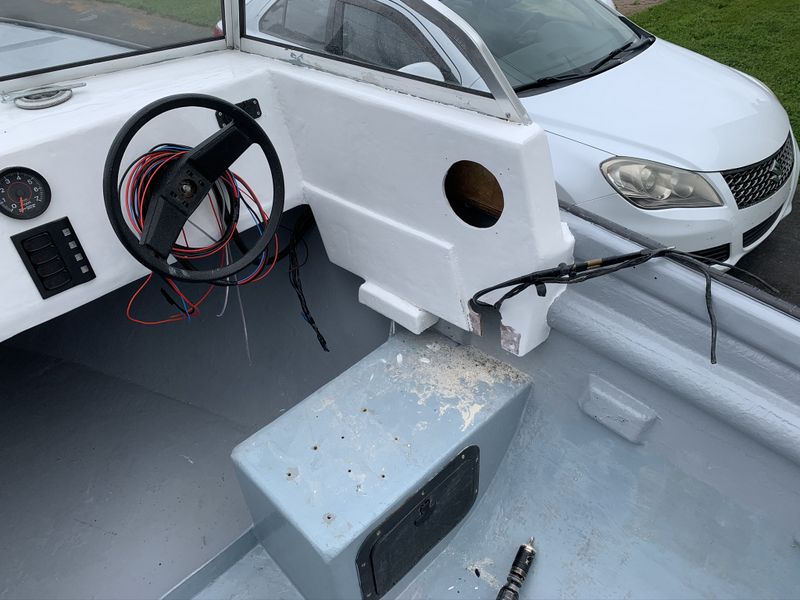
I also added an extra piece of 3/4" plywood to the inside of the dash for extra strength and support for the steering wheel.
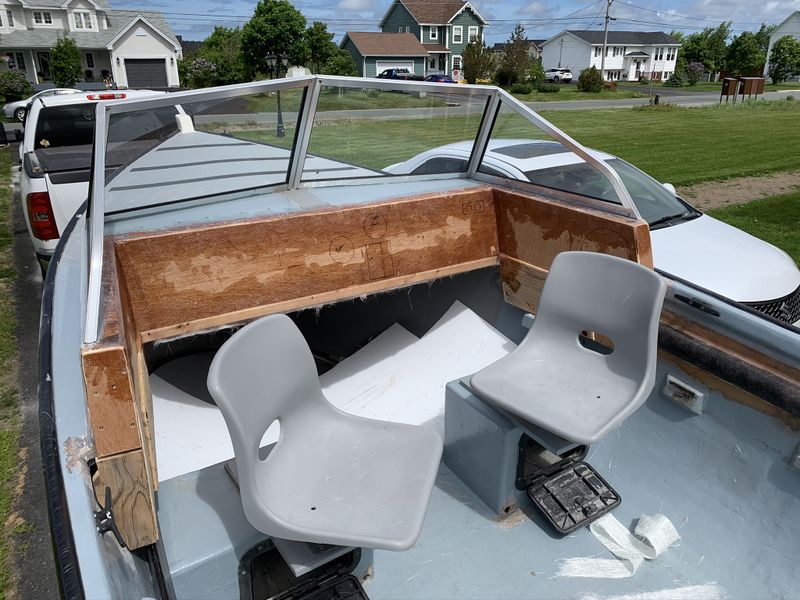
Now I could begin final fitment and fabrication of the side panels.
Again, all of the new panels were attached to the boat with PL Premium adhesive and coated screws for maximum strength. This hole in the wiring chase is for the motor control harness and cables.
All edges were smoothed and rounded over with my router and random orbit sander.
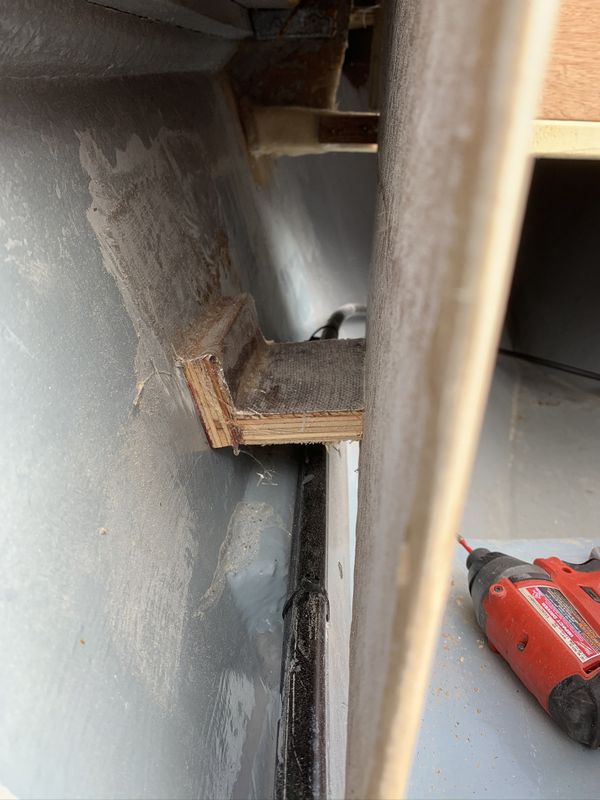
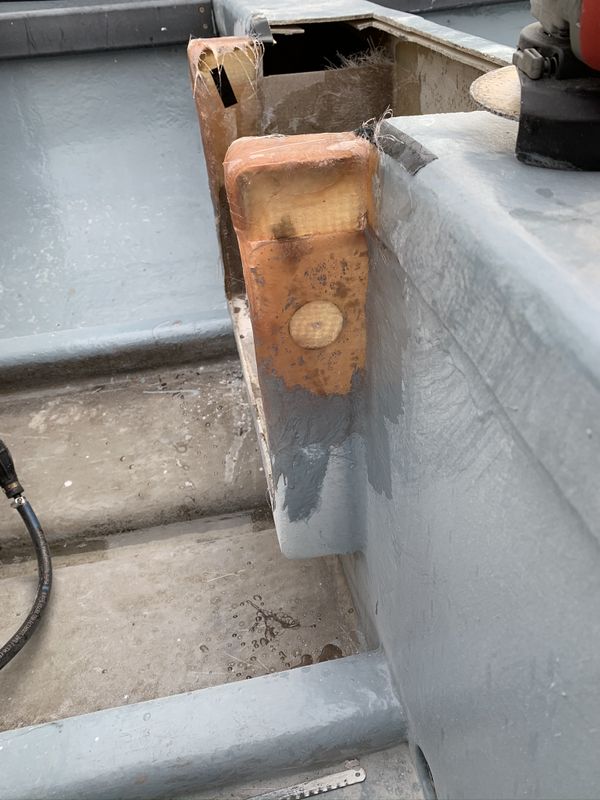
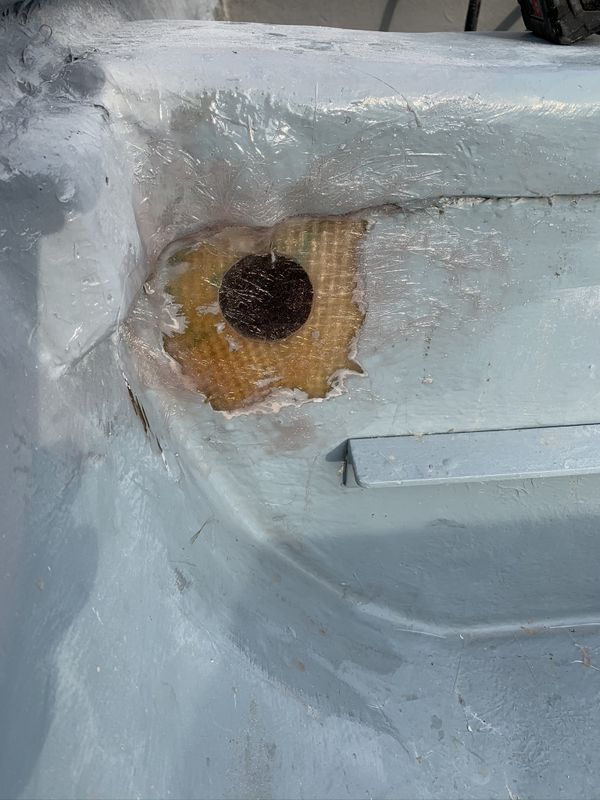
On the driver side the bottom of the side panel was supported by an old engine control mount, on the passenger side I made my own and glued & fibreglassed it in place.
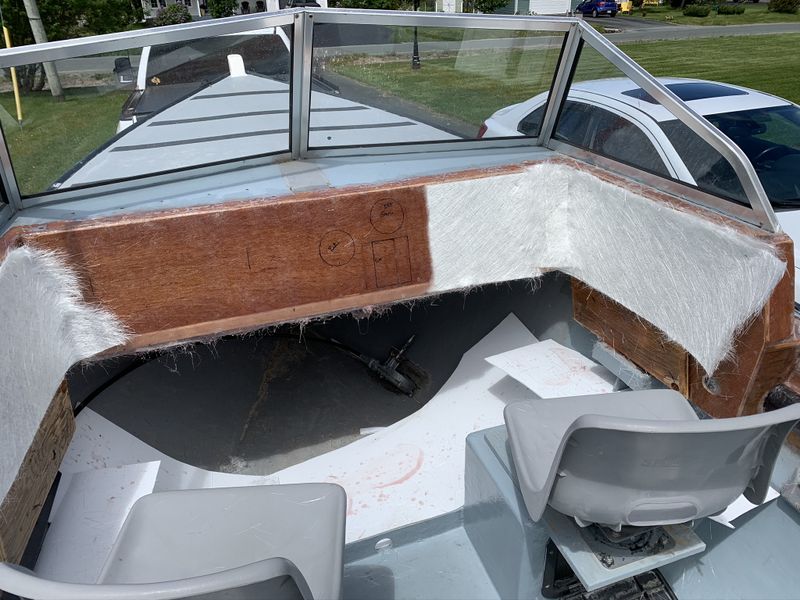
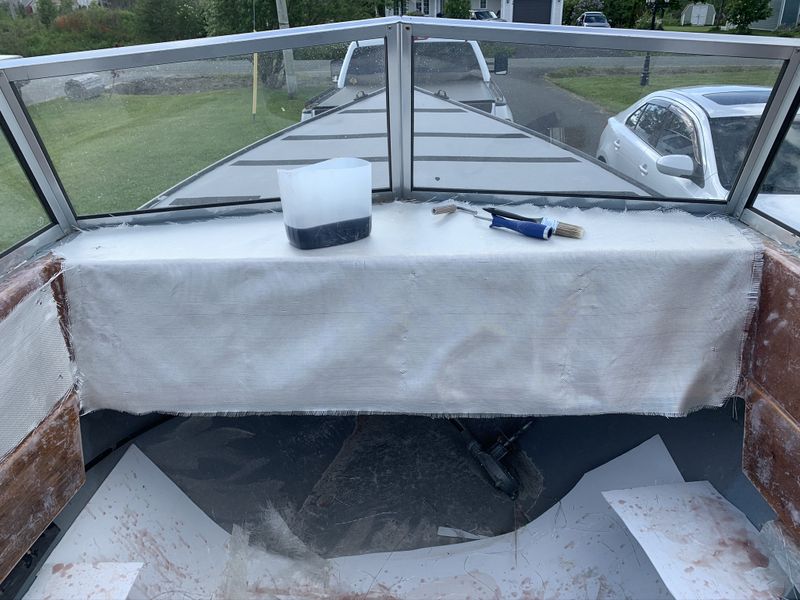
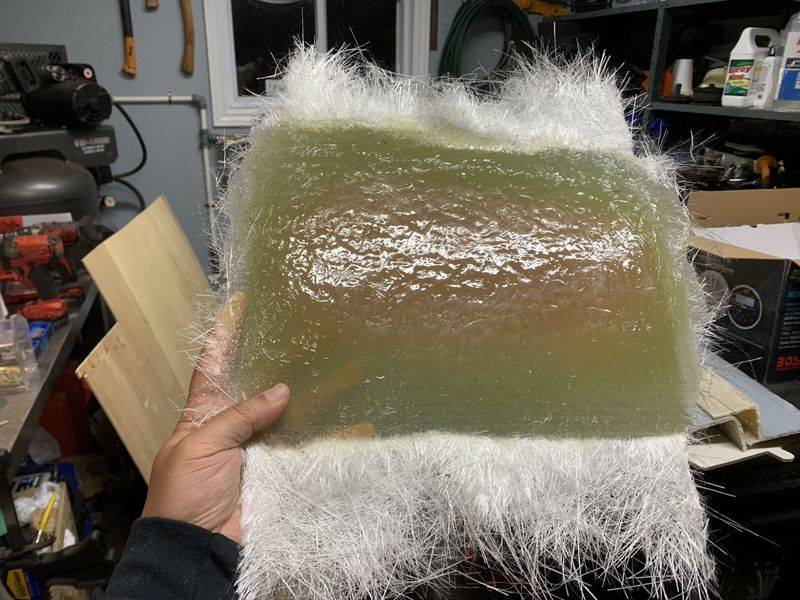
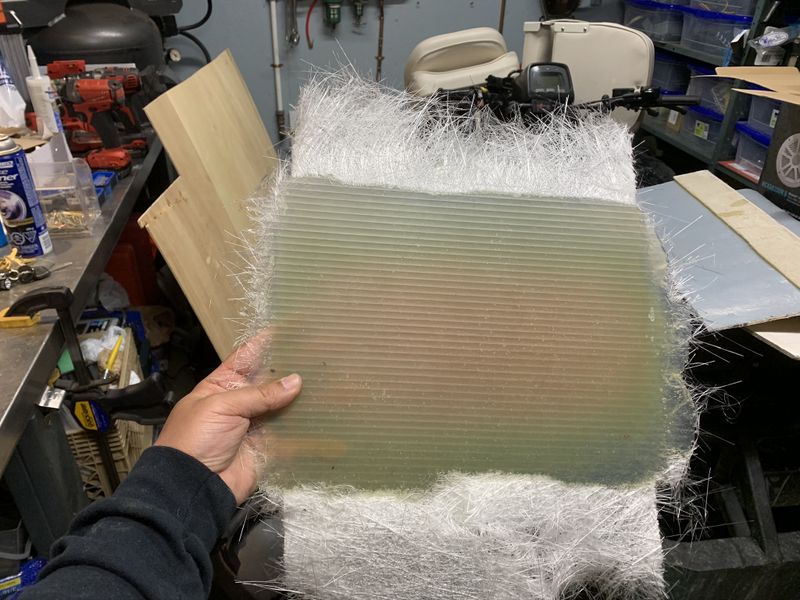
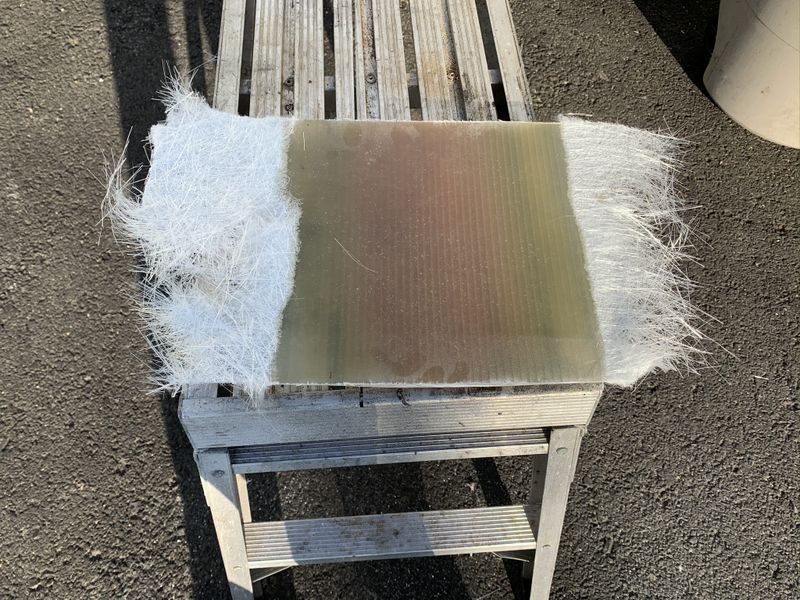
With the new dash pieces permanently installed I began fibre glassing the dash using chopped matt, torn into strips first covering all my edges.
Next I 'glassed in two full layers of chopped matt.
Followed by another layer this time using woven boat cloth.
All of the excess material will be trimmed later once the resin has fully cured.
Next up was cutting out holes for all of the accessories, steering wheel and motor controls. After the holes were cut out and parts test fit, I mixed up more resin and painted over all the exposed wooden edges to fully seal the wooden structure of the dash to prevent rot.
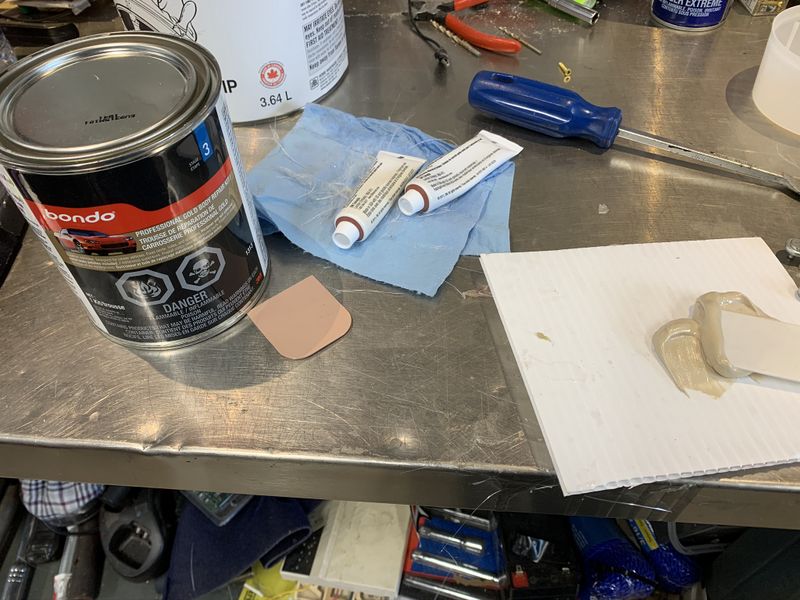
Next I did a lot of sanding and added some body filler to make the dash look good. I didn't make it perfect so it has a hand crafted appearance making the best use of time I have available for the project vs a 100% perfect shiny surface.
As it was quite warm and very sunny, I enlisted Project
Foreman to turn the boat around and get the front end inside my garage so I
could paint the dash and nose in the shade.
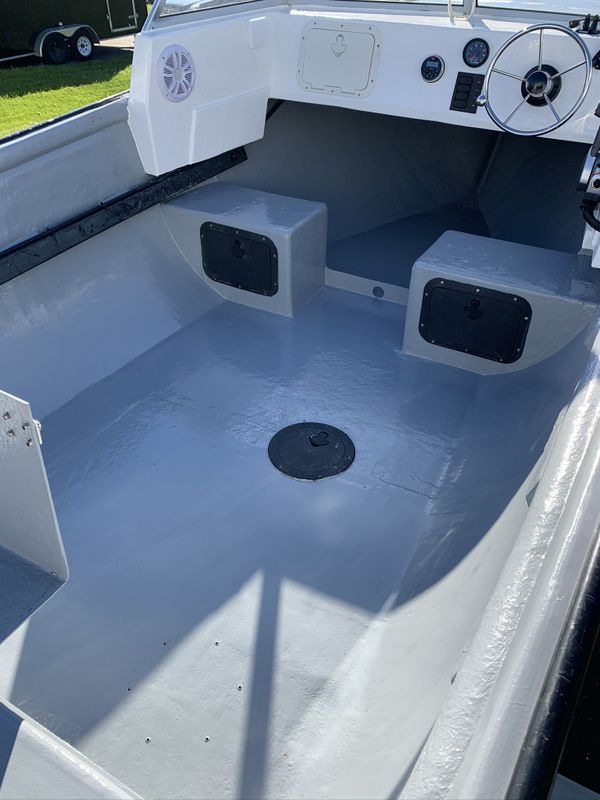
Like many modern boats I chose to paint the dash white and repaint the rest of the boat battleship grey (more pics can be found under the "Paint" heading. I chose not to use coloured gel coat as the boat had already been re-finished with oil paint inside at least twice before.
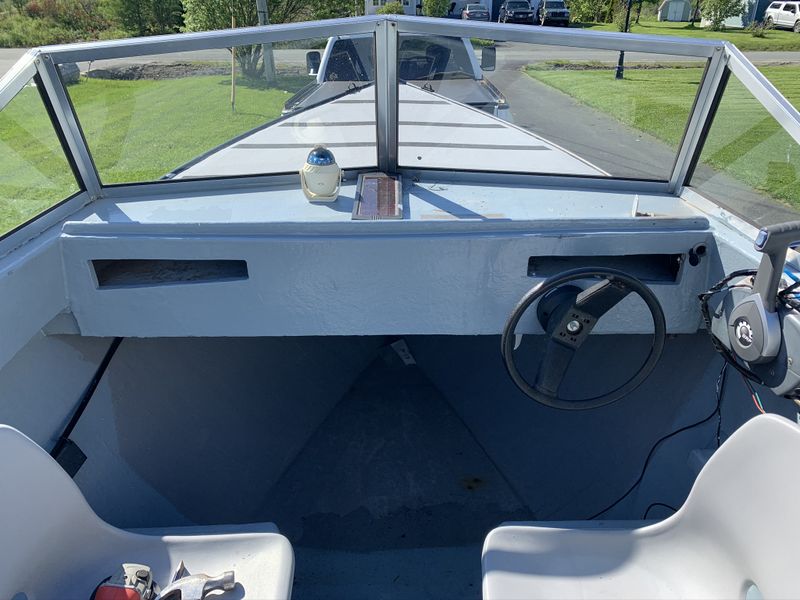
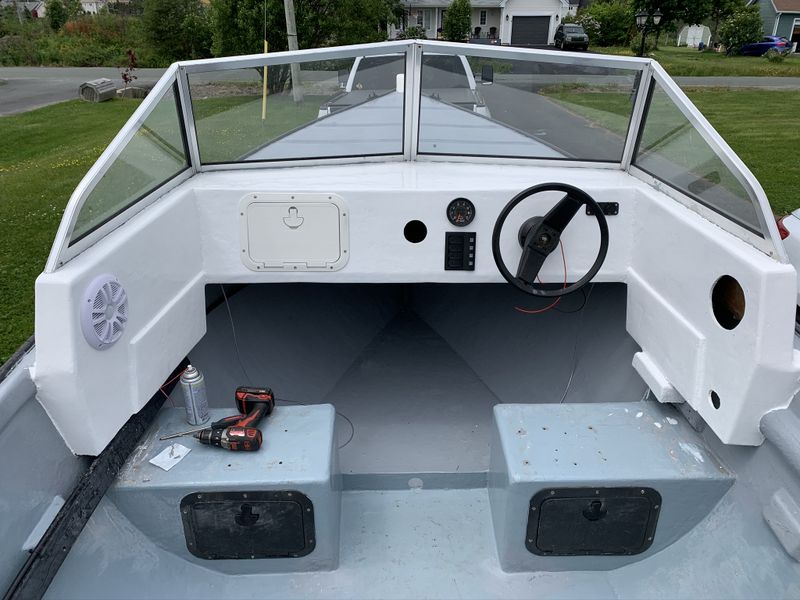
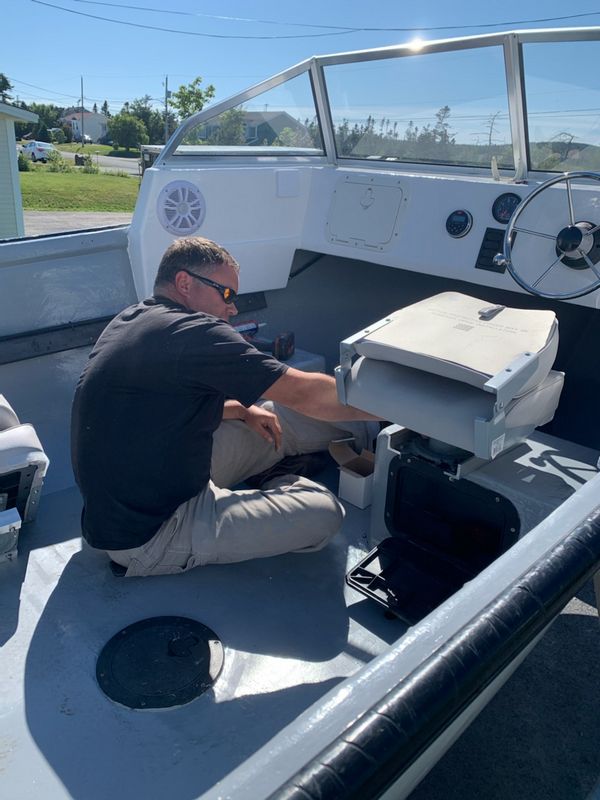
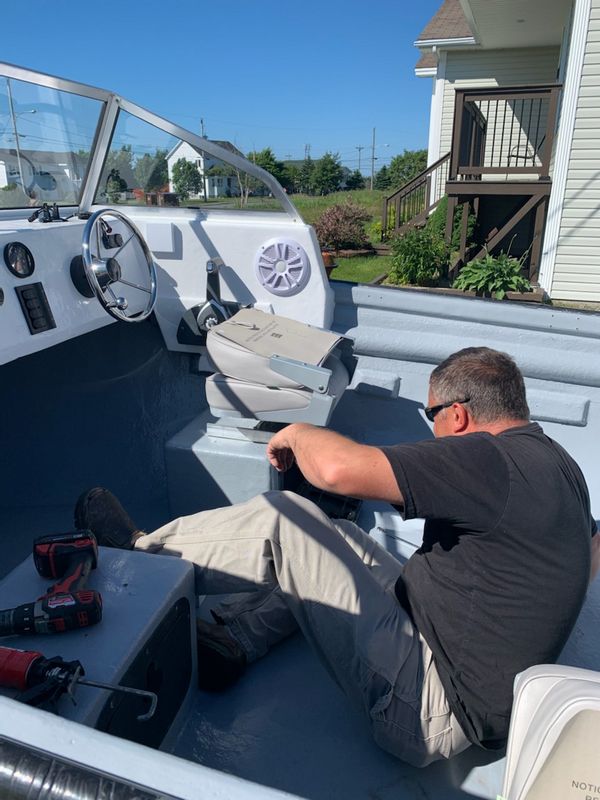
With dashboard painting complete I started installing the glove box lid, steering head, and accessories. Every accessory and screw in this boat was predrilled and the stainless fasteners coated with 3M Marine adhesive which is a quality product rated for above or below the waterline. This will prevent water from following any hardware and rotting out wooden structure under the fibreglass throughout the boat.
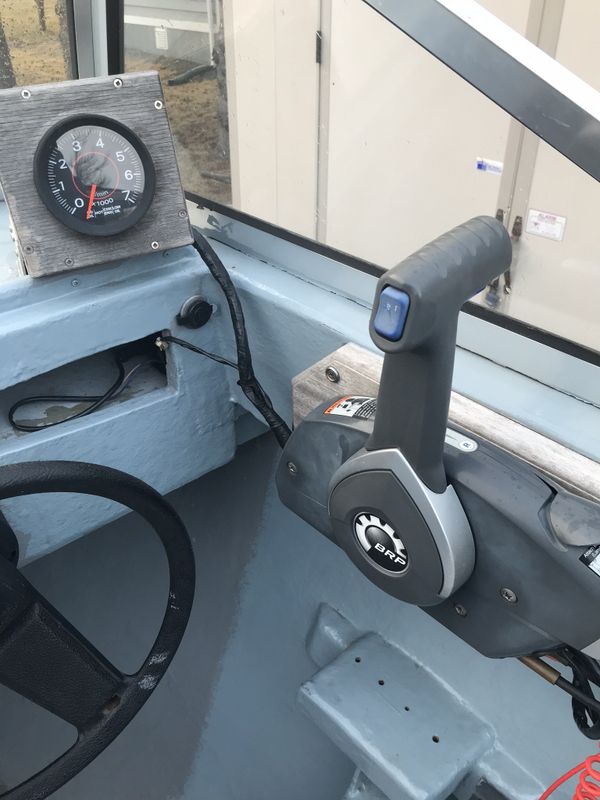
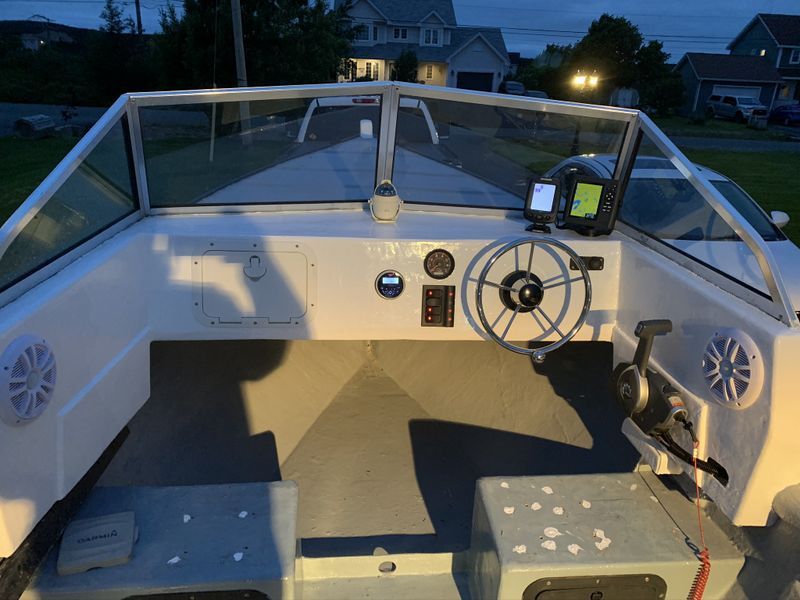
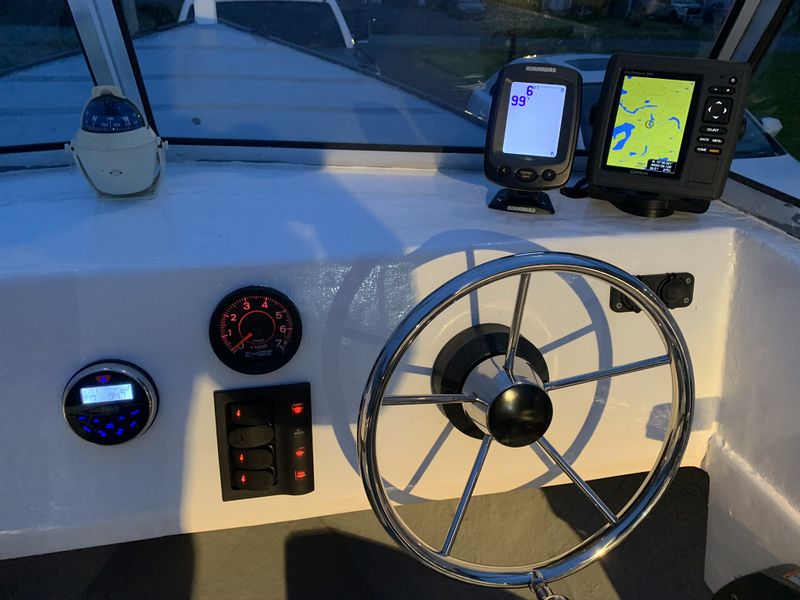
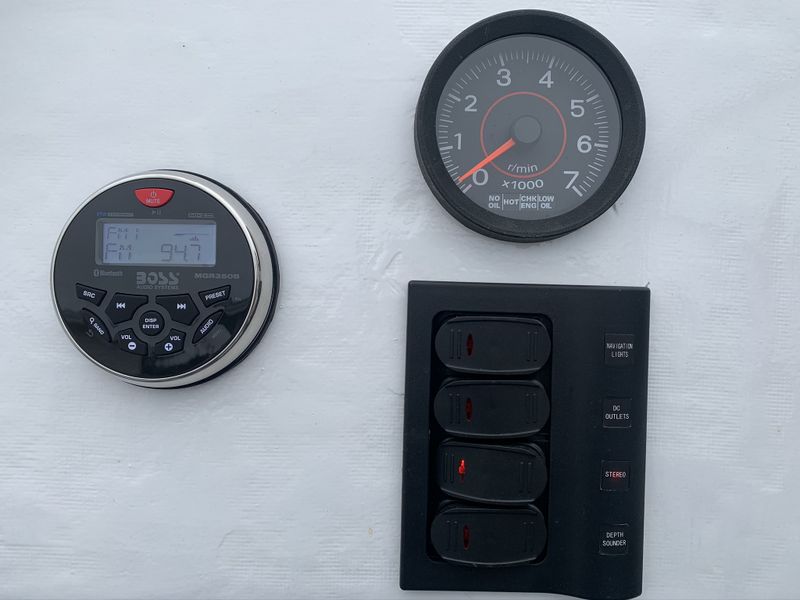
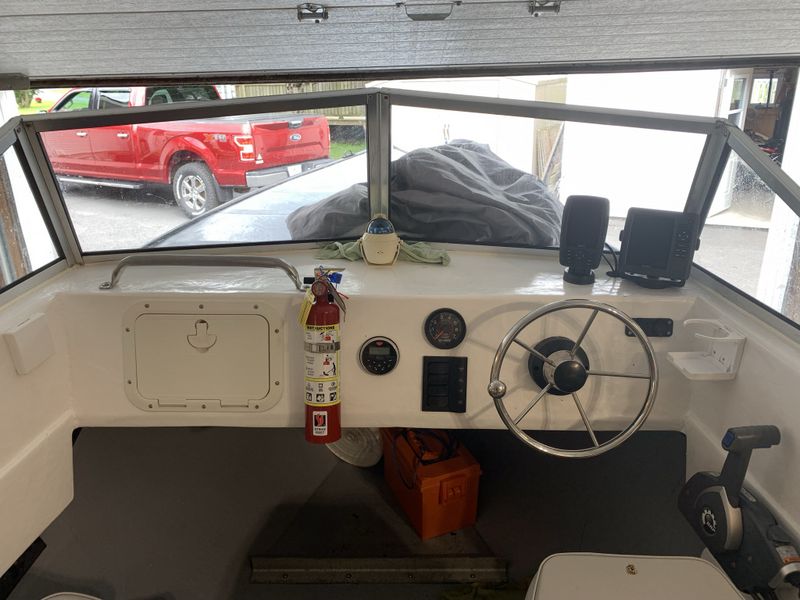
New accessories included a new switch panel/breaker panel, a 12v & USB charging outlet, properly mounted Evinrude gauge, an AM/FM/Bluetooth Stereo with 6.5" speakers, and led navigation lights. More details of the electrical wiring can be found under the "Electrical System" heading. I also spruced up the dash with a brand new 13.5" stainless steel steering wheel.
Dad's compass, Hummingbird Depth Sounder and Garmin GPS were also reinstalled.
No proper recreational boat is complete without cup holders for that early morning Tim Horton's run or Gatorade!
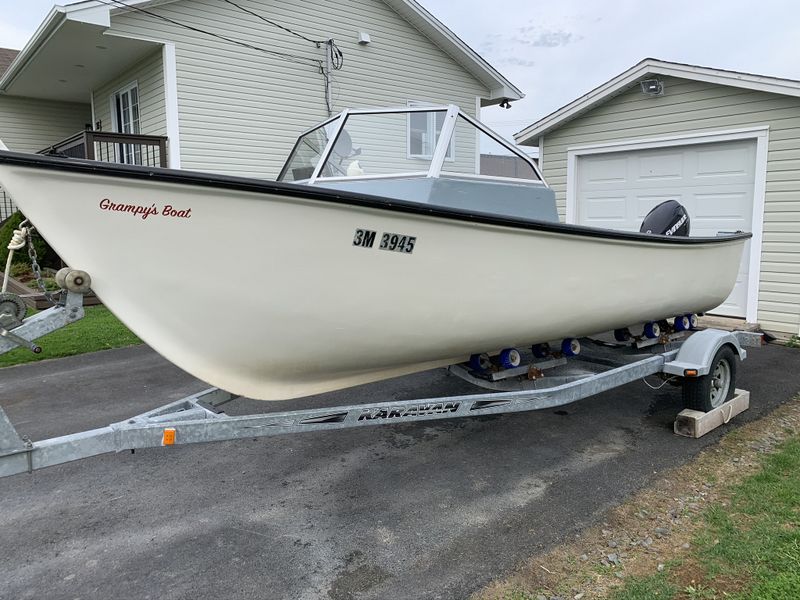
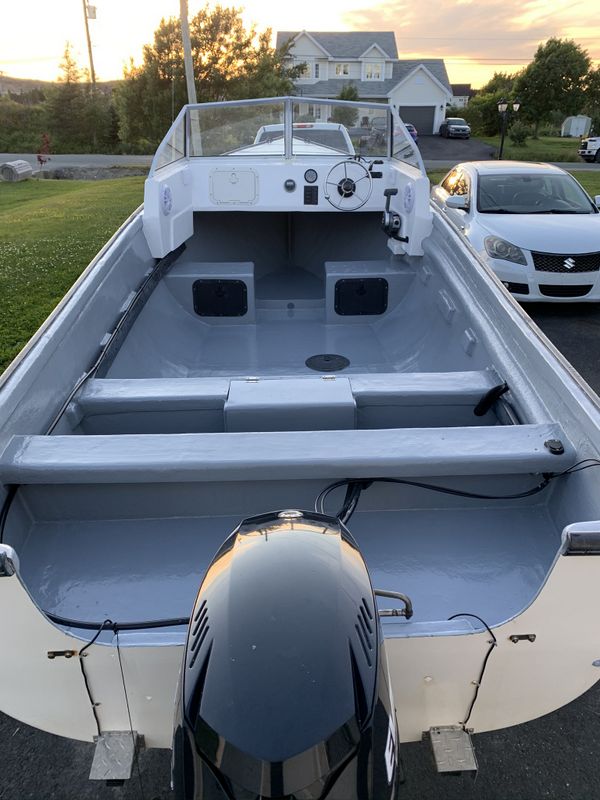
Finished product pic. As a surprise my brother Steve and I bought Dad new front seats which match the two rear seats replacing the old uncomfortable plastic school seats that came with the boat.
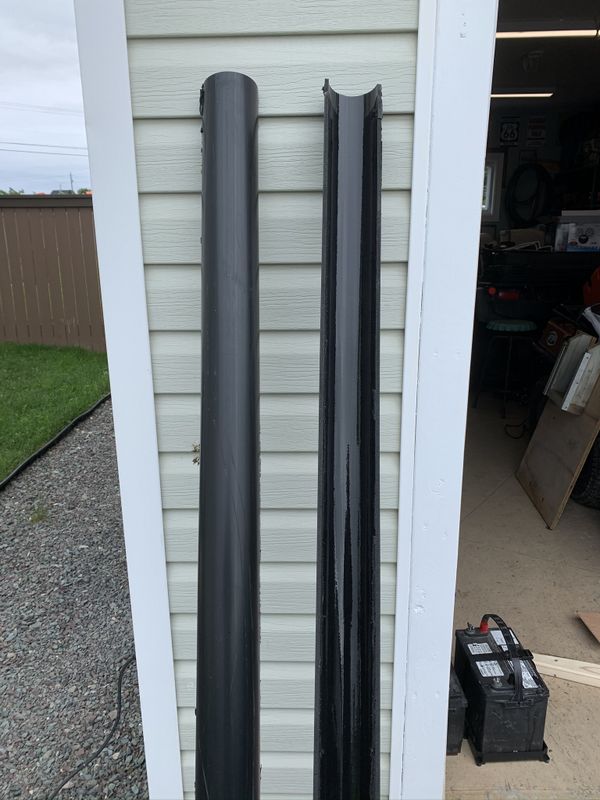
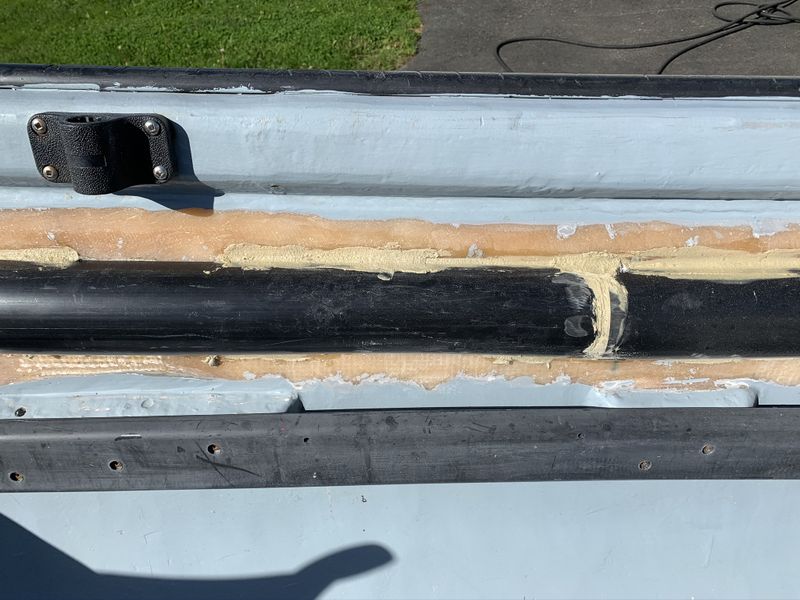
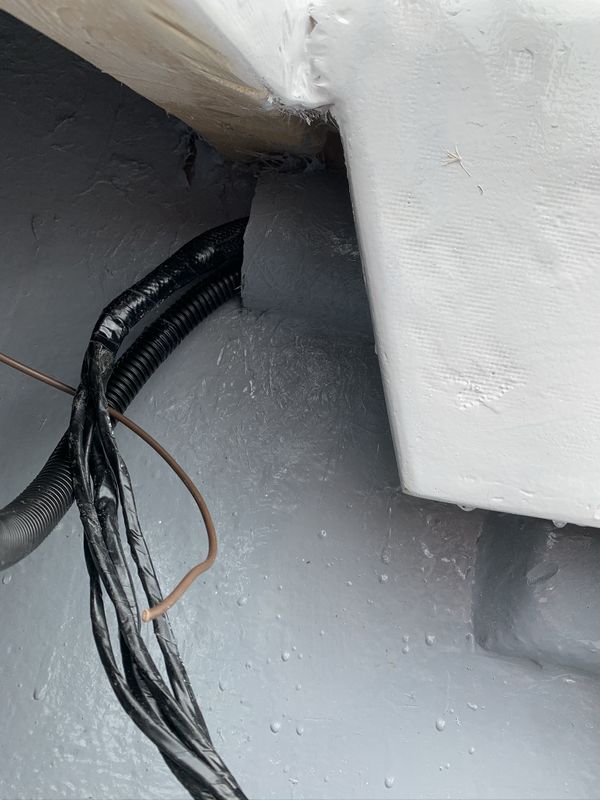
As you may have noticed in the before pics at the beginning of this project, the original wiring harness was very untidy and simply jammed inside some oversized wire loom and electric taped/ty-strapped to the side of the boat from rear to front. I wanted to fix this by installing a proper wire chase like found on many modern recreational boats. I started out with a six foot piece of 3" ABS drain pipe, my neighbour Dan helped me split the pipe in half on his table saw.
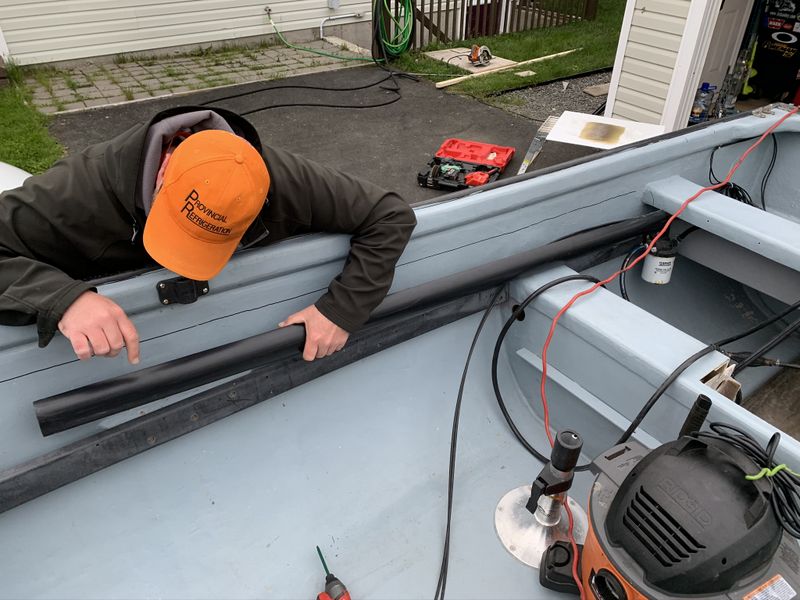
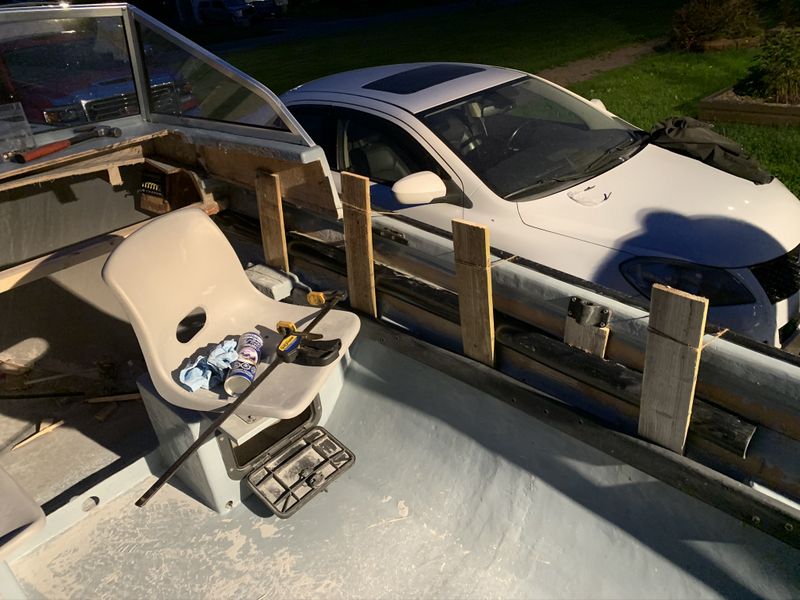
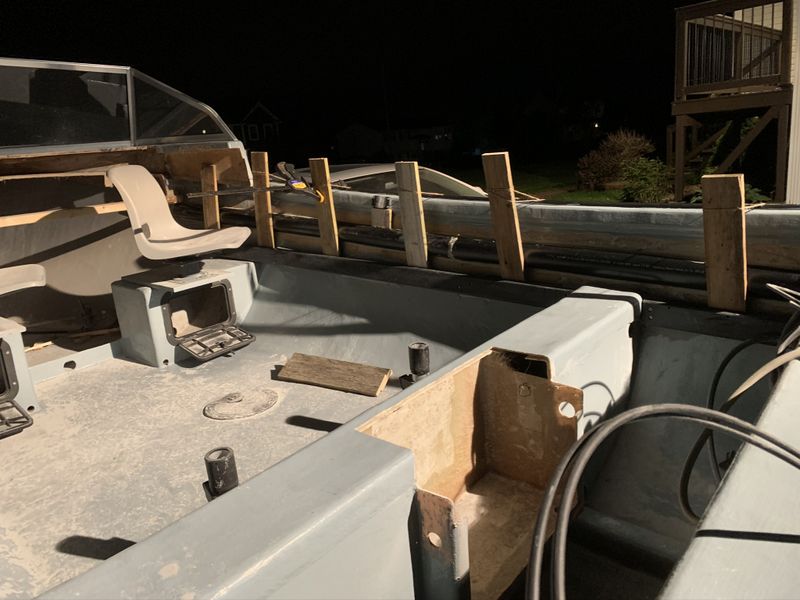
That evening Mark French arrived to lend a hand for the installation. First we marked the location of the wire chase then used grinders with flap discs to remove all paint above and below the chase so the adhesive and fibreglass would bond directly to the side of the boat and not to paint.
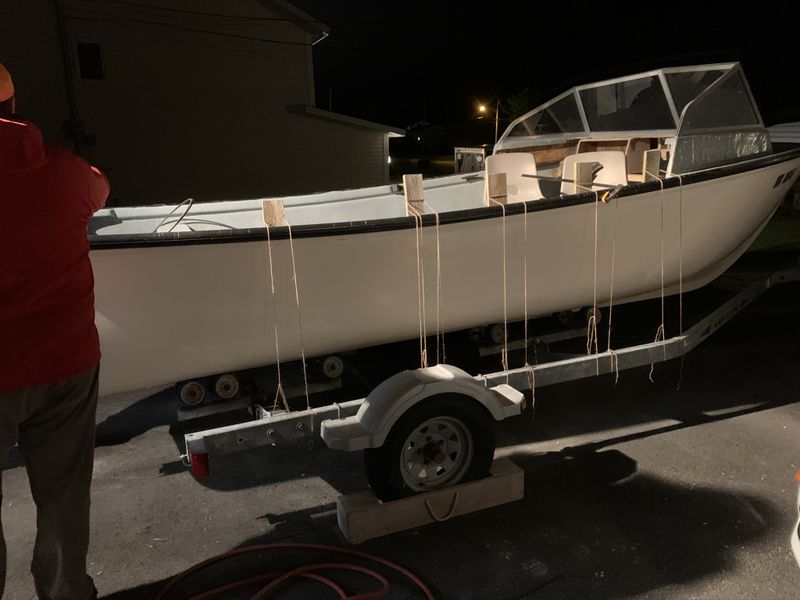
The edges of the pipe were coated with PL Premium 8x Stronger adhesive and clamped in place using short boards wedged into the ABS sideboards of the boat and tied off at the top down to the trailer. This kept a perfect amount of force against the ABS pipe so that it would bend and follow the curve of the hull while the adhesive cured.
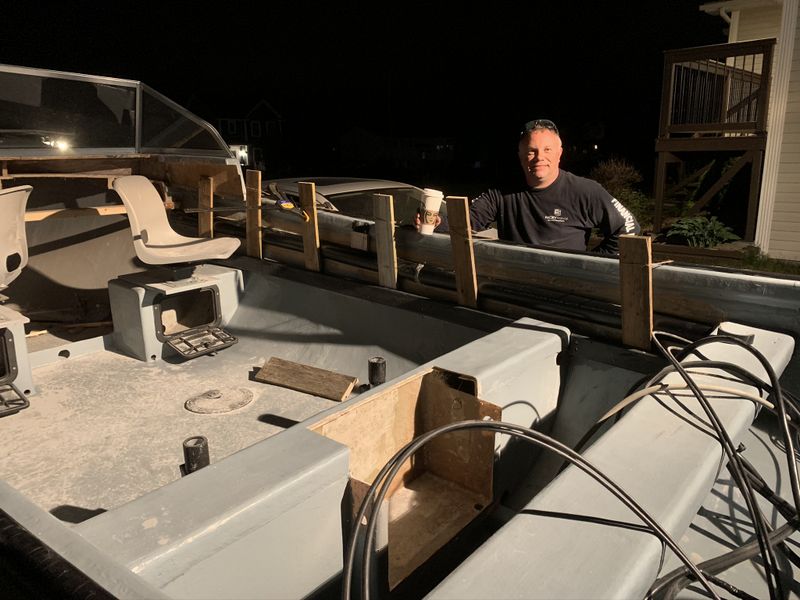
Good friends come to help, really really good friends also brought coffee!
I also applied a coat of PL Premium along the top and bottom edges for extra assurance of a strong bond.
The following evening I removed the wooden clamping boards and found the pipe firmly attached to the boat. Very impressed with the PL Premium 8x!
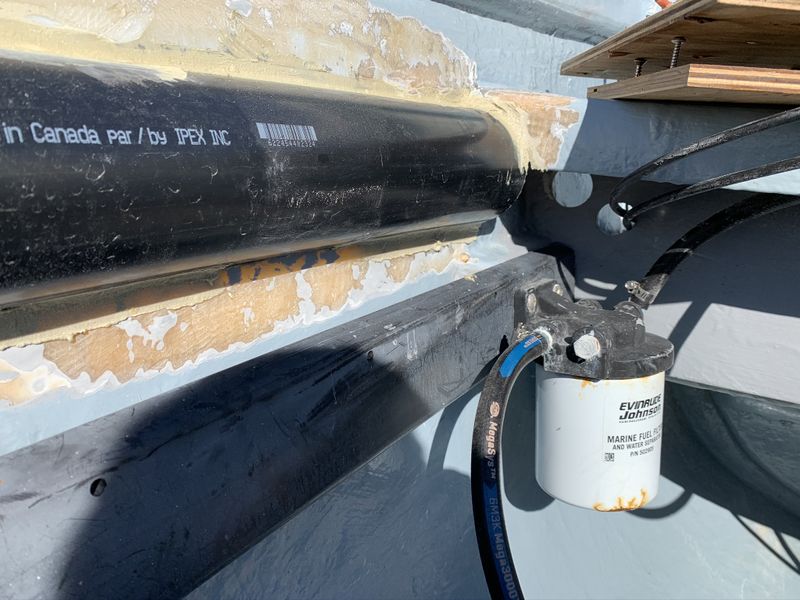
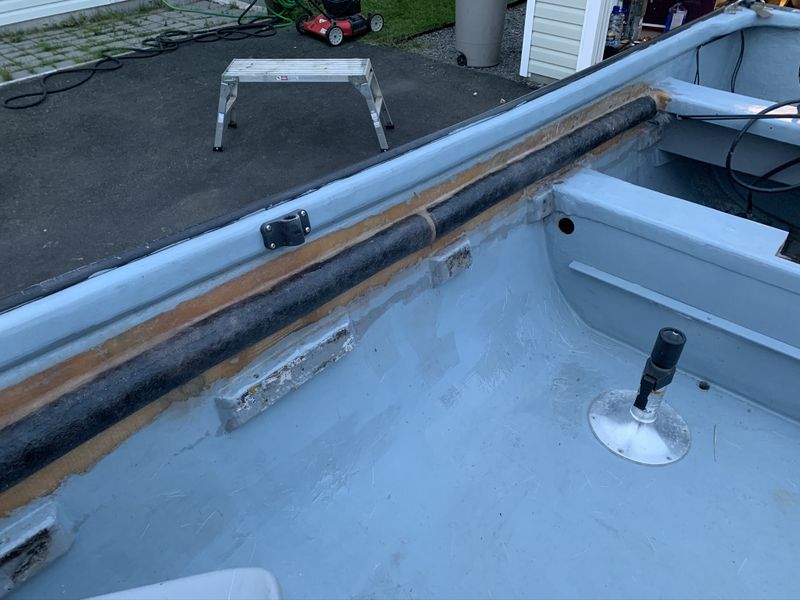
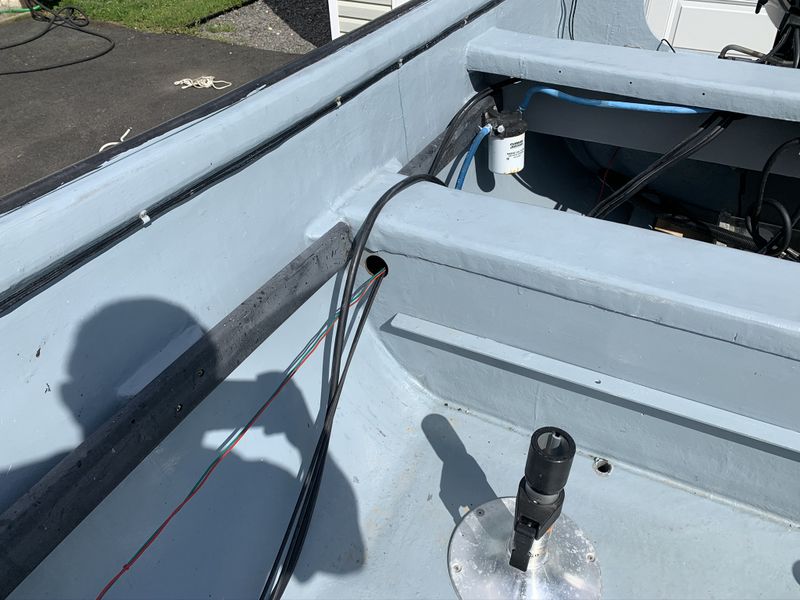
Next I cut strips of chopped glass matt to permanently fibreglass the wire chase in place. I also added a second narrower strip of matt up front where the curve of the boat is much more pronounced. The ABS pipe was sanded in coarse 80grit sandpaper to help the resin bond as much as possible.
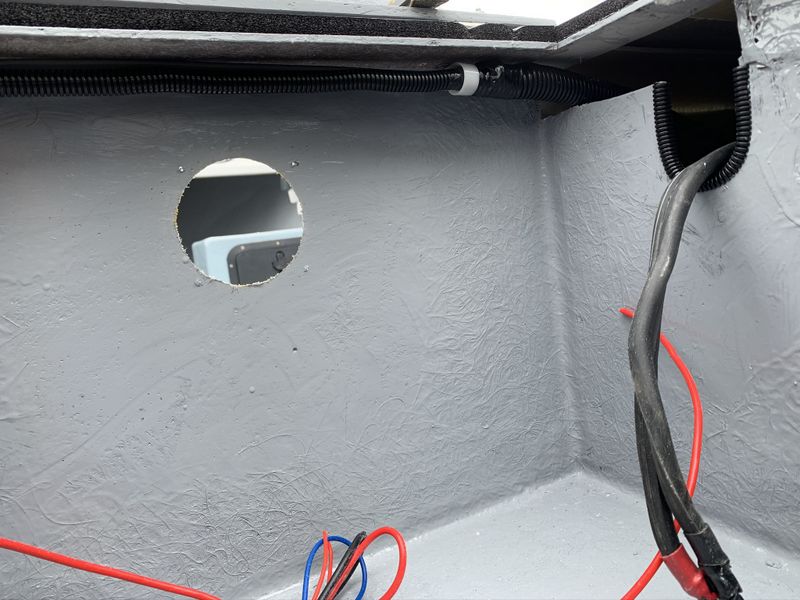
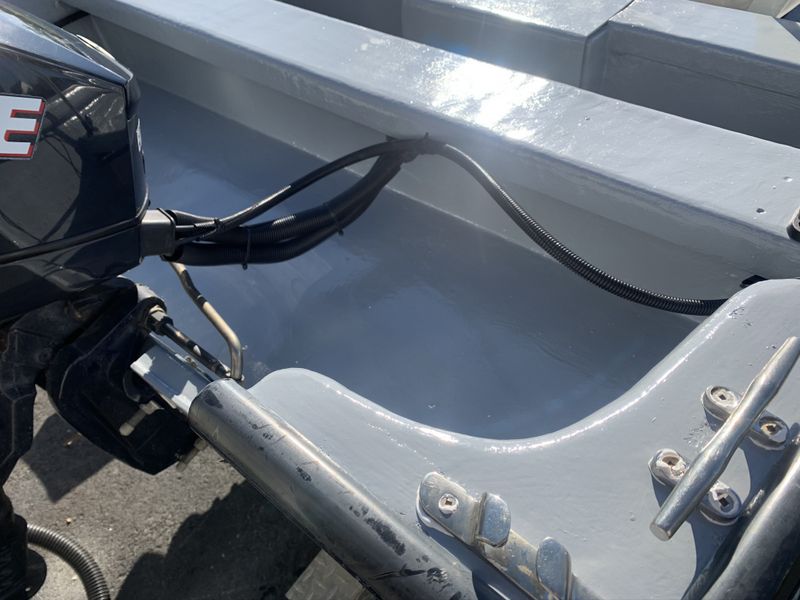
Before installing the side panel for the dash, I drilled a 2.5" hole in the pipe for the engine control cables to exit the wire chase and come out through the side panel to the control handle.
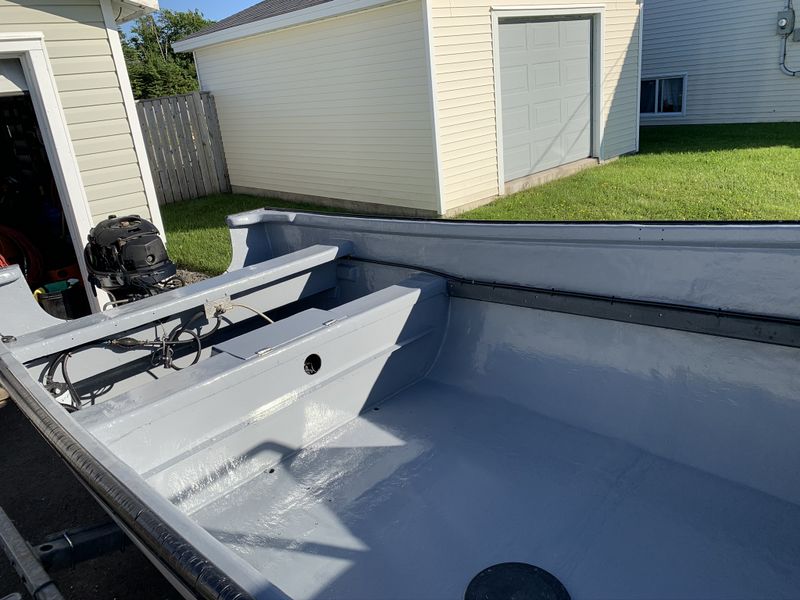
Wire chase painted! I also drilled a 1.25" hole near the back of the boat so those wires could exit the wire chase and run through the rear bench into the battery box. All in all I was very pleased with this part of the project. This addition really cleans up the inside of the boat, provides great protection to the wiring & motor control cables and provides an easy means to fish additional wiring later.
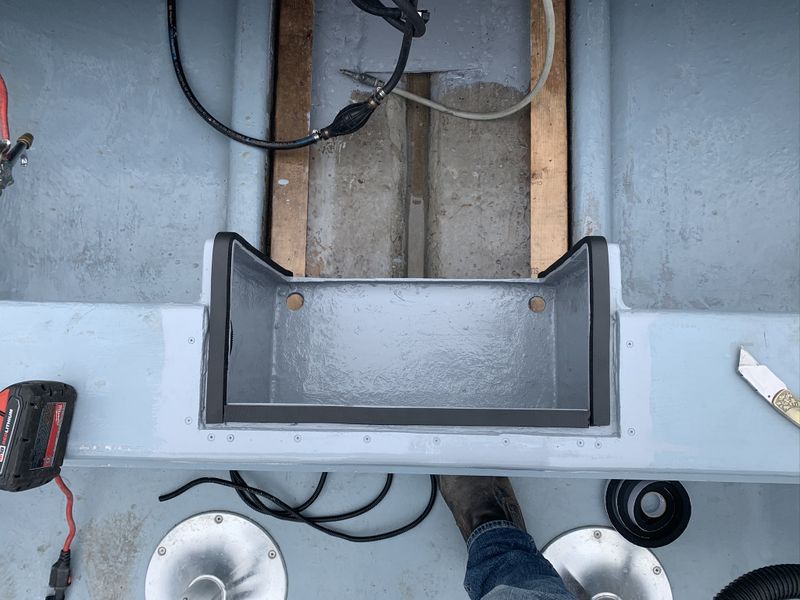
I forgot to take a before pic of the battery box, but essentially it's the same box pictured here but had a solid top and a very small sliding cover on the back side which wasn't big enough to fit the battery through without a wrestle. The battery also wasn't secured to the boat by any means other than gravity.
I decided to renovate the existing box located in the rear most bench (or tot), clean it up and make a two sided hinged cover to allow easy access to the battery. After marking it out with a square and straightedge I used my reciprocating saw and angle grinder to cut out the top of the box for the new cover.
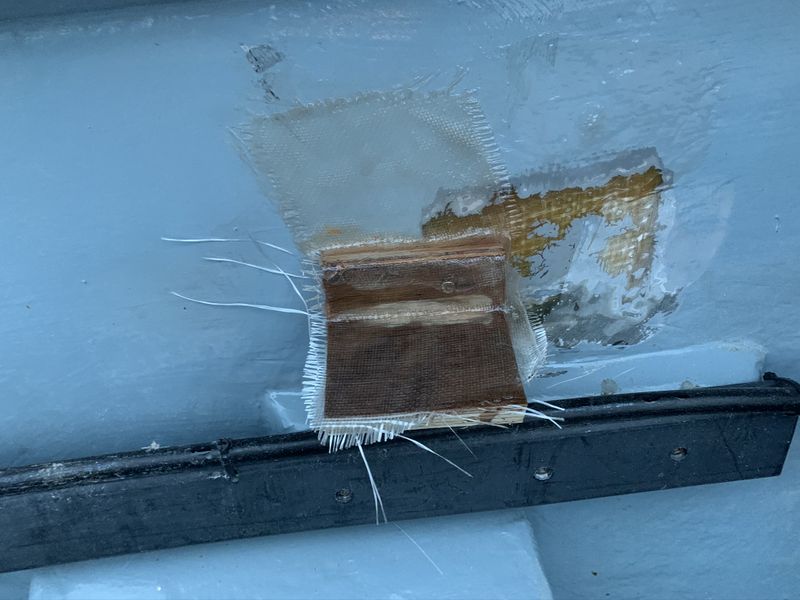
Next I had to extend the previous battery box upwards to match up with the new lid. I also filled in the old wiring holes by cutting a filler disc from a piece of scrap fibreglass material and glassing it in place.
Next I fabricated a recessed ledge for the new cover to rest on, incorporating enough space for a waterproof gasket.
I cut two strips from a sheet of fibreglass using one for the actual ledge, and the other as a spacer sandwiched between two layers of the original bench. These were glued in place with PL Premium, held with recessed stainless screws, and later coated with a layer of fibreglass resin.
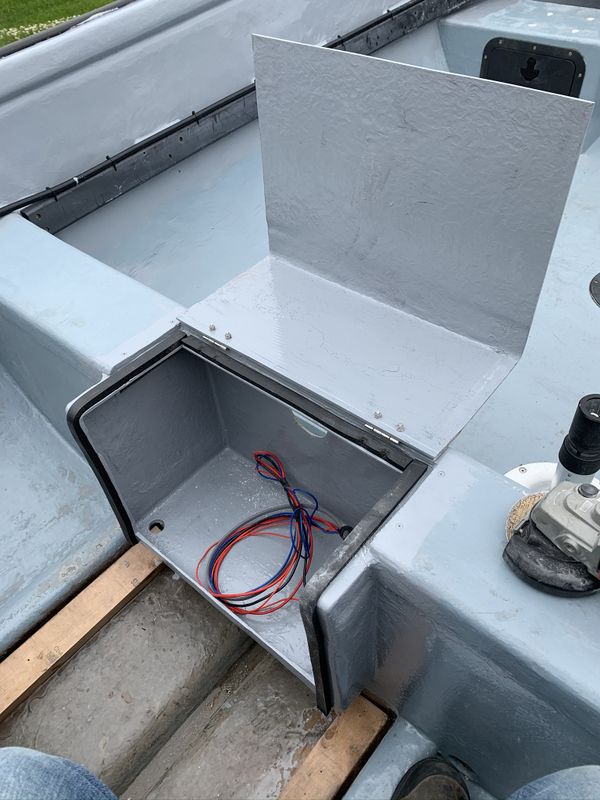
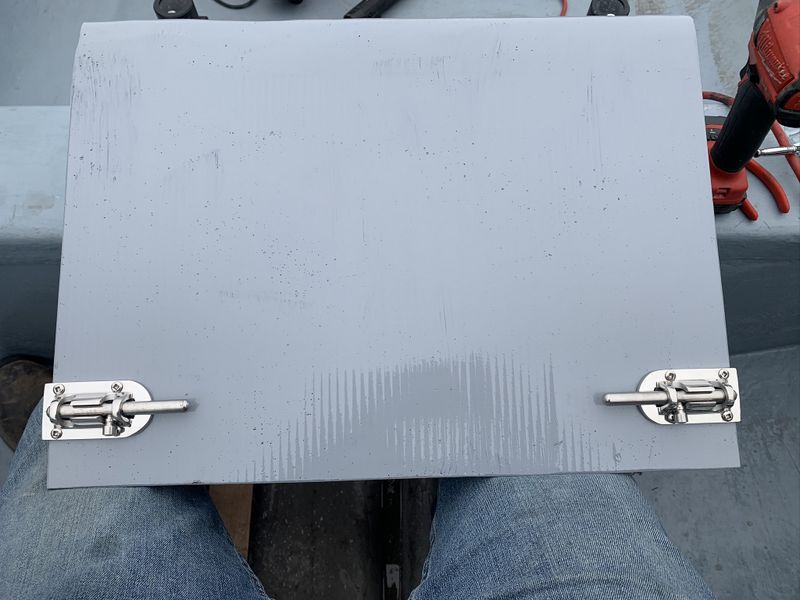
I made the new cover starting with the actual piece I cut out of the boat's rear bench. The top side was extended using a scrap piece of fibreglass sandwiched with new layer of glass above and below. The bottom was extended with entirely new fibreglass product using multiple layers of chopped matt and resin and a sheet of chloroplast as a mould. This resin doesn't bond to chloroplast so once cured it popped off the mould with ease.
Once cured the cover was trimmed to the correct dimensions.
With the battery box painted I installed some 1/2" gasket material to make the box water tight from the top. Drain holes in the bottom will allow any water or condensation to escape and provide ventilation.
Stainless hinges were installed with 1.5" machine screws, The screws were long enough to also provide an attachment for the wiring harness. I used a 2nd set of stainless lock nuts on the same screws to secure the harness with plastic anchors and wire loom.
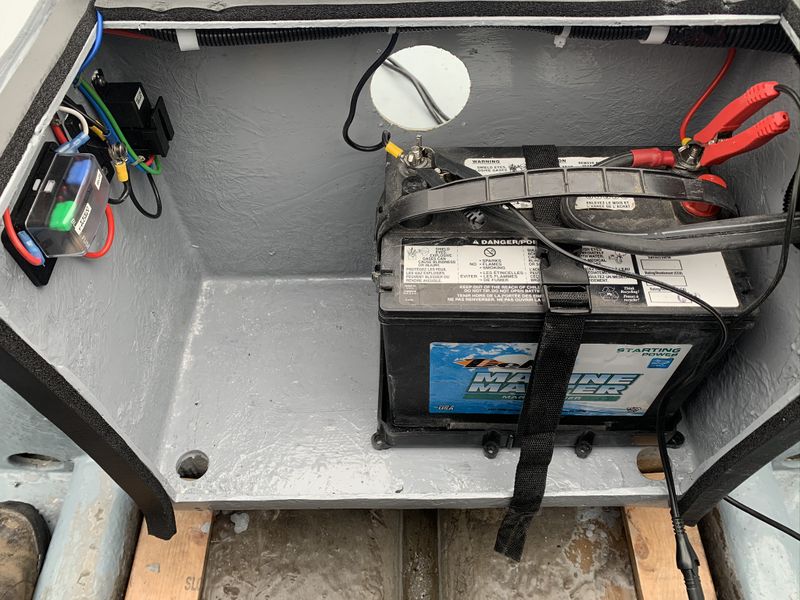
The battery was installed using a proper battery tray screwed in place with 8 stainless screws and uses a nylon hold down strap to secure the battery properly in place. The battery compartment now has its own fuse panel which protects the wire running to the front breaker panel and also protects the bilge pump.
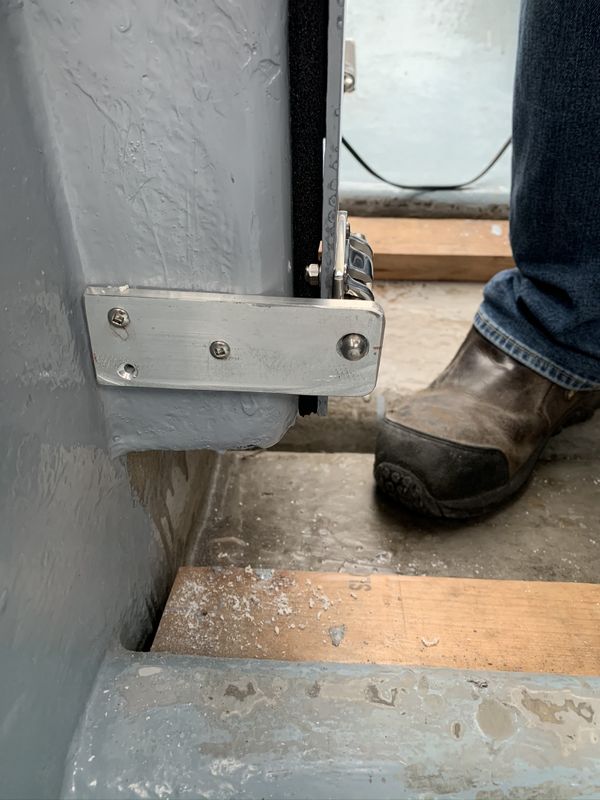
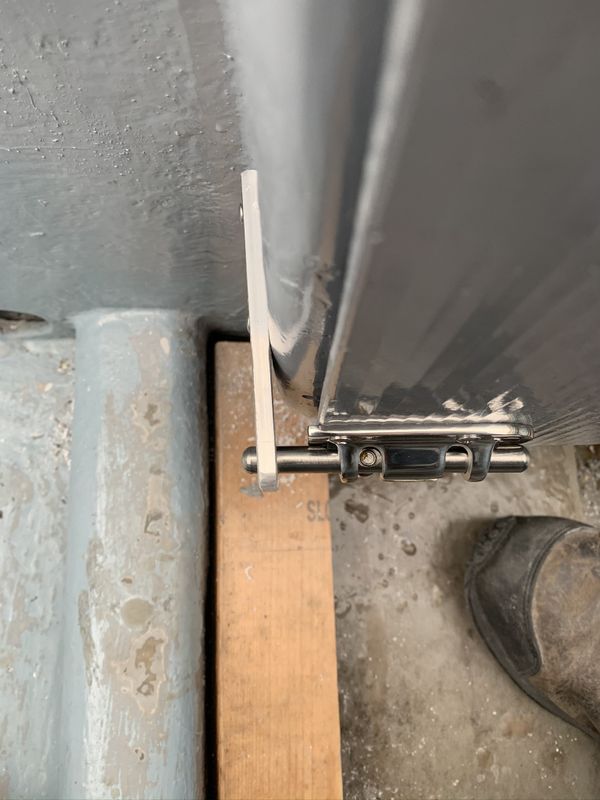
Nearing the end I next installed stainless barrel bolts and two custom made aluminum brackets to easily latch the battery box cover closed.
Lastly I installed a battery box vent which coupled with the drain holes below will allow moisture and battery fumes to safely escape. The new battery box was another bunch of work but it functions so much better than before. The new larger cover allows access to the battery and rear fuse panel much more sensible than before.
Needless to say, other than the OEM Evinrude engine harness, the rest of this boat's electrical was a mess. Even the Evinrude harness was untidy as it was mounted inside oversized wire loom, bits of rubber garden hose and a crap load of cheap gooey electrical tape. I literally spent over an hour disassembling, unwrapping old electrical tape and brake cleaning cheap tape glue from the harness.
As mentioned above under the heading "Wiring Chase" I planned to install a proper neat and tidy wire chase down the driver side of the boat to house the Evinrude harness, control cables, and my new electrical accessory harness. This meant fully disassembling the cables & harness and removing all accessory wiring installed by the previous owner. I'm a low voltage technician by trade so I wanted this all new, proper and reliable (like I did on my Argo 6x6 project last summer).
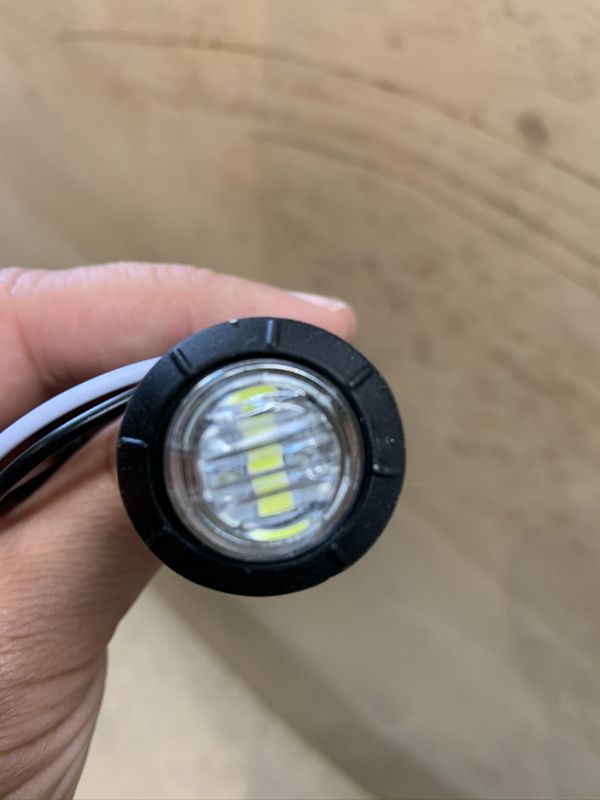
One of the first items was the installation of proper navigation lights. This would consist of Red and Green side markers and a white rear marker. LED side lights were expensive but I found these tidy stainless steel incandescent lights at Bluewater Marine for under $30 for the pair. A quick trip to NL Light Bars had me a pair of LED penny lights which I retrofit with ease into the housings.
The rear mast light is an LED sealed unit, it features a quick disconnect so the light can be easily removed when installing a boat cover. Turning on the new switch for the navigation lights will also activate backlighting in the Evinrude gauge which was also swapped to an LED bulb. LED's draw a lot less power than traditional bulbs and will run a long time on battery power which may be important if you break down near or after dark. The rear light also provides a surprising amount of scene lighting especially in pitch black.
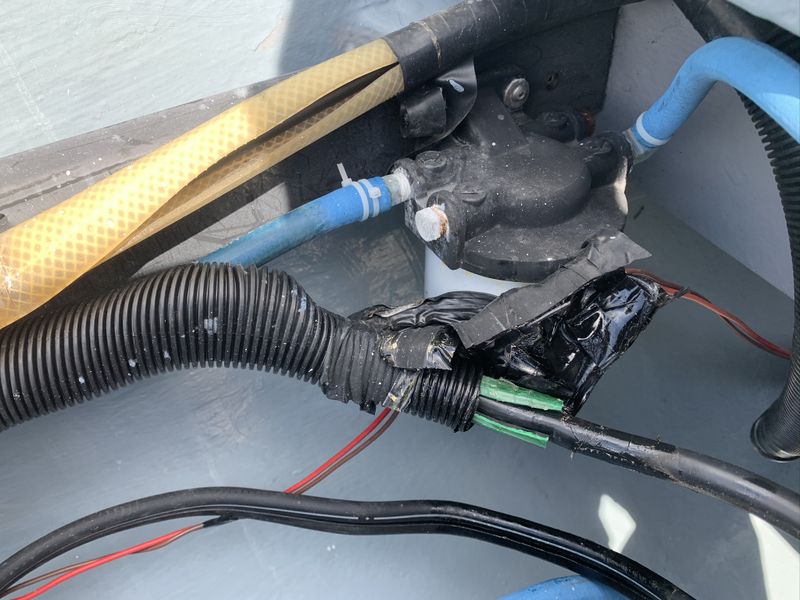
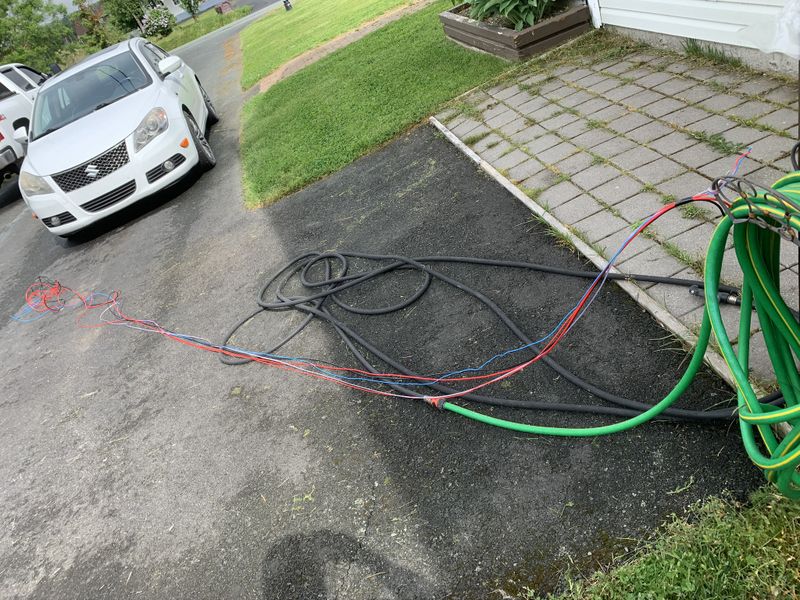
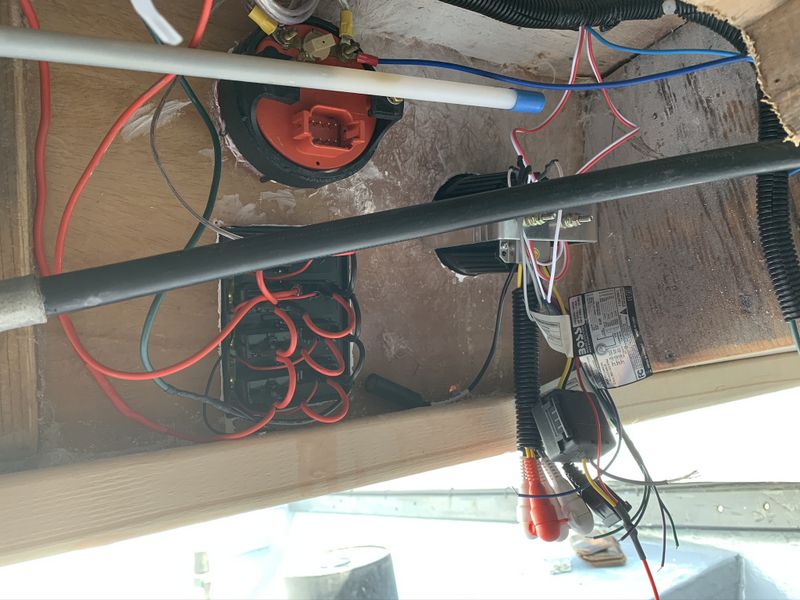
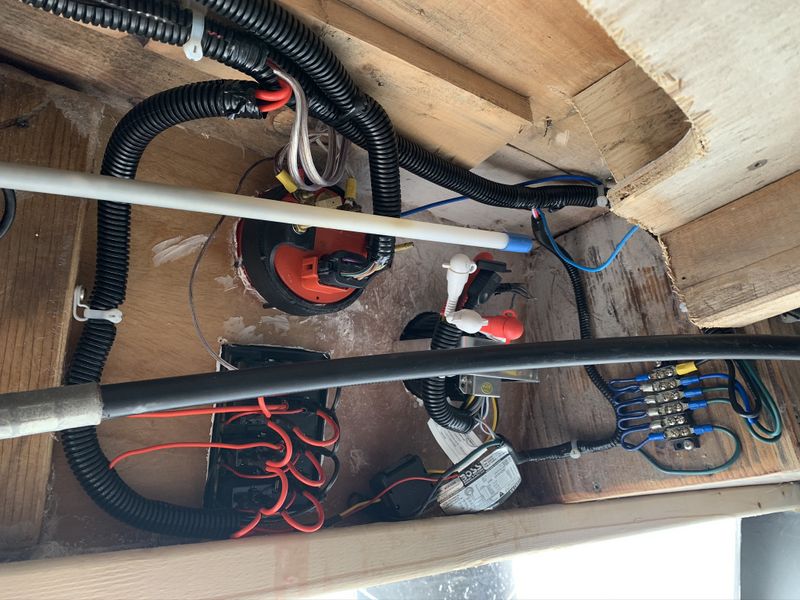
Next up was building my new rear to front accessory harness. This consisted of 8 gauge positive and negative main feed wires, wires for the rear navigation light, a key on power wire from the Evinrude Gauge to trigger a relay near the battery, plus a couple spare wires. This harness was occasionally tied and then wrapped in 1/2" split loom.
The harness was fished in place along with the Evinrude Harness and motor control cables dropping out necessary wires at the front, motor control handle, battery, and rear to the outboard motor.
The main engine power wires along with my new accessory harness exited the wire chase and were fished inside the rear bench and into the battery box. This section of harness was then covered in split loom and fixed in place with nylon anchors and stainless steel locknuts (on the hinge screws).
The brass ends of the engine control cables wouldn't fit through my original small side panel hole so I had to elongate the hole, temporarily cut out a section and fibre glass it back in place after.
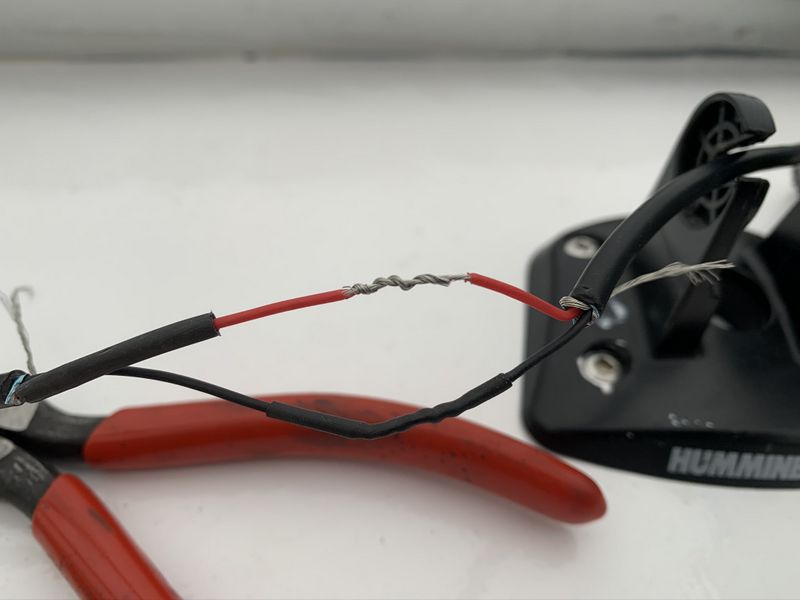
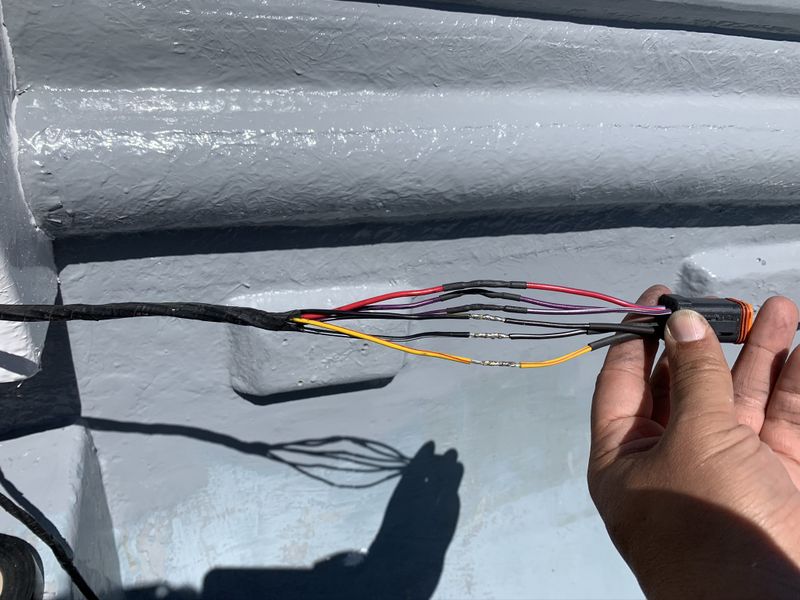
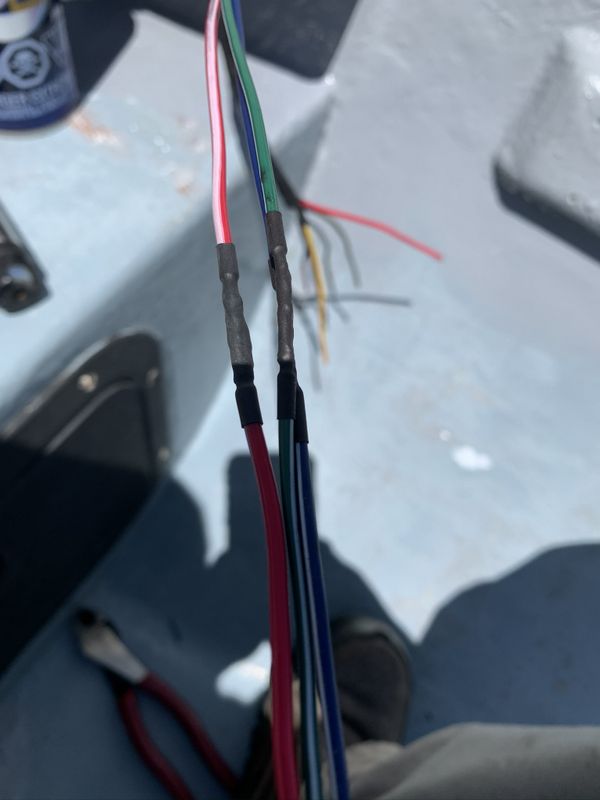
The connectors on the Evinrude harness were huge so I had to cut them off in order to fish them inside the wire chase along with all the other cables. This wasn't a big deal as I had to lengthen them anyway to accommodate the new engine gauge location to the left of the steering wheel. I start my connections using a nice tight inline splice.
Followed with proper solder technique and glue lined heat shrink.
New wiring roughed in.
Pretty well finished product. A hugely important item I want to point out especially in a boat is the importance of dielectric grease. I use dielectric grease and fluid film on every singe electrical terminal and especially with steak on connectors. fluid film will work its way down the stranded cable to prevent corrosion and its not petroleum based so it wont damage or cause the wire or insulation to become brittle.
The switch panel I chose is a combination switch panel with circuit breakers. If the breaker trips you simply pop of the faceplate and reset the breaker. This provides protection for your accessories in a nice tidy package. This model had 1x5amp, 1x10amp, and 2x15amp breakers.
The Evinrude gauge is a nice piece, primarily a tachometer but it also incorporates warning lights for low oil level, over temperature, and check engine. The OEM warning sounder is located under the dash. The stereo we chose is a Boss Audio Systems marine kit which included this trick 3.5" AM/FM/Bluetooth head unit and two 6.5" marine speakers. The head unit will also run rear speakers and has an RCA subwoofer line output as well!
Again, each accessory was installed with silicone adhesive around the accessory and most importantly around every stainless fastener to prevent water from following the fastener and damaging the wooden substructure below the fibreglass.
This trick weather resistant 12v accessory and USB charging combination outlet was a nice EBay find, I ordered two last summer and installed the other in my Argo 6x6.
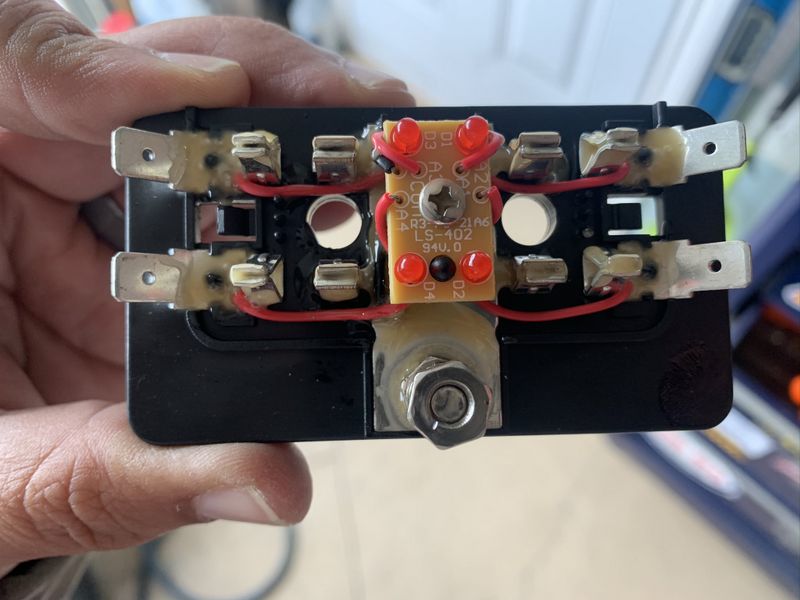
This is the disassembled rear fuse panel which I took apart to fully coat in dielectric grease. This will really help prevent corrosion and electrical gremlins.
Rear battery box.
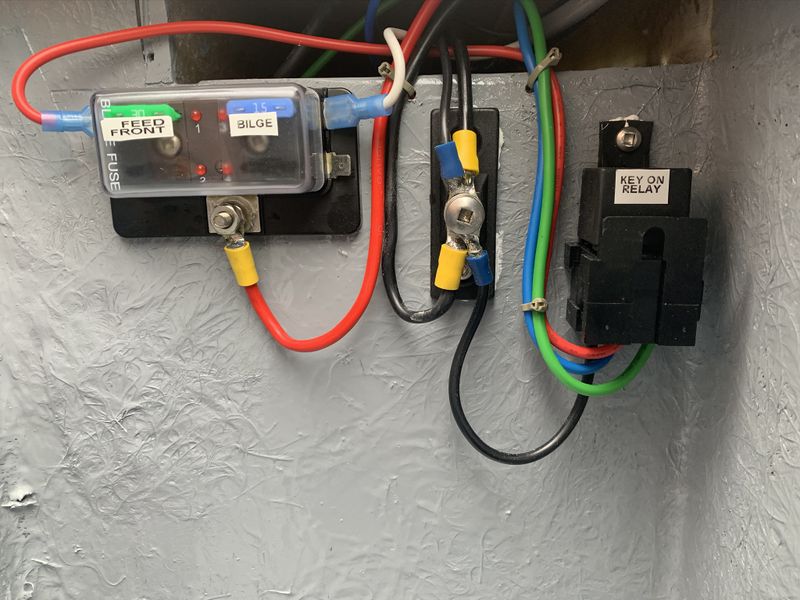
Inside the battery box I installed the rear fuse panel which protects the 8 gauge feed to the front breaker panel, as well as the bilge pump. Also an electrical (-) grounding block and finally a key on relay. This relay is activated from the purple wire in the Evinrude harness and only powers on when the key is on. The front breaker/switch panel is fed from this relay so when Dad shuts off the boat all accessories power off. This will prevent accidentally leaving something on and running the battery flat while the boat is on the trailer. The float activated bilge pump is on constant power in case of emergency. With great care taken in running wires to prevent chaffing and lots of dielectric grease on every connection, this new electrical system should be quite reliable for a long time. Corrosion in wire is a lot easier to prevent than it is to fix.
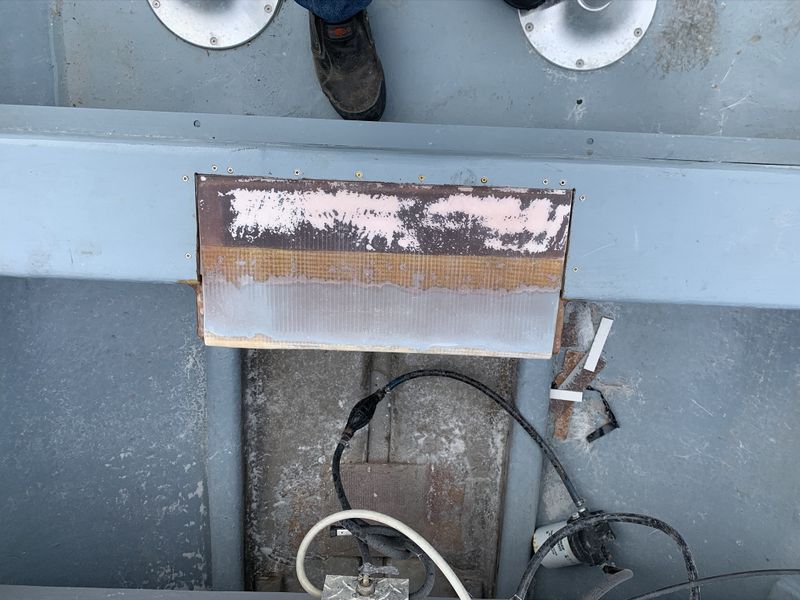
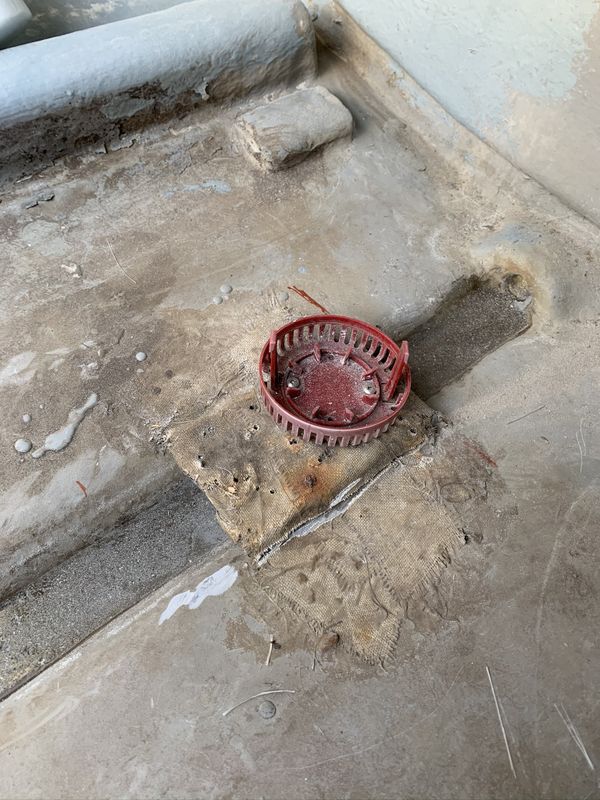
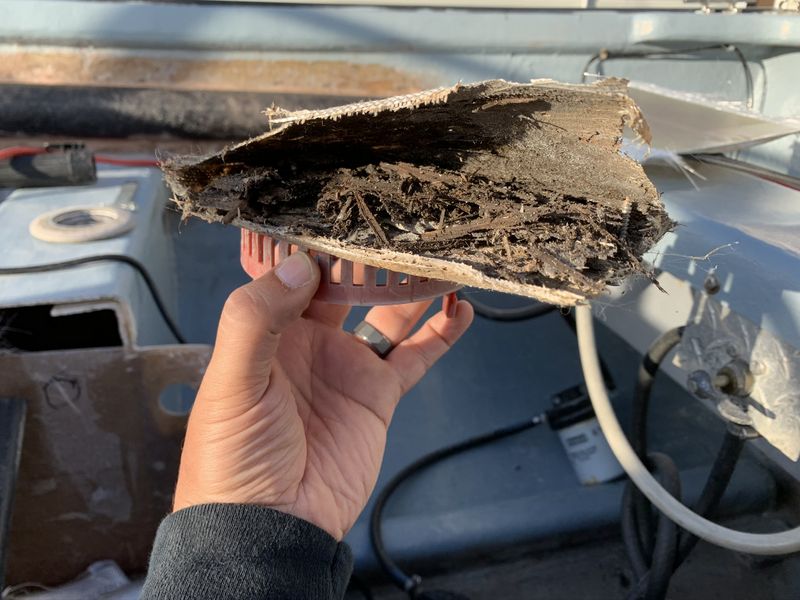
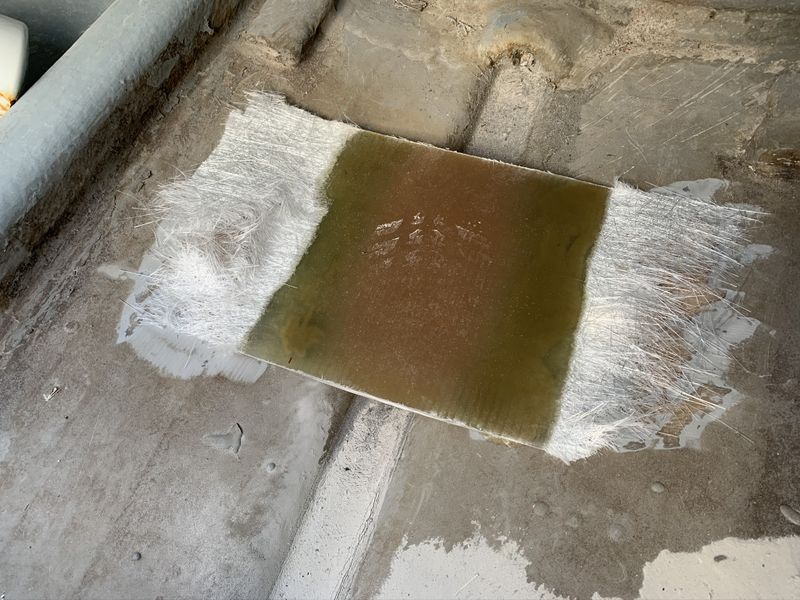
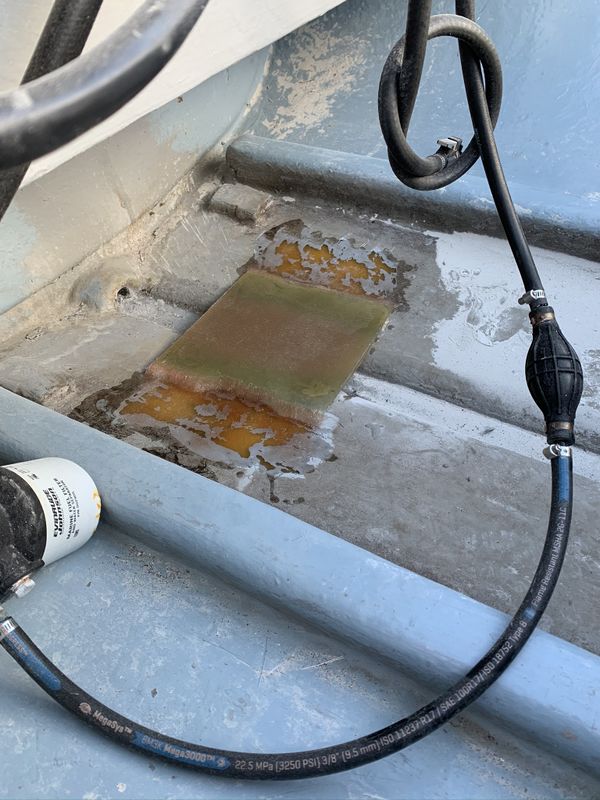
The boat came with a nice automatic bilge pump but it was attached to the hull by only a wish and a prayer by the time Dad took ownership.
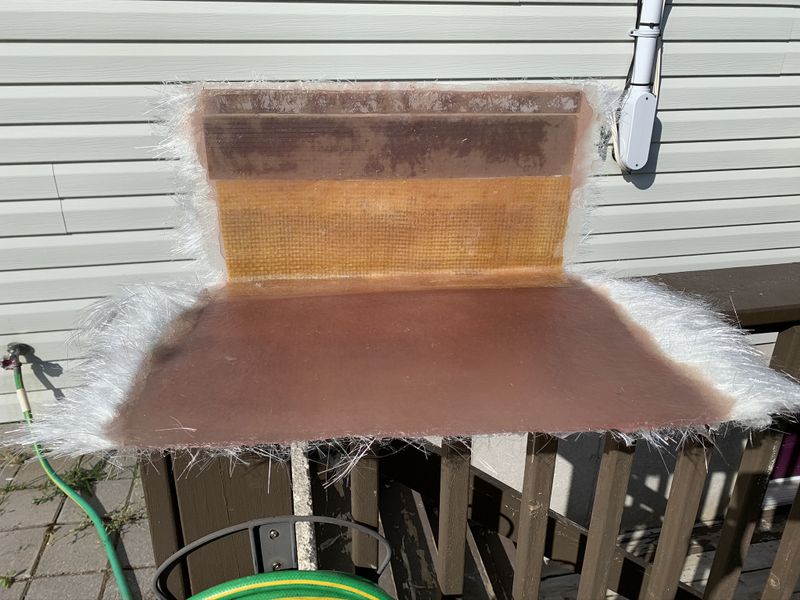
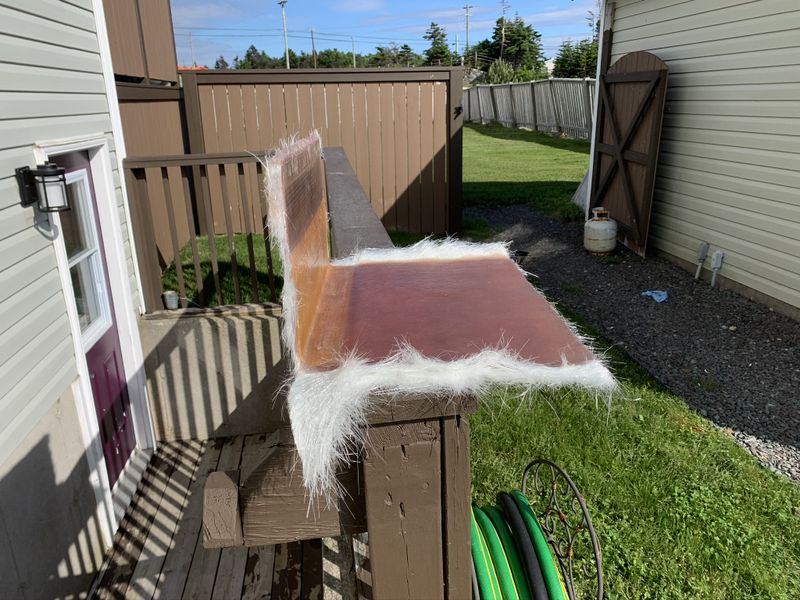
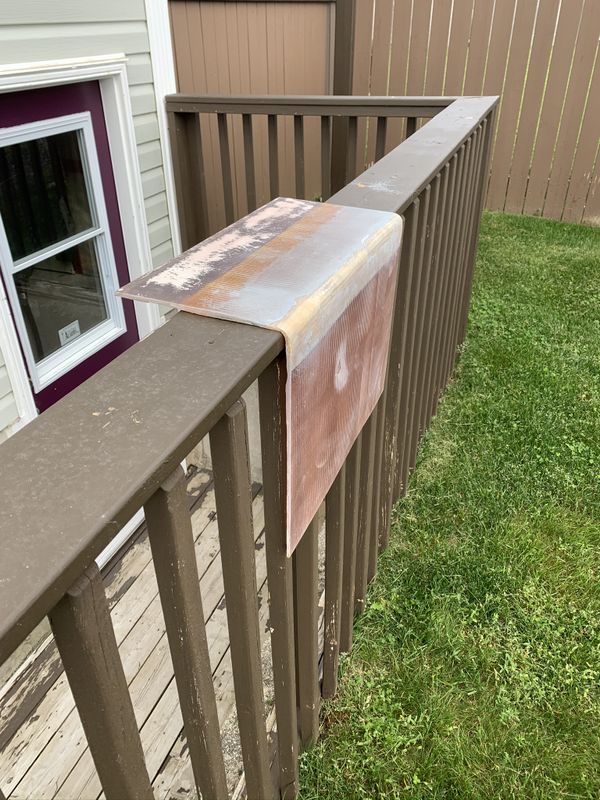
The old mount at one time was plywood covered in a messy dry layer of fibreglass.
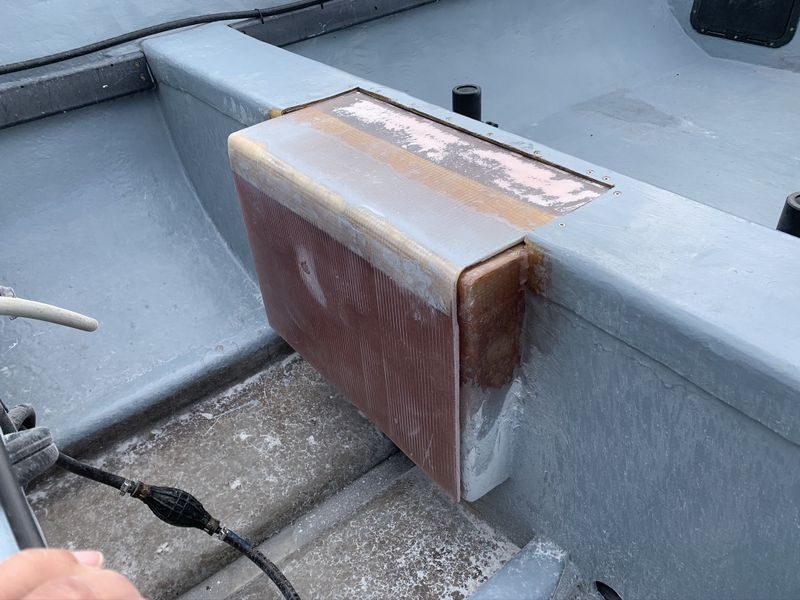
I fabricated a new mount entirely out of fibreglass chopped matt and resin building up 5-6 layers using a piece of chloroplast as a mould.
As this resin does not bond to chloroplast it popped off with ease once fully cured.
I trimmed the new piece to length and readied for installation.
When I made the new mount I didn't fully soak the first couple layers of matt, leaving them bare on the end to bond to the bottom of the boat.
The new piece bridges the drain valley and is not only strong, being made of solid fibreglass it shouldn't rot out.
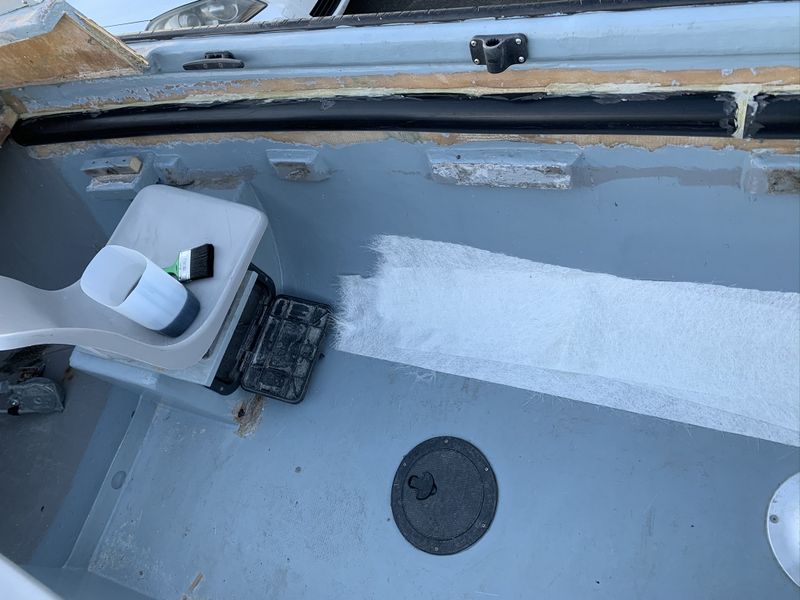
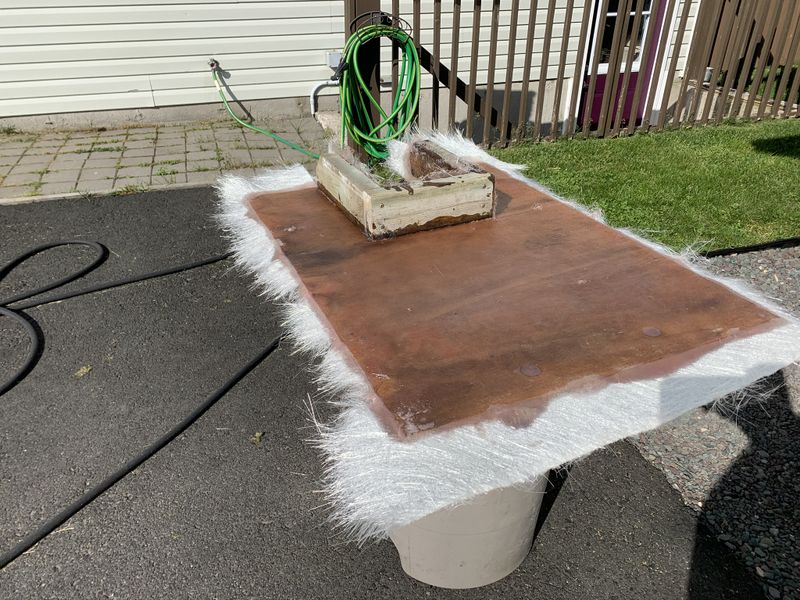
The previous owner made this rear floorboard out of bare 3/4" marine plywood. I decided to apply a layer of fibreglass on all sides to permanently seal it from rotting out.
The pump and automatic float switch were reinstalled with new wiring, and the new rear floor board painted and reinstalled.
When we got the boat the inside had been hastily painted by the previous owner with an unpleasant shade of bluish grey oil paint. Painting began by removing all accessories attached to the inside of the boat including the rear seat posts and rope tie offs.
As previously mentioned I earlier painted the new dash white and I had painted various sections of the interior with two coats of battleship grey oil paint for a nice tidy modern appearance.
I had left the main part of the floor for last after all other renovation work including wiring was complete.
When I reinstalled the interior accessories I coated every screw with 3M marine adhesive which is rated for above and below the water line. This took extra time but will ensure that water does not follow the stainless steel fasteners and rot out areas of the boat with wooden substructure.
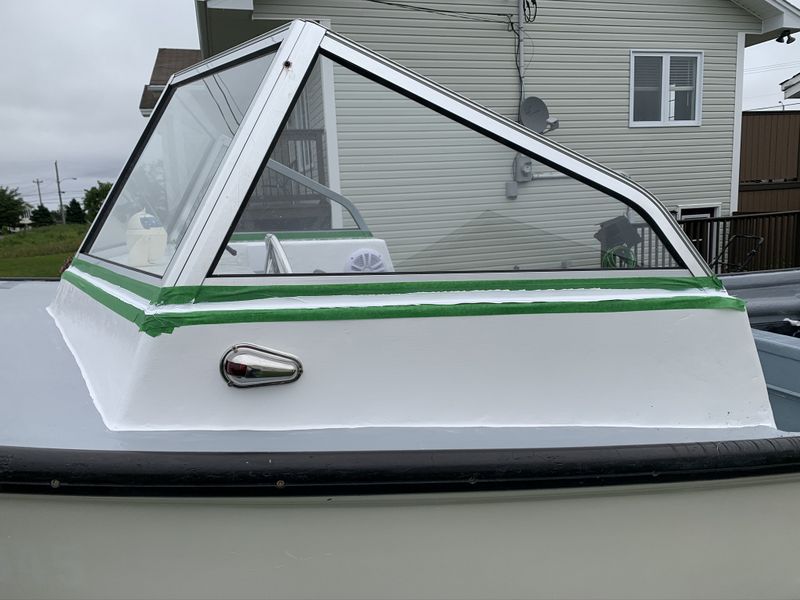
Along with all the major parts of this project there were also some notable minor improvements made along the way as well. Below the closed in cuddy up front the installer left a large gap all the way around where it meets the hull.
I picked up a can of long strand fibreglass and filled in the seam. This will seal the gap, add a little strength, and make for a much neater finished appearance once painted.
I also filled in many of the holes drilled through the bulkheads by the previous owner for the old wiring system. Once painted they were pretty well unnoticeable.
The dash outside of the windshield wasn't replaced and had a lot of imperfections. Some sanding and quality body filler made it much smoother and looked great once painted!
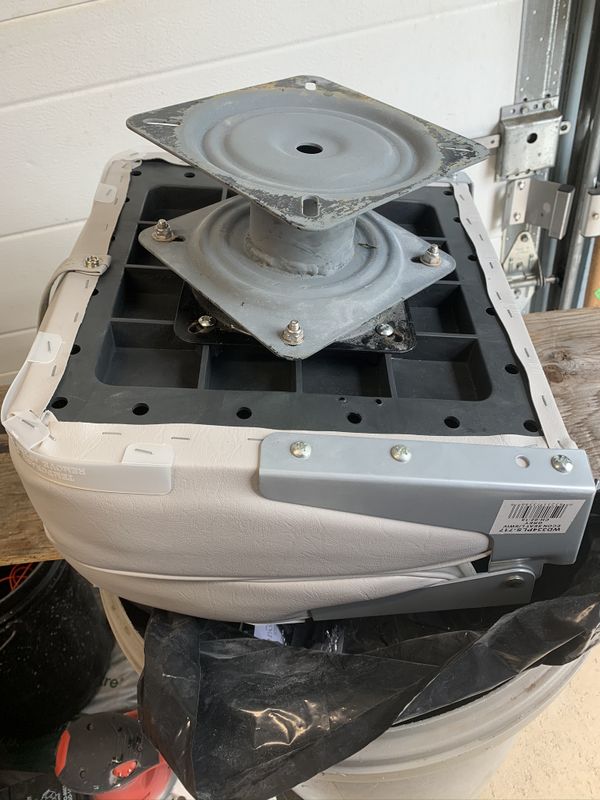
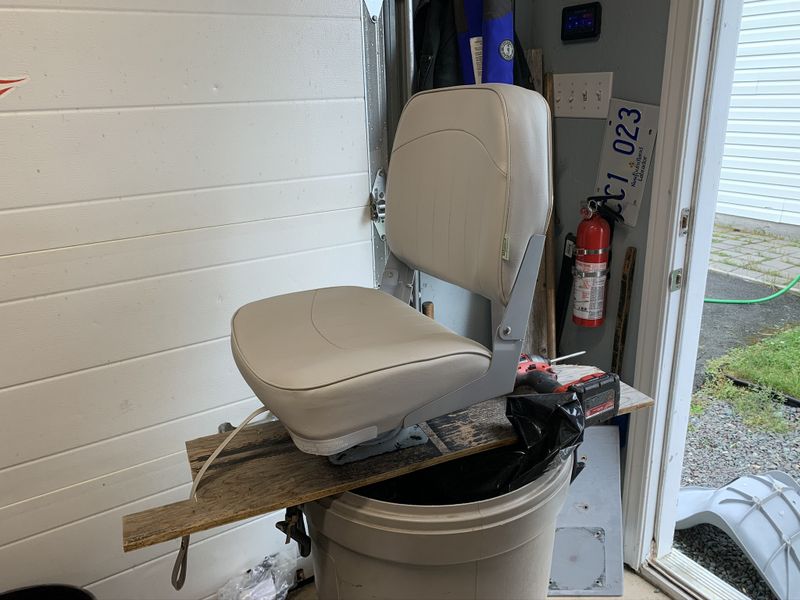
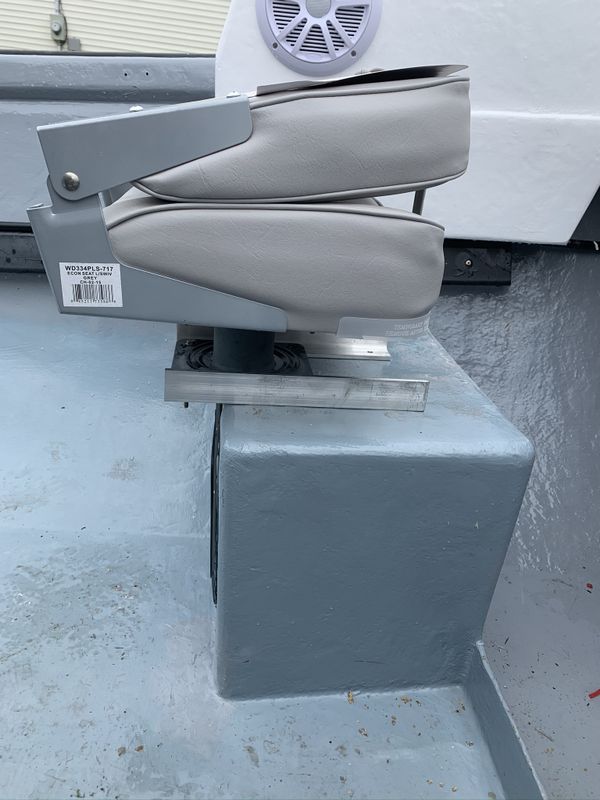
My brother Steve and I surprised Dad as we purchased two brand new front seats which are much more comfortable than the old plastic ones, and they also match Dad's rear seats.
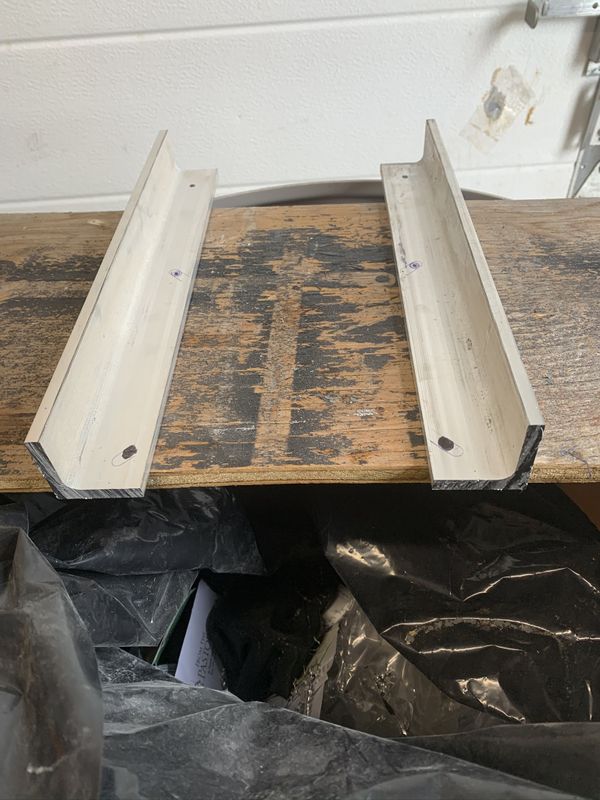
When Dad bought the boat he found the seats were too far forward and moved them rearwards on mounts made from 3/4" plywood. This wasn't terribly strong and would be prone to rotting out so I fabricated new seat rails out of 1.5x1.5x0.25" aluminum angle iron.
With the new dash the seats didn't have to be as far back either, the new mounts are very sturdy and tidy as well!
I used 6 sets of stainless steel bolts, washers & locknuts per seat with four of those attaching the seat/rails through the seat post/storage boxes on each side.
Next I used UV resistant marine sealant to properly seal the windshield to the boat. This filled in the existing gap, looks much better and will be easier to keep clean.
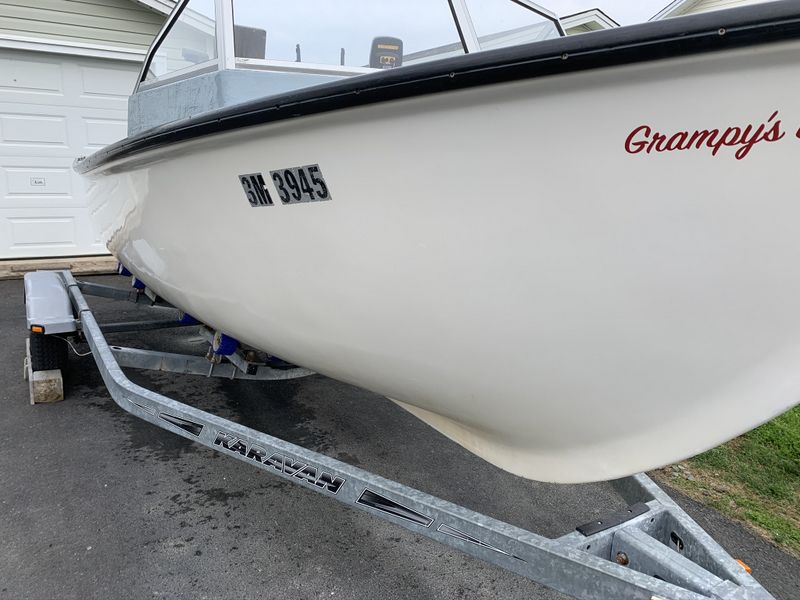
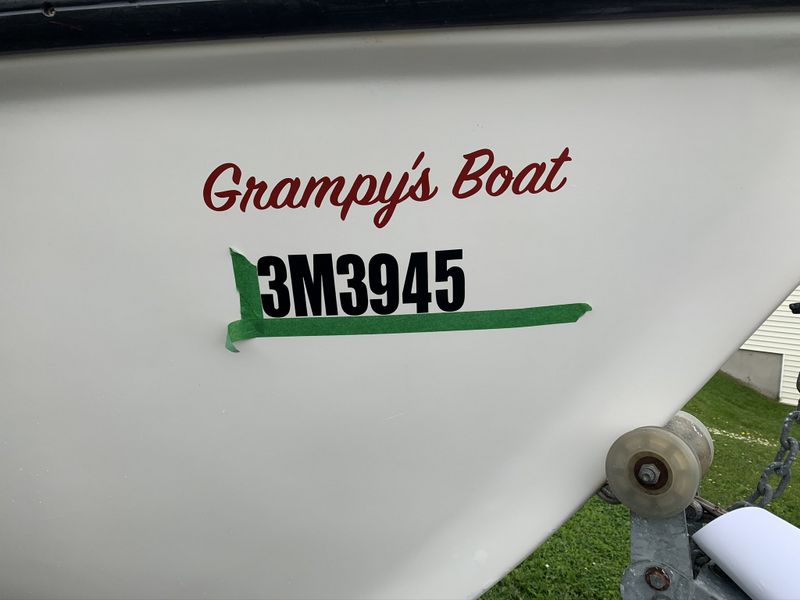
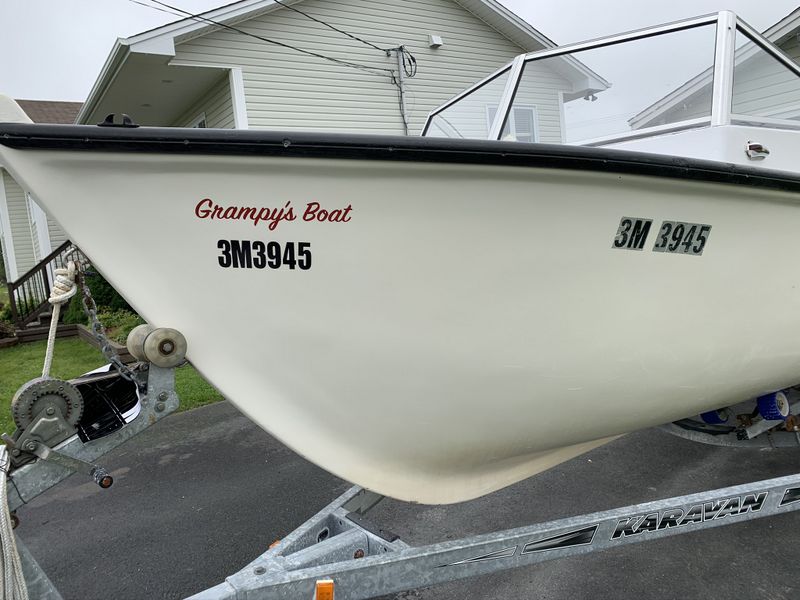
The previous owner's Canadian Tire mailbox numbers were removed and replaced with proper vinyl decals directly below Dad's name plates.
Finally, the previous owner did not use a proper through hull for the bilge pump which I rectified with the proper piece installed with 3M sealant well above the water line.
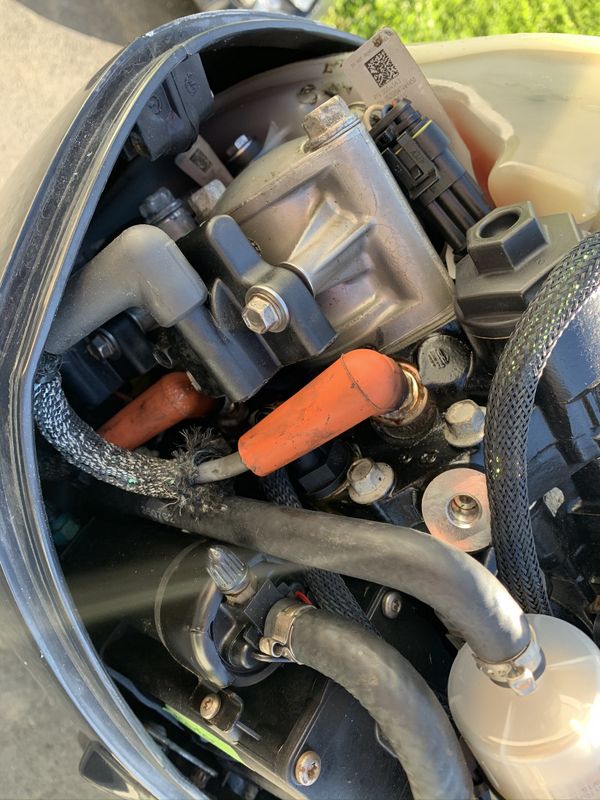
It would be silly to do all this work and not have the boat run well so I took the time to make a few minor repairs and perform a full service on the Evinrude E-TEC 60.
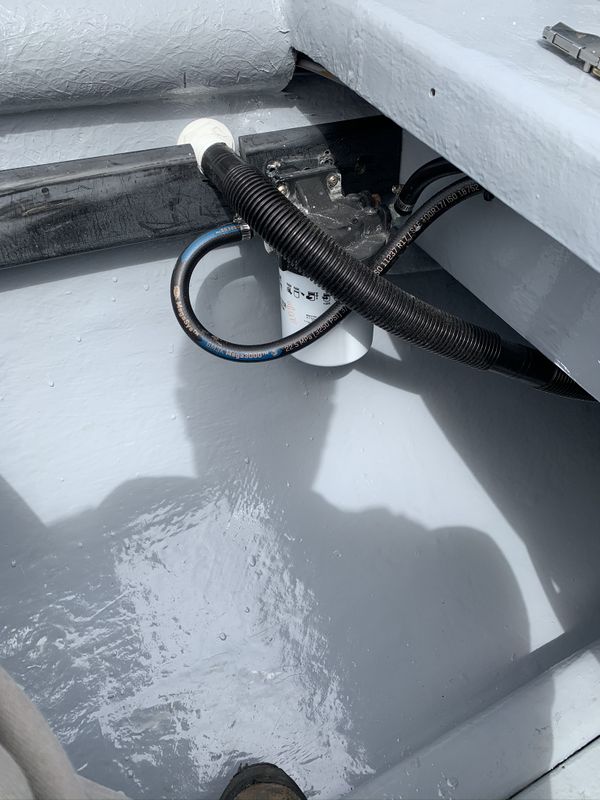
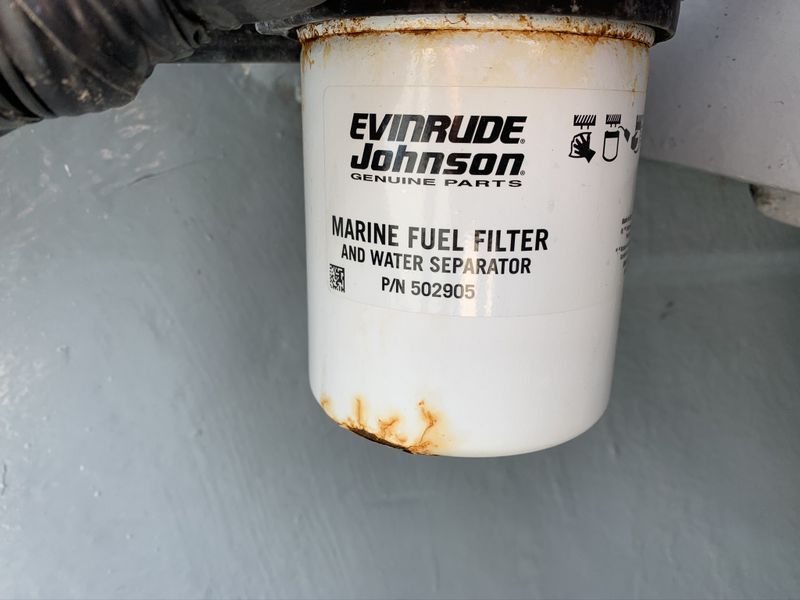
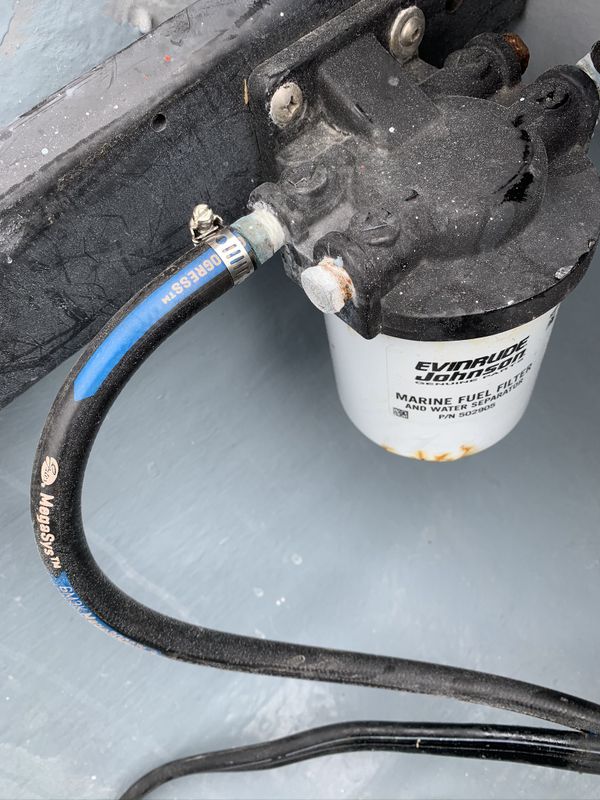
A lot of the fuel lines were old and dry rotted so they were replace with new quality line and clamps. This motor is fuel injected so clean water free fuel is very important so the fuel filter/water separator cartridge was replaced as well.
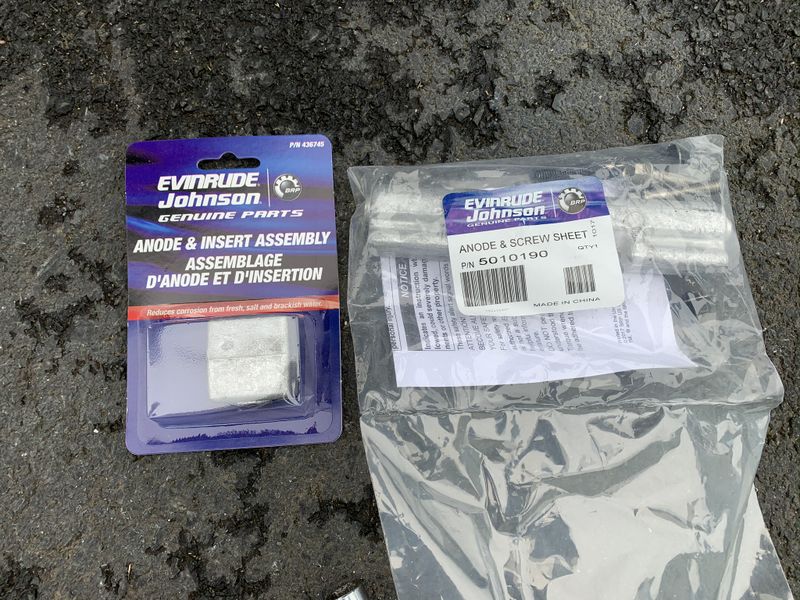
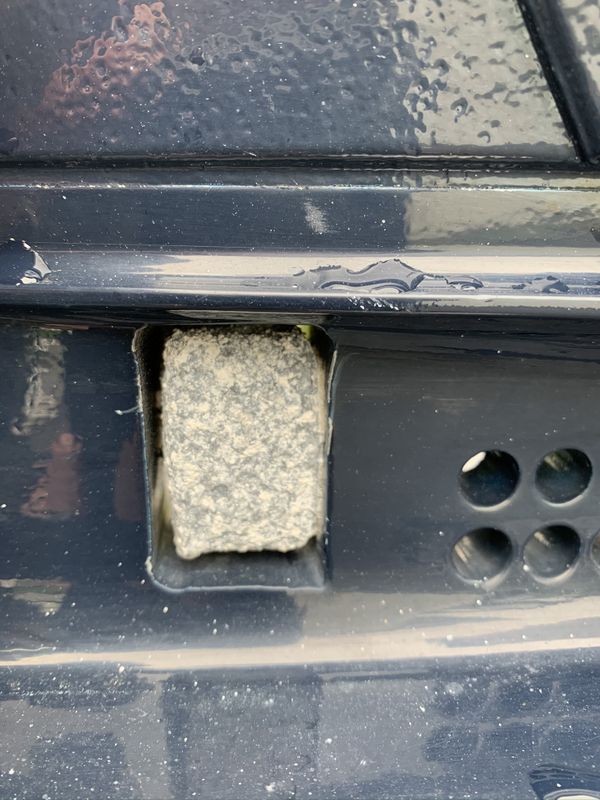
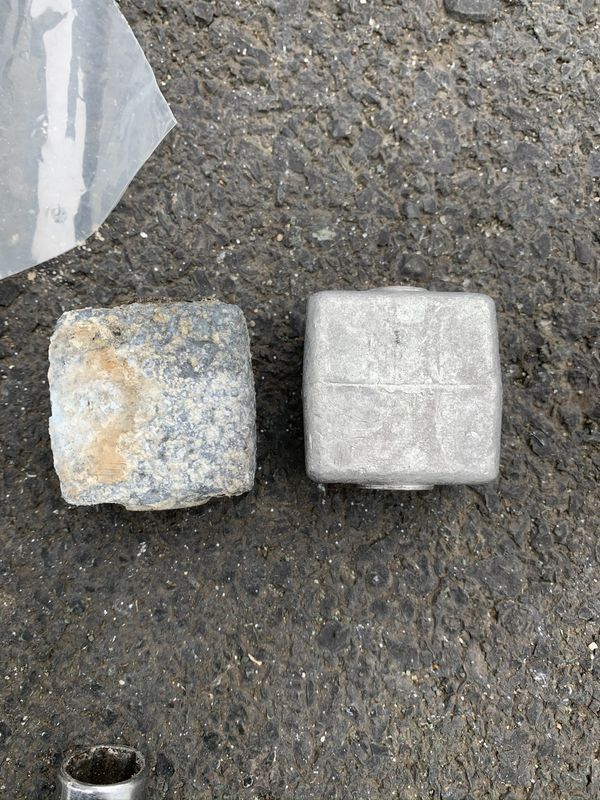
The sacrificial anodes on the motor were past their prime so they were replaced as well.
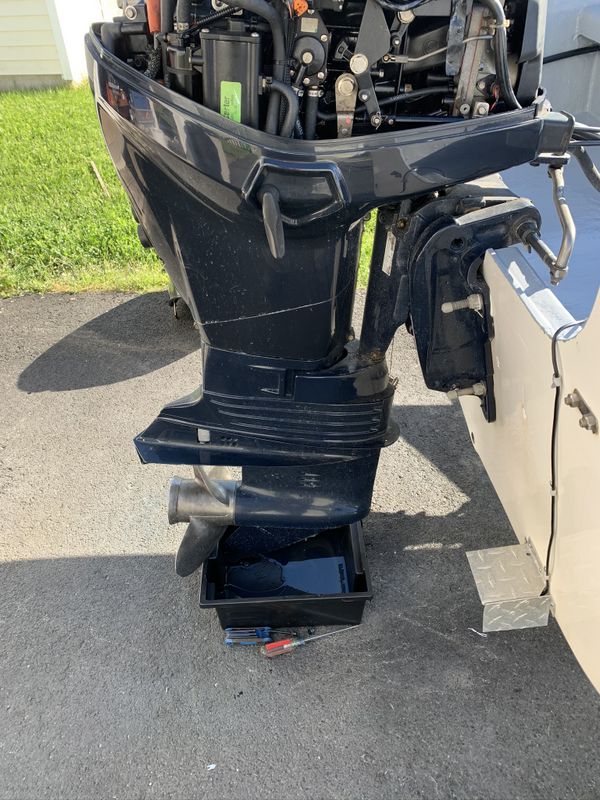
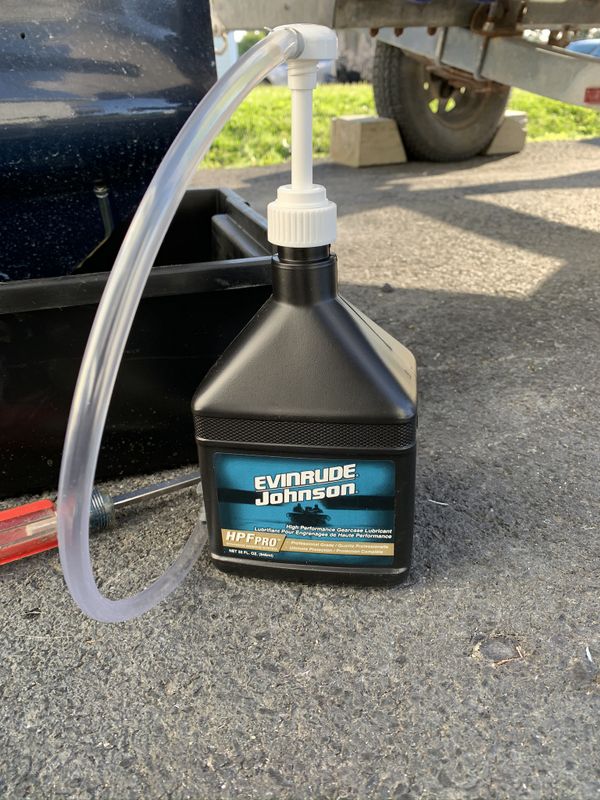
Next the lower leg oil was drained. I found the previous service technician installed the drain & vent plugs with no gaskets so I found 2-3 tablespoons of water in the leg oil.
New Evinrude leg oil was properly installed through the drain hole and proper gaskets installed on both bolts.
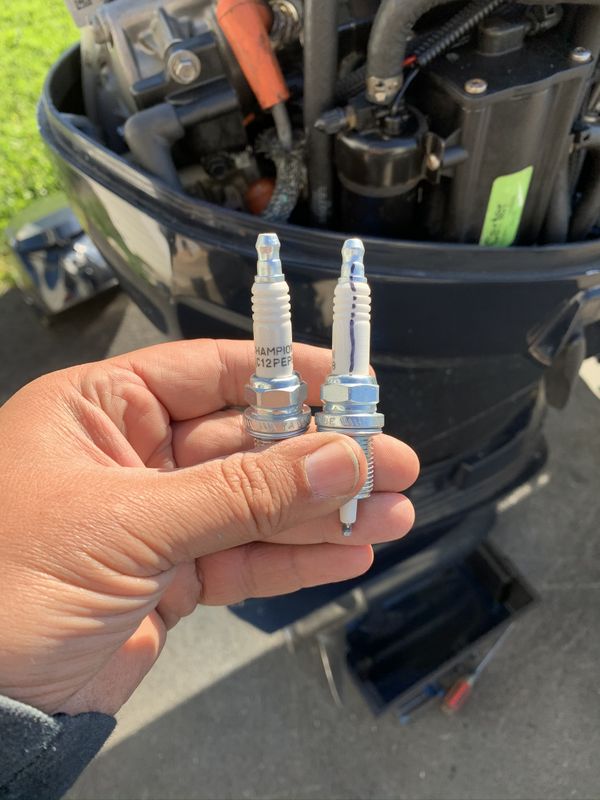
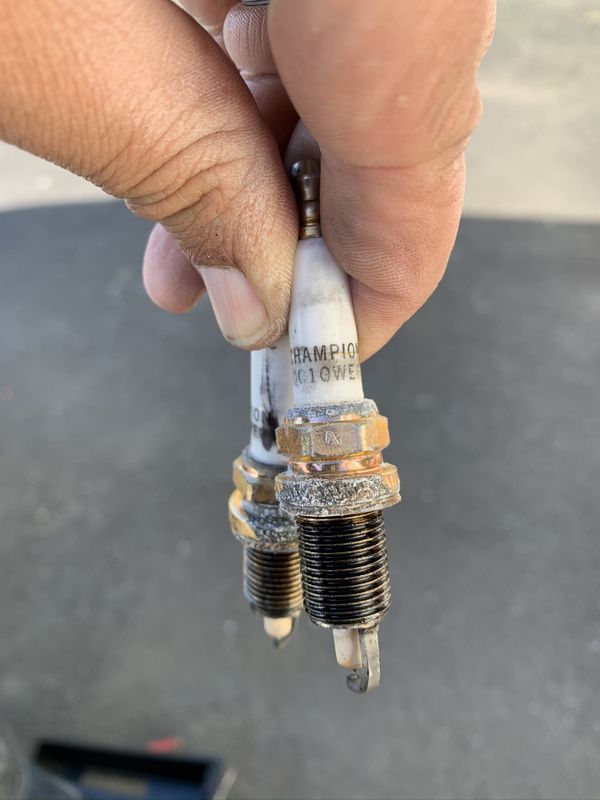
Next up was replacing the spark plugs.
With Evinrude E-TEC motors it's very important to index the plugs properly so the open end faces the injector. There are lots of great YouTube videos on the subject so you can make sure you do it right. A sharpie is used to draw a line on the plug so you can reference the open end when installing them, and there is a window it has to point when you torque them.
I also found that the previous service technician installed incorrect plugs in this motor. Not sure how much difference that makes but Bluewater Marine supplied me with the correct ones which I confirmed on the engine's data plate prior to installation.
With the project mostly complete I finished out the engine work by neatly installing new wire loom on the engine control cables, fuel line and wiring harness, and greasing up all the grease points on the motor and steering. I also found the motor tilt lock used when trailering for long distances seized. I took the unit apart, cleaned lubed and reinstalled so it functions properly now.
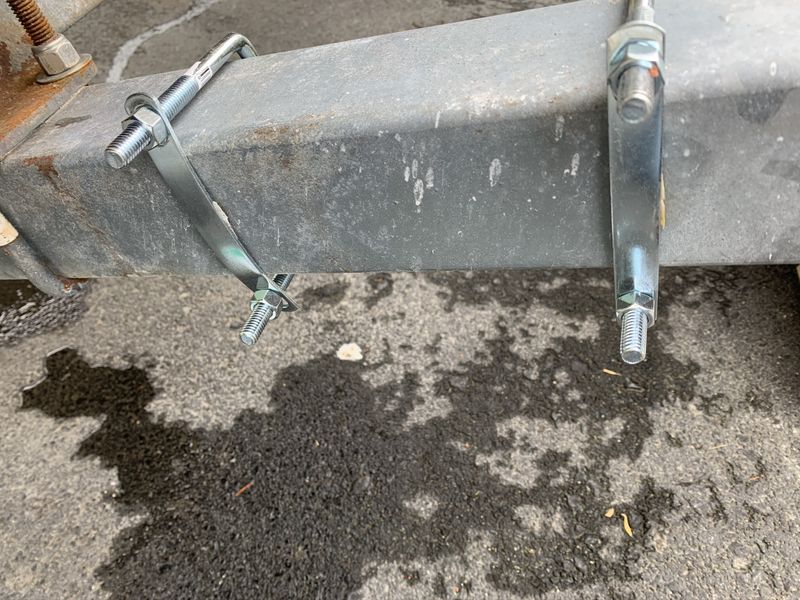
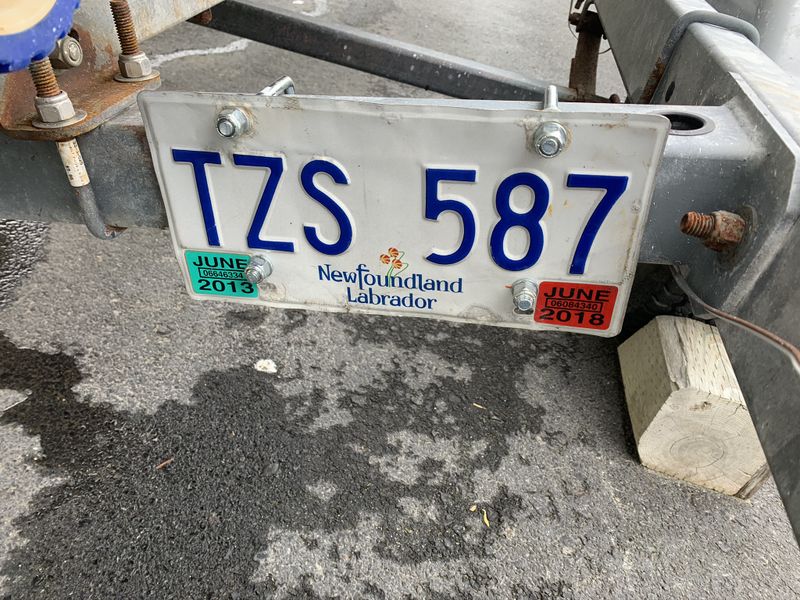
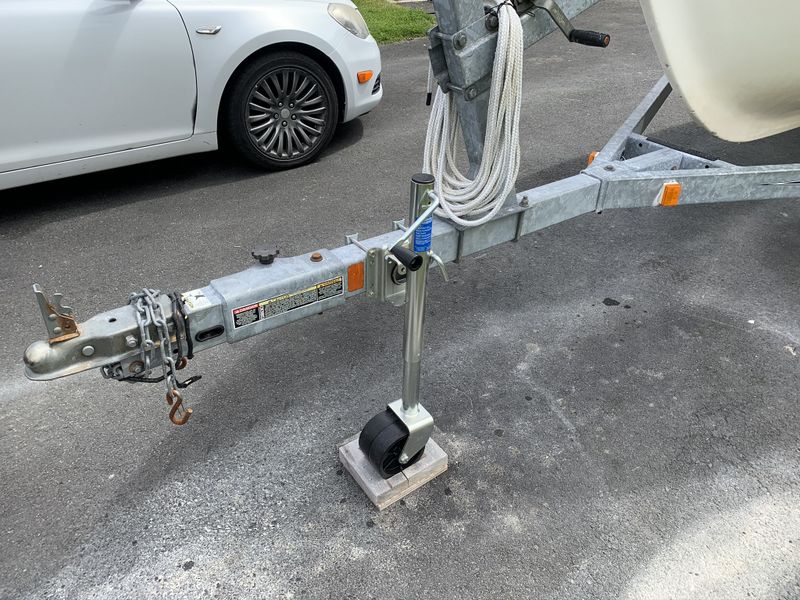
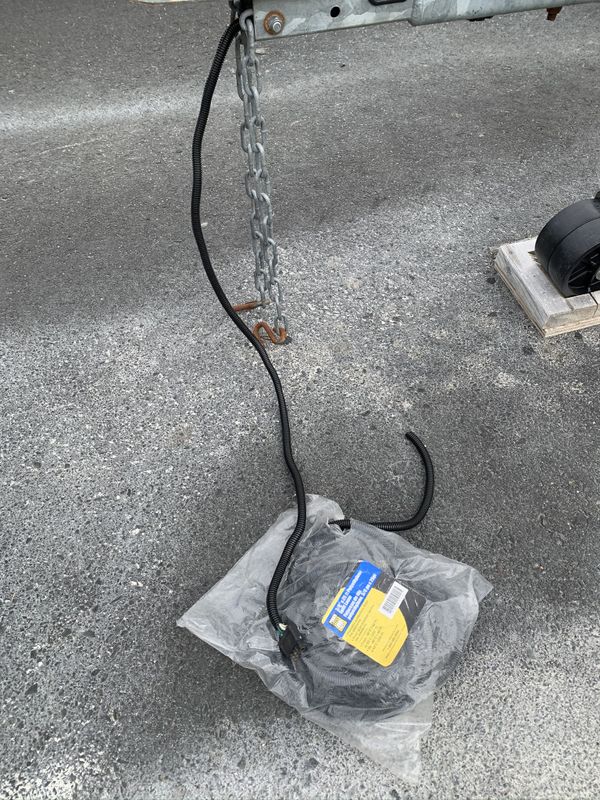
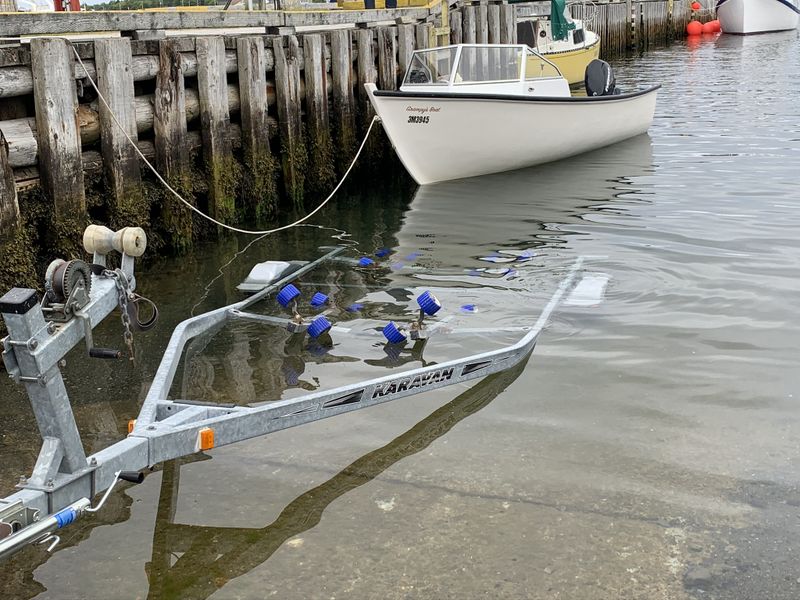
Along with boat maintenance I also made a few minor repairs to dad's Karavan galvanized boat trailer. Wheel bearings were greased and a new solution for mounting the license plate fabbed.
Dad also picked up a new front dolly wheel so I threw that on for him as well.
Finally a couple marker lights which had broken were re-attached and some wire loom installed on the ratty trailer light harness for a nice tidy clean appearance.
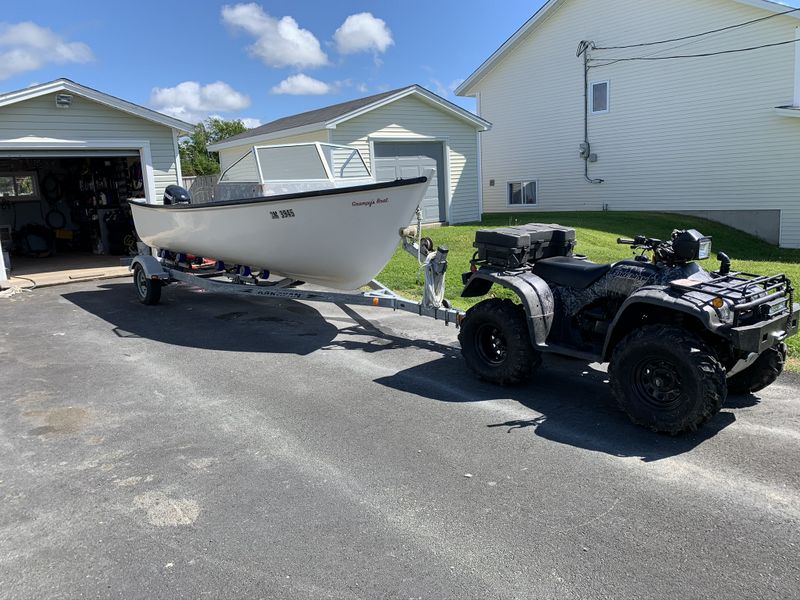
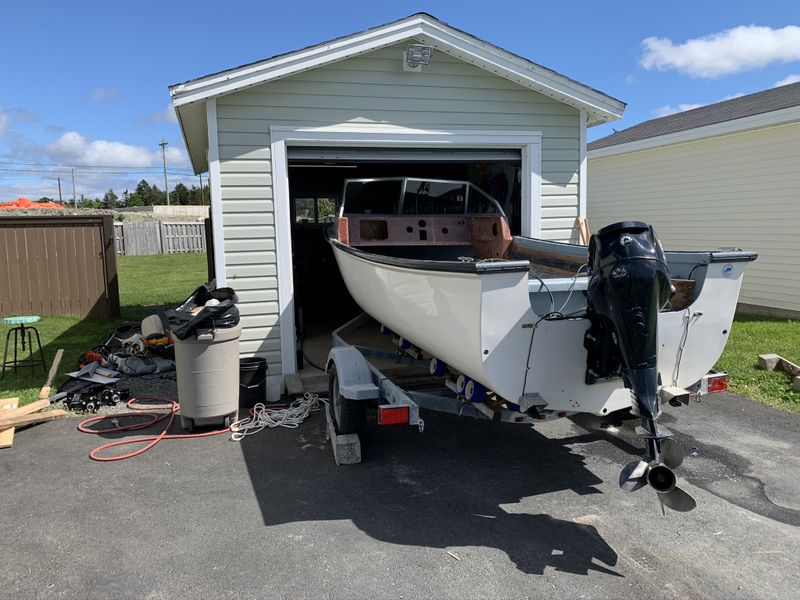
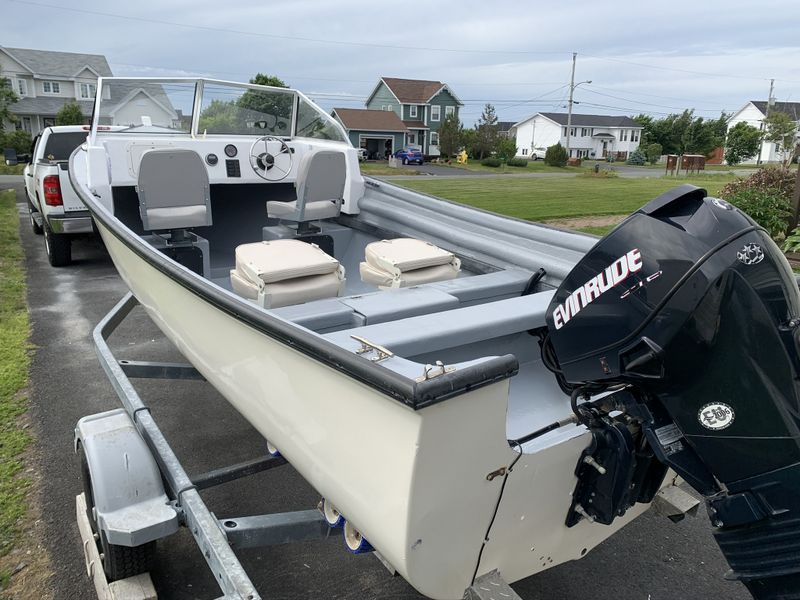
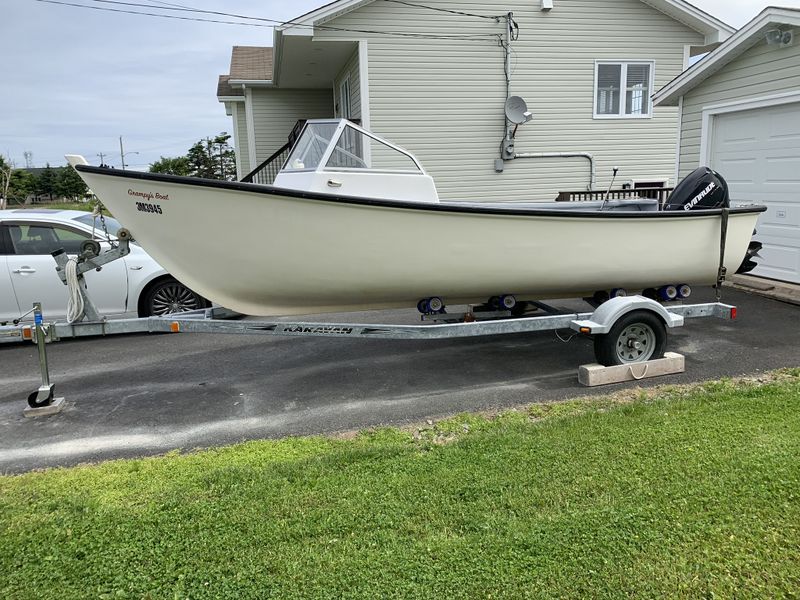
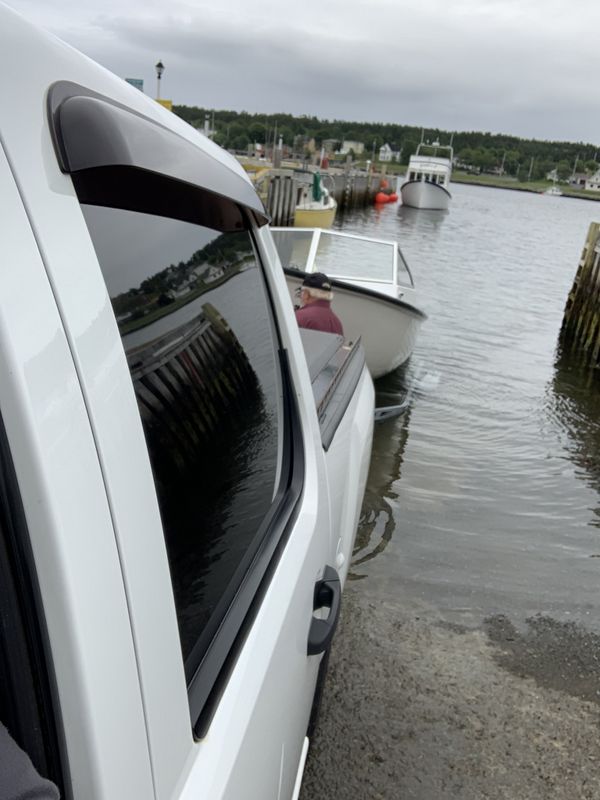
It's now the second Friday of July 2020 and I'm all loaded up and ready to hit the road to deliver the newly renovated boat to Dad in Bay Roberts!
On Friday afternoon dad and I took the boat for a test spin out the harbour to make sure everything was working well.
Dad has a season launch pass at the Legion in Bay Roberts which has an excellent facility for launching boats!
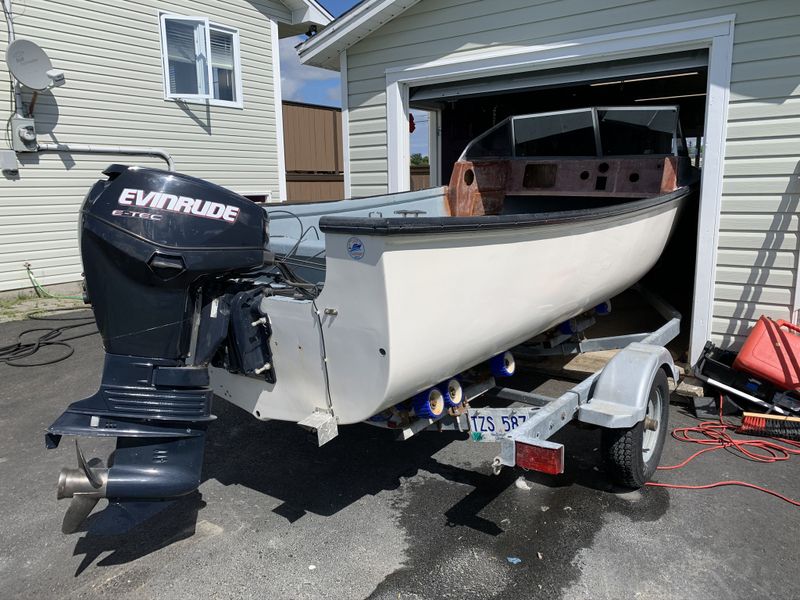
This was actually my first ride in this boat and I was very impressed. It's a very clean hull and the Evinrude E-TEC runs great.
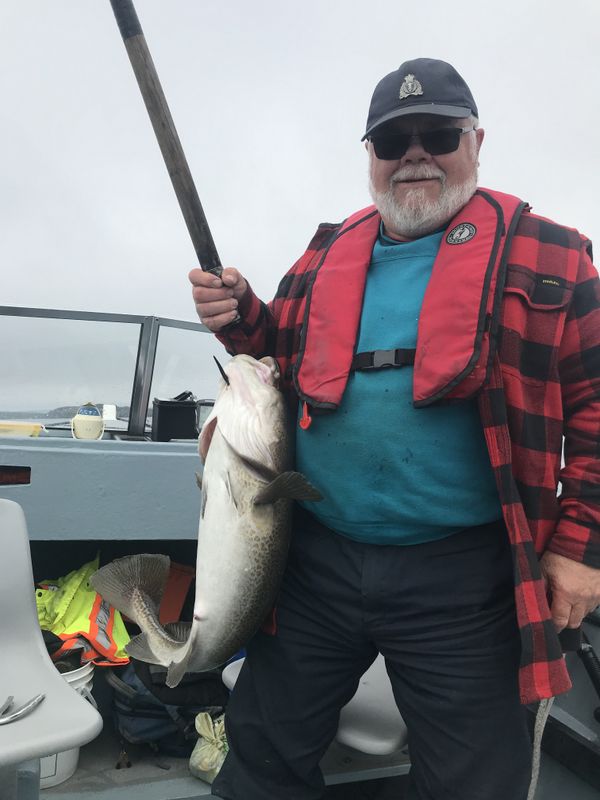
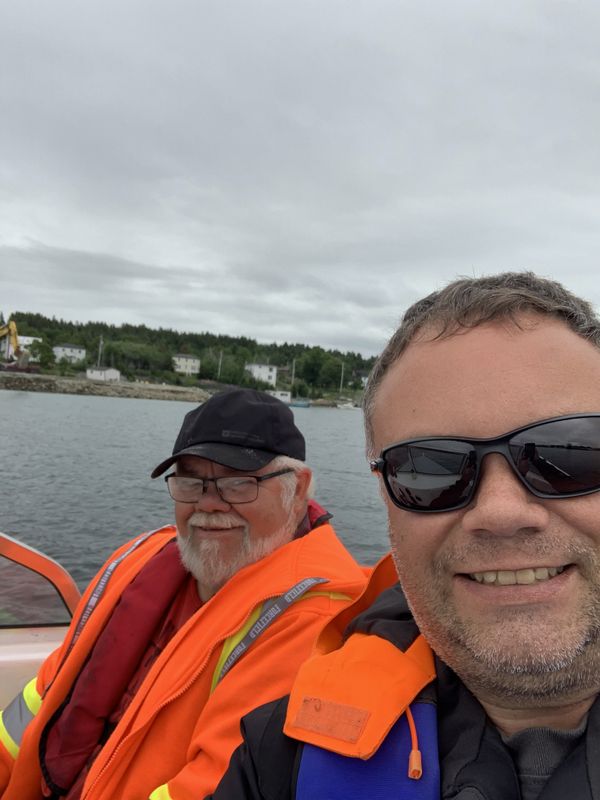
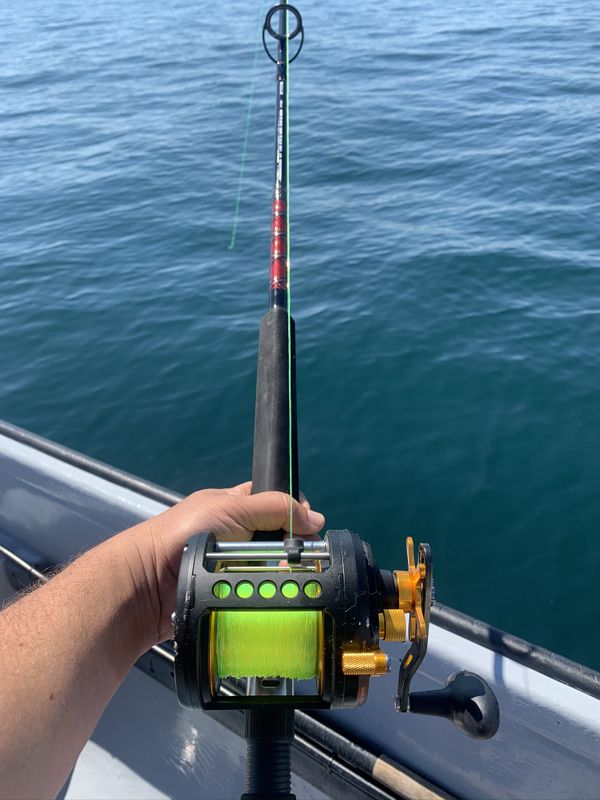
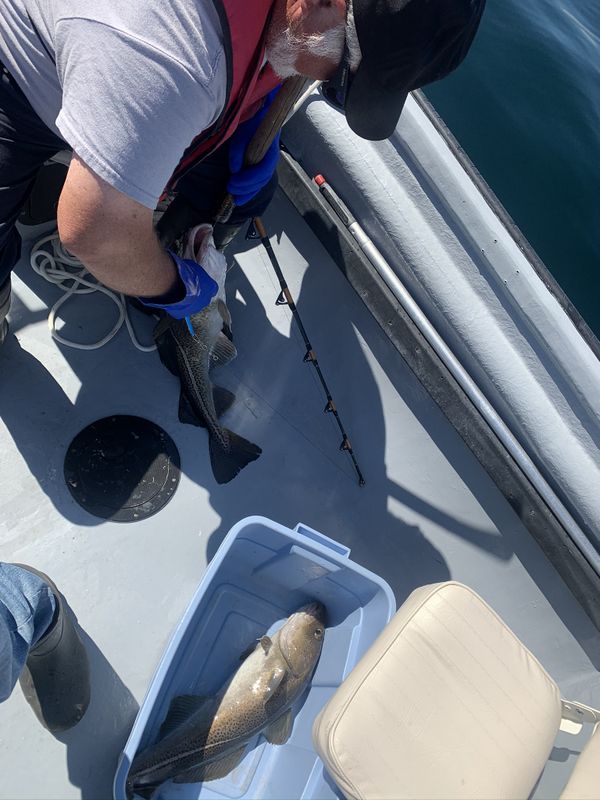
The following weekend I went out to Bay Roberts for the day Sunday. Dad and I took advantage of near perfect weather to head out on Conception Bay for the recreational food fishery.
We didn't have much luck at the traditional spots just outside Bay Roberts but struck into beautiful fish off Burnt Head filling our quota in no time. More pics can be found on the Crew Adventures Page under Recreational Food Fishery 2020.
All in all it was a heck of a lot of work but absolutely worth it to see Dad so happy. I stopped sending progress pictures towards the end of the build to leave the final reveal as a surprise. We are all looking forward to many great trips on the water in this summer and for many more!
Quick 2021 Update:
Dad's boat continues to run very well and he was very active in the recreational ground fish food fishery both last year and this year. In August I gave dad a hand to replace his defective fish finder/depth sounder in the boat. The wire chase I installed last year made running the new cables a breeze. I also waterproofed the hardware holding a new grab handle and new fire extinguisher he installed earlier this year.
Cheers, MIKE
Copyright © 2025 Michael Smith |