|
Area51 Project - AJ's 2009 Skidoo 500ss TNT: |
||||||||||||||||||
|
Machine Specs:
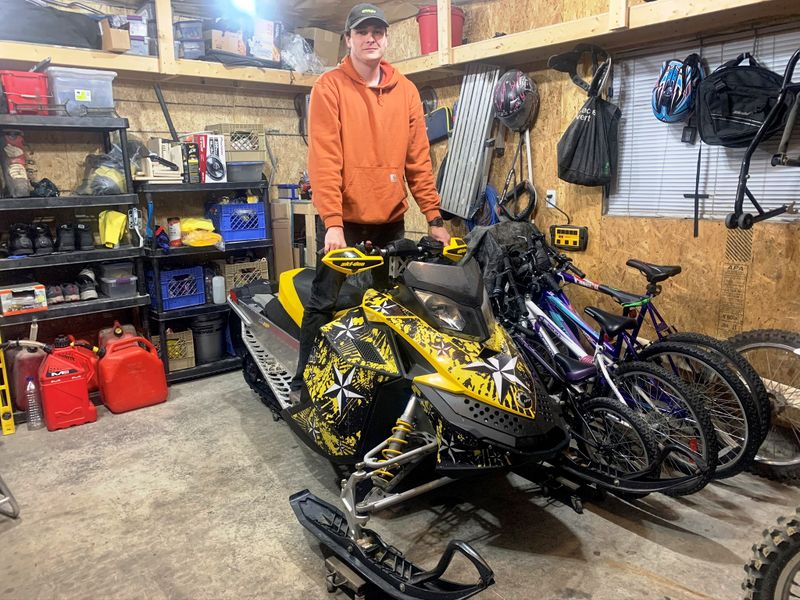
In July 2020 AJ Power came across an epic summer deal on a beautiful 2009 MXZ 500ss the owner wanted to get clear of quickly. After a thorough inspection the machine actually checked out as mint as advertised, a cash offer was made, and AJ came home with an excellent off-season deal! The machine is 10 years old, has a bunch of upgrades and less than 2000km on the clock!
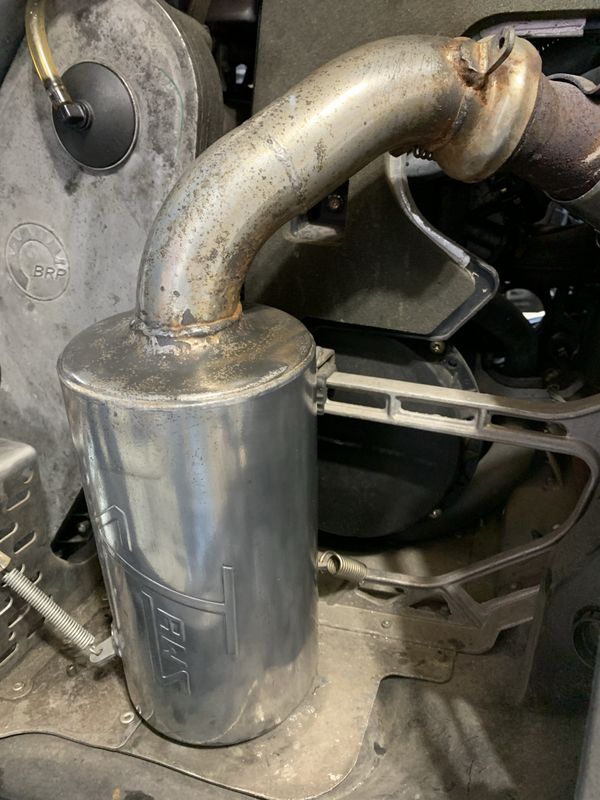
The MXZ has an upgraded 1.5" lug track, one tooth dropped top chain case gear, a custom wrap, Skidoo removable 2nd seat, a Jaws trail can (and the OEM muffler) and had never been smacked or beat up.
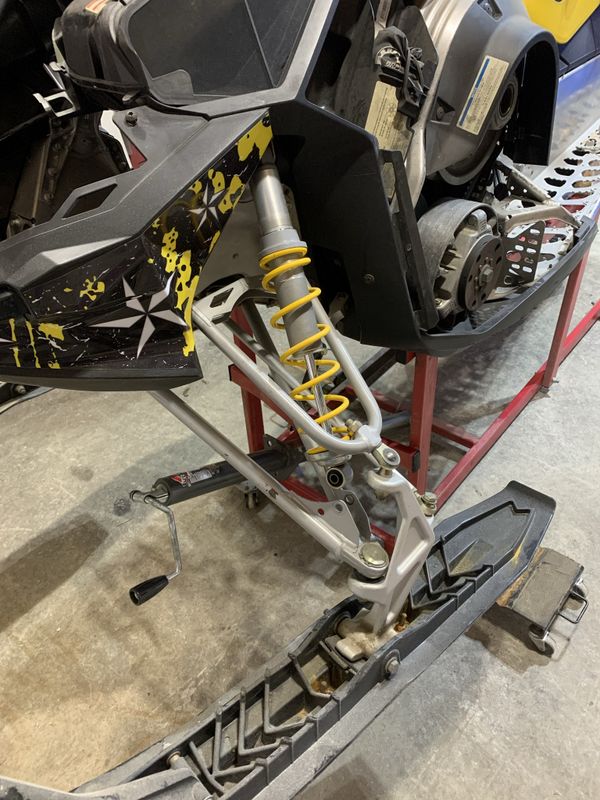
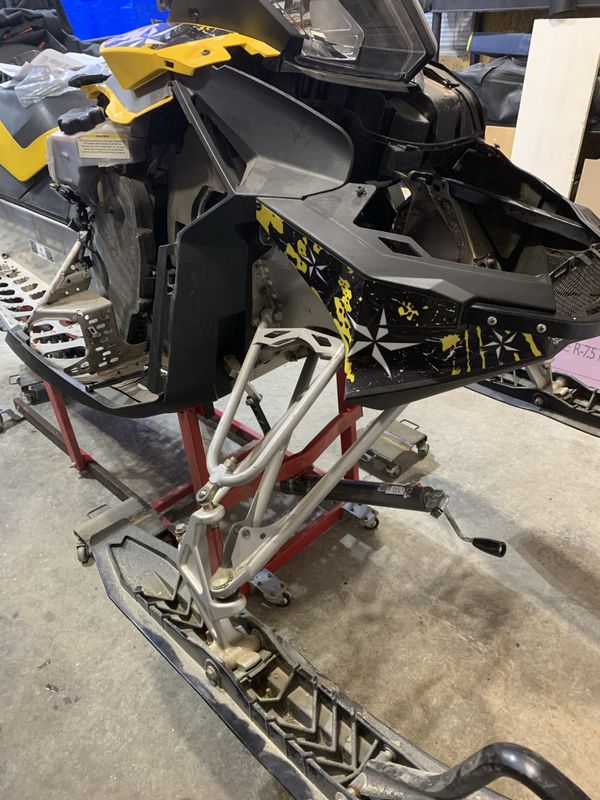
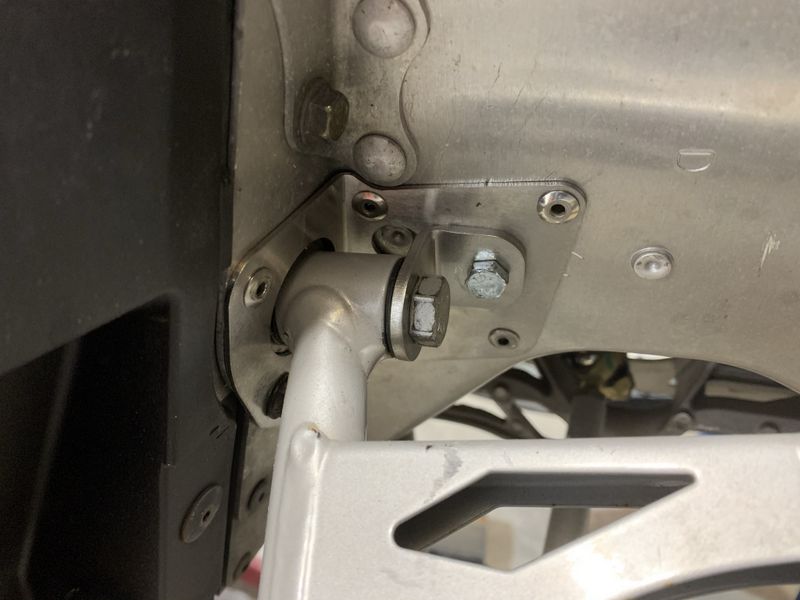
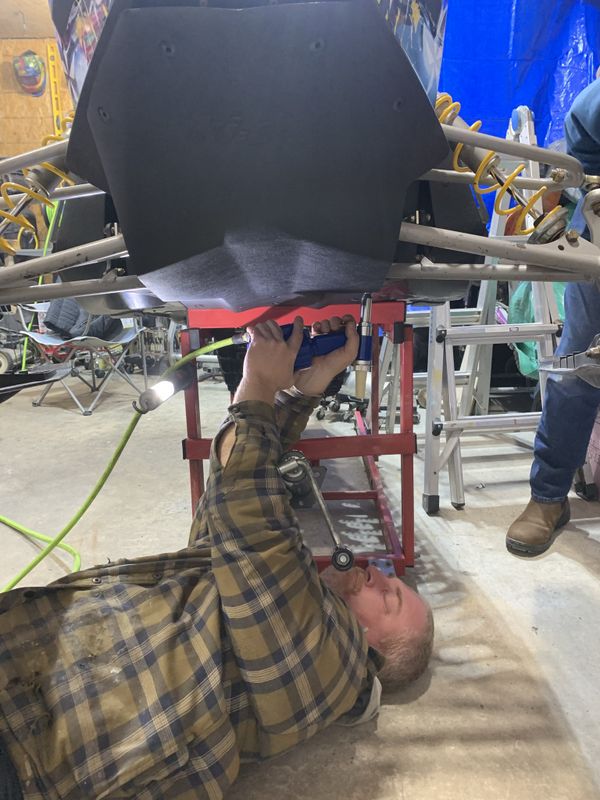
In December AJ, Bill, Ronnie and I began work on a few upgrades and some basic maintenance on the new whip. First up was installing a Grip-n-Rip Racing front end brace kit to help protect the lightweight but delicate S-module. This kit consists of Stainless Steel braces for the rear-upper control arm mount, and a full lower A-arm brace. We started with the upper kit by removing the exhaust, shocks and both upper control arm bolts.
The upper braces are 2 pieces, the first pictured installed above gets held in place by one existing 10mm bolt and 5 supplied 3/16" rivets.
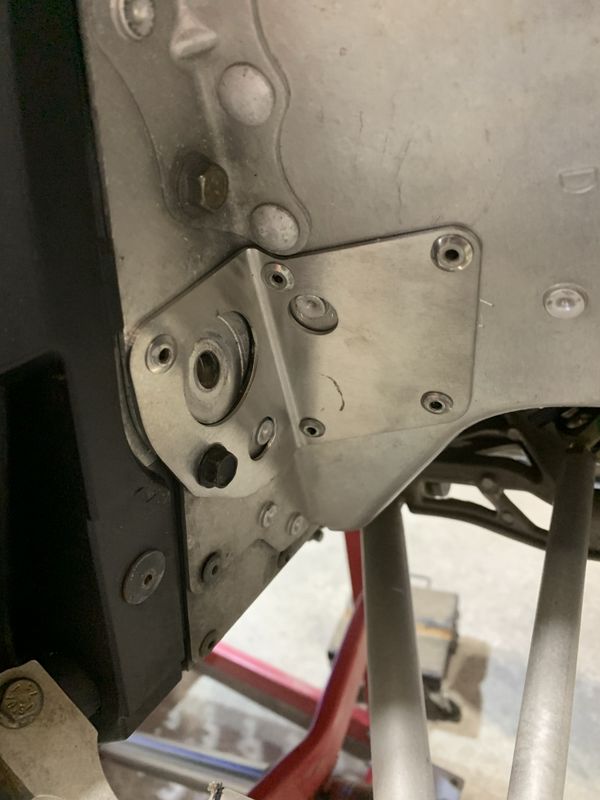
The 2nd piece is an L-bracket which you attach through the control arm bolt then drill a bolt hole through the new brace and into the frame. This set up really strengthens up this area of the front end in the REV-XP chassis.
To install the lower brace you have to remove all 4 lower A-arm bolts & washers, the new bracket is installed re-using the bolts without the washers as the brace takes the place of them.
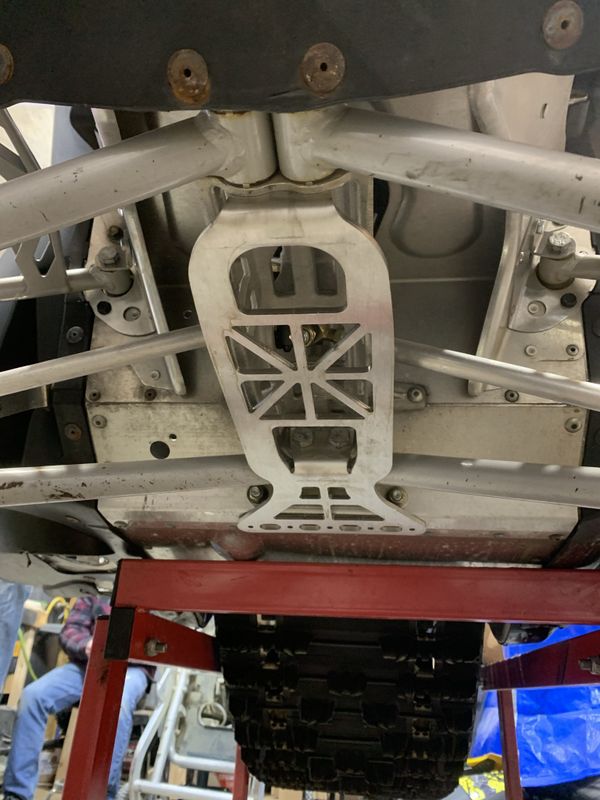
The factory piece that the lower A-arms bolt to is called the S-module, its cast aluminum so its light weight but is prone to cracking without a lot of force. This new bracket really helps strengthen the front end and protect this module. Lastly 5 included structural rivets are installed along the rear brace into the bulkhead, be very careful drilling these holes as not to puncture one of the cooling hoses.
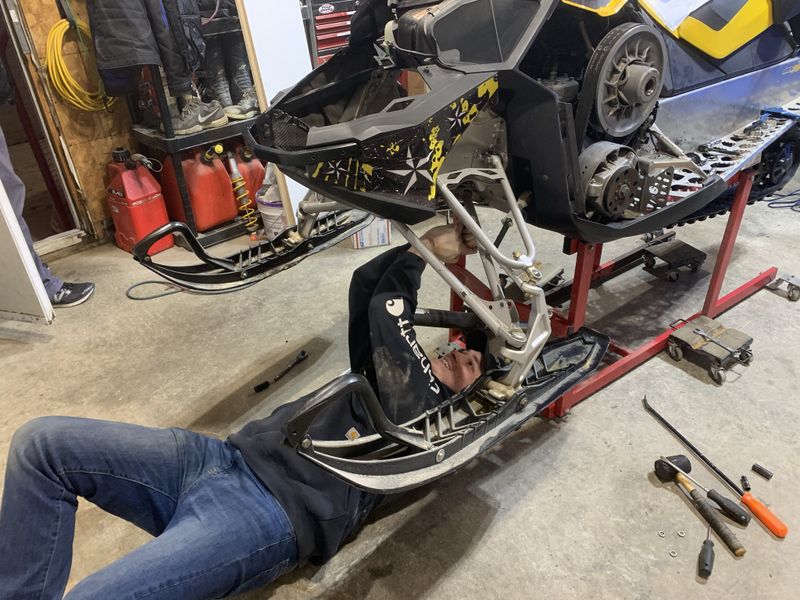
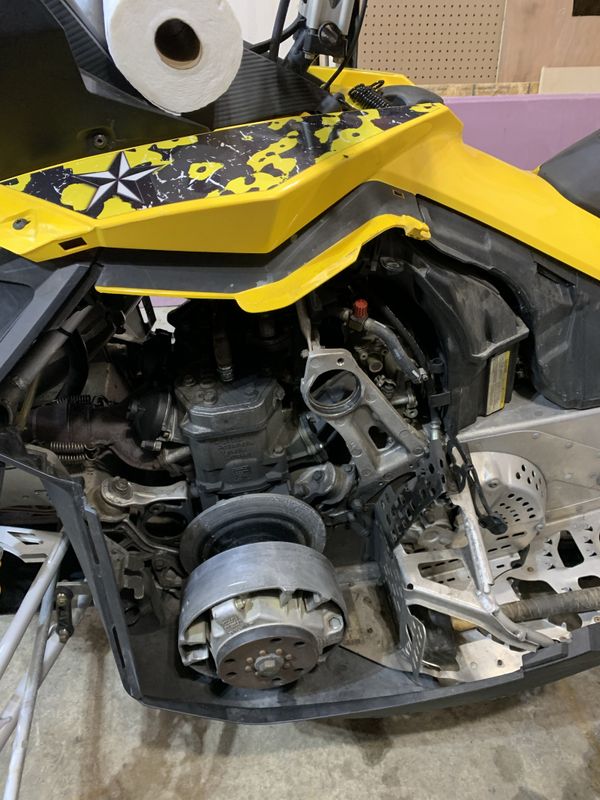
With the braces installed and front suspension put back together & torqued, we moved on to some maintenance items including fresh spark plugs and removing and cleaning the power valves. Neither were terrible but on a new/used machine when you're unsure when these services were last performed it's better to take care of it now.
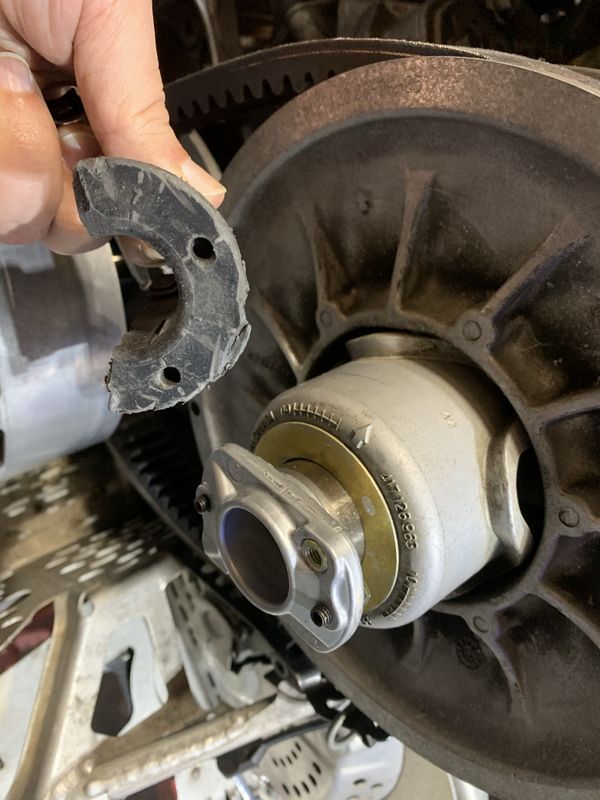
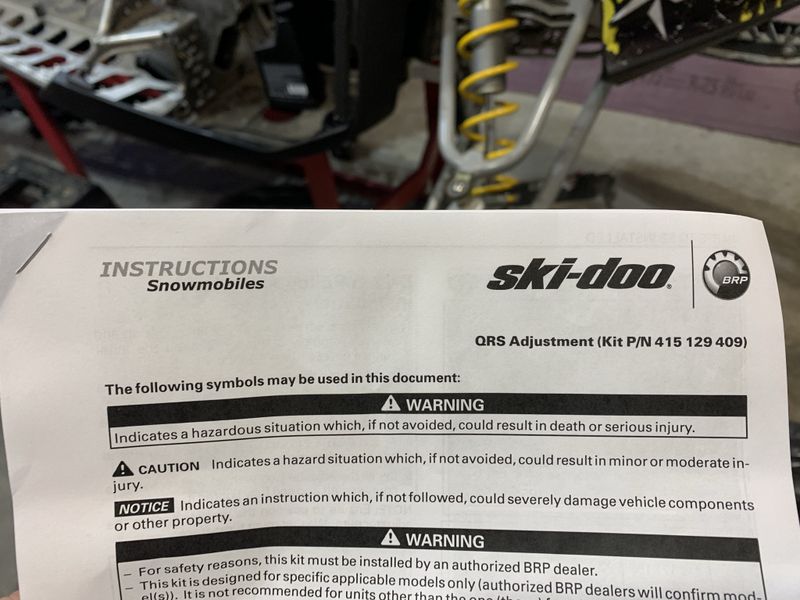
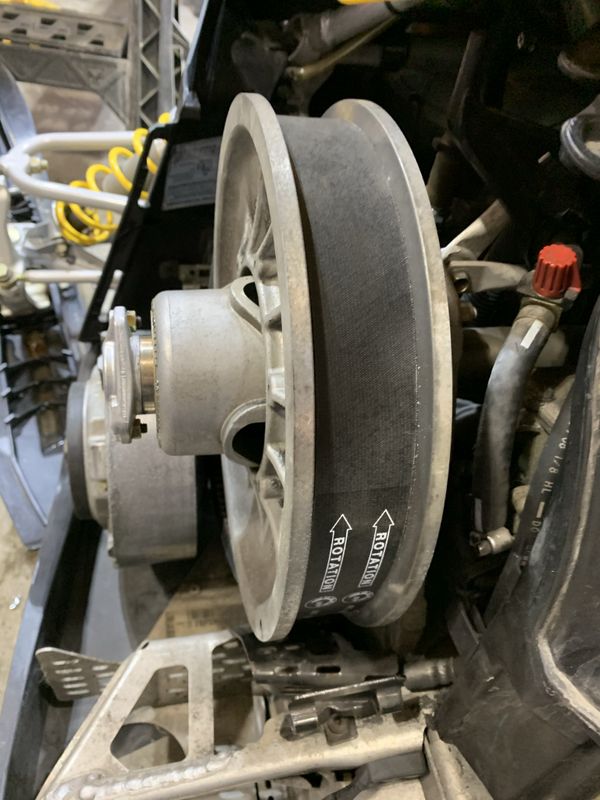
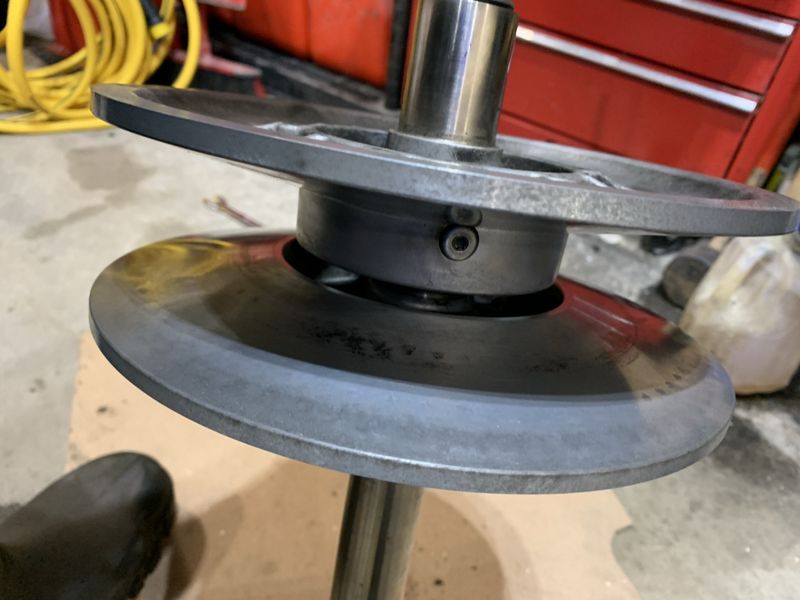
Next up was replacing the broken OEM plastic belt deflection adjuster on the QRS secondary clutch.
Skidoo sells an updated replacement part which is now Aluminum and also comes with a traditional BRP secondary clutch belt changing tool which now makes that job a lot easier. All necessary parts are included in the kit and instructions were fantastic.
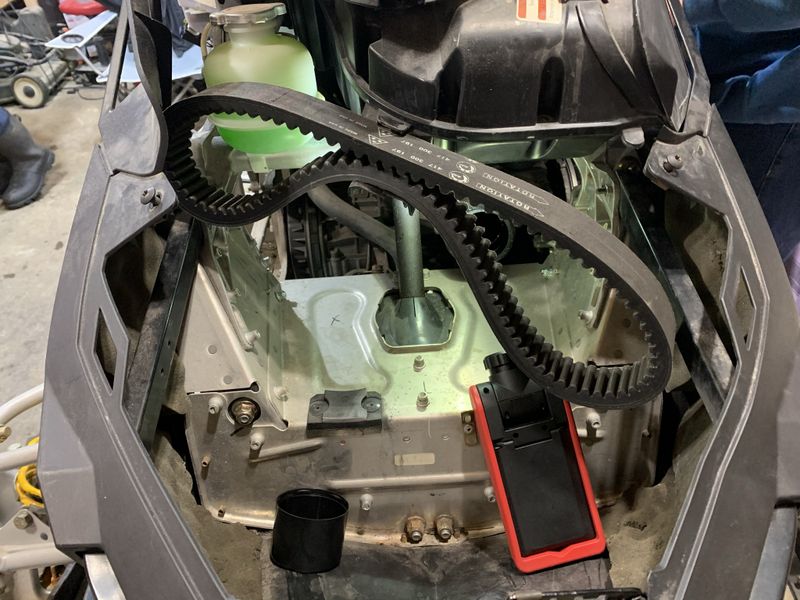
With the new adjuster in place AJ thoroughly cleaned the clutches and installed a brand new drive belt, again mostly due to the unknown age of the belt on the machine.
The old belt was kept as a great spare and is properly installed in its holder (unlike in the pic above!) after the pipe was reinstalled. A length of velcro fastener tape keeps the belt secure.
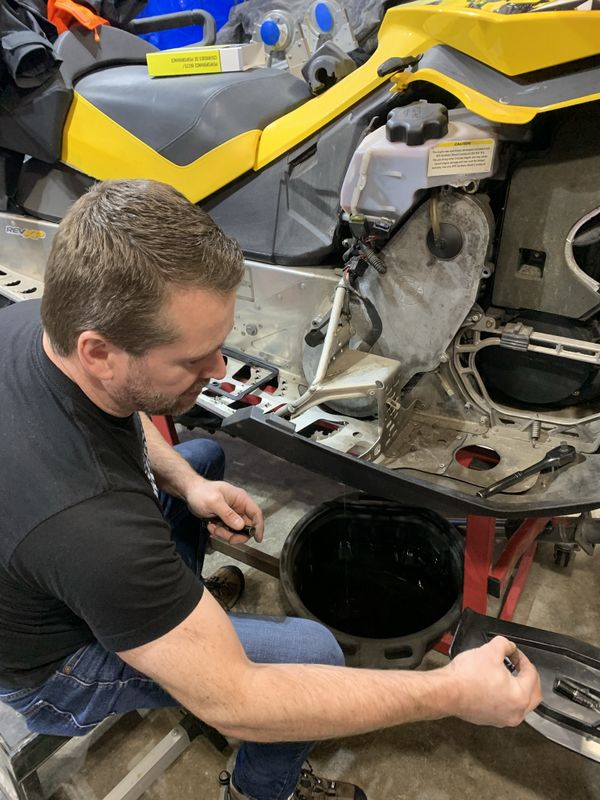
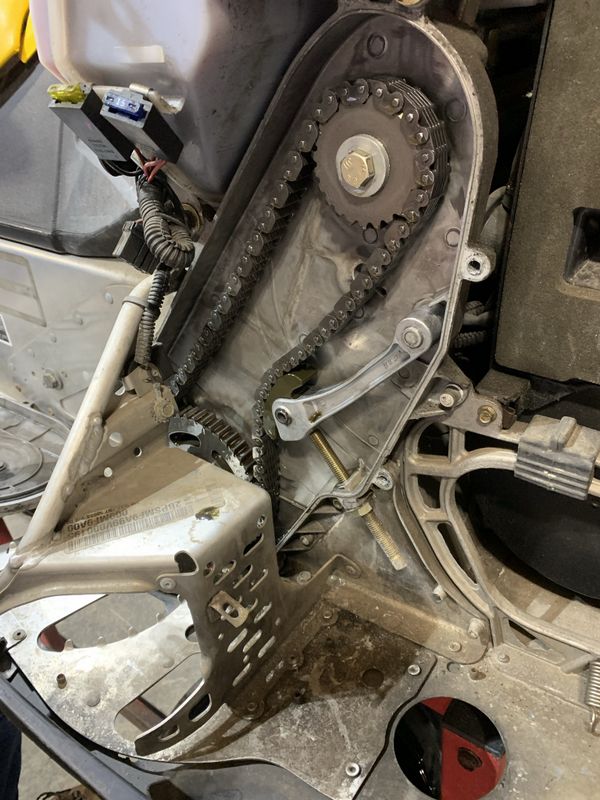
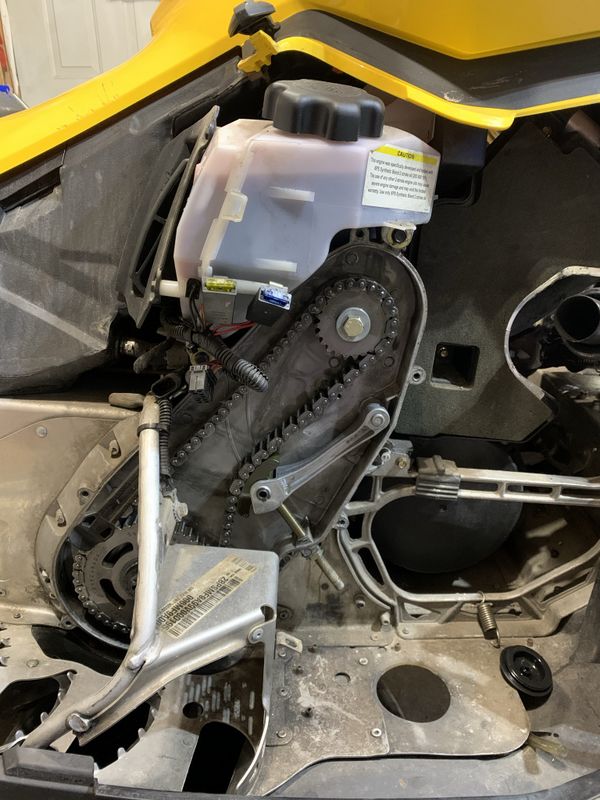
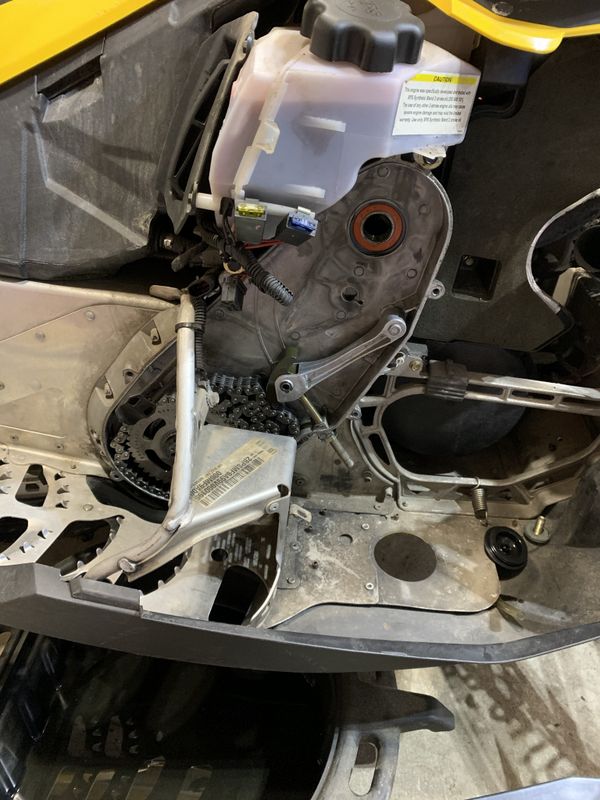
While we worked on one side of the machine, Bill tackled draining, cleaning, adjusting and refilling the chain case with fresh oil.
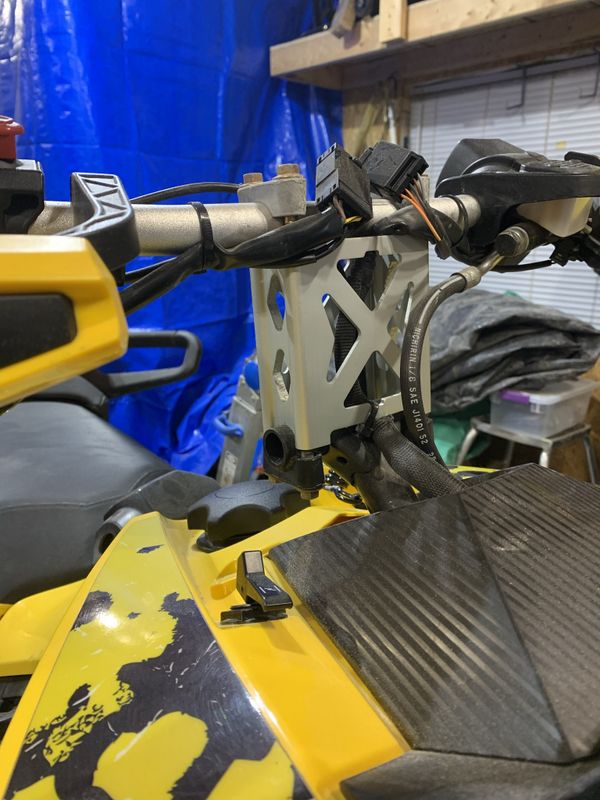
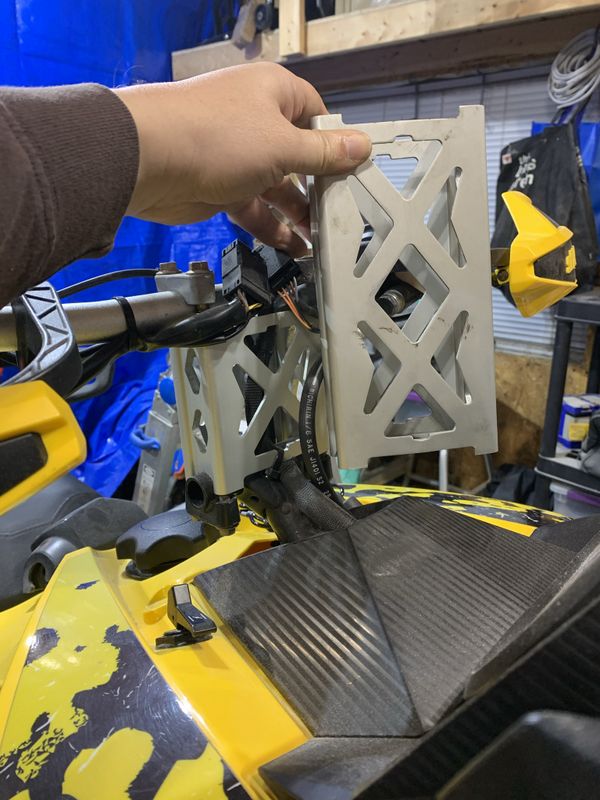
Next up was swapping out the original 4.5" handlebar riser block for the 8" one that came off my sled as I went with a 6" on project REV.
The new unit bolted in place with the same hardware, the headlight & cluster housing had to be loosened to access the electrical plug for re-routing through the new block. Next we loosened up a clamp and pulled up some slack in the brake hose to fit the new set up. AJ will need and has ordered a throttle cable extension which will finish out this upgrade.
Lastly (for now) we installed a new OEM Skidoo skid plate to better protect the front suspension from trail obstacles. I held the plate in place up front while Ronnie installed the rivets along the bottom. Fortunately Skidoo predrilled holes for the skid plate in the lower bulkhead. Next the front 4 rivets were marked, drilled and installed.
Lastly with most of the work complete (for now) we reinstalled the exhaust system including the Jaws Trail can that came with the machine. AJ also has the OEM muffler so he can swap back if necessary especially if he plans to ride in Gros Morne National Park.
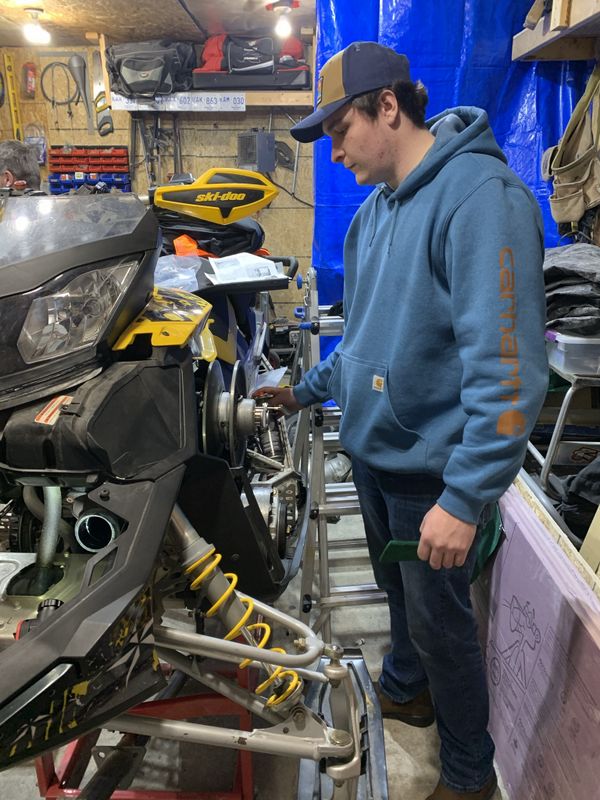
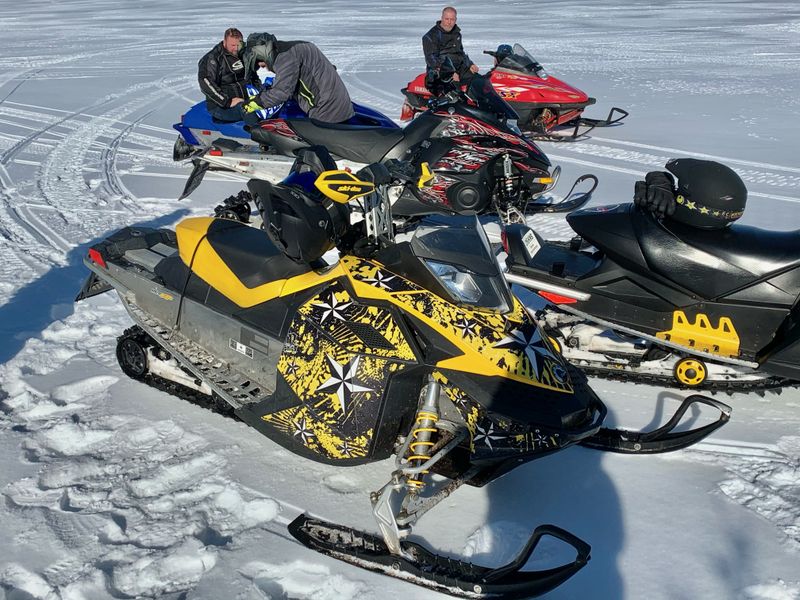
With the machine fully reassembled AJ got out for a test flight in the Goulds with a few of his buddies. By the end of the ride the machine was bogging off the line like a car starting out in 2nd or 3rd gear. Sure enough the secondary clutch wasn't back shifting all the way.
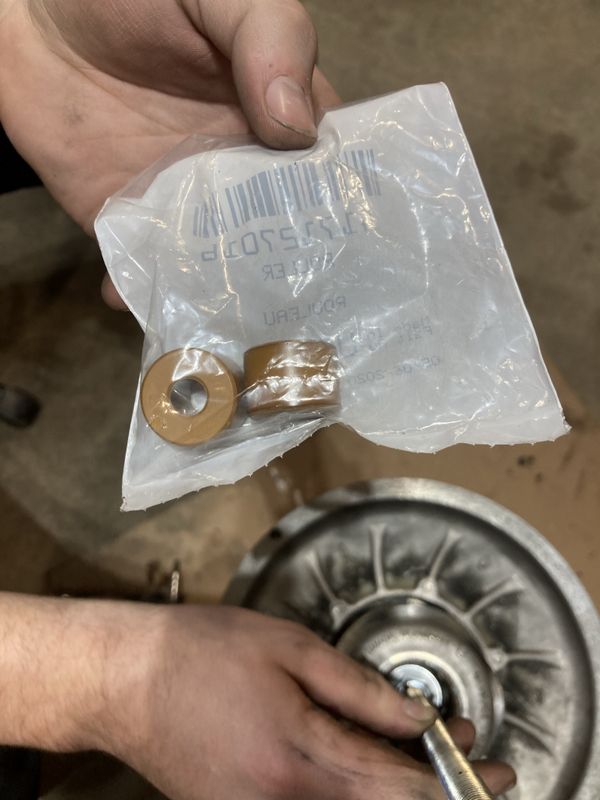
I wasn't familiar with QRS secondary clutches (and also working on project ARGO) but Ronnie set to work on Google, looking at how to's and found all the information necessary to complete the job. Most likely cause was broken secondary rollers so AJ went to the dealer and picked up a brand new set.
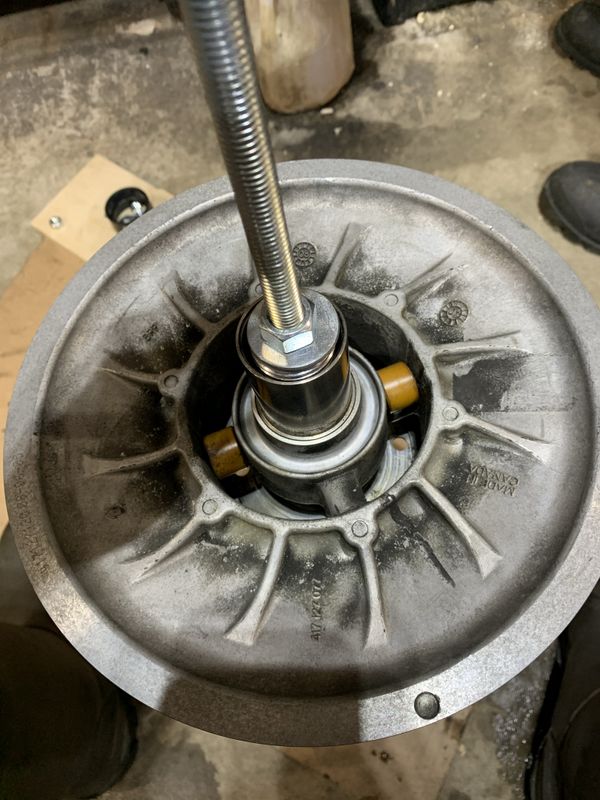
As Ronnie (like most DIY'ers) didn't have a factory chain case alignment tool, he took the extra step to remove the chain case cover, chain, upper bolt & gear. To remove the clutch and jackshaft from the machine you also remove the bearing retainer & bolt from behind the Secondary clutch then it can be pulled from the sled.
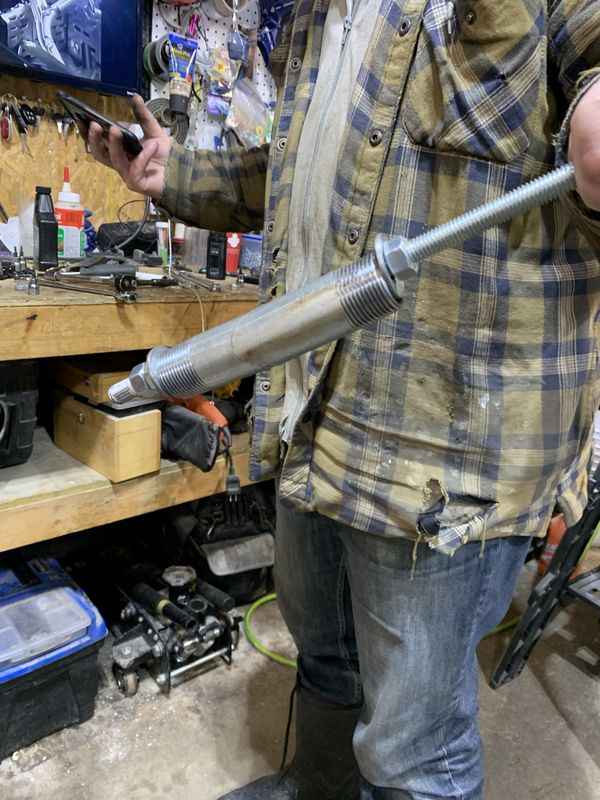
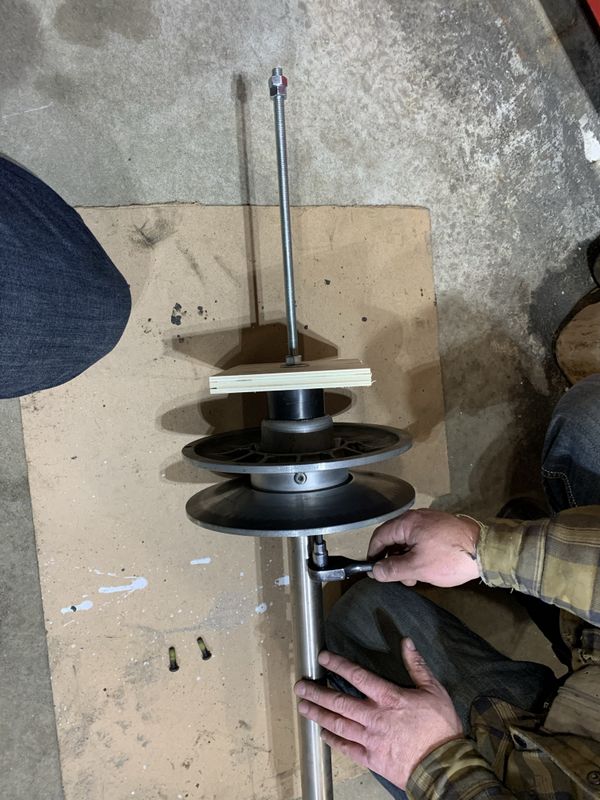
Ronnie quickly built a home made QRS secondary repair tool by taking a piece of steel pipe and cutting it in half on a 45 degree angle and using some all thread, washers and bolts.
The tool is inserted into the centre of the secondary clutch (with the belt deflection adjuster removed first), and a nut tightened so that the split pipe slides, then grips the clutch on the inside surface.
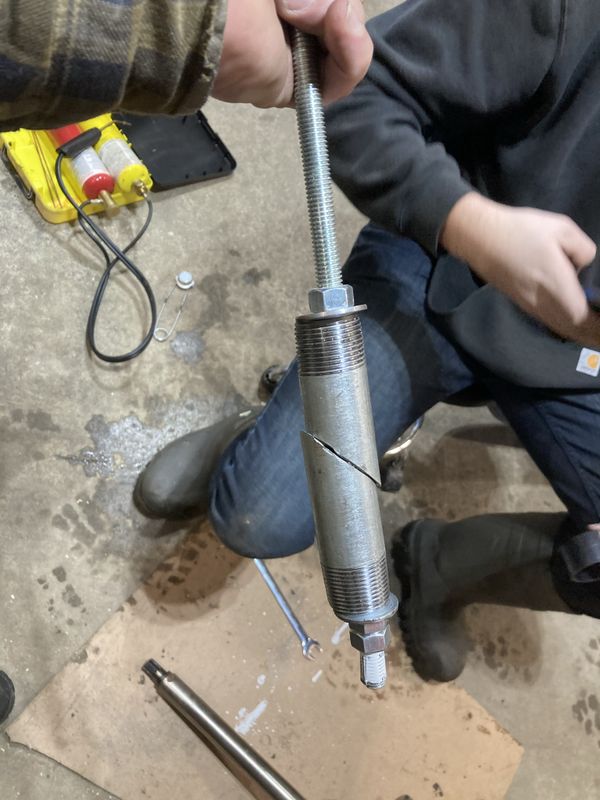
With the tool making a firm grip on the inside of the clutch, a piece of 2" ABS pipe was slid in place to push on the helix. You need a large washer, or in Ron's case a piece of plywood and another nut. As you tighten the nut the helix is pushed open to relieve pressure from the spring. Next remove the 4 bolts on the back side of the clutch holding the helix in place.
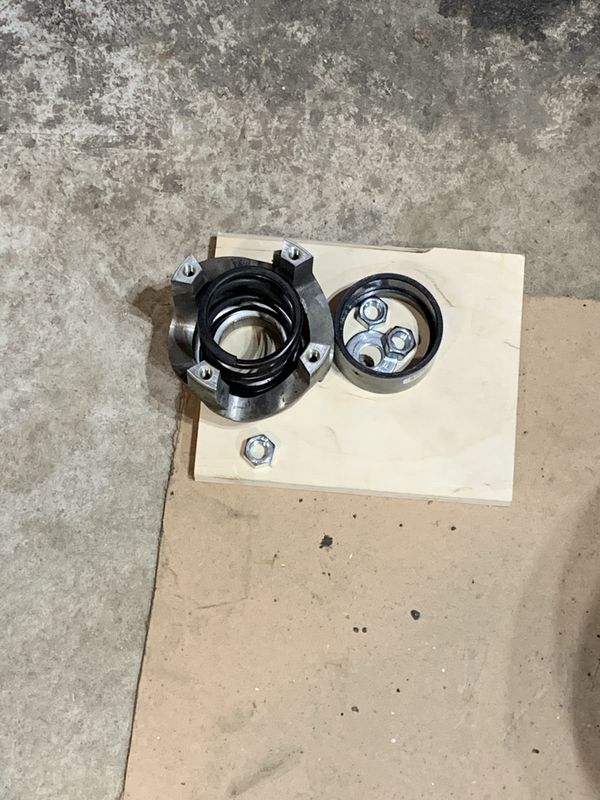
Back off the outer nut and remove your big washer, 2" pipe and the helix/spring.
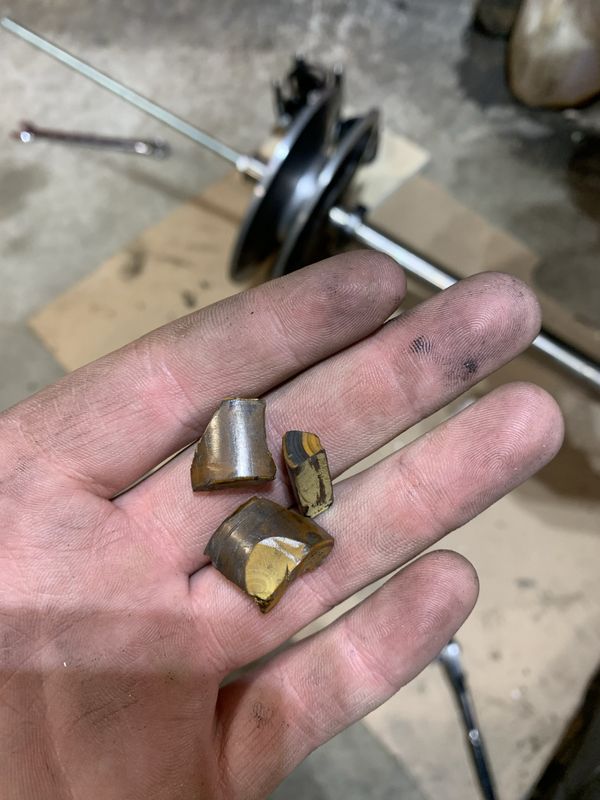
Once apart the boys found a sure sign of the problem, broken rollers as suspected.
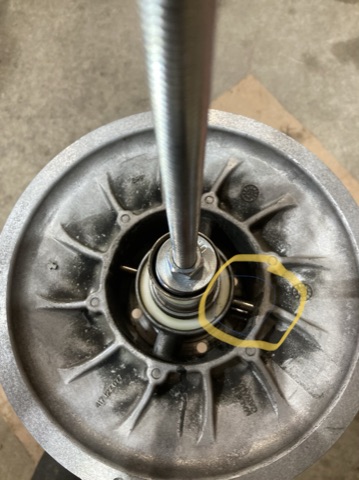
The roller reside here (circled) remove the E-clips then remove both roller bolts.
Rollers are installed with the washer against the outer sheave, bolt inserted (with fresh Locktite) and lastly the E-clips reinstalled.
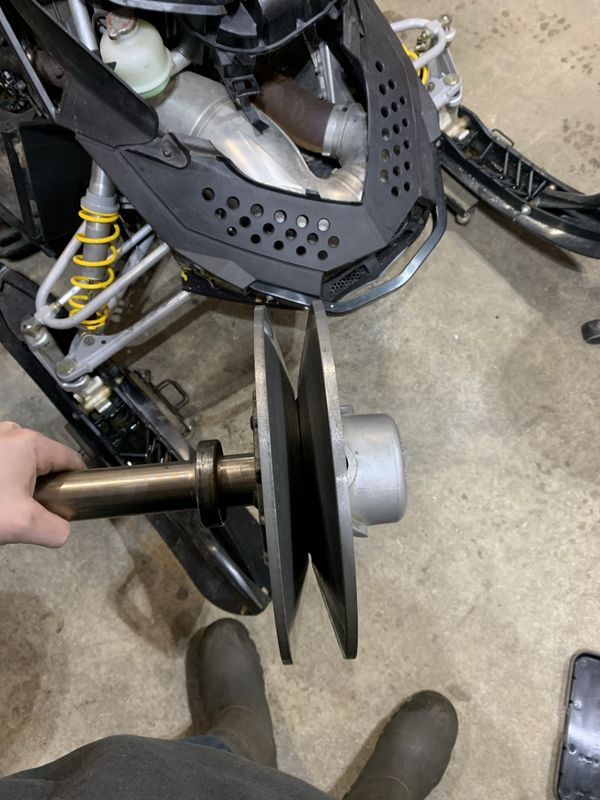
Clutch fixed and fully reassembled.
Now the sled is fully reassembled and ready to ride. The roller replacement is a fairly common repair on these sleds and its great to see that with a little ingenuity that it can easily be done at home!
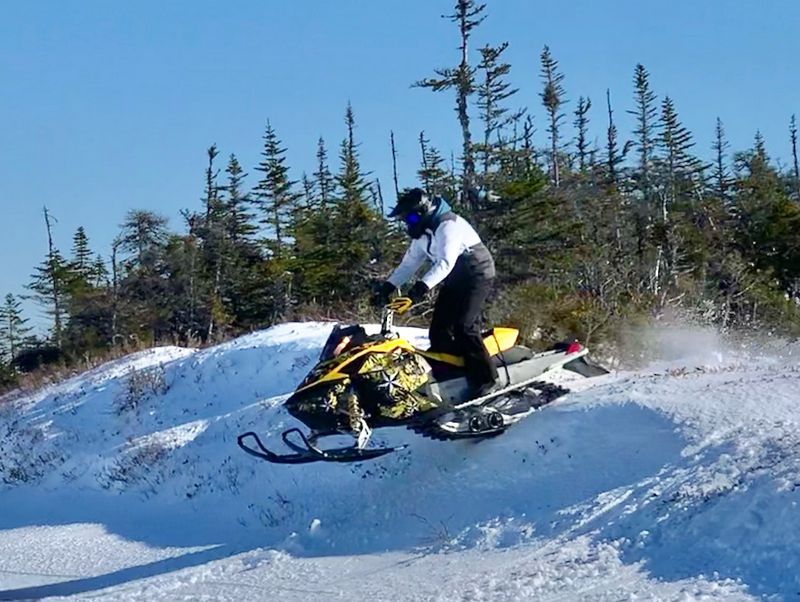
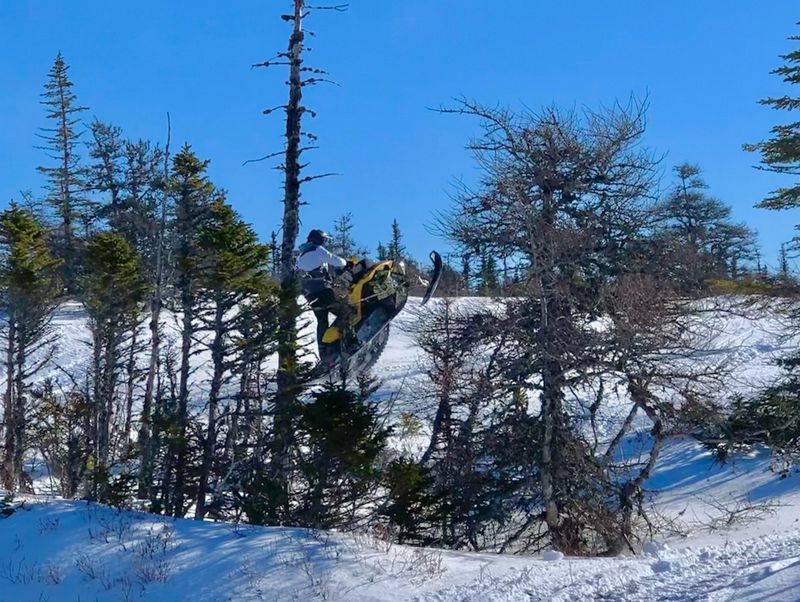
Great day for a good old fashioned Goulds to Witless Bay rip with the crew!
2026 Quick Update:
New track, fresh spark plugs and the TNT was ready for the trails once again!
A.J. and his brother Ashton out for a ride on the new Southern Shore Trailway.
Cheers, Mike
Copyright © 2025 Michael Smith |